|
|
Post Reply 
|
Page 123> |
| Author |
 Printable Version Printable Version Google Google Delicious Delicious Digg Digg StumbleUpon StumbleUpon Windows Live Windows Live Yahoo Bookmarks Yahoo Bookmarks reddit reddit Facebook Facebook MySpace MySpace Newsvine Newsvine Furl Furl Topic Search Topic Search  Topic Options Topic Options
|
geewizard 
Senior Member 
Joined: 16 Apr 2017 Location: Spokane Online Status: Offline Posts: 347 |
 Topic: Creating more space in the R-178 Topic: Creating more space in the R-178Posted: 11 Jun 2017 at 8:30am |
|
yes indeed, very nice work. Thanks for the info.
|
|
|
2021 Winnebago Micro Minnie 1708FB
2017 R-Pod 177 (Blue) HRE SOLD 2004 Outfitter Apex 8 camper 2014 Toyota Tundra DC |
|
 |
|
|
Leo B
podders Helping podders - pHp

Joined: 13 Jan 2012 Location: Lyndonville, VT Online Status: Offline Posts: 4508 |
Posted: 11 Jun 2017 at 4:46am |
|
Nice work!!
|
|
|
Leo & Melissa Bachand
2017 Ford F150 2021 Vista Cruiser 19 csk Previously owned 2015 Rpod 179 2010 Rpod 171 |
|
|
|
|
jimandclare
Groupie 
Joined: 13 Apr 2016 Location: Erie, MI Online Status: Offline Posts: 96 |
Posted: 10 Jun 2017 at 8:27pm |
|
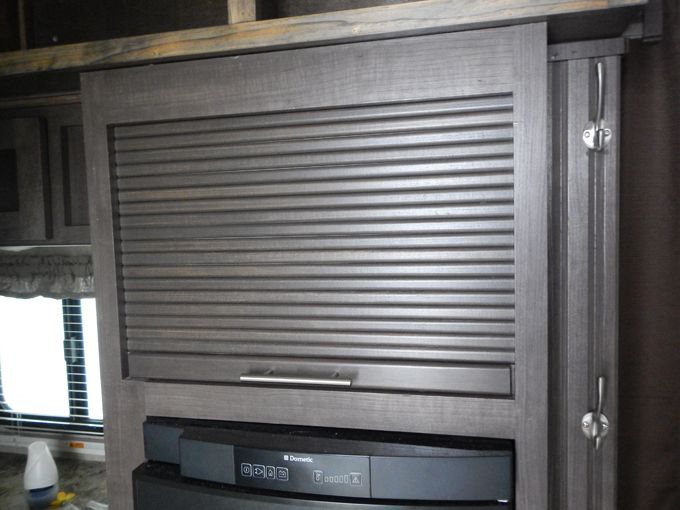
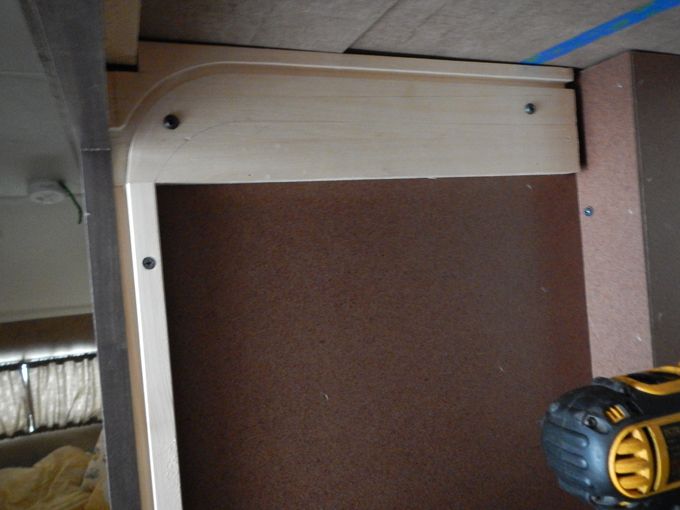
Actually I couldn't find anything online that would fit this opening so instead I built it from scratch. Not as difficult as I feared it would be. Plenty of DIY articles and YouTube videos online. First I drew the inside view of the cabinet full sized on some cardboard and laid out a shape for the track. Used that drawing to make a template to route a 5/16" groove for the door to slide in. I made the track in 2 pieces so I could get the door into the tight space.
 I rounded the edges on some 3/4" poplar and cut each of the slats 1/4" thick. Then I set them in the track to check for length and figure out how many I needed to make. 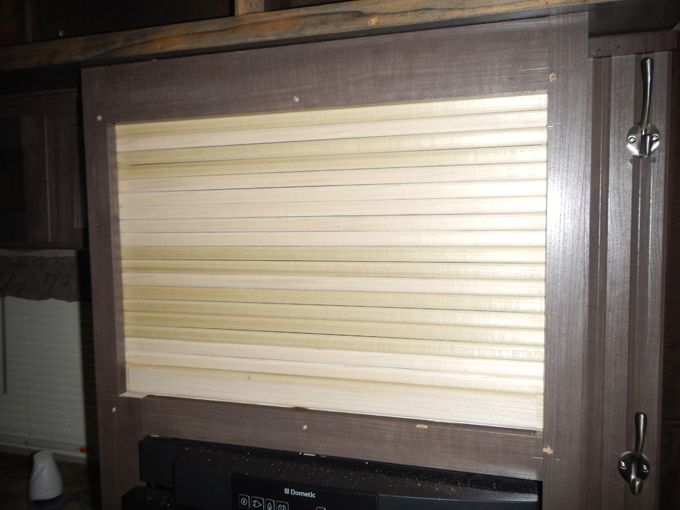 Then I stained and finished them and glued them on to some cotton canvas from Walmart with a spray contact adhesive. I stretched the canvas and stapled it to some plywood. Then I screwed 2 straight boards to the plywood on the canvas at 90 degrees to use as guides to keep the slats lined up and straight. Then I used a sharp knife to cut away the excess canvas. 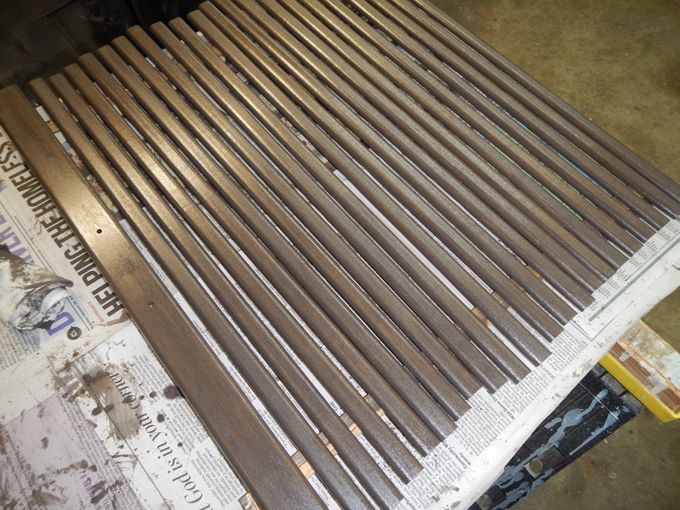 |
|
|
Jim & Clare
2016 R-pod 178 2014 Ford Edge |
|
|
|
|
geewizard
Senior Member
Joined: 16 Apr 2017 Location: Spokane Online Status: Offline Posts: 347 |
Posted: 10 Jun 2017 at 7:17pm |
|
My wife likes your tambour door. Where did you get it?
|
|
|
2021 Winnebago Micro Minnie 1708FB
2017 R-Pod 177 (Blue) HRE SOLD 2004 Outfitter Apex 8 camper 2014 Toyota Tundra DC |
|
|
|
|
jimandclare
Groupie
Joined: 13 Apr 2016 Location: Erie, MI Online Status: Offline Posts: 96 |
Posted: 10 Jun 2017 at 4:11pm |
|
I like the cargo net idea because it matches everything else but wasn't able to locate that particular one so I was leaning towards making cabinet doors. My wife didn't want to be banging into the doors so had to find on a compromise. When I was younger I wanted to make a roll top desk but never got around to it so I opted for the tambour door. Easier than I thought it would be and now it's out of my system.
|
|
|
Jim & Clare
2016 R-pod 178 2014 Ford Edge |
|
|
|
|
geewizard
Senior Member
Joined: 16 Apr 2017 Location: Spokane Online Status: Offline Posts: 347 |
Posted: 10 Jun 2017 at 9:49am |
|
I removed the microwave from our 177 to use the space for added storage. In our 177, the inside of the space was finished so I didn't have to do anything other than put up a net.
The net I bought from Amazon http://www.amazon.com/gp/product/B00QMT3488/ref=oh_aui_detailpage_o05_s00?ie=UTF8&psc=1 fit perfectly. |
|
|
2021 Winnebago Micro Minnie 1708FB
2017 R-Pod 177 (Blue) HRE SOLD 2004 Outfitter Apex 8 camper 2014 Toyota Tundra DC |
|
|
|
|
greenpod
Newbie 
Joined: 04 May 2017 Online Status: Offline Posts: 7 |
Posted: 09 Jun 2017 at 5:10pm |
|
Fine looking work!
|
|
|
|
|
jimandclare
Groupie
Joined: 13 Apr 2016 Location: Erie, MI Online Status: Offline Posts: 96 |
Posted: 09 Jun 2017 at 3:00pm |
|
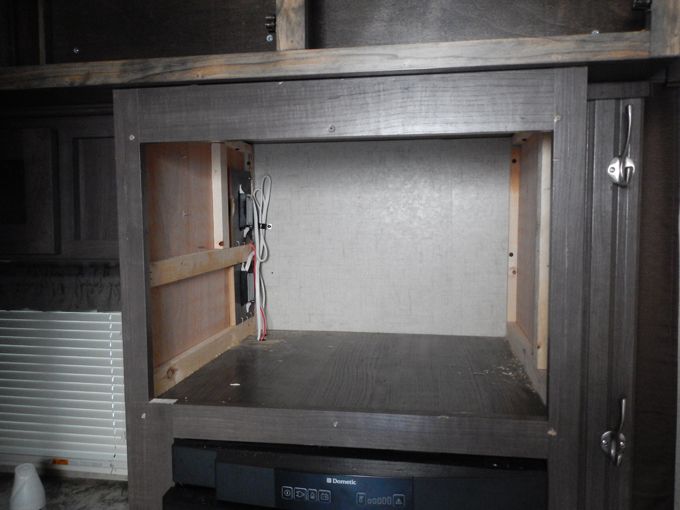
This past winter I was standing in our 178 and got curious
about how much space the microwave actually took up in the cabinet. So on a lark I took it out figuring I could
always put it back in if necessary. Holy
smokes I couldn’t believe the amount of additional storage space that was
available if we took out the microwave completely. We don’t use the microwave that much and it
weighs nearly 50 pounds. That’s just too
much unnecessary weight to heat up a cup of coffee and make popcorn. So we decided to re-purpose the cabinet for
storage and purchase an inexpensive light weight toaster oven to replace it.
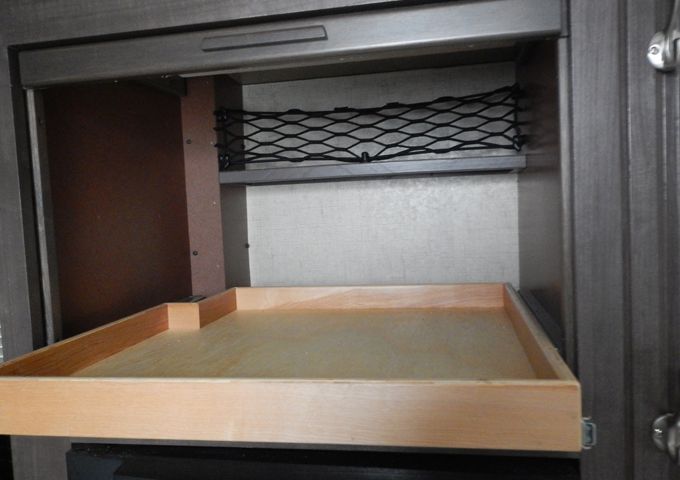
I lined the inside of the cabinet with 1/8 thick hardboard and made a removable box around the exposed electrical wires and outlets.
Then I finished off the inside with a small shelf and a slide out tray for our food and cooking supplies.
We had a rather warm spell this past winter and with
entirely too much time on my hands I finished of the cabinet with a tambour
door.
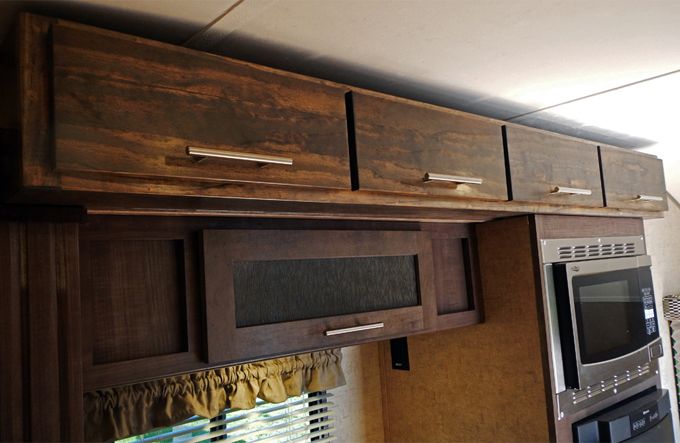
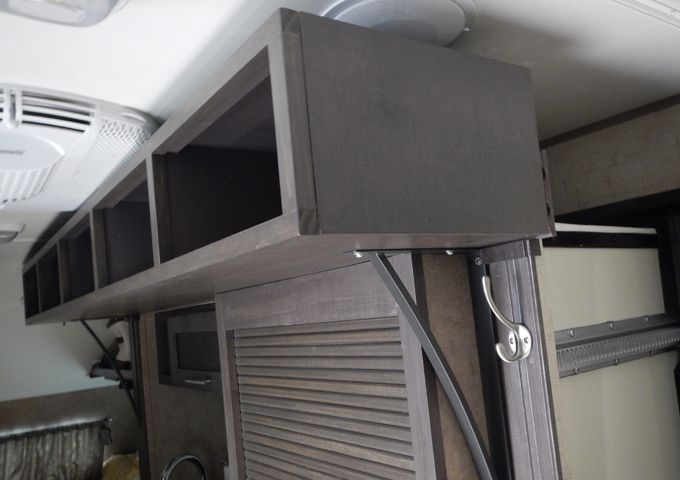
Last summer I built a cabinet above the kitchen area and
fastened it to the molding at the top of the slide out. Great idea for additional space but a really lousy
design. It just wasn’t deep enough to be
of any use.
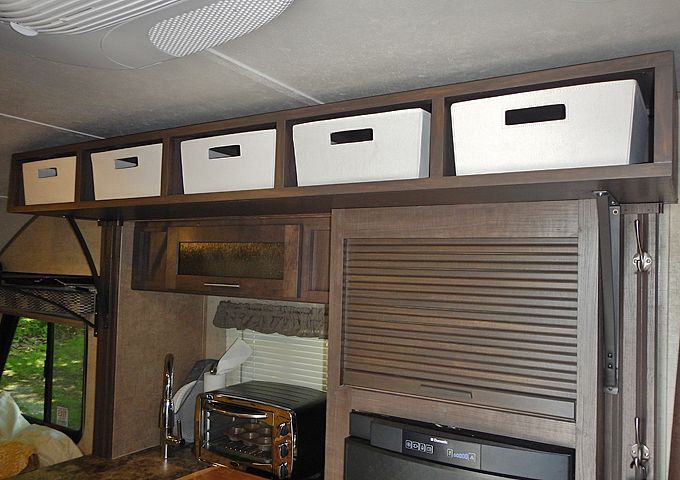
So I took it out and built another one the full 75” length of the upper molding and 13” deep. The height at 7 ¾” is enough to give clearance with the AC unit and the curvature of the ceiling in the rear of the 178 when the slide out moves in and out.
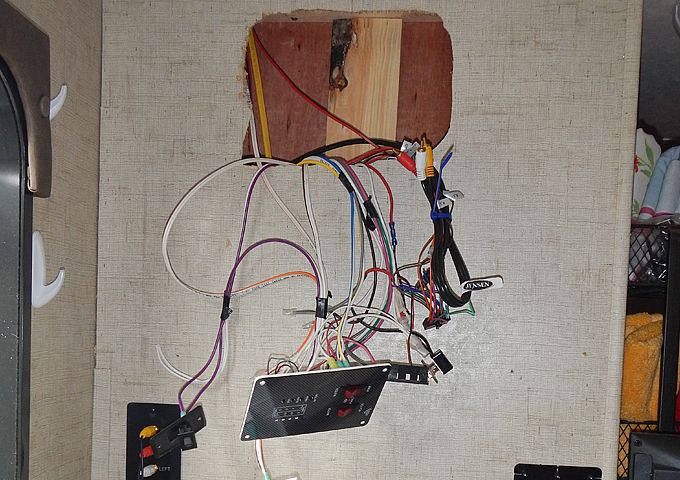
Lastly, one design feature about the 178 we find irritating is the placement of radio. It’s up near the ceiling and it’s impossible to see the LCD display clearly in any level of light without something to stand on.
So I removed the radio and the entire cabinet and built a new deeper cabinet using the original as a model.
Rerouted the rat’s nest of wires through new lower openings
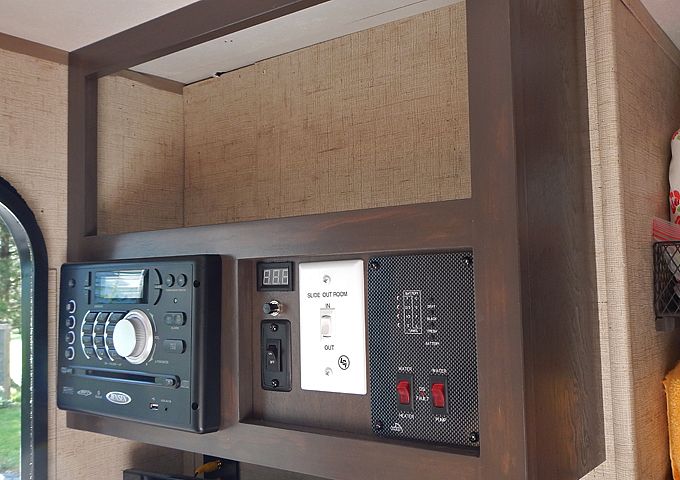
in the wall. Mounting the radio at eye
level and the switches and tank level indicators closer together created another
nice sized storage area above.
I covered the original hole in the wall with the drawer
bottoms I saved after making new deeper and taller drawers. |
|
|
Jim & Clare
2016 R-pod 178 2014 Ford Edge |
|
|
|
|
jimandclare
Groupie
Joined: 13 Apr 2016 Location: Erie, MI Online Status: Offline Posts: 96 |
Posted: 04 Mar 2017 at 11:30am |
Just a quick note that "Jeff's Rpod Brown" paint color is in fact in the Sherwin-Williams color database. Thanks for sharing Jeff.
|
|
|
Jim & Clare
2016 R-pod 178 2014 Ford Edge |
|
|
|
|
Wood River Pod
Senior Member

Joined: 30 Sep 2016 Location: Wood River, ID Online Status: Offline Posts: 153 |
Posted: 03 Mar 2017 at 9:43am |
|
It should be. If not the recipe is on my picture. It's an enamel paint, so it will paint everything but glass. They said mix a drop of water with a small amount to thin it out, and it should blend nicely with existing. At first they tried to convert your stain recipe to paint, but it came out pink. The sample on the back of the drawer looks good. Enjoy!
|
|
|
|
|
Post Reply
|
Page 123> |
| Forum Jump | Forum Permissions You cannot post new topics in this forum You cannot reply to topics in this forum You cannot delete your posts in this forum You cannot edit your posts in this forum You cannot create polls in this forum You cannot vote in polls in this forum |


 Creating more space in the R-178