|
|
Post Reply 
|
Page <123> |
| Author |
 Printable Version Printable Version Google Google Delicious Delicious Digg Digg StumbleUpon StumbleUpon Windows Live Windows Live Yahoo Bookmarks Yahoo Bookmarks reddit reddit Facebook Facebook MySpace MySpace Newsvine Newsvine Furl Furl Topic Search Topic Search  Topic Options Topic Options
|
jimandclare 
Groupie 
Joined: 13 Apr 2016 Location: Erie, MI Online Status: Offline Posts: 96 |
 Topic: Creating more space in the R-178 Topic: Creating more space in the R-178Posted: 26 Feb 2017 at 10:51am |
|
Nope its under the bed.
|
|
|
Jim & Clare
2016 R-pod 178 2014 Ford Edge |
|
 |
|
|
voisj
Senior Member 

Joined: 19 Jul 2016 Location: San Luis Obispo Online Status: Offline Posts: 471 |
Posted: 26 Feb 2017 at 11:28am |
|
I see it in the pictures now, there's not much room for a drawer,
This heat deflector could help a little. I made it so i could keep plastic bins under the bed and not melt anything. Not pretty, but blows the air out into the cabin instead of under the bed. |
|
|
|
|
Wood River Pod
Senior Member

Joined: 30 Sep 2016 Location: Wood River, ID Online Status: Offline Posts: 153 |
Posted: 26 Feb 2017 at 3:33pm |
|
What is the SW stain or paint recipe? I'd like to get some mixed up. Both stain and paint.
Been using Brown "Espresso" spray paint. Not for anything to out on the open. Does not match 100% but works for small stuff. Would love to match the color. Have not had the time to take a drawer in and have it matched. Great Mod! Looks awesome. Thanks |
|
|
|
|
jimandclare
Groupie
Joined: 13 Apr 2016 Location: Erie, MI Online Status: Offline Posts: 96 |
Posted: 27 Feb 2017 at 6:54am |
I took a sample of the opaque muddy gray brown trim to Sherwin Williams and after a few days they produced a stain that is really close. Have to just keep building up 3-4 thin layers of the stain. Here is the formula - hope it helps. 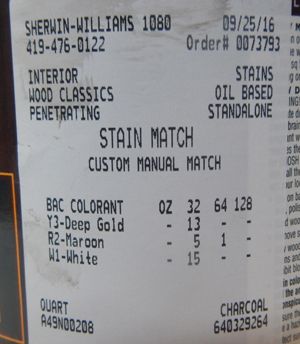 |
|
|
Jim & Clare
2016 R-pod 178 2014 Ford Edge |
|
|
|
|
jimandclare
Groupie
Joined: 13 Apr 2016 Location: Erie, MI Online Status: Offline Posts: 96 |
Posted: 27 Feb 2017 at 6:58am |
Great idea. Looks like there still might be room for a full extension drawer. I'll have to get out the tape measure have a look.
|
|
|
Jim & Clare
2016 R-pod 178 2014 Ford Edge |
|
|
|
|
Wood River Pod
Senior Member
Joined: 30 Sep 2016 Location: Wood River, ID Online Status: Offline Posts: 153 |
Posted: 02 Mar 2017 at 5:35pm |
|
jimandclare,
Thanks for the stain info. I took your info and one of my drawers into my local Sherwin Williams. After a 1 1/2 days they came up with a very close paint recipe. It was difficult since the manufacturer stained the wood and then put a "cloudy" clear coat on (per the paint store), which produces the "muddy" look as you called it. I was pleased with the sample patch we put on the back of the drawer. This should be fine for small patch jobs or painting accent pieces. I'm hoping it works fine on the particle board found throughout the pods. Regardless, it will be better than the espresso brown spray paint I've been using. Hope the forum finds this useful. If someone tweaks this for a better result, please share with the group. Thanks  |
|
|
|
|
jimandclare
Groupie
Joined: 13 Apr 2016 Location: Erie, MI Online Status: Offline Posts: 96 |
Posted: 02 Mar 2017 at 7:12pm |
|
Paint instead of stain! Wish I'd thought of that. Looks like a trip to Sherwin Williams is in the cards for this weekend. Thanks for sharing a cool idea. Do you think it's in their computer as Jeffs Rpod Brown?
|
|
|
Jim & Clare
2016 R-pod 178 2014 Ford Edge |
|
|
|
|
Wood River Pod
Senior Member
Joined: 30 Sep 2016 Location: Wood River, ID Online Status: Offline Posts: 153 |
Posted: 03 Mar 2017 at 9:43am |
|
It should be. If not the recipe is on my picture. It's an enamel paint, so it will paint everything but glass. They said mix a drop of water with a small amount to thin it out, and it should blend nicely with existing. At first they tried to convert your stain recipe to paint, but it came out pink. The sample on the back of the drawer looks good. Enjoy!
|
|
|
|
|
jimandclare
Groupie
Joined: 13 Apr 2016 Location: Erie, MI Online Status: Offline Posts: 96 |
Posted: 04 Mar 2017 at 11:30am |
Just a quick note that "Jeff's Rpod Brown" paint color is in fact in the Sherwin-Williams color database. Thanks for sharing Jeff.
|
|
|
Jim & Clare
2016 R-pod 178 2014 Ford Edge |
|
|
|
|
jimandclare
Groupie
Joined: 13 Apr 2016 Location: Erie, MI Online Status: Offline Posts: 96 |
Posted: 09 Jun 2017 at 3:00pm |
|
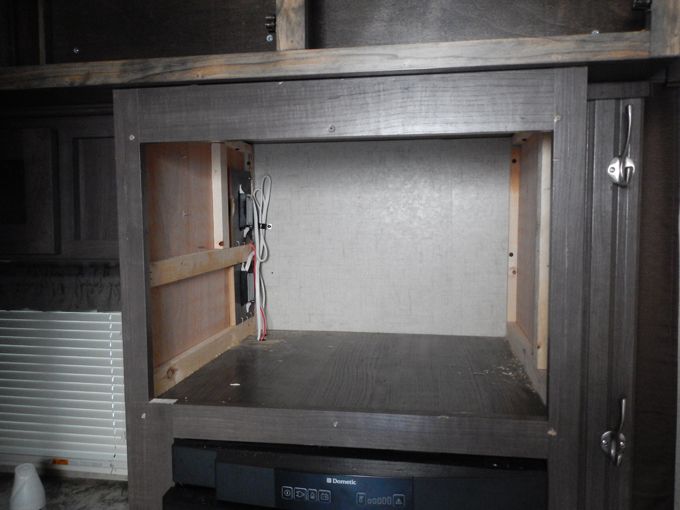
This past winter I was standing in our 178 and got curious
about how much space the microwave actually took up in the cabinet. So on a lark I took it out figuring I could
always put it back in if necessary. Holy
smokes I couldn’t believe the amount of additional storage space that was
available if we took out the microwave completely. We don’t use the microwave that much and it
weighs nearly 50 pounds. That’s just too
much unnecessary weight to heat up a cup of coffee and make popcorn. So we decided to re-purpose the cabinet for
storage and purchase an inexpensive light weight toaster oven to replace it.
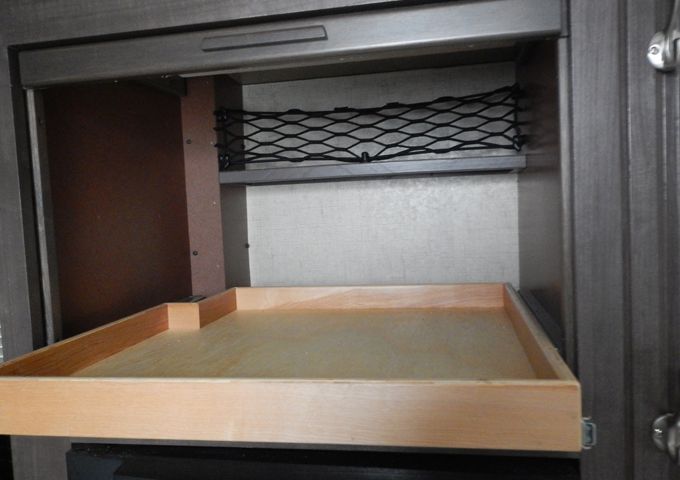
I lined the inside of the cabinet with 1/8 thick hardboard and made a removable box around the exposed electrical wires and outlets.
Then I finished off the inside with a small shelf and a slide out tray for our food and cooking supplies.
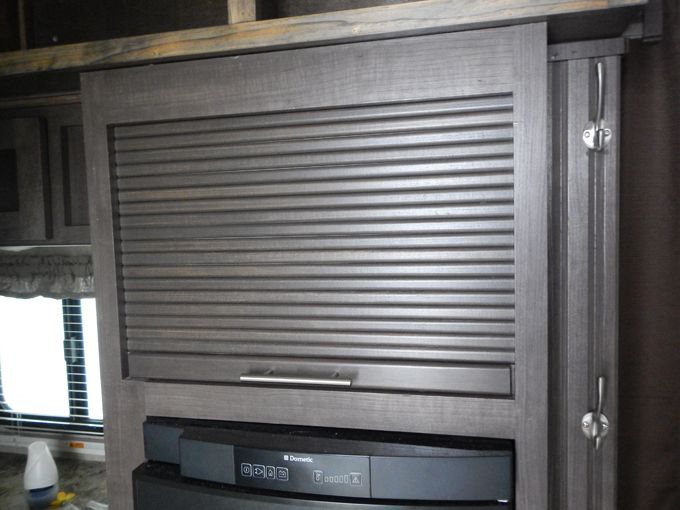
We had a rather warm spell this past winter and with
entirely too much time on my hands I finished of the cabinet with a tambour
door.
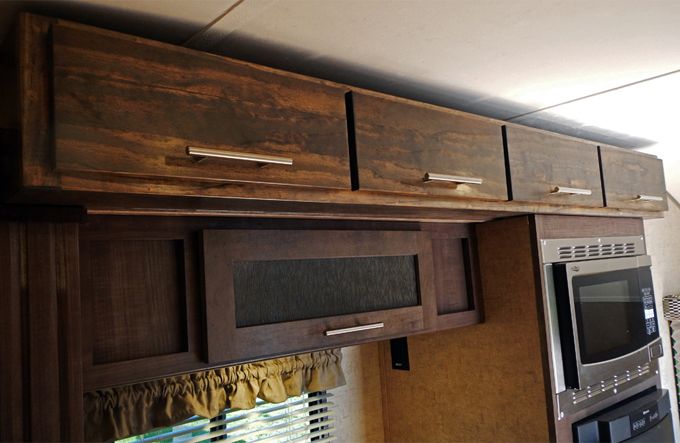
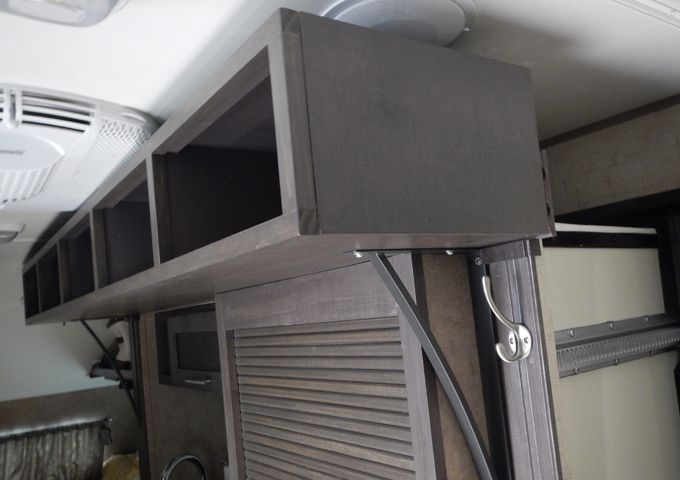
Last summer I built a cabinet above the kitchen area and
fastened it to the molding at the top of the slide out. Great idea for additional space but a really lousy
design. It just wasn’t deep enough to be
of any use.
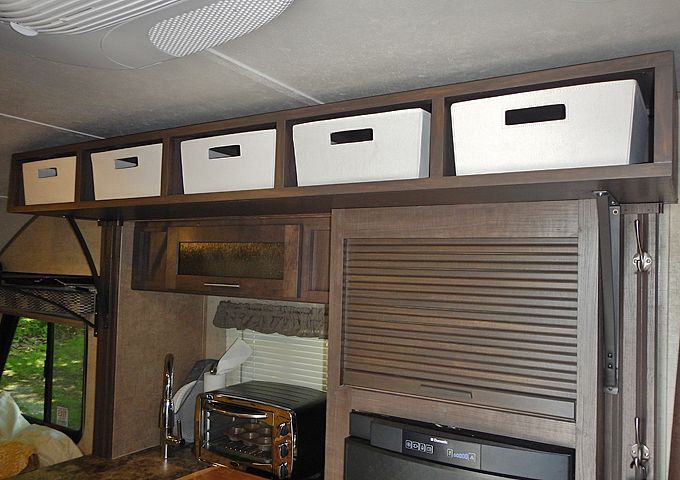
So I took it out and built another one the full 75” length of the upper molding and 13” deep. The height at 7 ¾” is enough to give clearance with the AC unit and the curvature of the ceiling in the rear of the 178 when the slide out moves in and out.
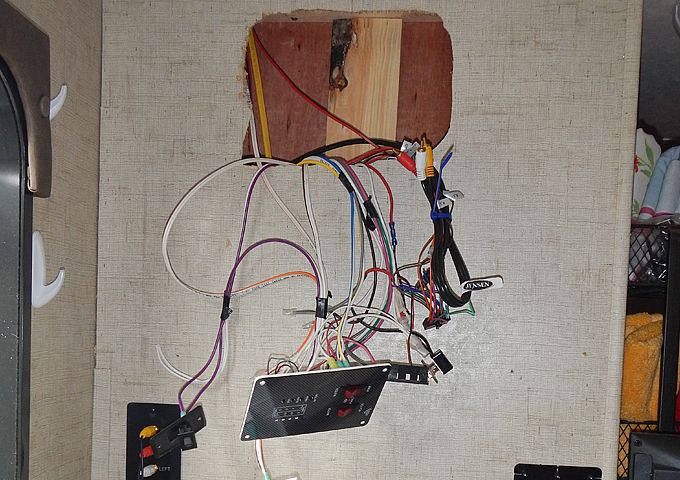
Lastly, one design feature about the 178 we find irritating is the placement of radio. It’s up near the ceiling and it’s impossible to see the LCD display clearly in any level of light without something to stand on.
So I removed the radio and the entire cabinet and built a new deeper cabinet using the original as a model.
Rerouted the rat’s nest of wires through new lower openings
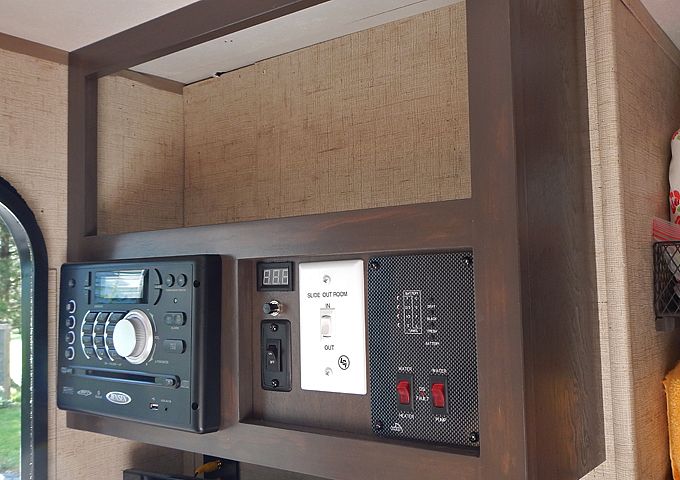
in the wall. Mounting the radio at eye
level and the switches and tank level indicators closer together created another
nice sized storage area above.
I covered the original hole in the wall with the drawer
bottoms I saved after making new deeper and taller drawers. |
|
|
Jim & Clare
2016 R-pod 178 2014 Ford Edge |
|
|
|
|
Post Reply
|
Page <123> |
| Forum Jump | Forum Permissions You cannot post new topics in this forum You cannot reply to topics in this forum You cannot delete your posts in this forum You cannot edit your posts in this forum You cannot create polls in this forum You cannot vote in polls in this forum |


 Creating more space in the R-178