My 2014 172 podmods
Printed From: R-pod Owners Forum
Category: R-pod Discussion Forums
Forum Name: Podmods, Maintenance, Tips and Tricks
Forum Discription: Ask maintenance questions, share your podmods (modifications) and helpful tips
URL: http://www.rpod-owners.com/forum_posts.asp?TID=15653
Printed Date: 03 Aug 2025 at 1:23pm
Software Version: Web Wiz Forums 9.64 - http://www.webwizforums.com
Topic: My 2014 172 podmods
Posted By: abikerider
Subject: My 2014 172 podmods
Date Posted: 10 Apr 2023 at 8:27pm
| I am starting this thread to document my modifications and repairs to my fixer-upper Rpod that I got for a great price knowing it would need some work. We bought it in December 2022 and I've been working on it since. I will post my mods in chronological order. |
Replies:
Posted By: lostagain
Date Posted: 11 Apr 2023 at 6:00am
|
Since we did a lot of changes to our 172, we'd love to see what you are doing. It's a great little trailer.
By the way, welcome to the forum. ------------- Never leave footprints behind. Fred & Maria Kearney Sonoma 167RB Our Pod 172 2019 Ford F-150 4x4 2.7 EcoBoost |
Posted By: StephenH
Date Posted: 11 Apr 2023 at 9:36am
|
Welcome to the forum and I also look forward to reading about your repairs and modifications. I hope it goes well and you wind up with a great RPod in which to have many fun adventures, making many great memories doing so. ------------- StephenH Happy is the man that findeth wisdom,... http://www.rpod-owners.com/forum_posts.asp?TID=7712 - ouR escaPOD mods Former RPod 179 Current Cherokee Grey Wolf 24 JS |
Posted By: abikerider
Date Posted: 14 Apr 2023 at 9:50am
Here are some pictures of the pod after we got it.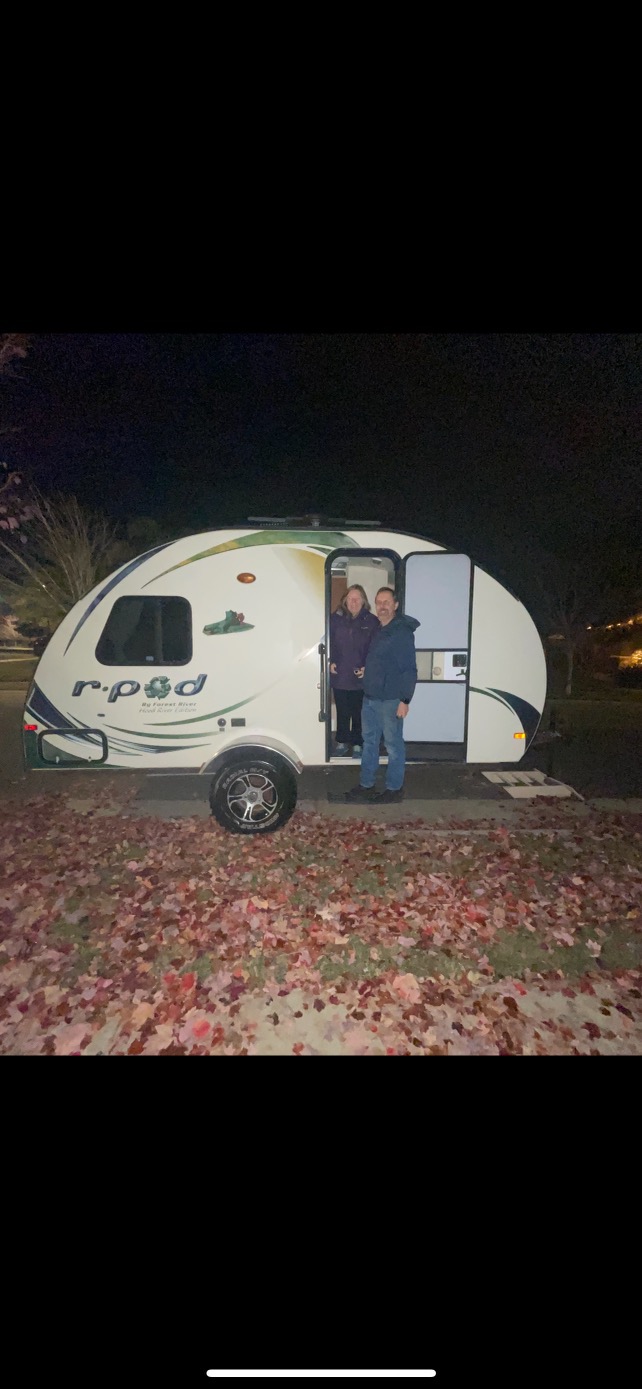 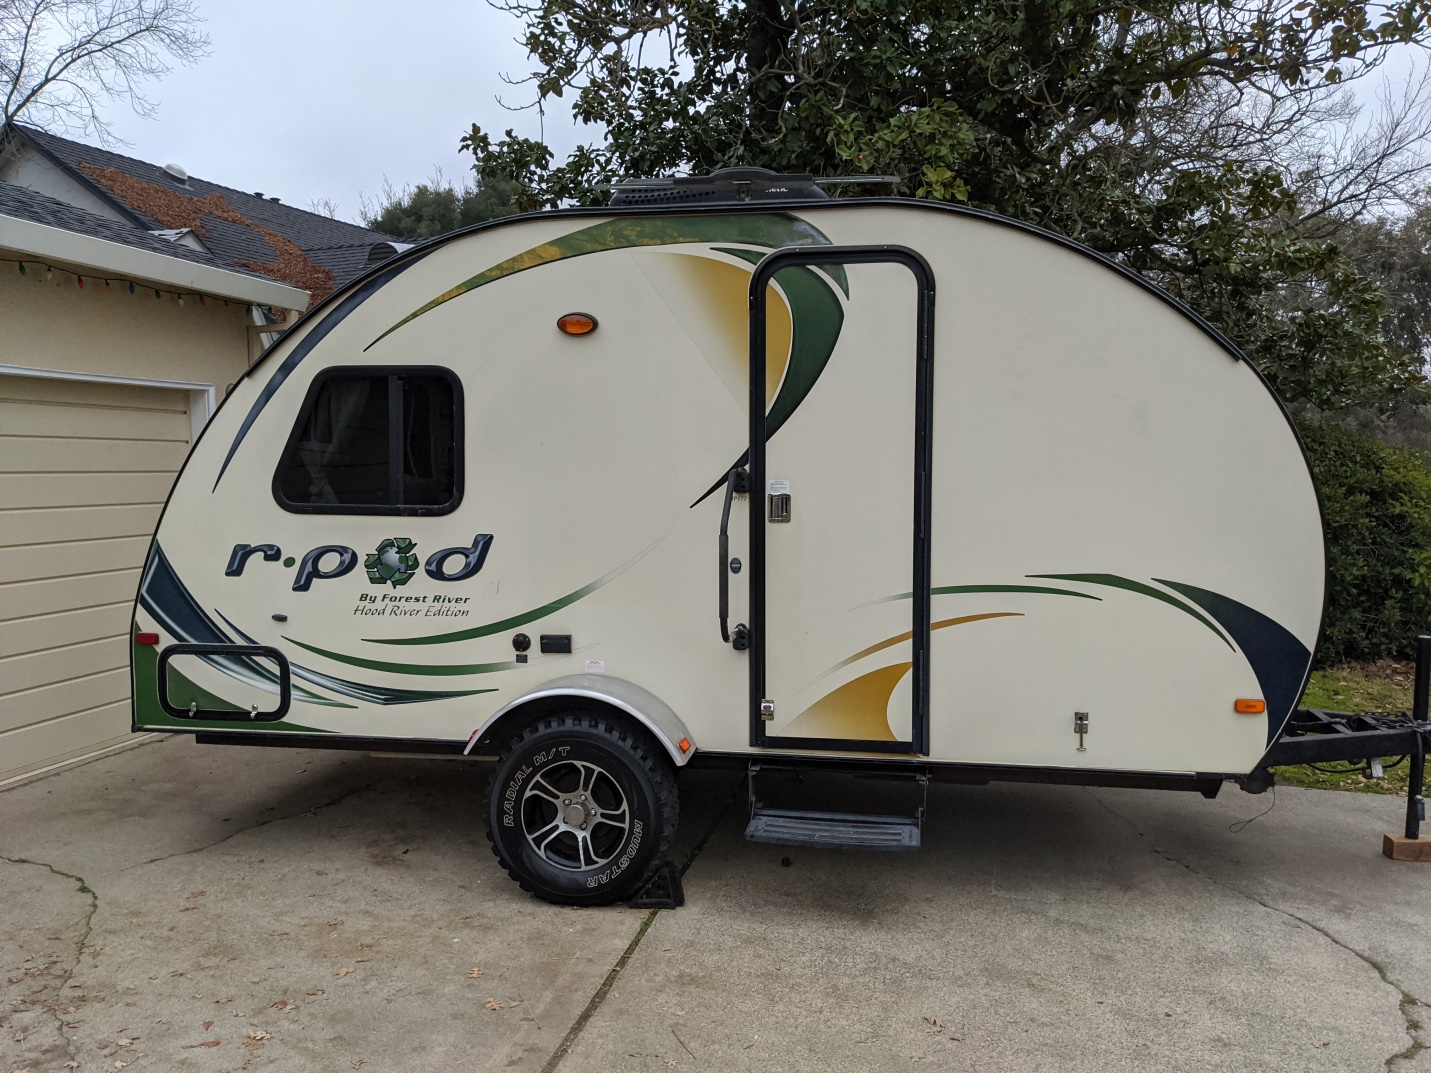 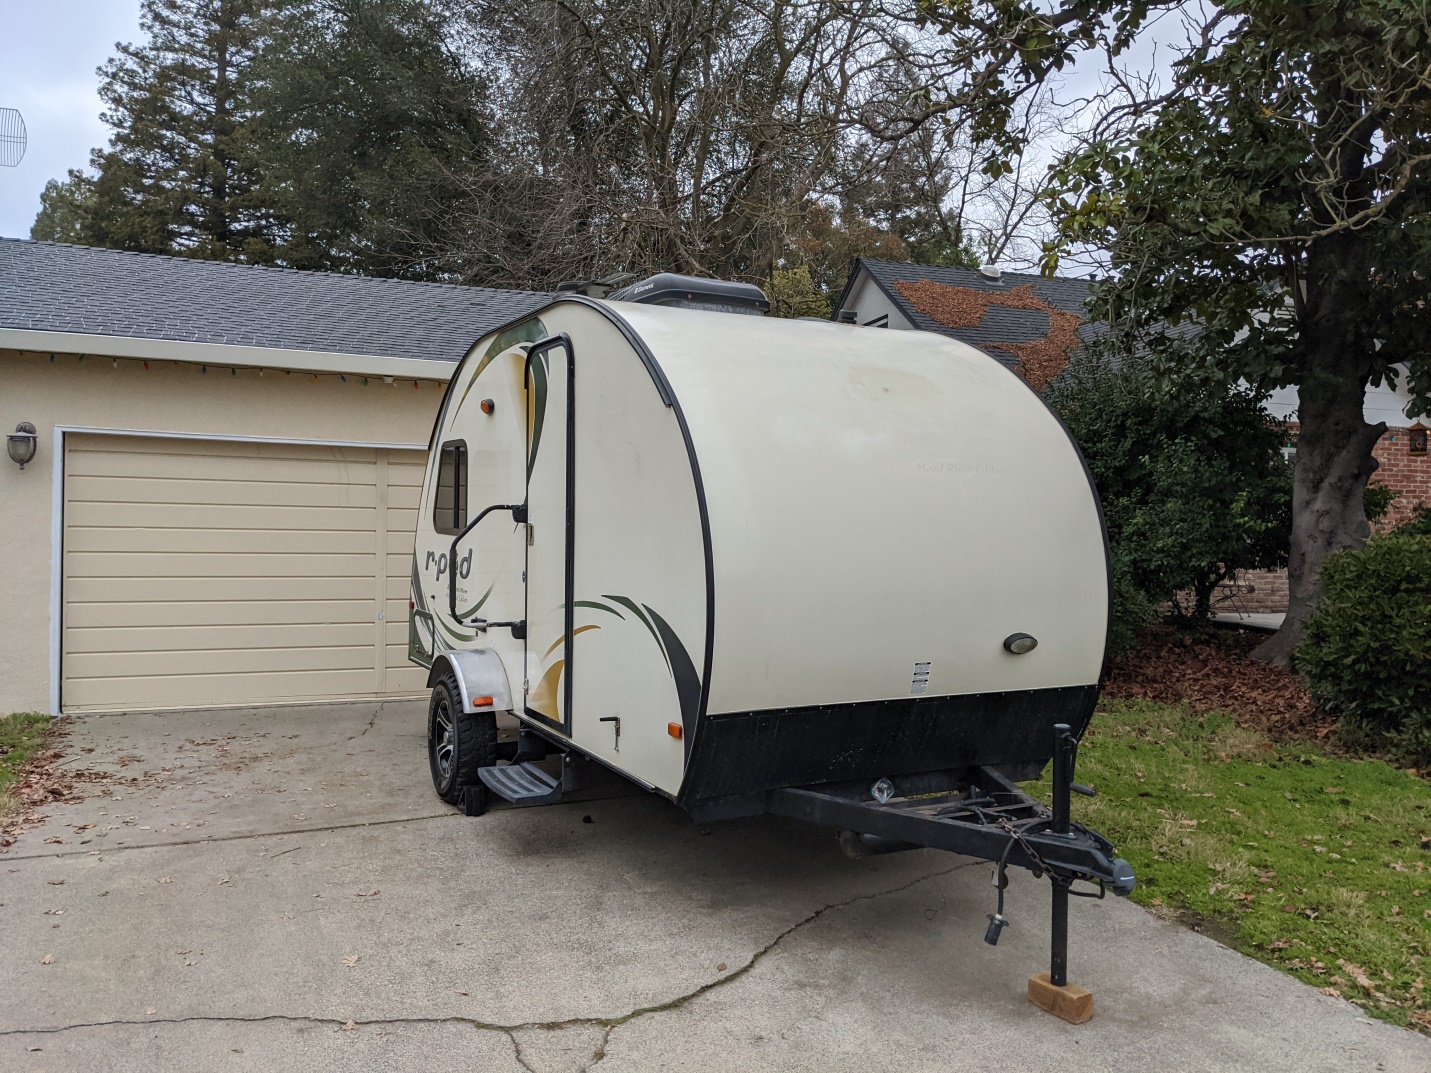  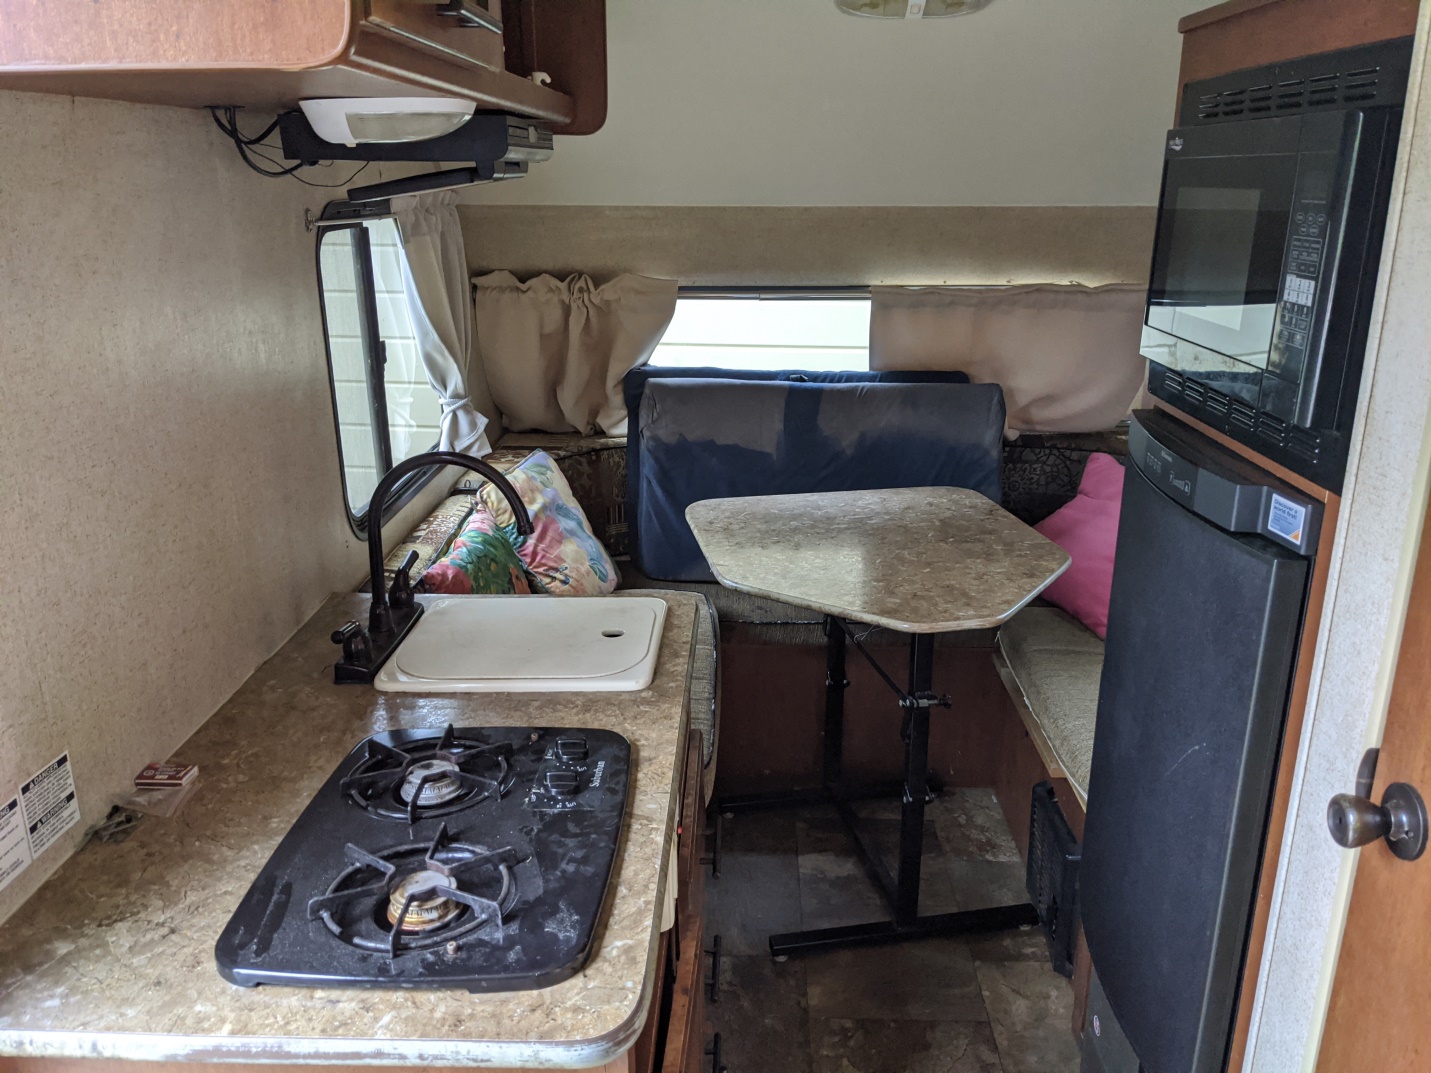 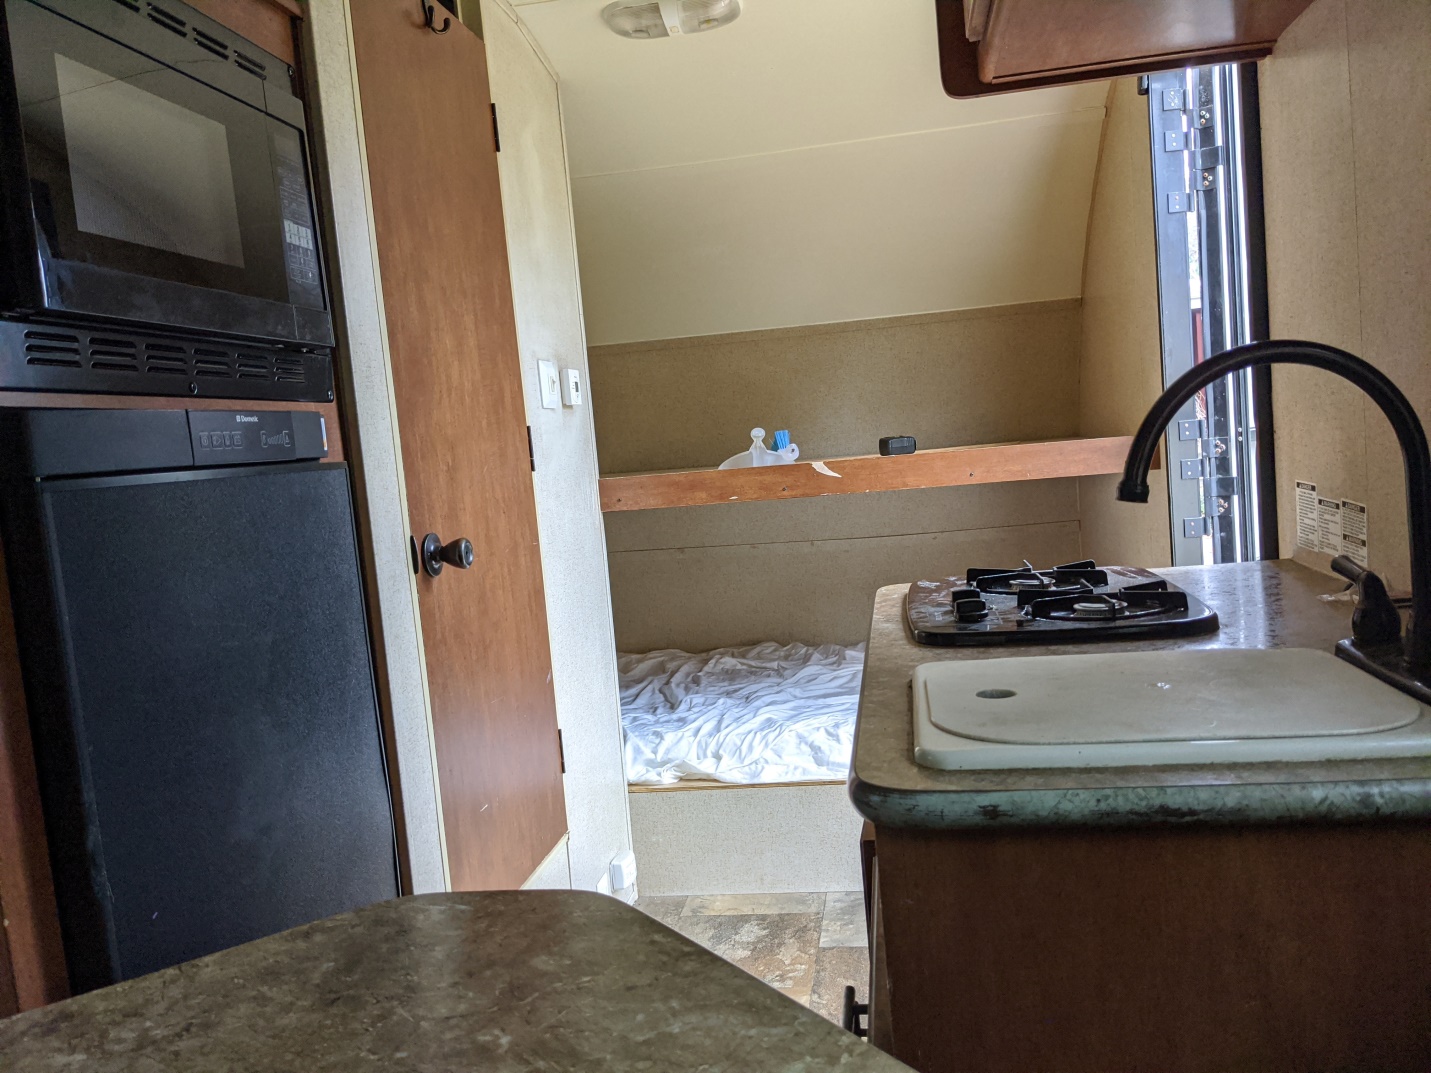 |
Posted By: abikerider
Date Posted: 14 Apr 2023 at 9:52am
|
Is there a better way to post pictures here other than pasting link addresses? |
Posted By: StephenH
Date Posted: 14 Apr 2023 at 10:33am
|
Yes. Look at the icons above the text entry box. To the left of the question mark, there is a double box with an arrow. Click on that. It will bring you to the advanced editor. Once you are there, look for an icon on the top row that looks like a tree. That is the Insert Image tool. Click on that and you will get a dialog box where you can upload pictures. Now, as for the pictures, you need to use an image editing program such as the GIMP (Gnu Image Manipulation Program which is available for multiple platforms) or other image editing program to re-size your photos. I find 800x600 or equivalent to work well as this reduces the file sizes to a good size that isn't too big while still being big enough to see details. Upload your picture and it will show up in the box on the left. Select it and then when you hit the OK button, it will be inserted into your post. If you want to insert multiple pictures, hit your down arrow to get your cursor below the picture you just inserted and repeat the process. Edit: You can also go back and edit your previous post to insert the pictures there instead of creating a new post. The Edit function is under the Post Options.
------------- StephenH Happy is the man that findeth wisdom,... http://www.rpod-owners.com/forum_posts.asp?TID=7712 - ouR escaPOD mods Former RPod 179 Current Cherokee Grey Wolf 24 JS |
Posted By: lostagain
Date Posted: 14 Apr 2023 at 11:13am
|
Our 172 had badly worn and sun damage decals so we took them all off and left it plain white. I considered getting a decal made naming it "White Cloud," but it was too costly. ------------- Never leave footprints behind. Fred & Maria Kearney Sonoma 167RB Our Pod 172 2019 Ford F-150 4x4 2.7 EcoBoost |
Posted By: Rpodrrr
Date Posted: 16 Apr 2023 at 8:48pm
| Congratulations on the 172. It took me a good year to clean up the poor construction but now that it’s settled in I just hook it up to the truck and go. Check the outside walls at the corners at each end of trailer to make sure they are sealed properly. |
Posted By: Rpodrrr
Date Posted: 16 Apr 2023 at 8:54pm
|
Do yourself a favour and buy some Eternabond tape from Amazon. Cut some thin strips and tape it along the side rails at on the roof.also use it over the spoiler if you have one and it will most certainly seal the roof from any future leaks. The spoilers are notorious for leaking. I also took all the screws out from the trim that joins the vertical walls to the roof and replaced them with stainless and a bit of sicaflex. Many screws holes were drilled by the manufacturer but didn’t have screws and the trim is like a gutter and causes leaks. One day they may actually come to the conclusion that good manufacturing will create more sales. 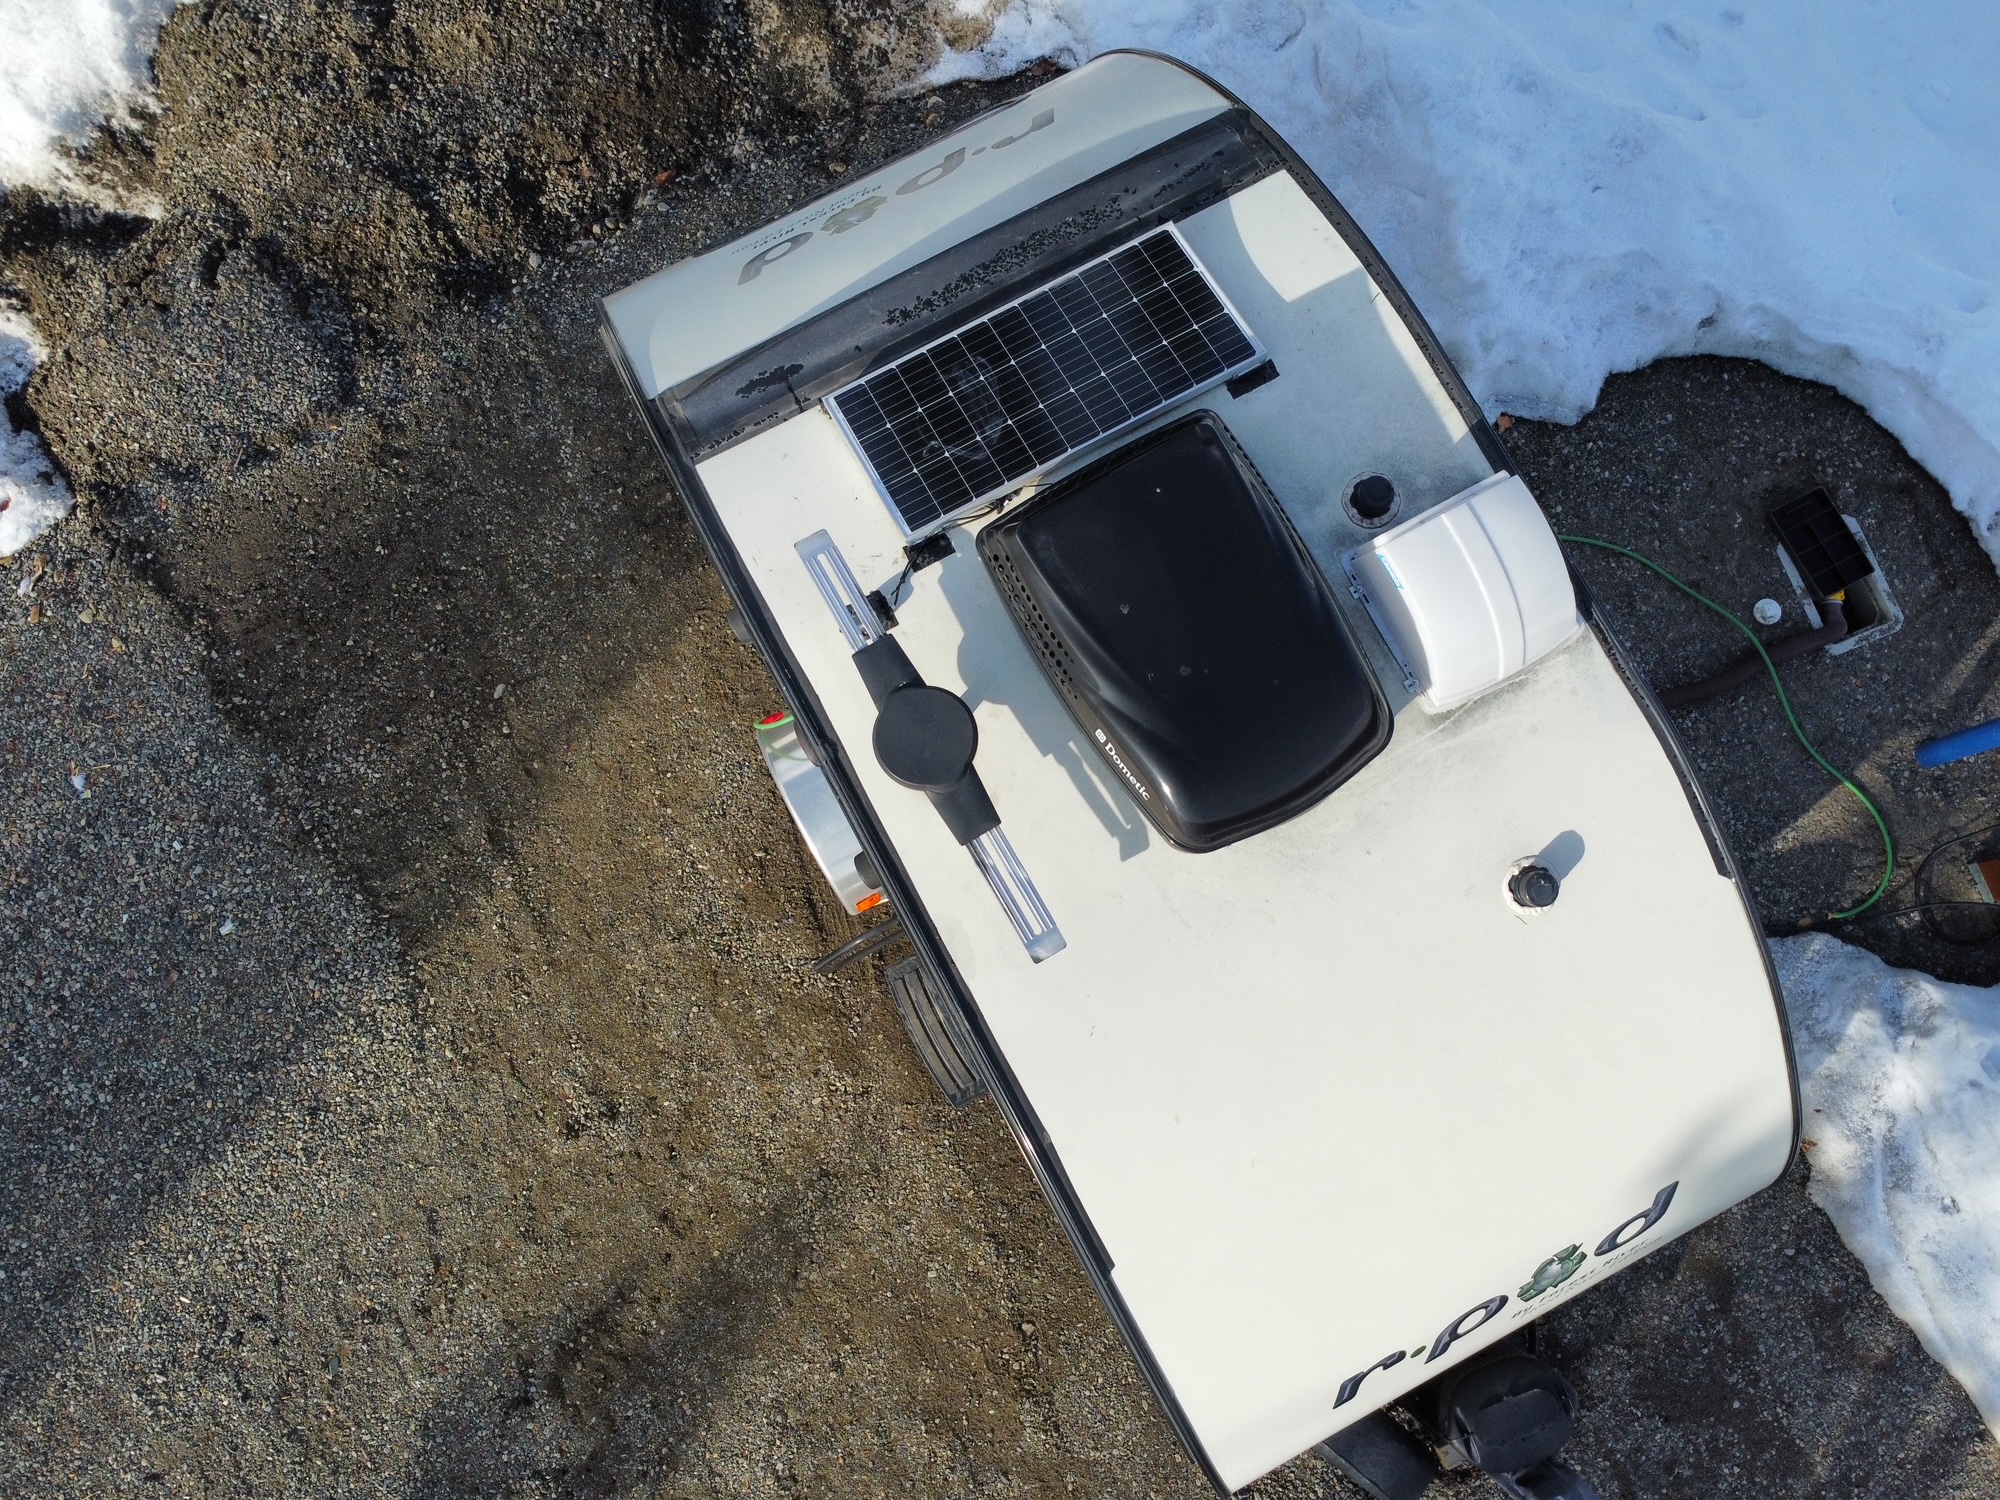
|
Posted By: abikerider
Date Posted: 03 May 2023 at 11:17pm
| Thanks Stephan H, that helps. The only thing is that it limits it to 1000 kB pics. I'll have to resize my images. |
Posted By: abikerider
Date Posted: 04 May 2023 at 1:06am
|
The first thing I decided to do was get rid of that awful laminate countertop and dinette table and replace it with something nice. I found this 1" x 25" x 72" butcherblock at Home Depot for $159 and bought two. https://www.homedepot.com/p/Interbuild-6-ft-L-x-25-in-D-Acacia-Butcher-Block-Standard-Countertop-in-Golden-Teak-with-Square-Edge-675781/317198293 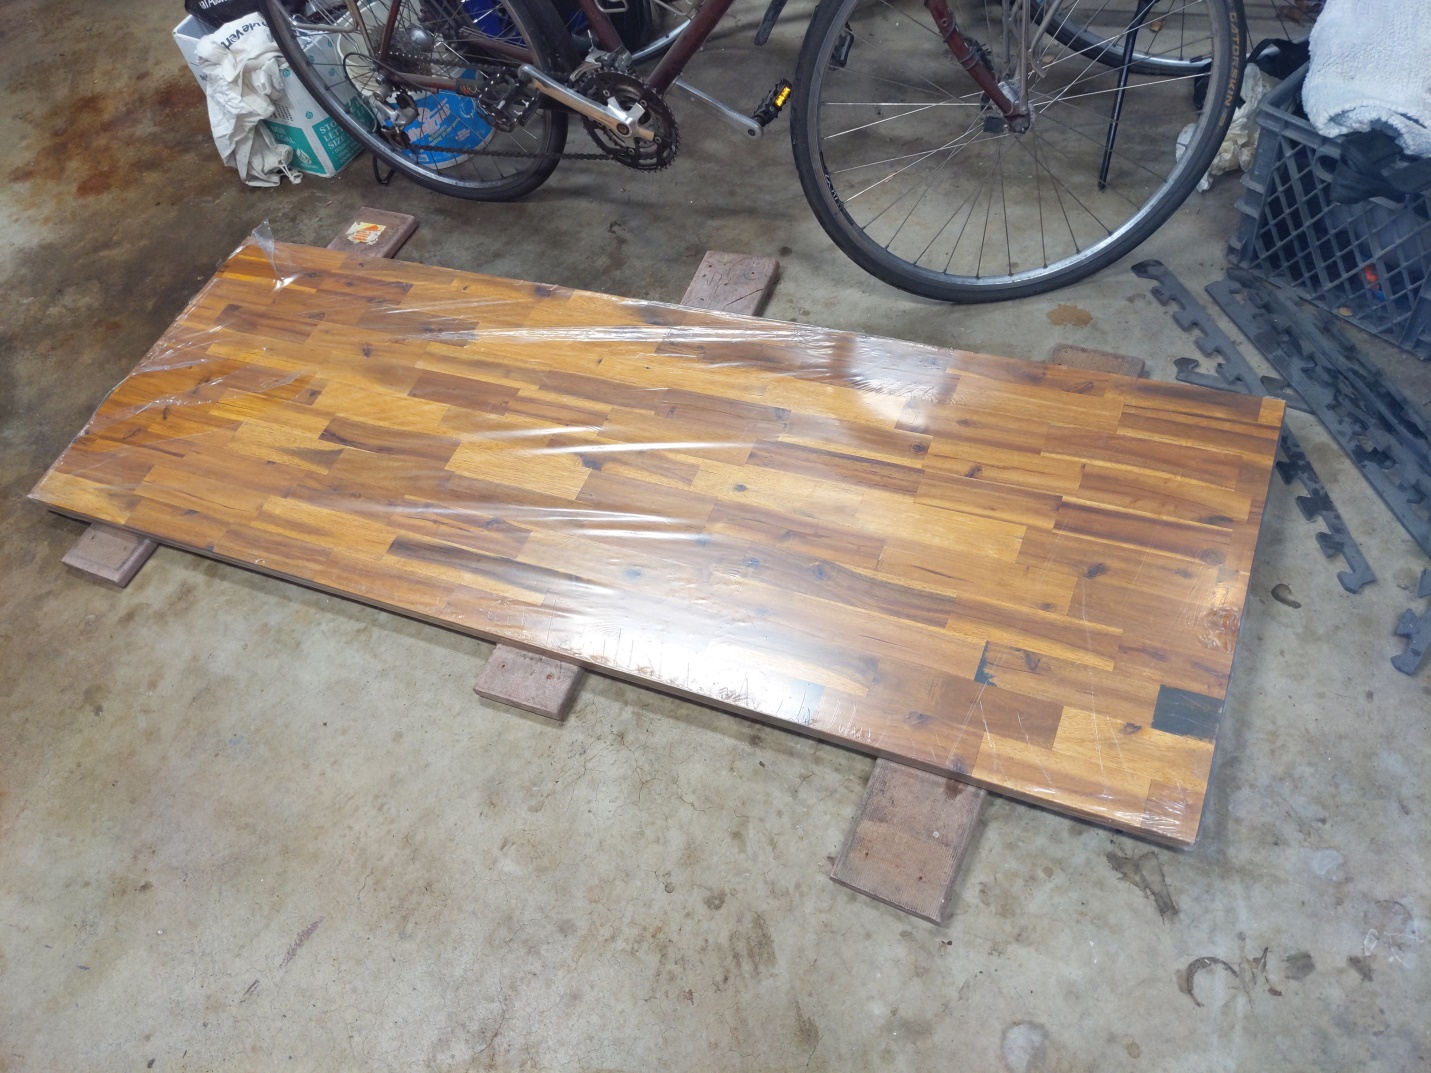 Here's a before and after. 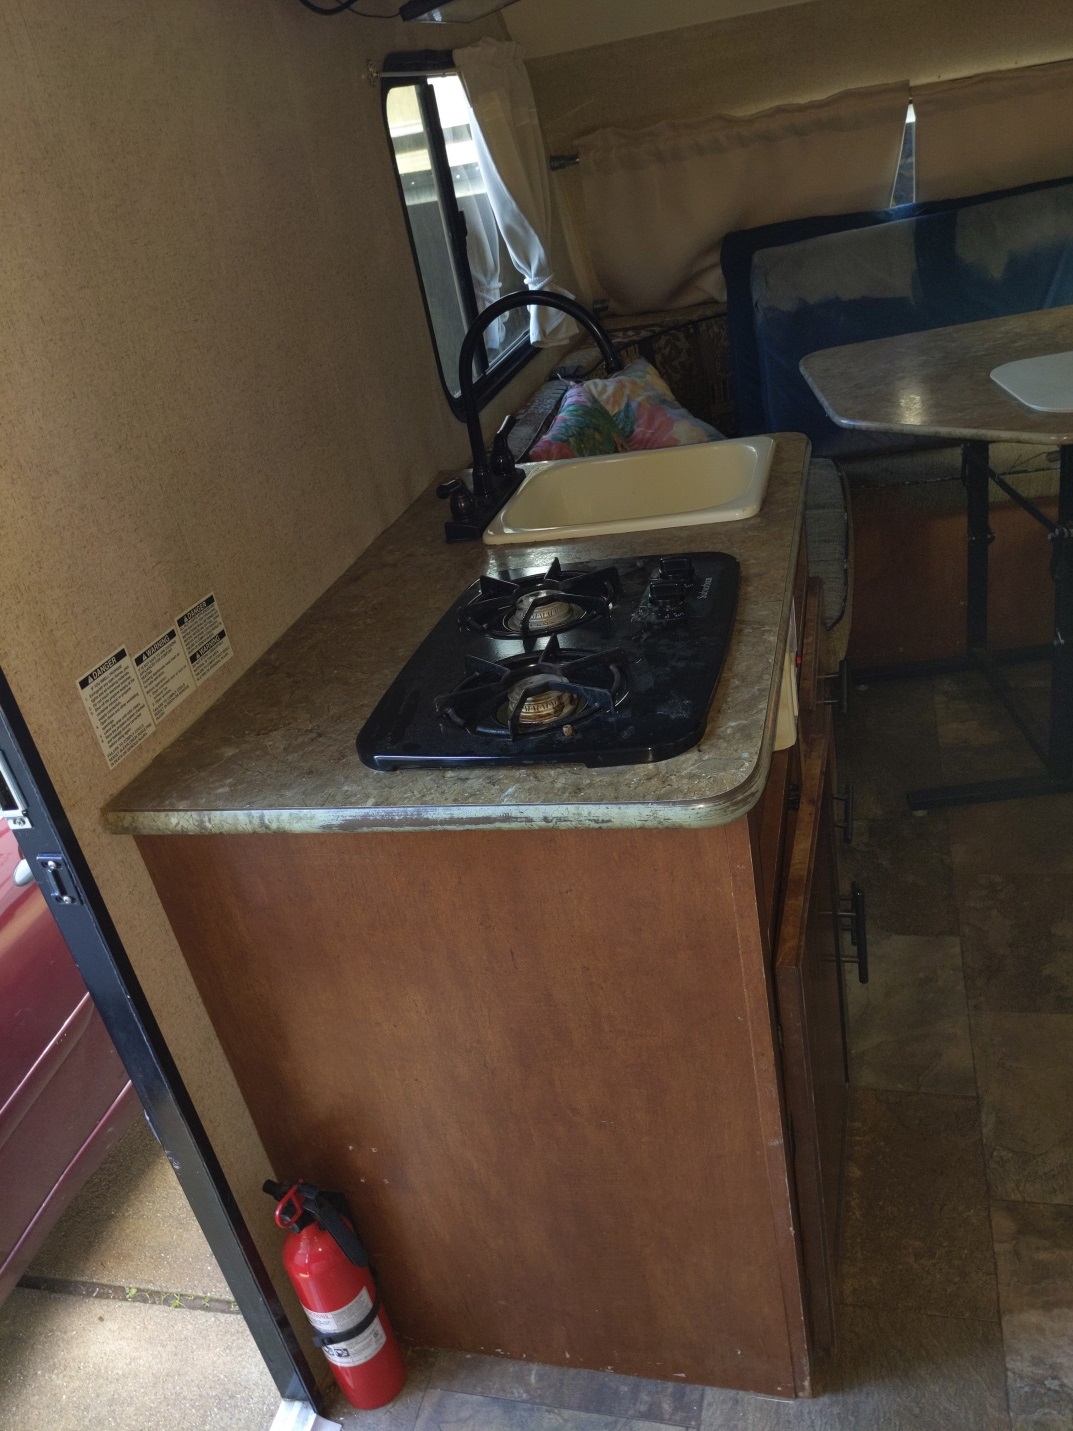 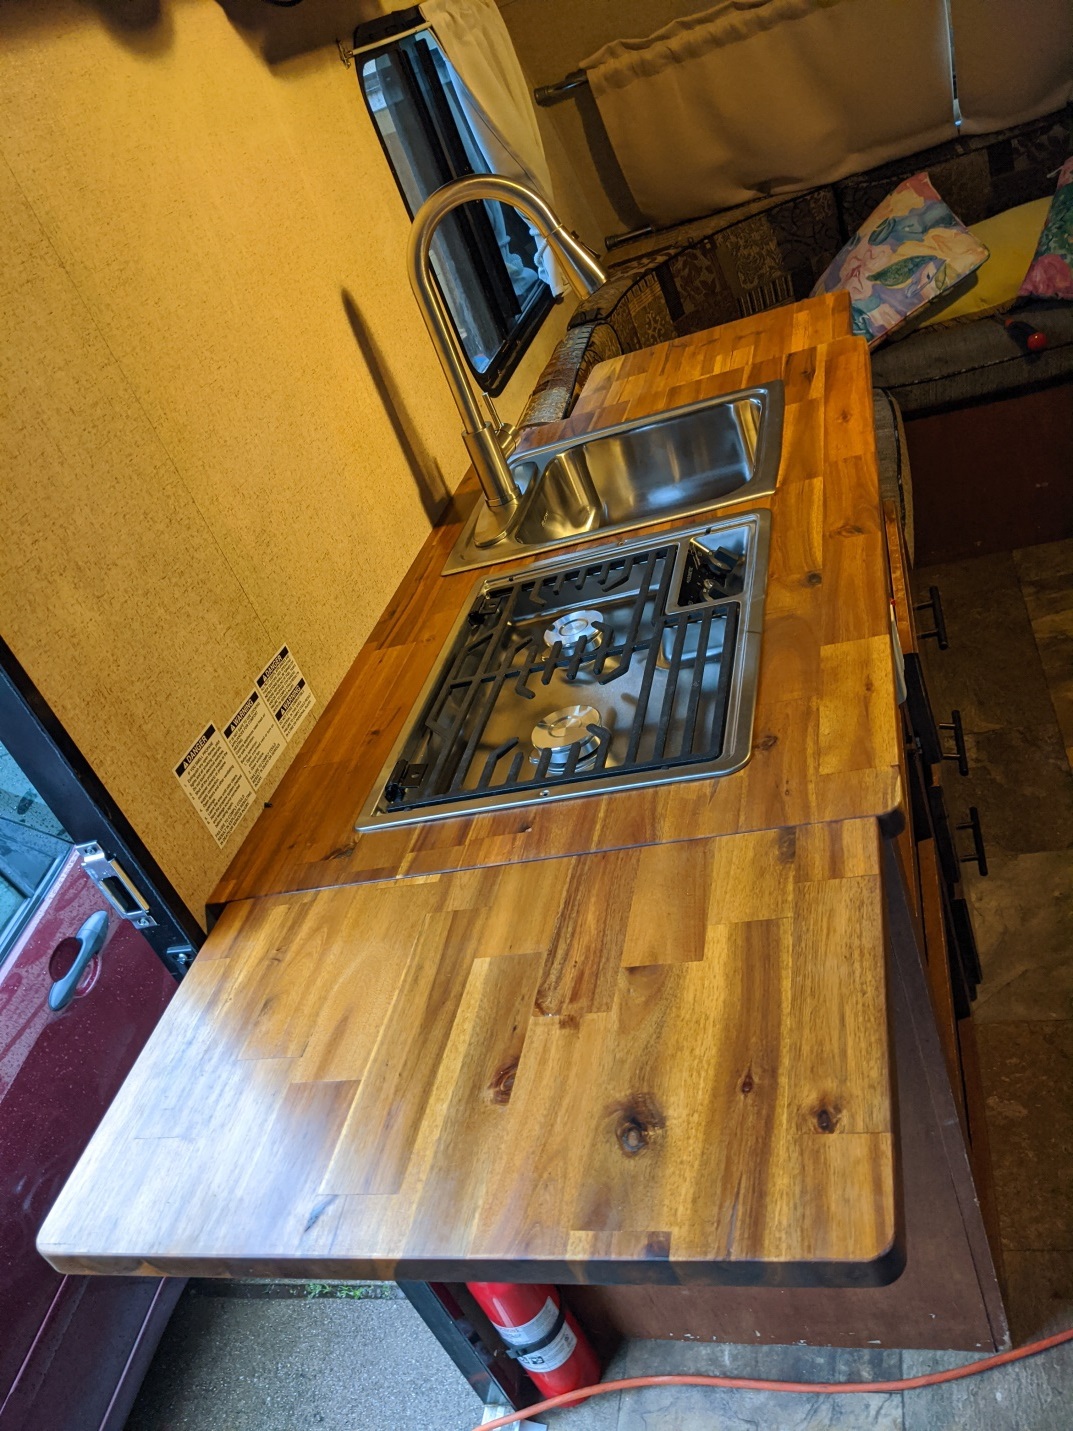 As you can see, I added some flip-up countertop on each side to make the kitchen much more user-friendly and a nice shiny SS sink and stovetop from ebay. Here are some pics of the build process. First I removed the old countertop and added some 1 x 12 pine boards to each side for mounting the flip-up countertops. 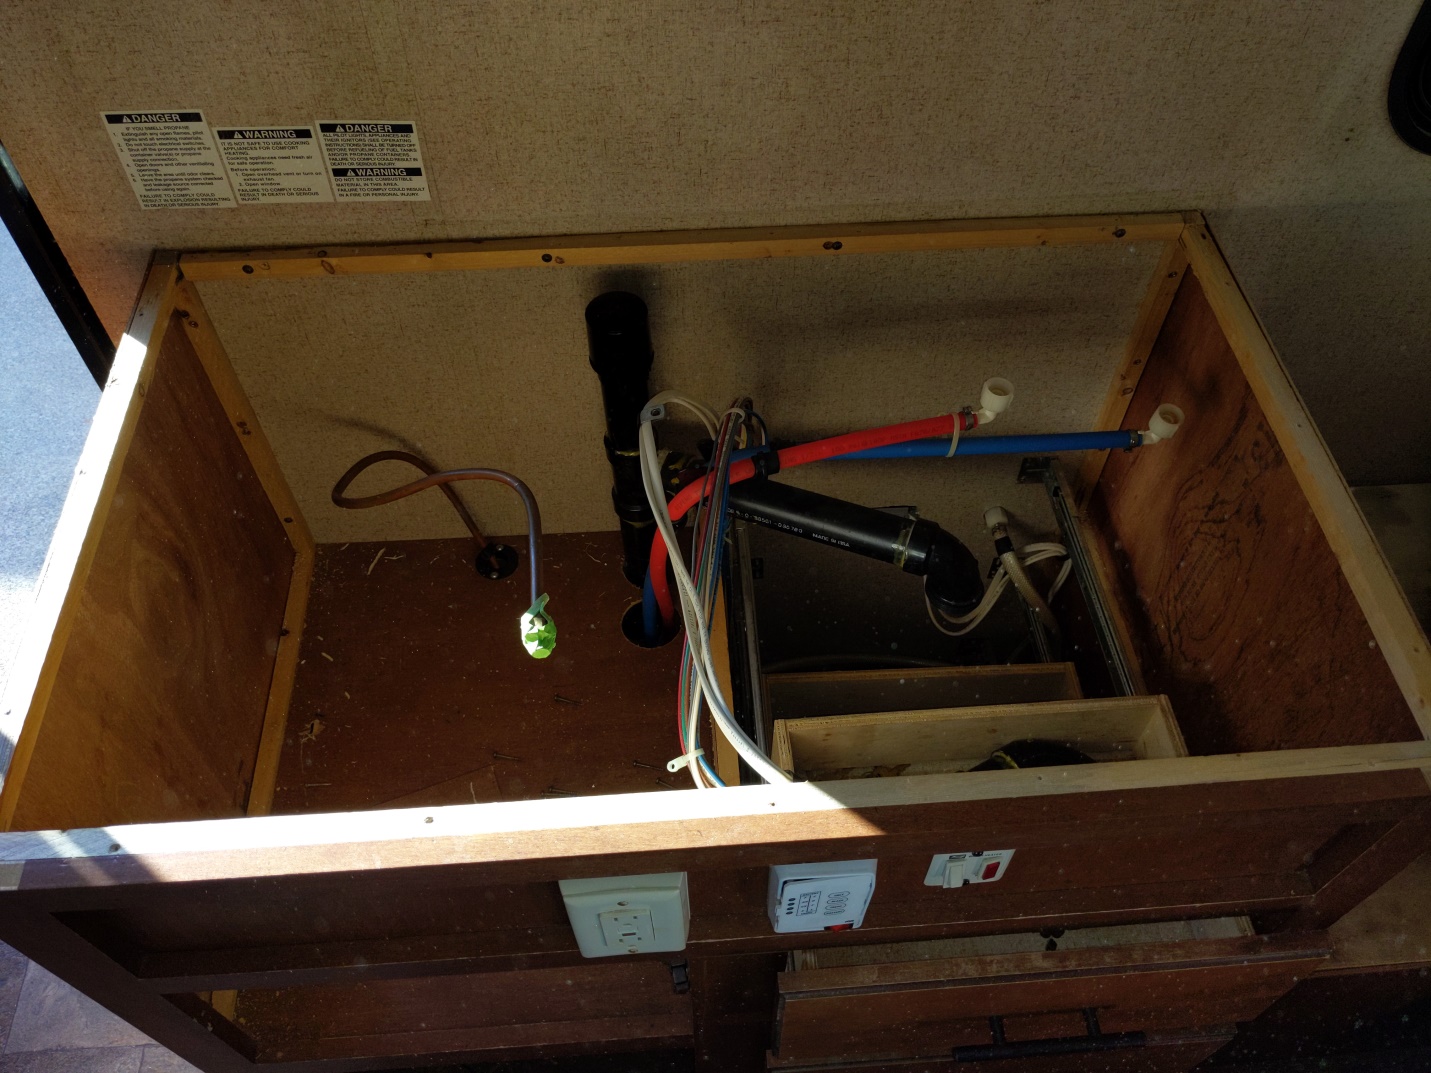 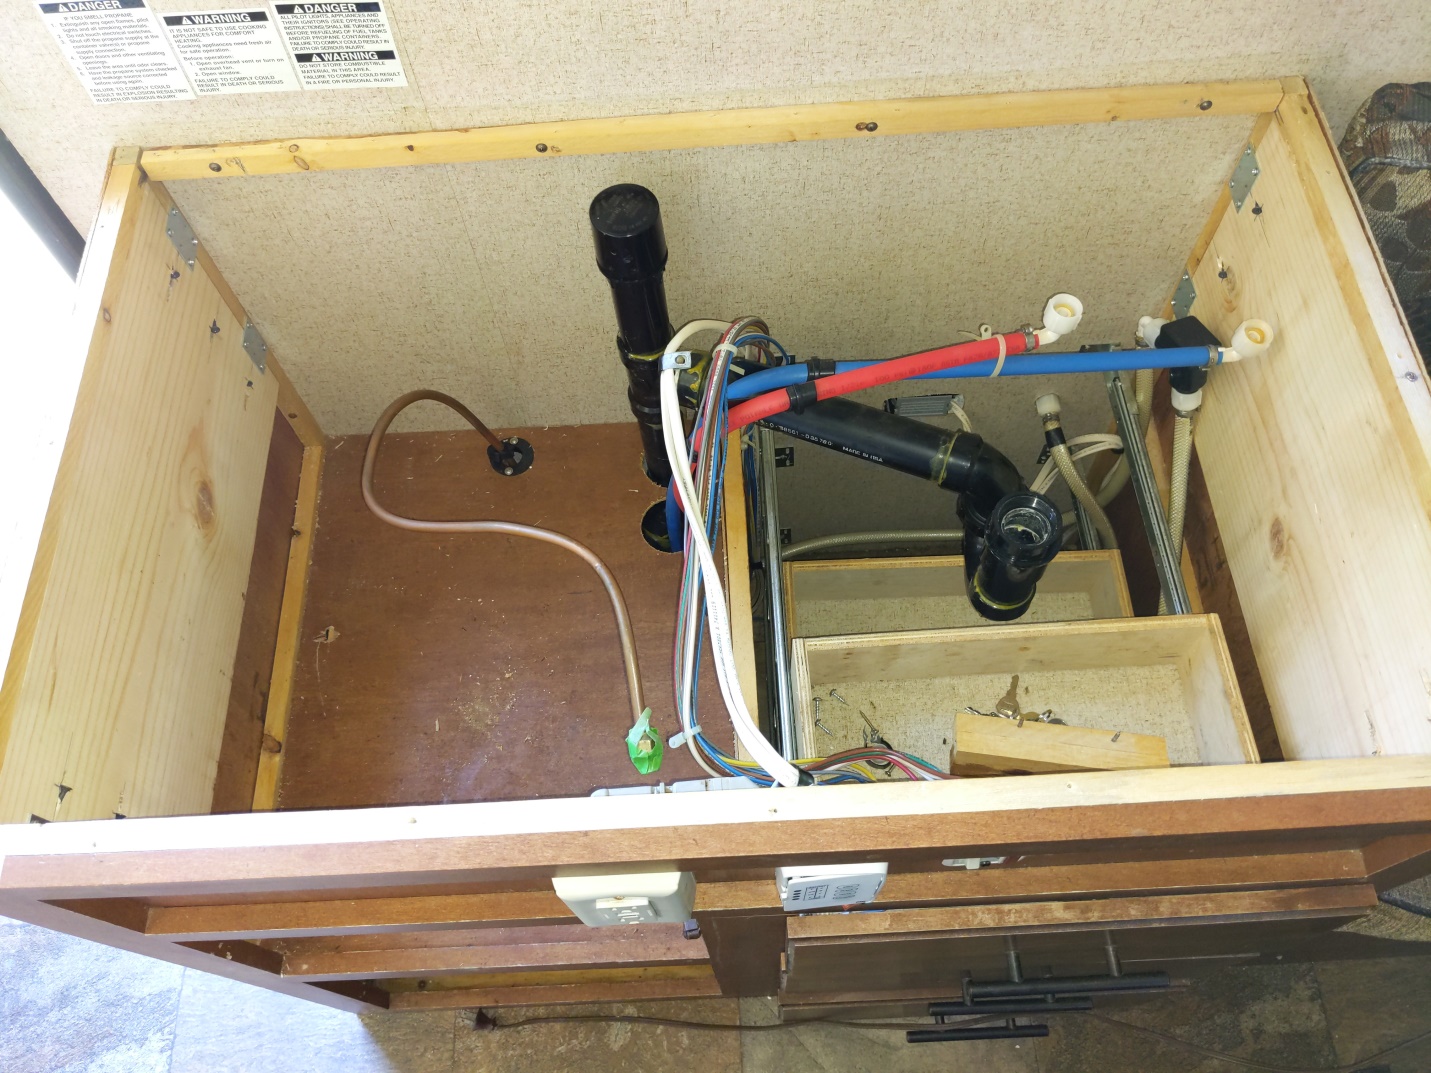 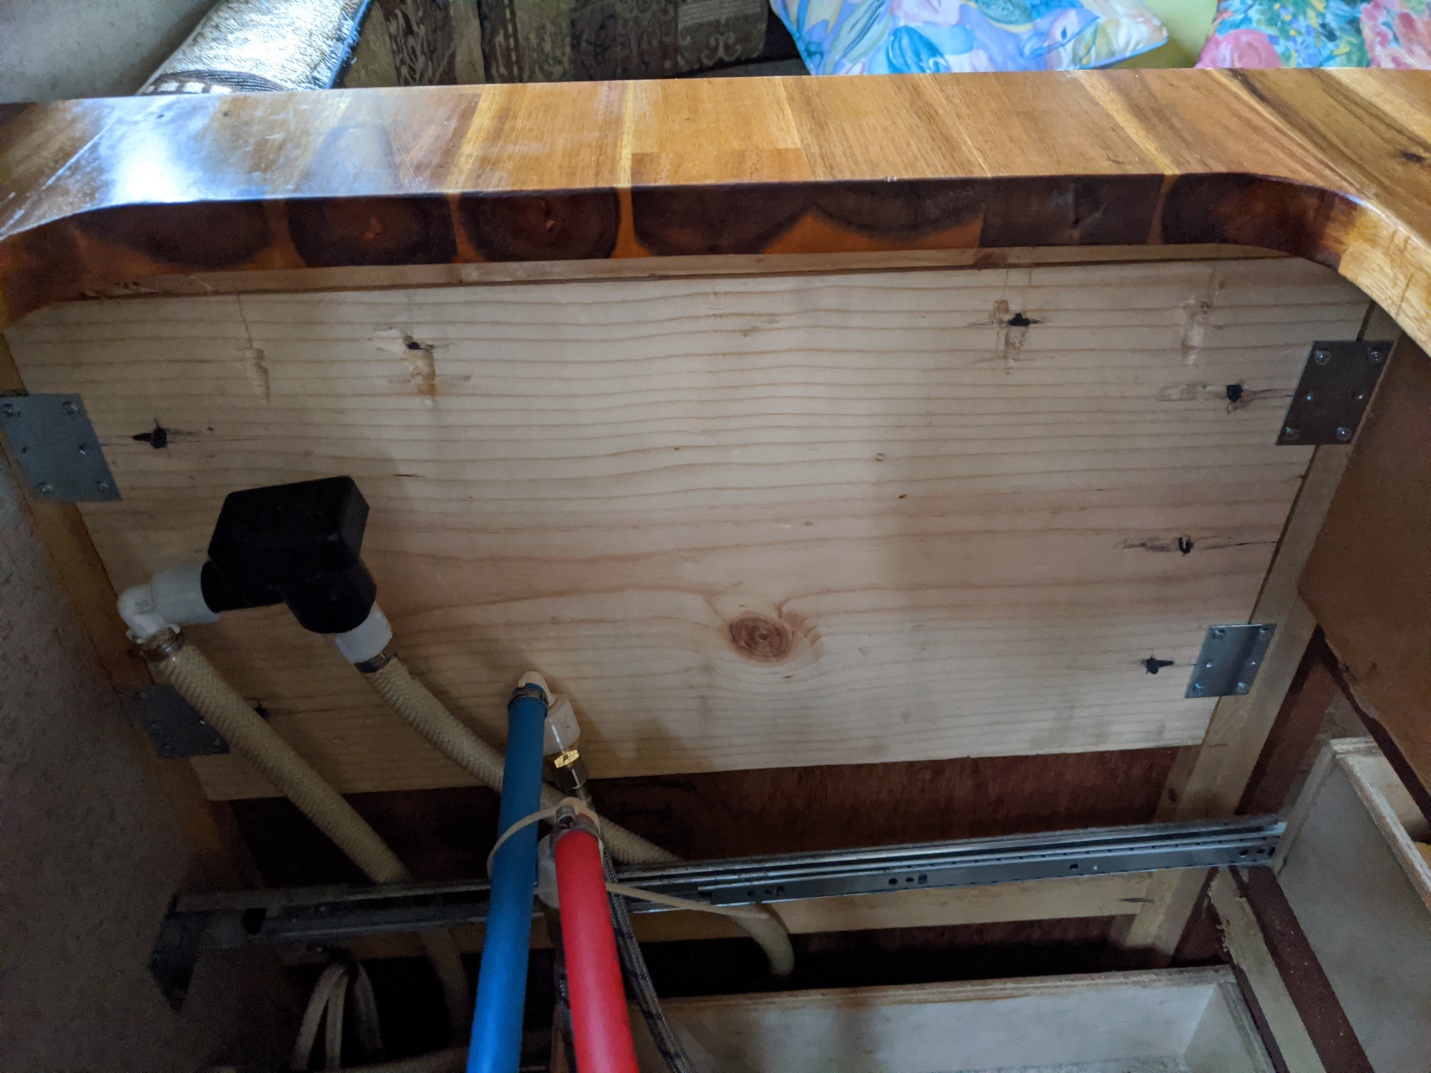 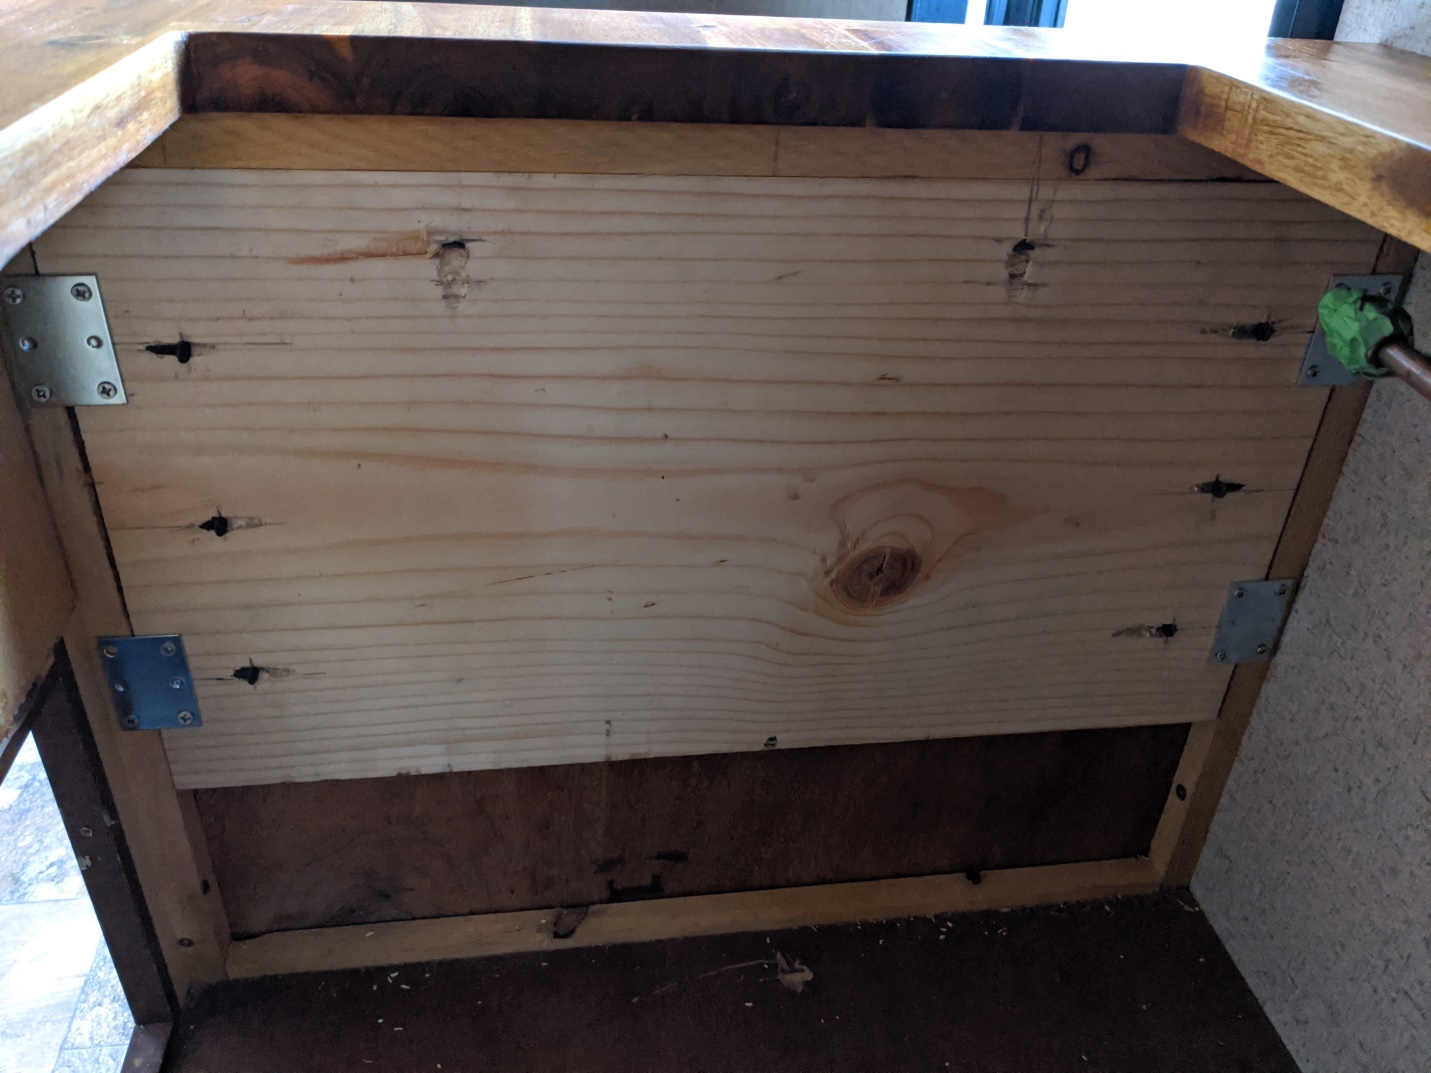 Continued on next post. |
Posted By: abikerider
Date Posted: 04 May 2023 at 1:21am
Here I am measuring twice and cutting once.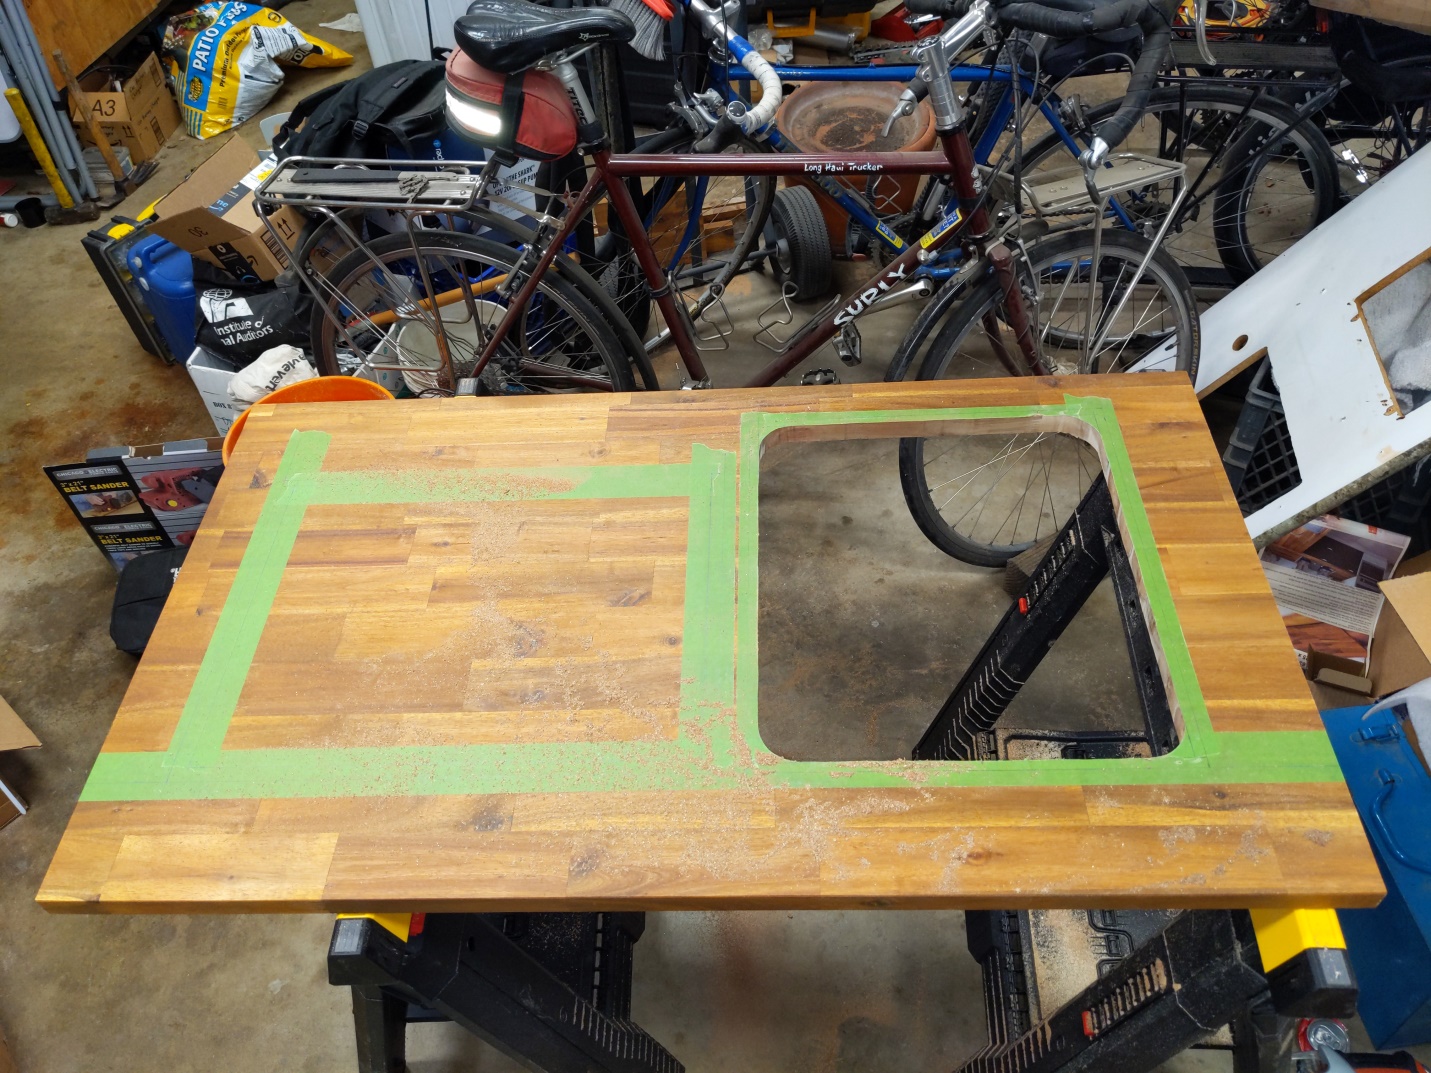 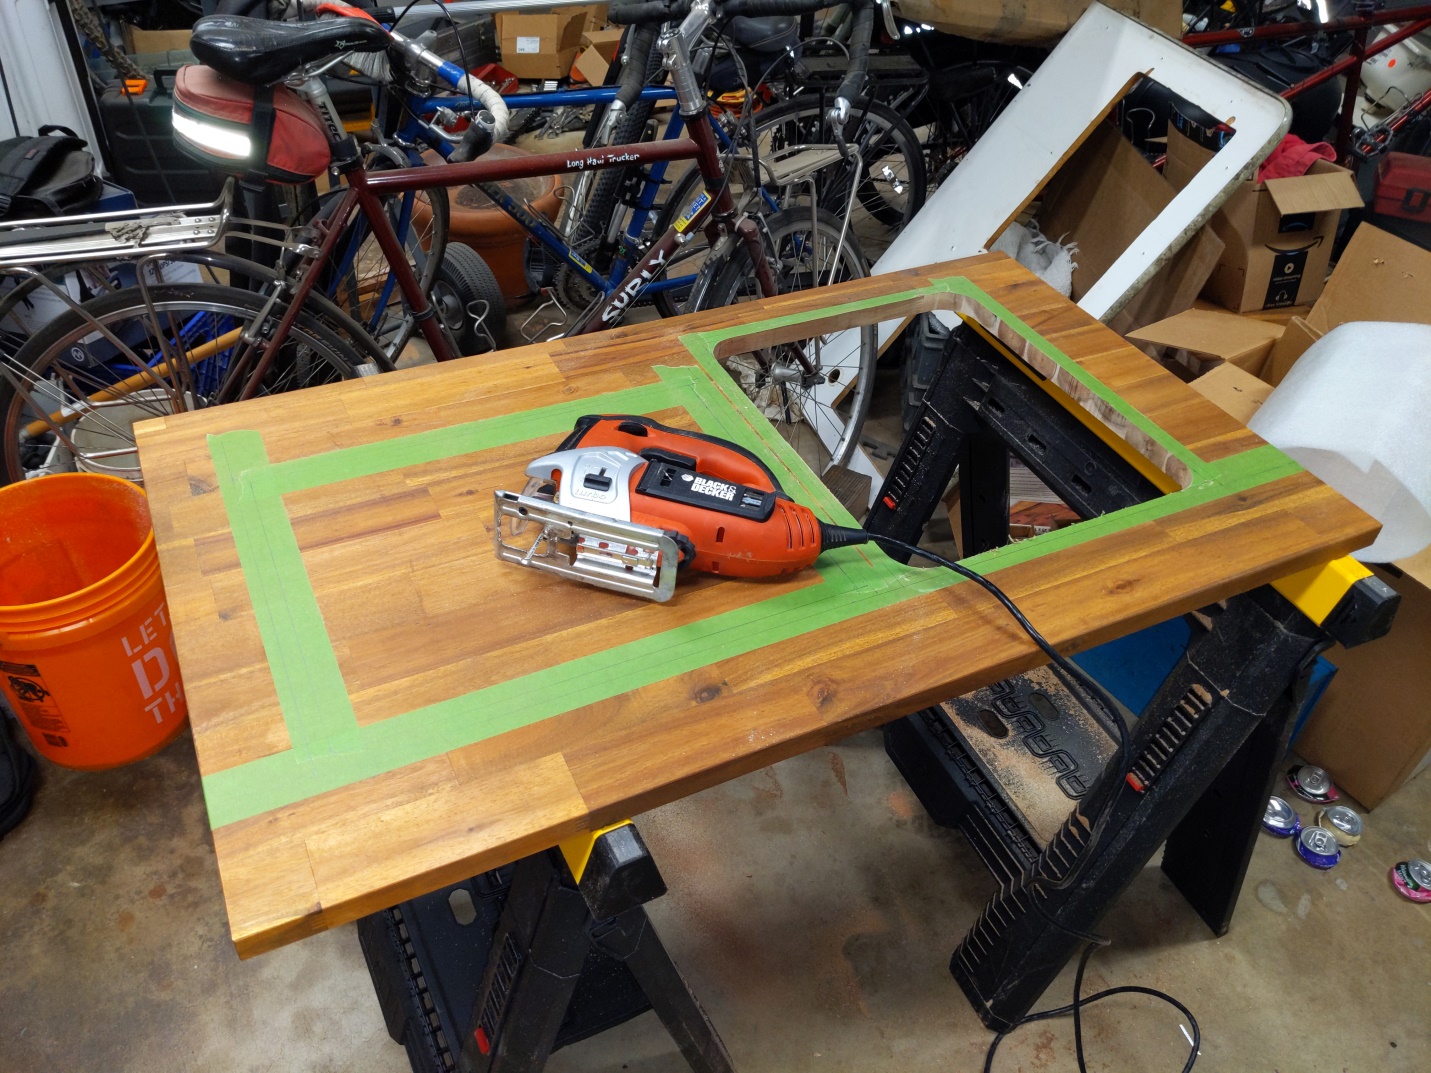  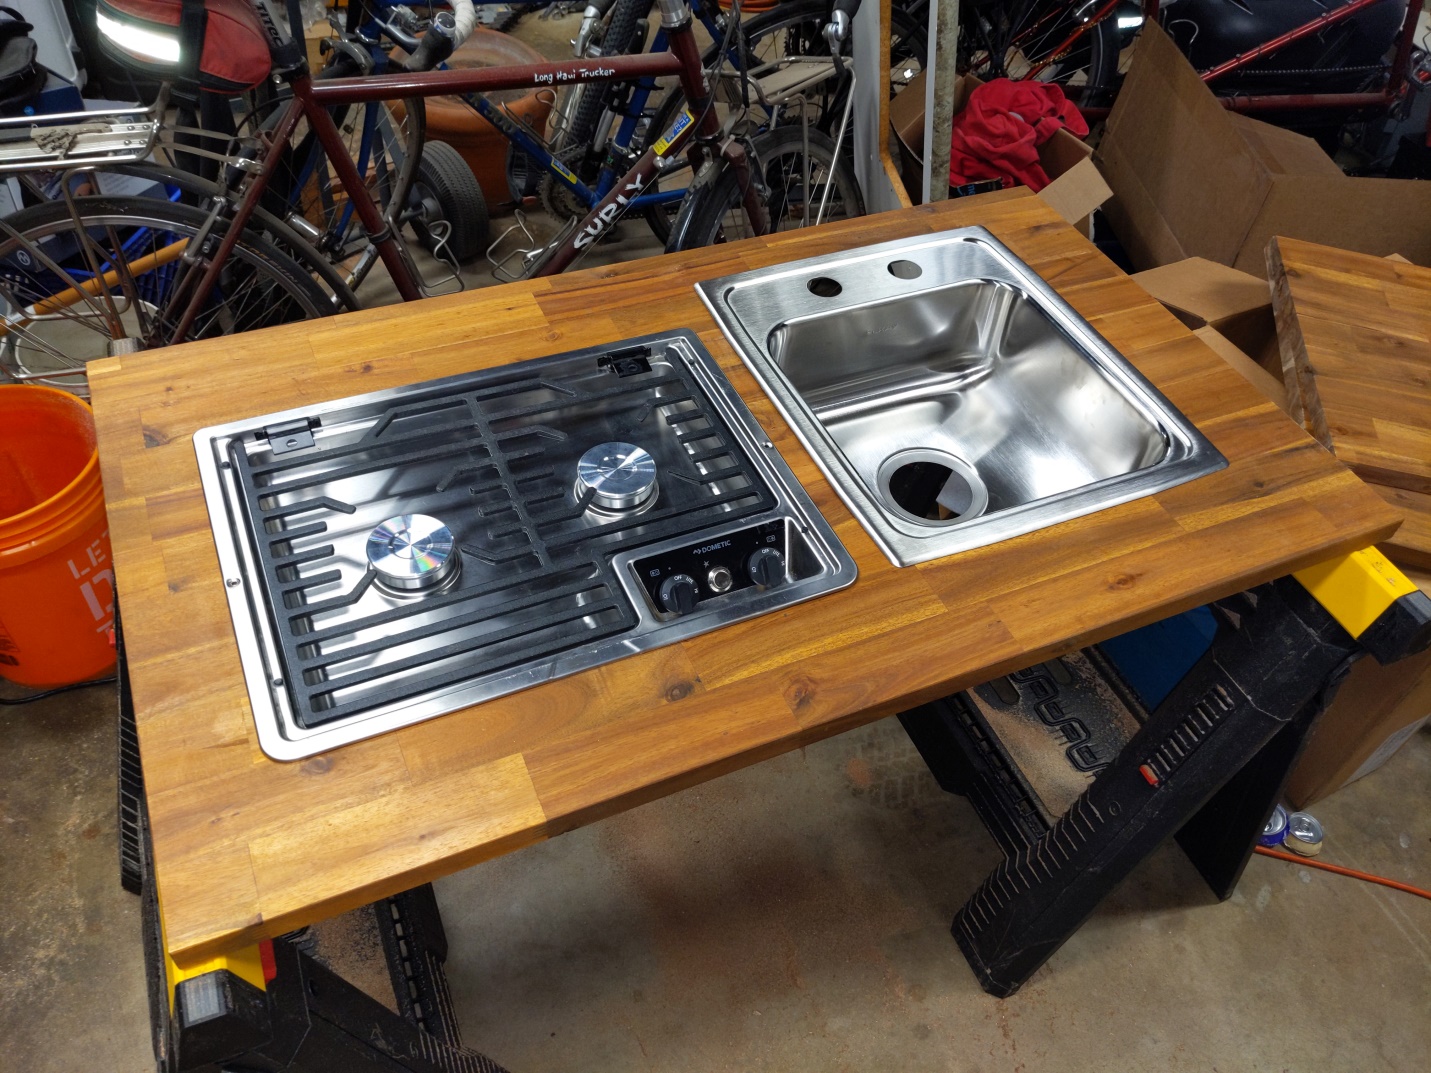 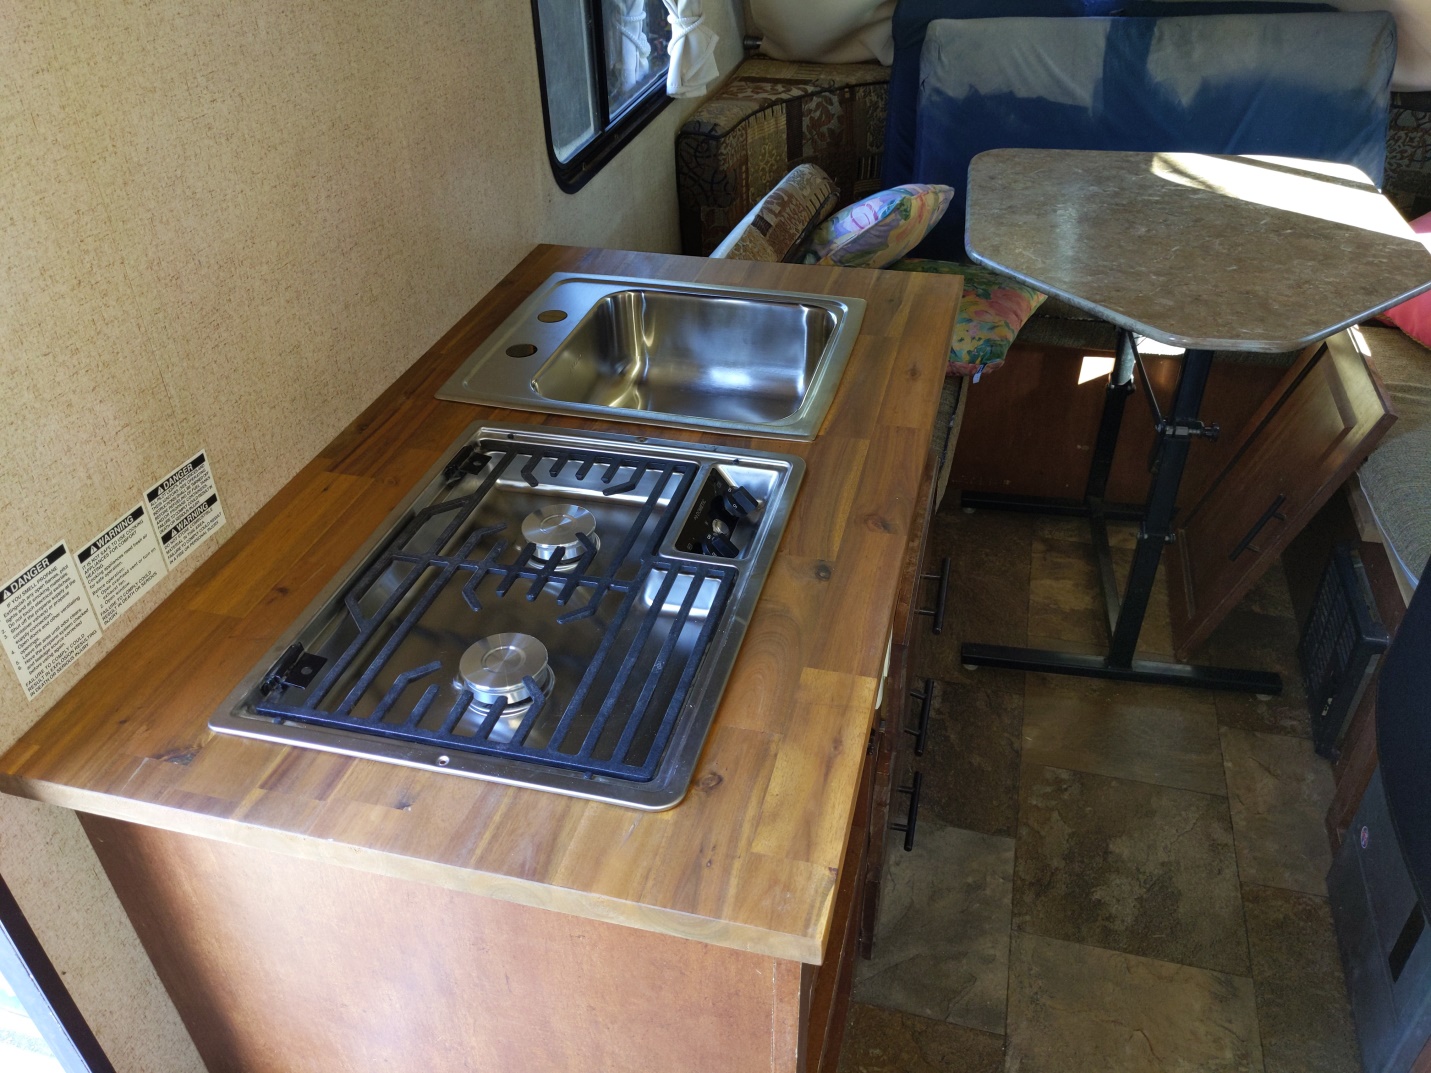 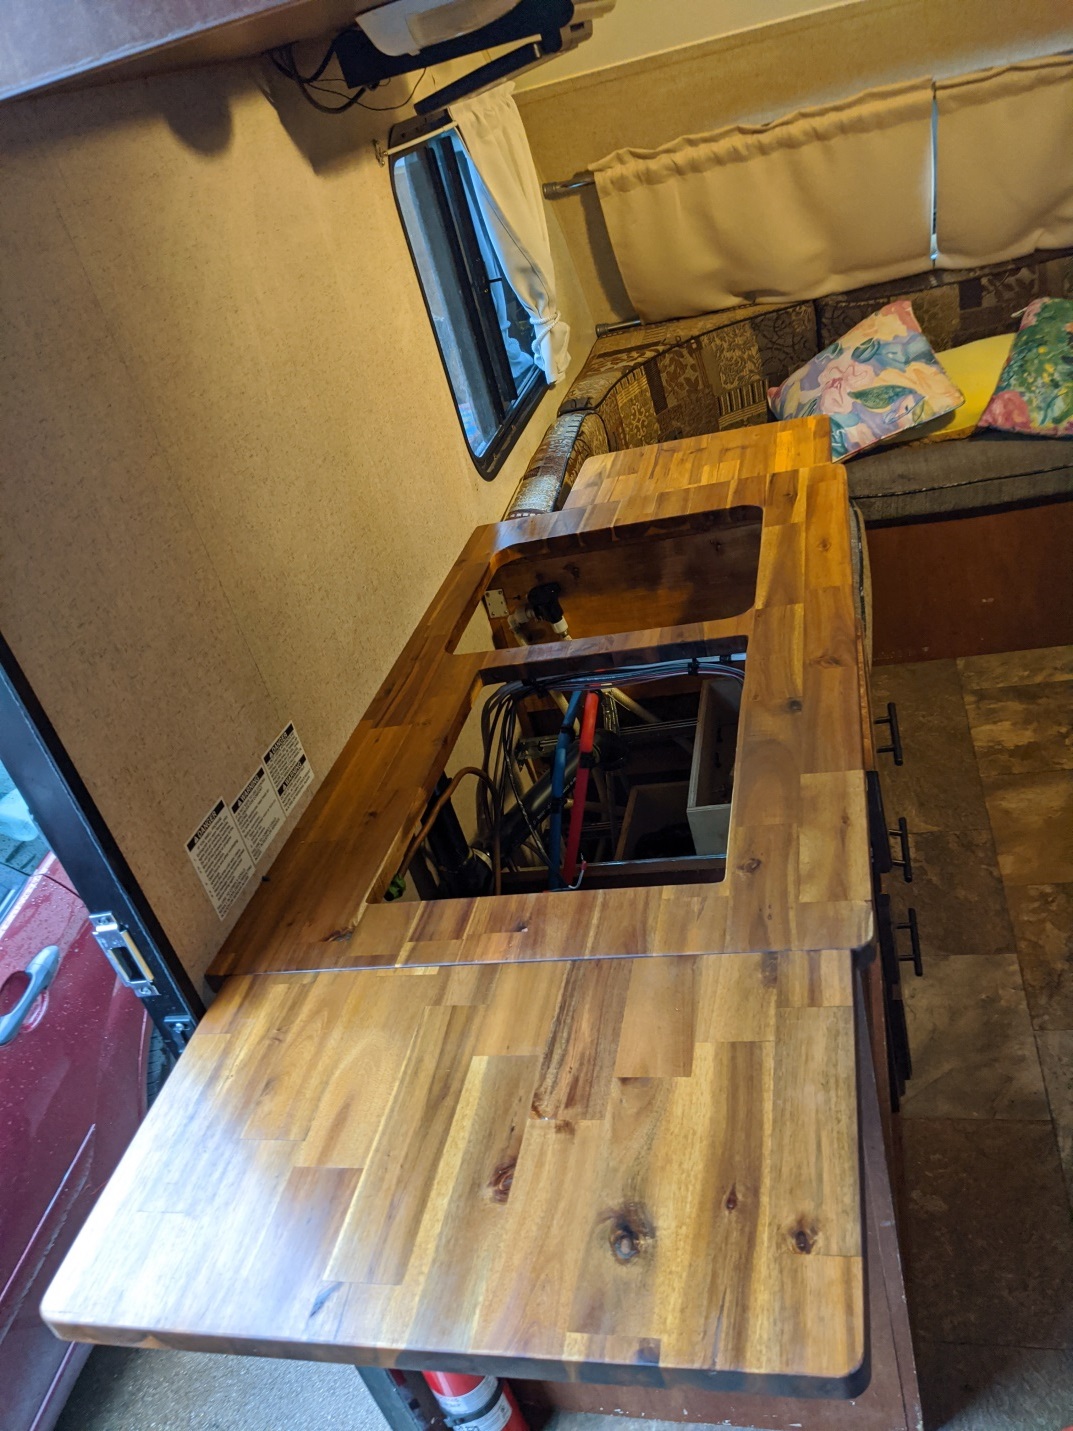 I rounded the corners of the flip-up counters using my router. I think it looks pretty good. It's a huge improvement over the stock countertop. |
Posted By: abikerider
Date Posted: 04 May 2023 at 2:02am
|
Some other things I did to the outside when weather permitted was remove and re-caulk the right side roof where it meets the side molding using geocell, gradually replace every screw with stainless steel ones, remove and re-apply Dicor self leveling compound to the fantastic fan and plumbing vents, remove flaking and rusty paint from the frame and coat with Rustoleum enamel, and remove some of the decals on the front, rear, and right side that were peeling. Those stickers were a b*tch to remove. Also replaced corroded door and storage locks, step handle, front outside light (bad switch), new safety chains (old ones were very rusty), dual propane tank mounts and cover, propane regulator and hoses, aluminum diamond plate battery box, new end caps on original sewer hose storage tube, new 15' Rynoflex sewer hose and longer second storage tube, new wheels and tires ( it had the original 10 year old tires on corroded rims without a spare, and a spare tire holder on back (it was missing and I had to adapt one off of Amazon).
|
Posted By: abikerider
Date Posted: 04 May 2023 at 2:10am
The TV antenna was very corroded and had started to leak water so I removed it and put in a Panorama combination Wifi/cellular/GPS antenna. We really don't watch TV but we do like our Internet. Because this antenna is made for thinner roofs and the extender offerred by the manufacturer still was not long enough, I had to fabricate my own 80mm mount extension. Here's some pics of it. It was not easy to make since it required some very fine and large metric taps and dies to fabricate. Let me know if you'd like me to make one for you. I have all the tools now. 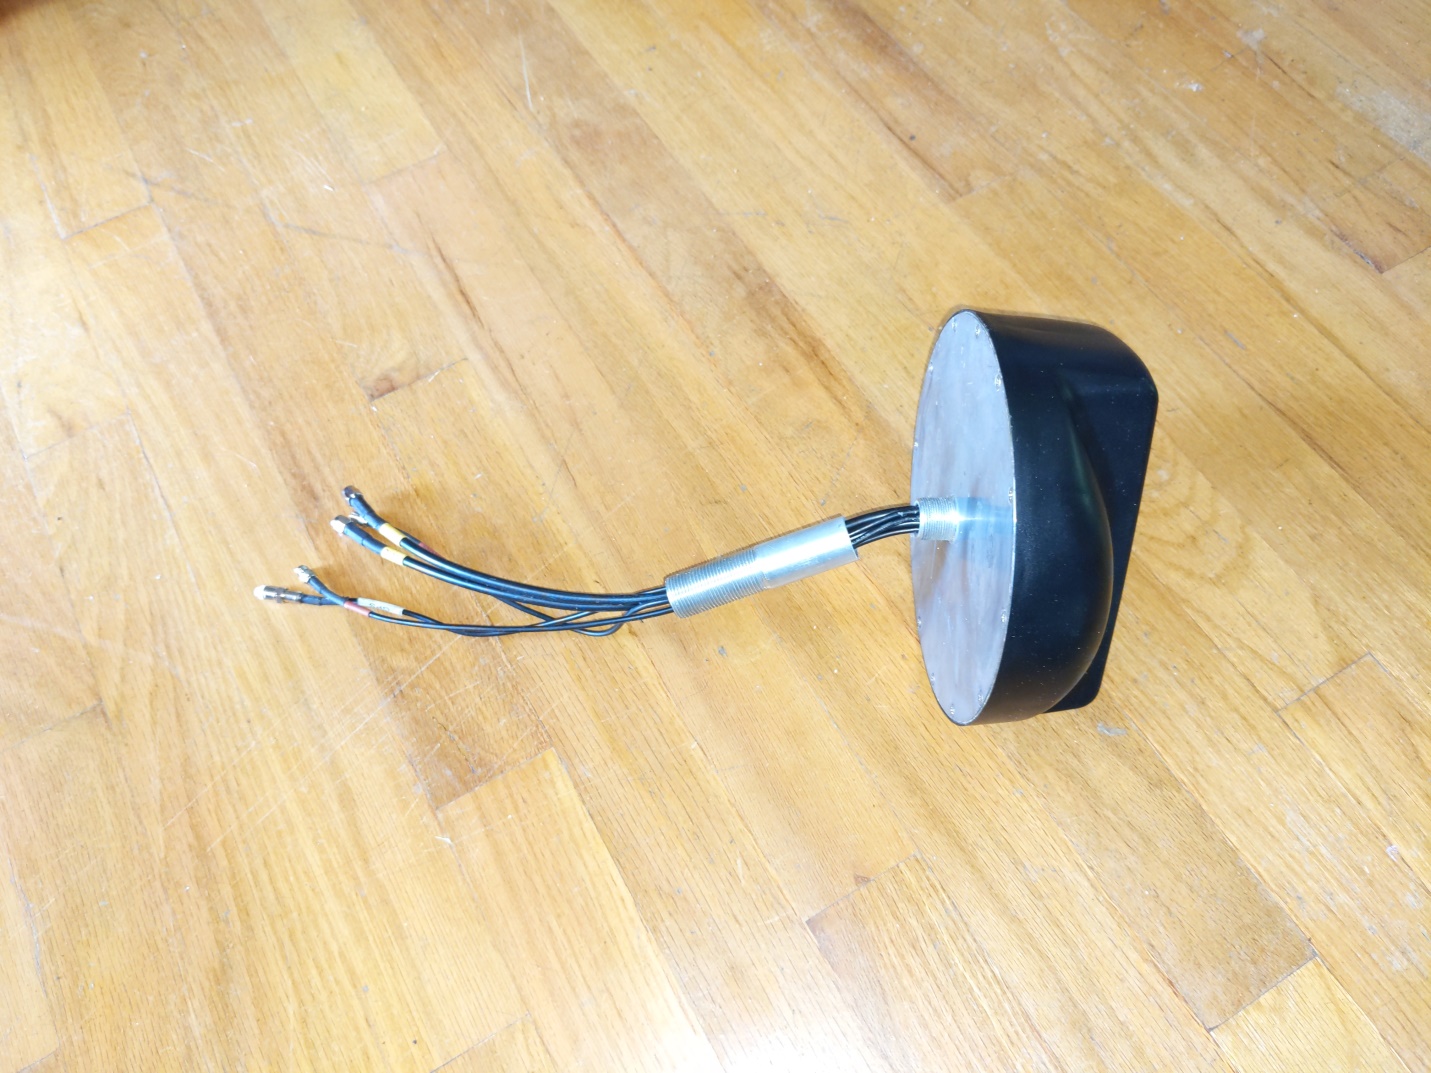 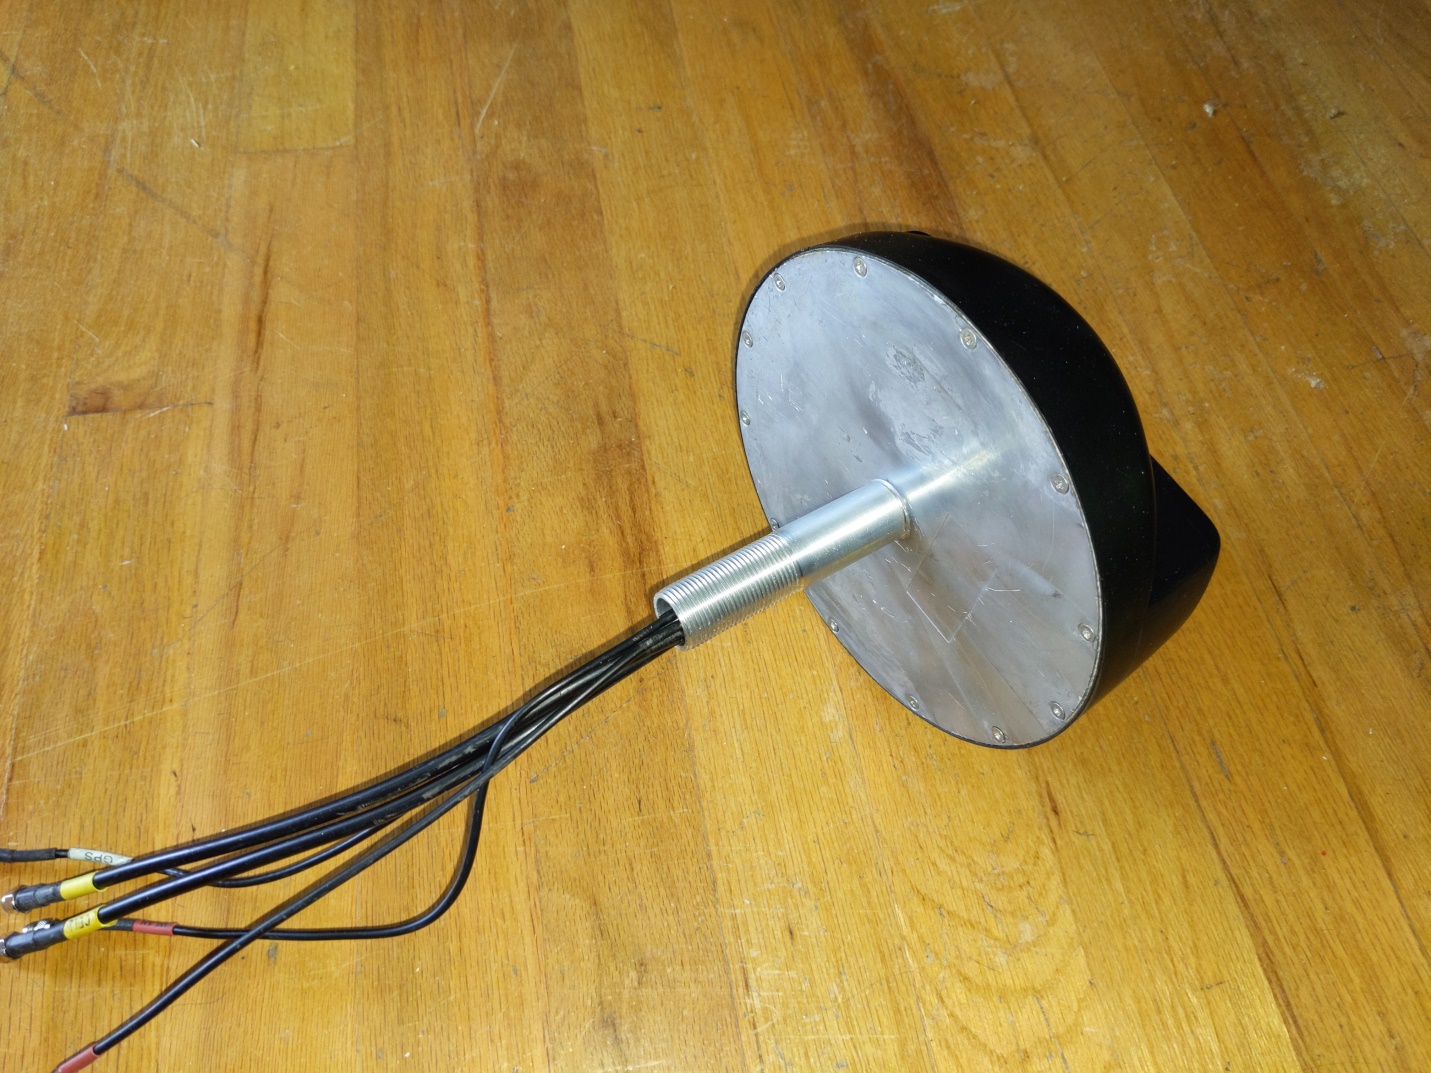 v
|
Posted By: abikerider
Date Posted: 04 May 2023 at 2:37am
I also removed the bathroom sink as it was pretty useless and took up valuable space. I'm posting pics of the process in the hope that it will help others to do the same. I have seen others do this but with very few pictures that show the process.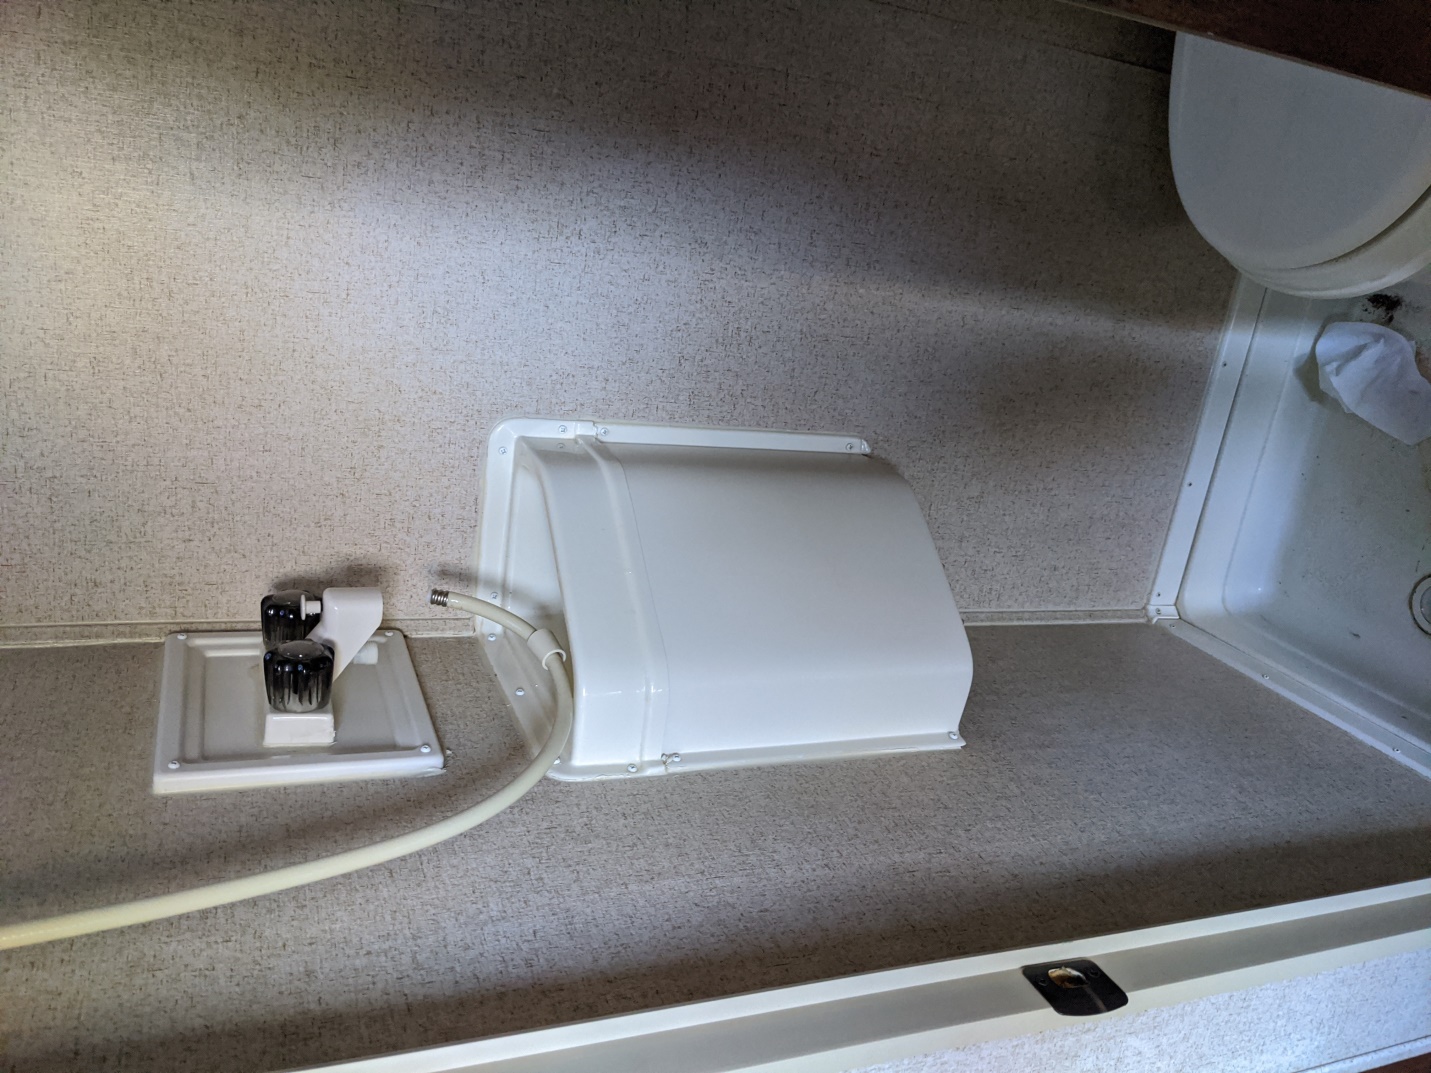  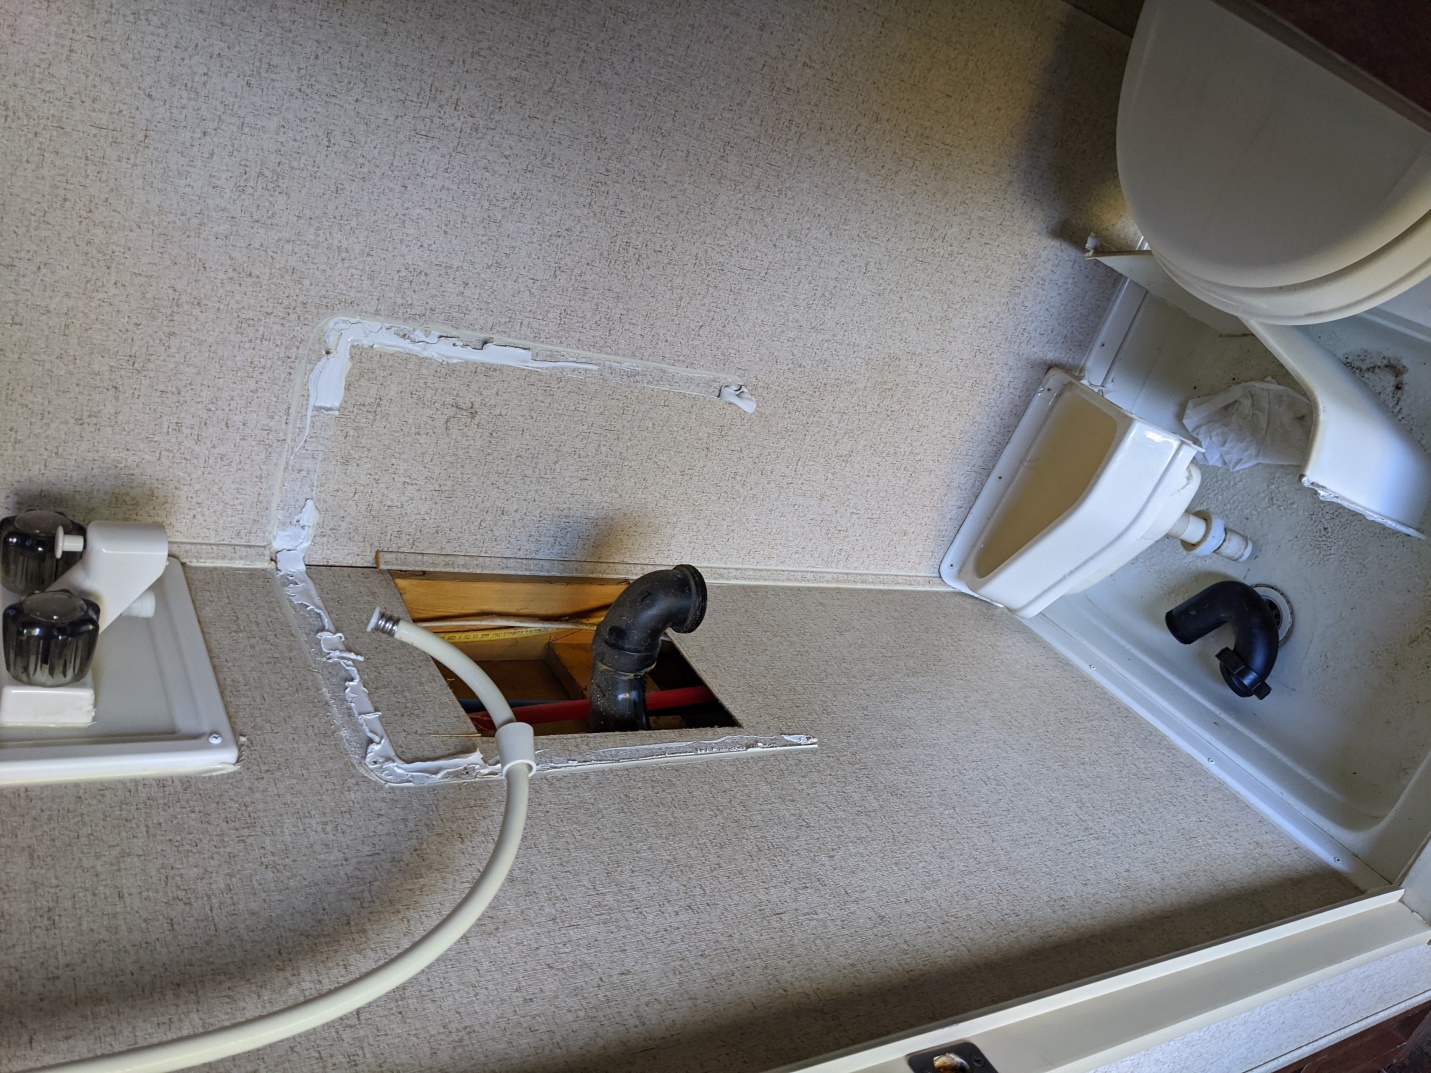 I had to cap off this drainpipe. I ended up cutting it right at the hub of the elbow and used a rubber cap to seal it.I had to widen the opening to get the saw in there. 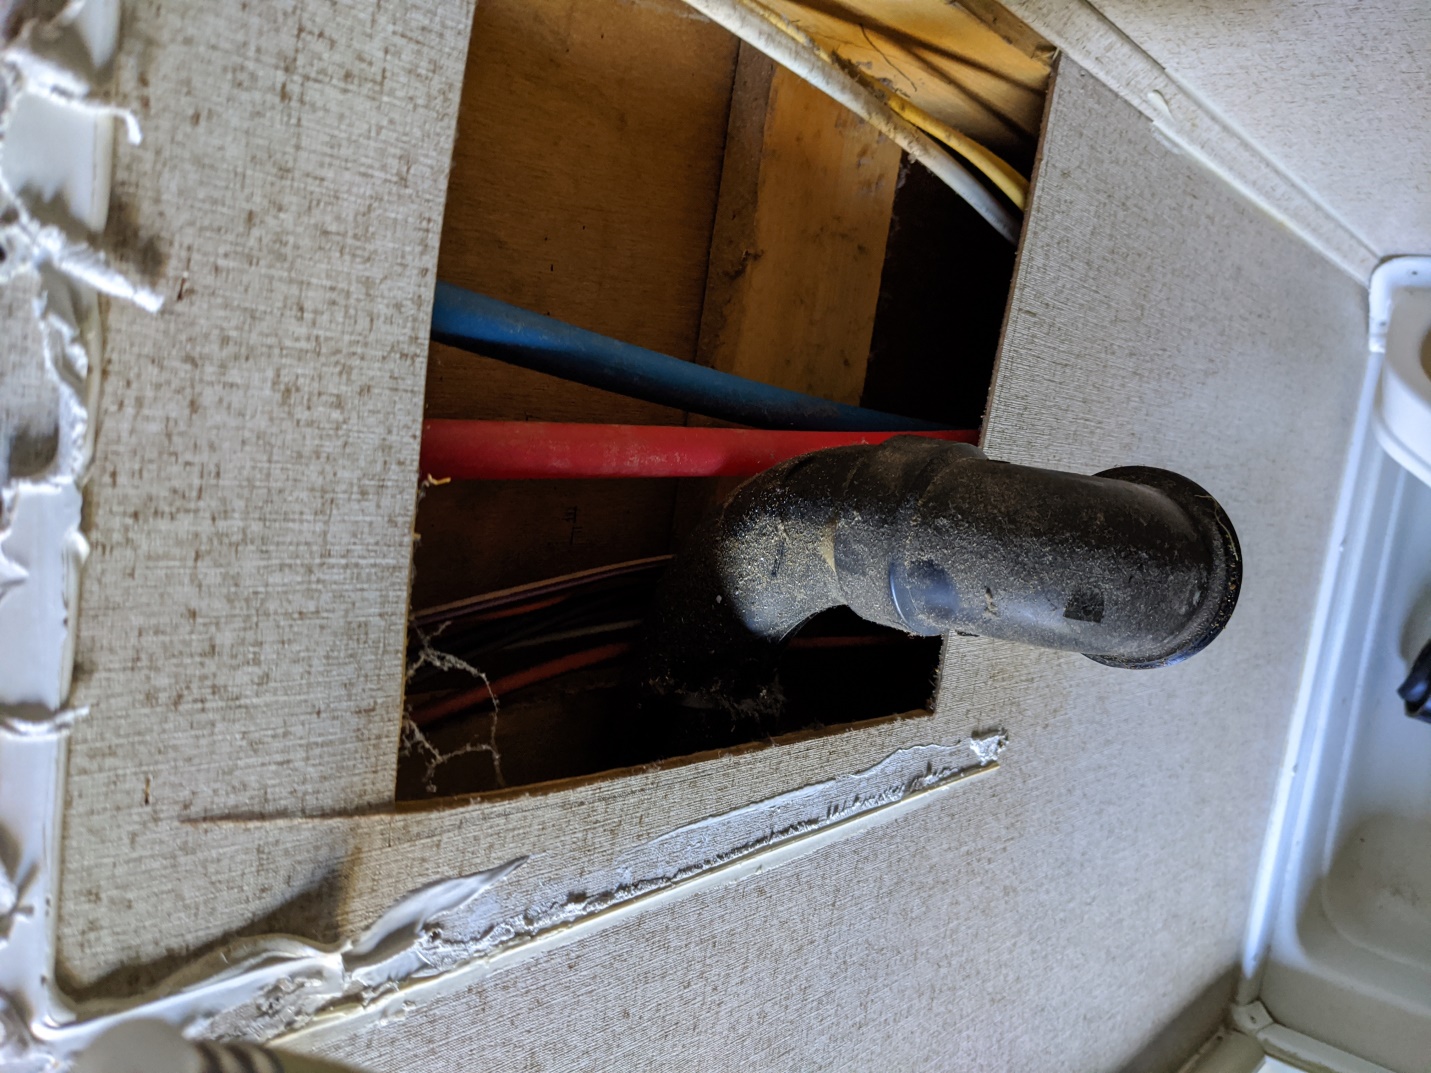  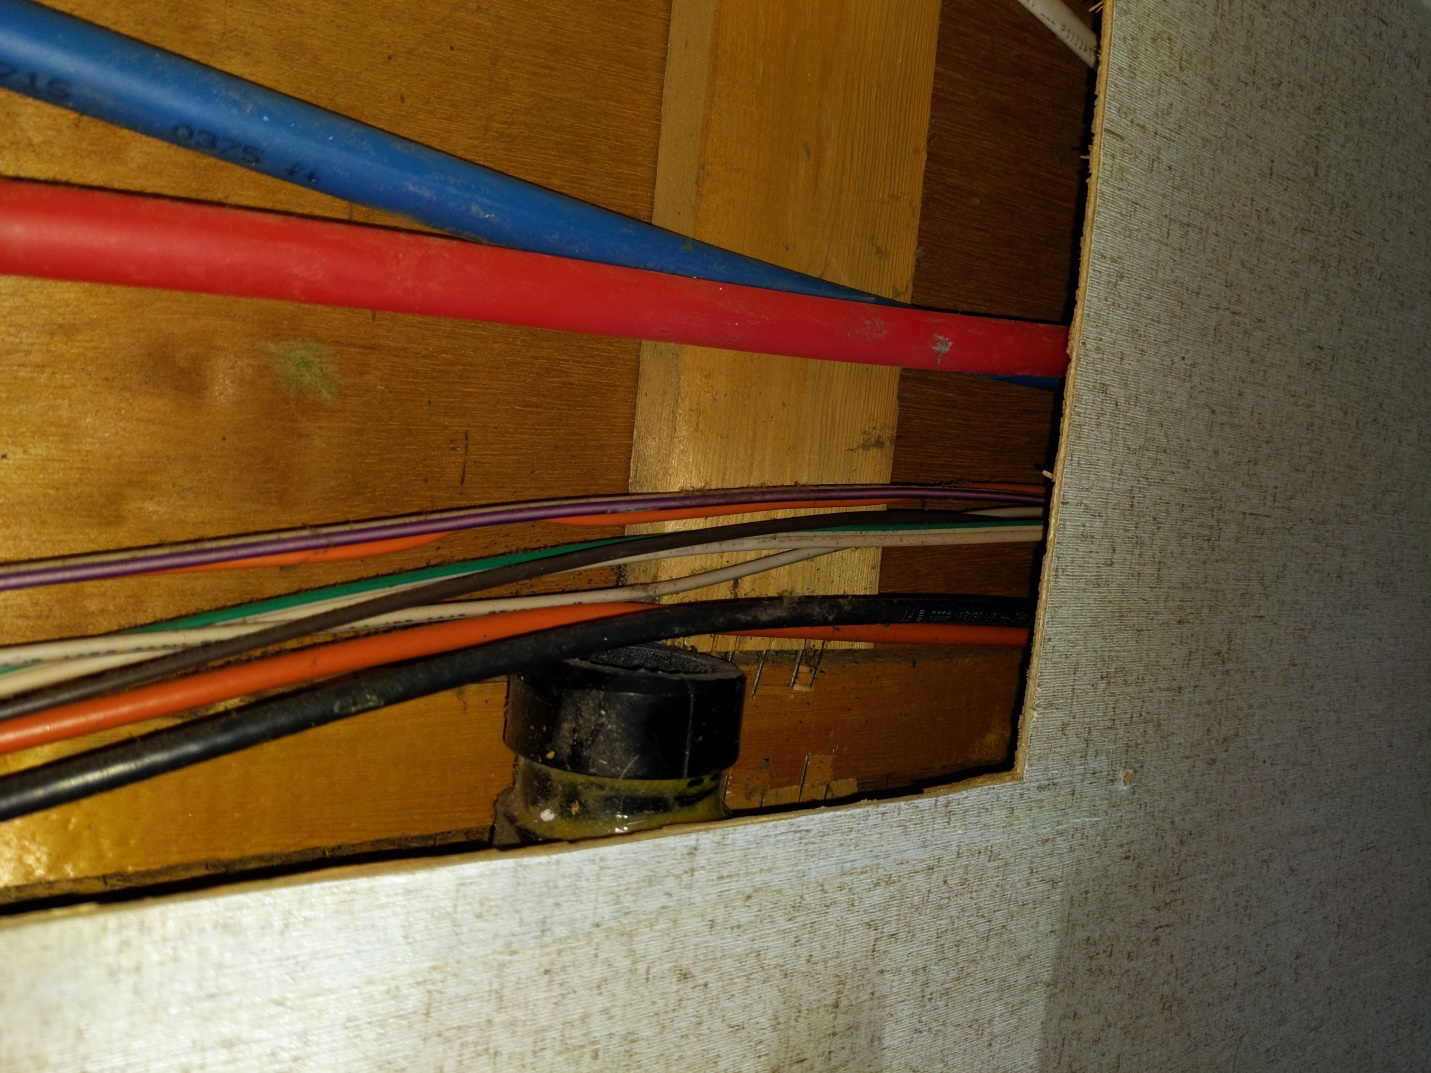 Don't worry, I used a hose clamp to keep it in place.  I found this matching piece of wall behind the broken refrigerator and carefully cut it to size since I did not have a second chance. 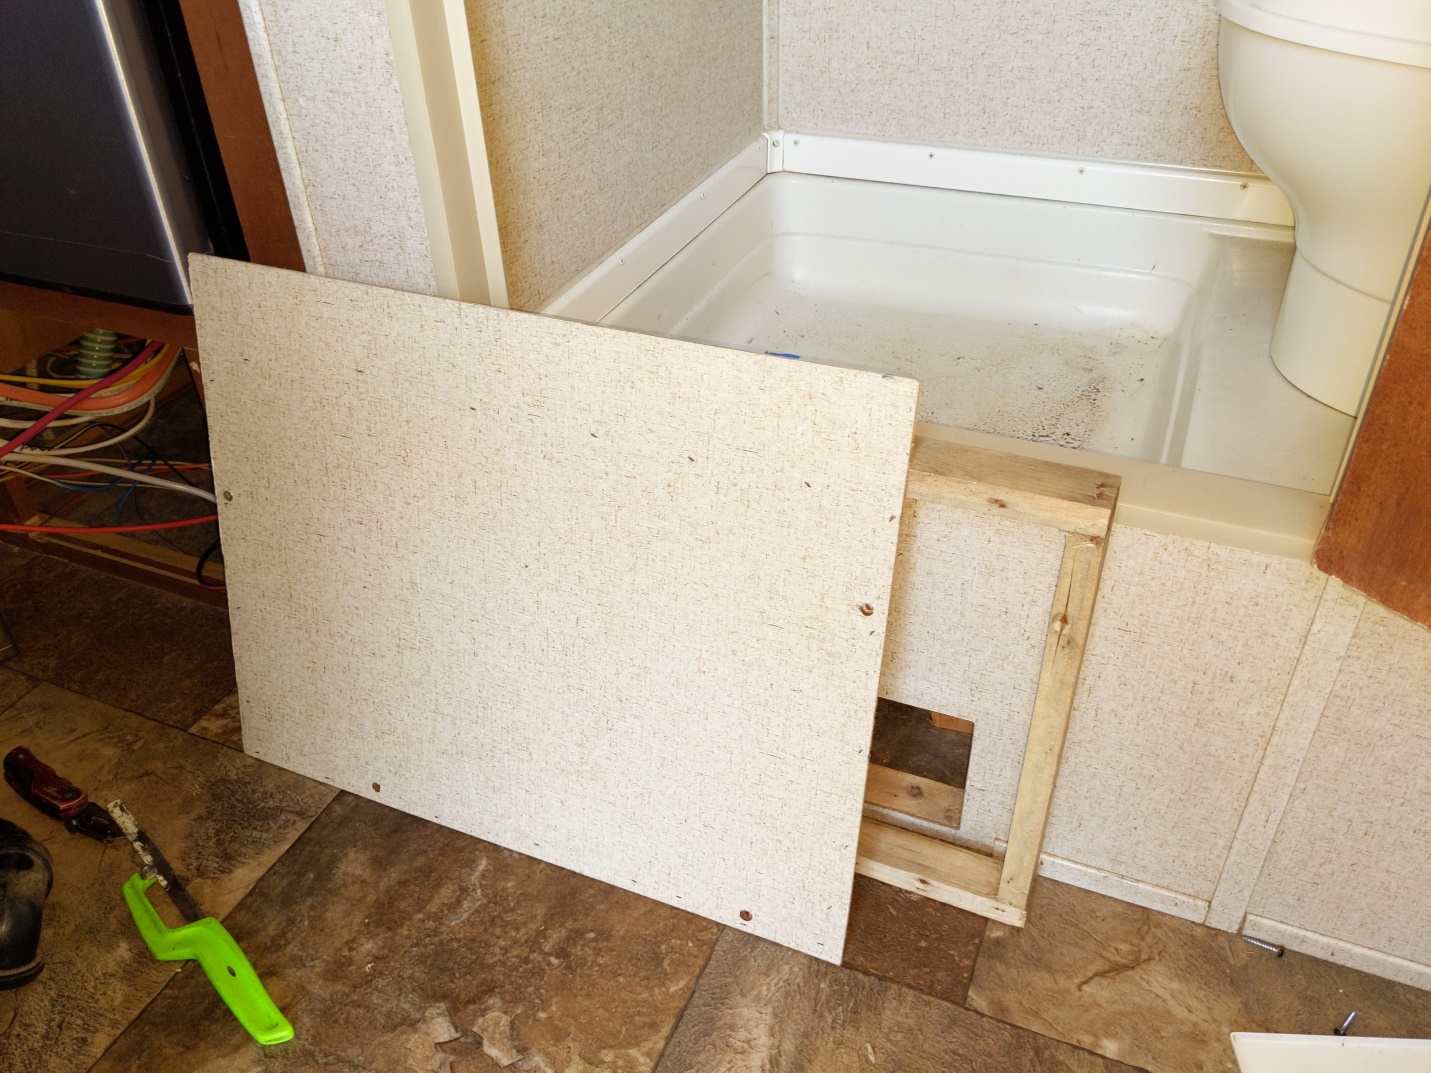 Here's the rubber cap with the hose clamp on it. 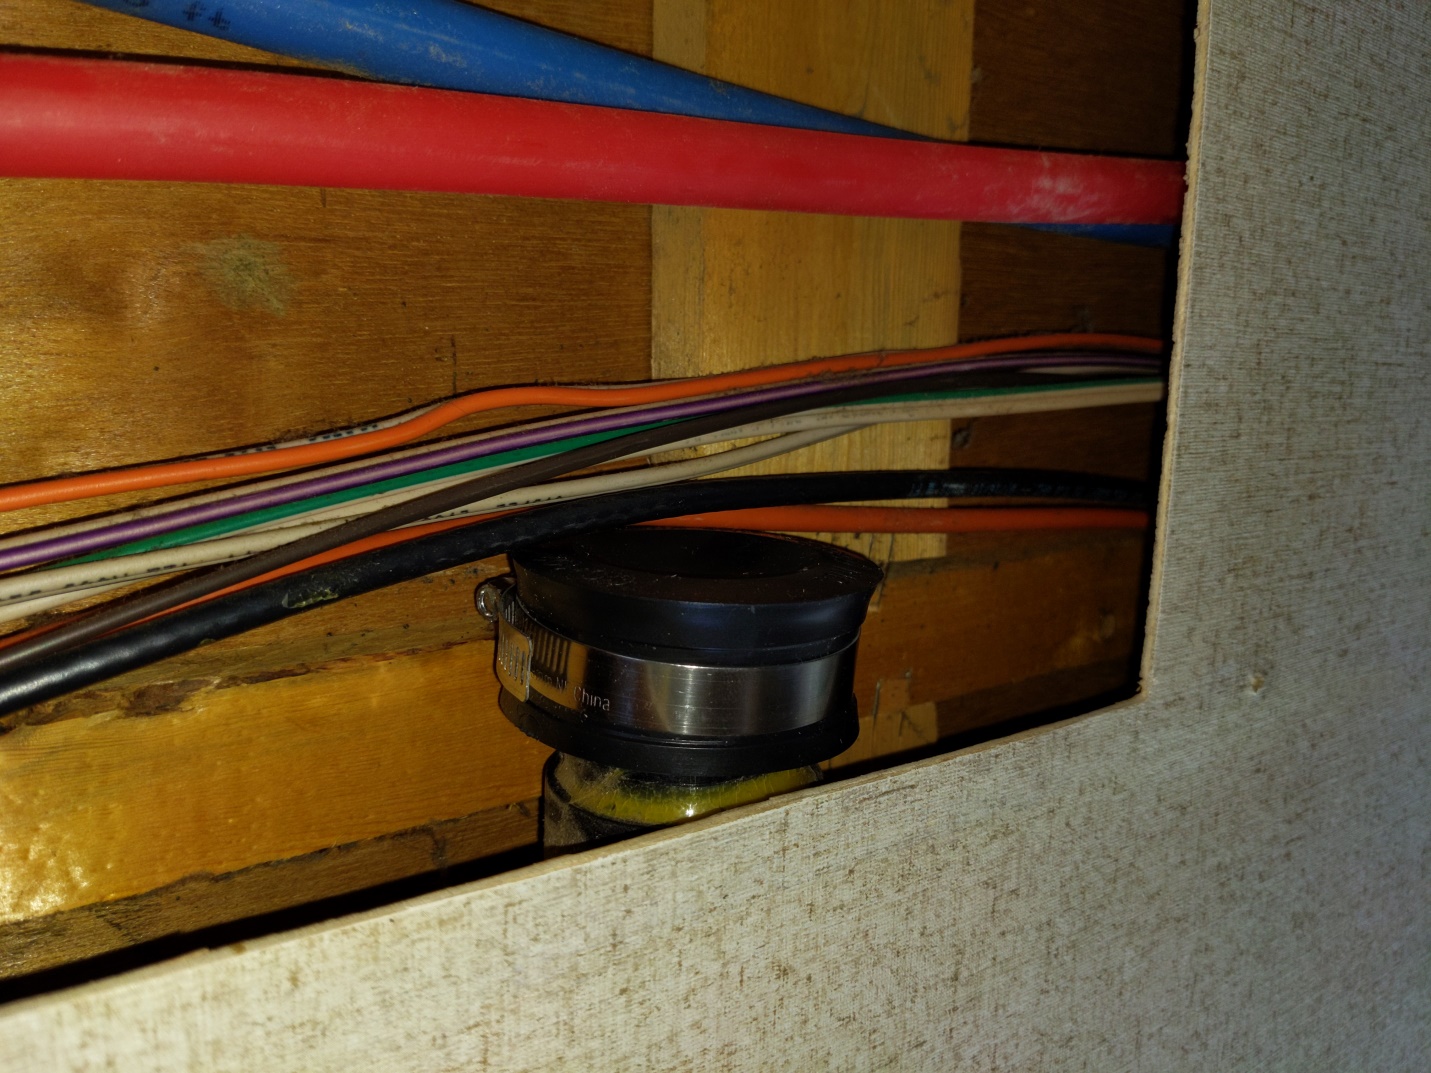 After squaring up the hole (a utility knife works really well on this thin stuff), I glued and clamped these pieces of 1 x 3 around the perimeter so that I could glue the new piece in there. 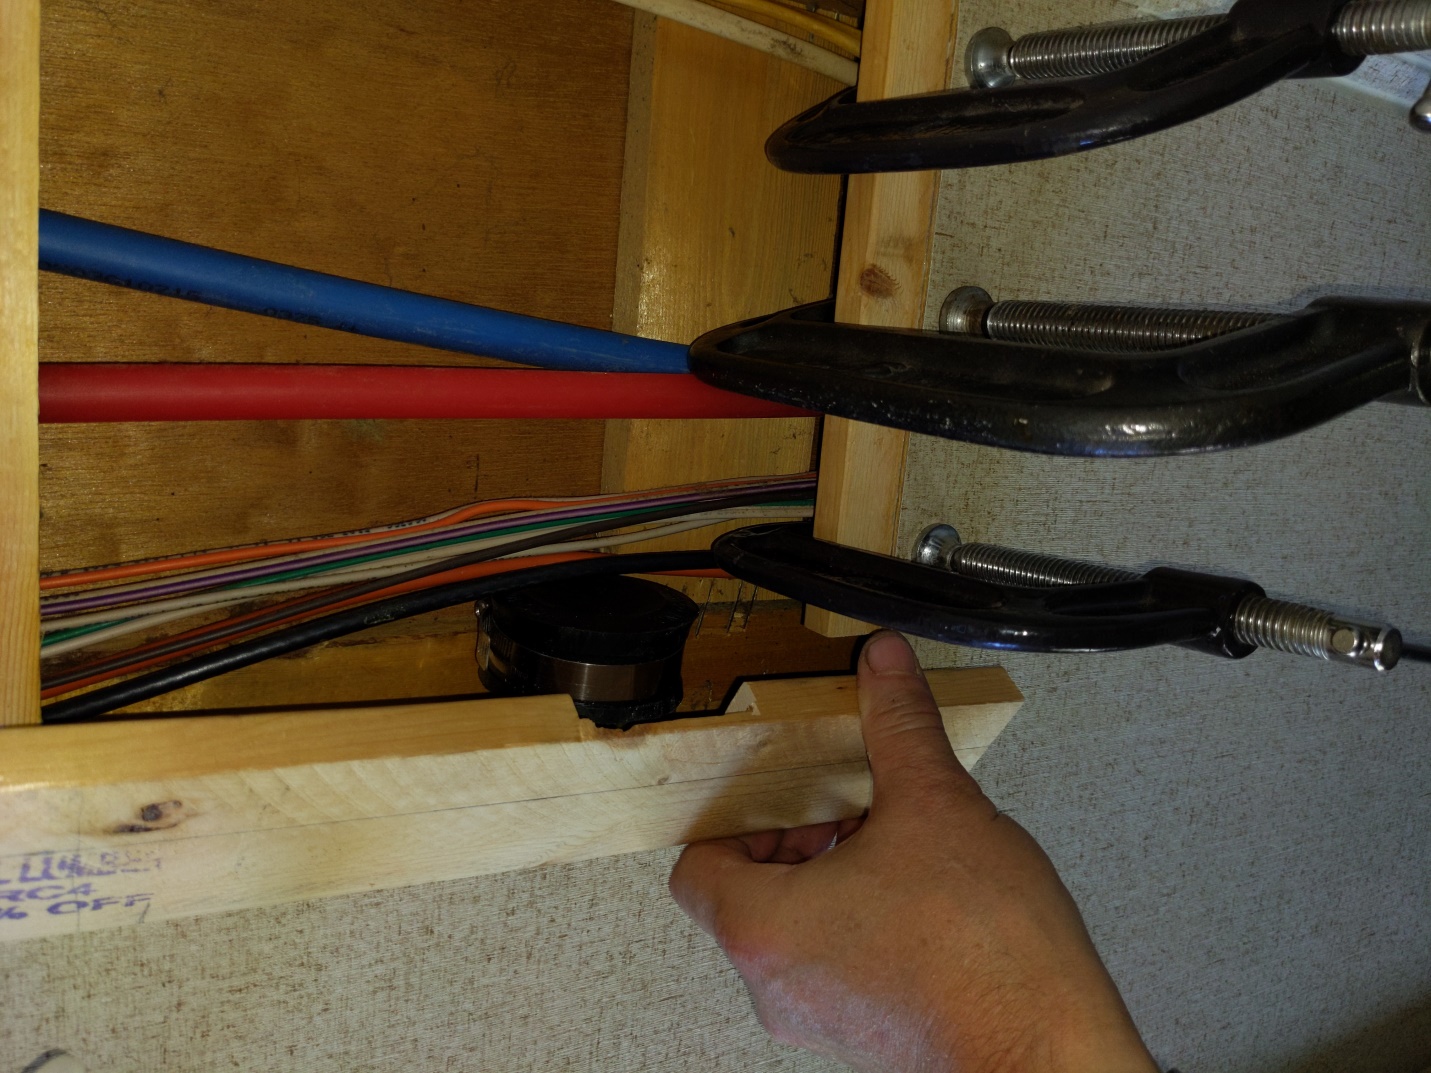 Here it is all glued into place. It doesn't match exactly, but it's good enough for me. I also need to put in some kind of corner molding since the one in there has a big gap. 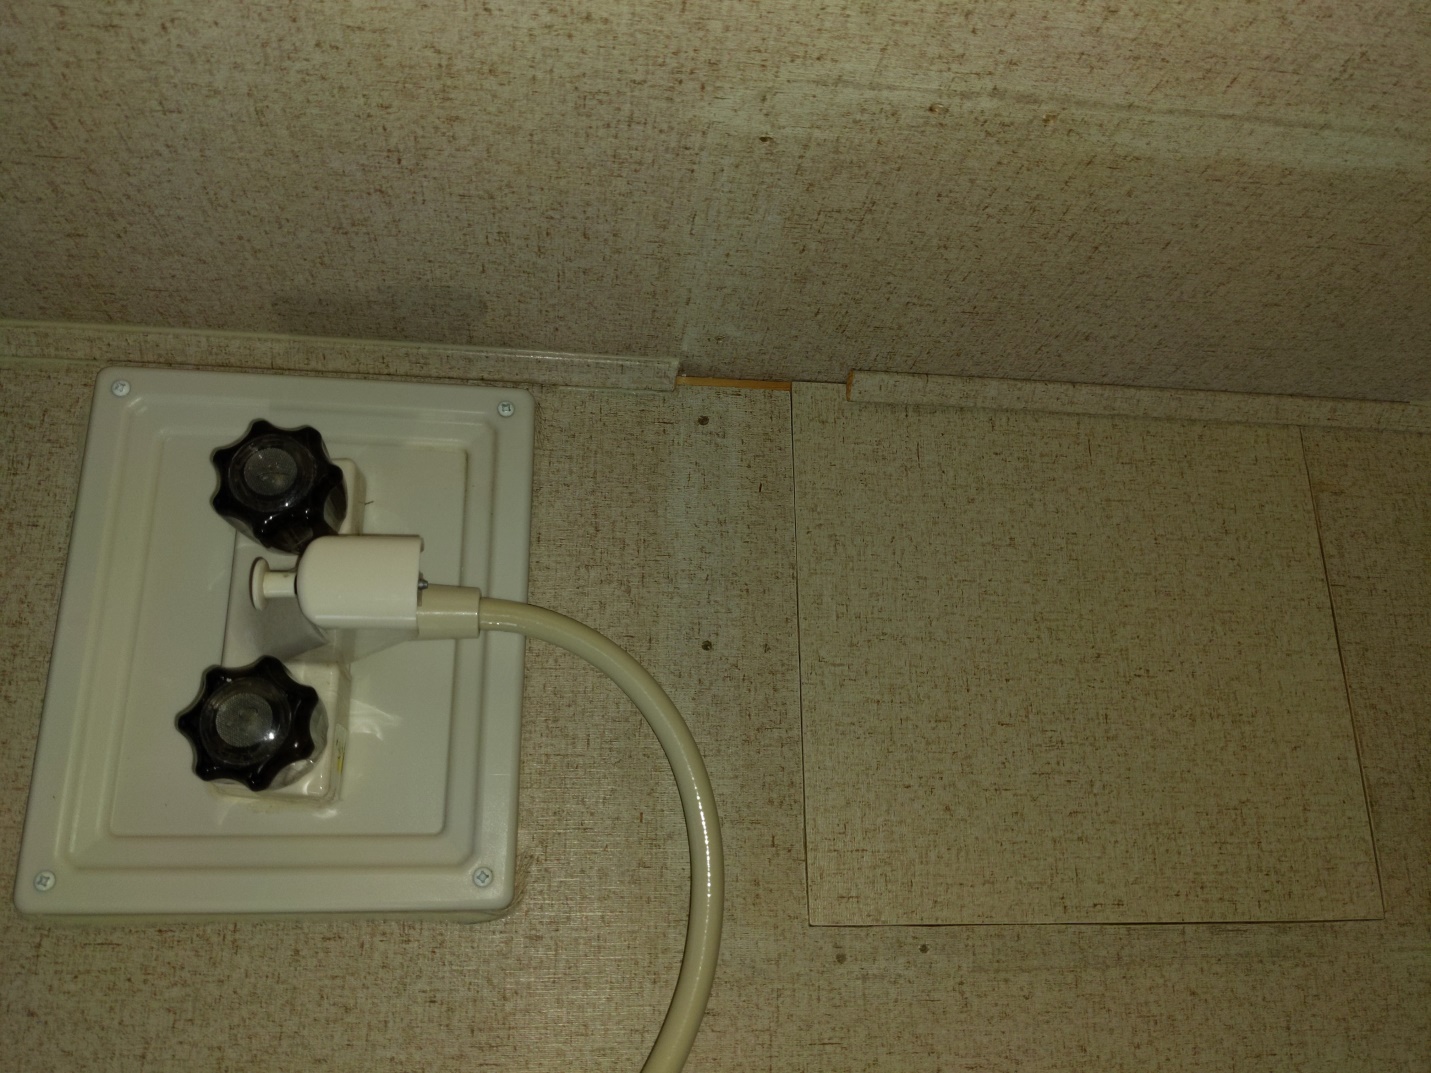 This is what I used to caulk it. 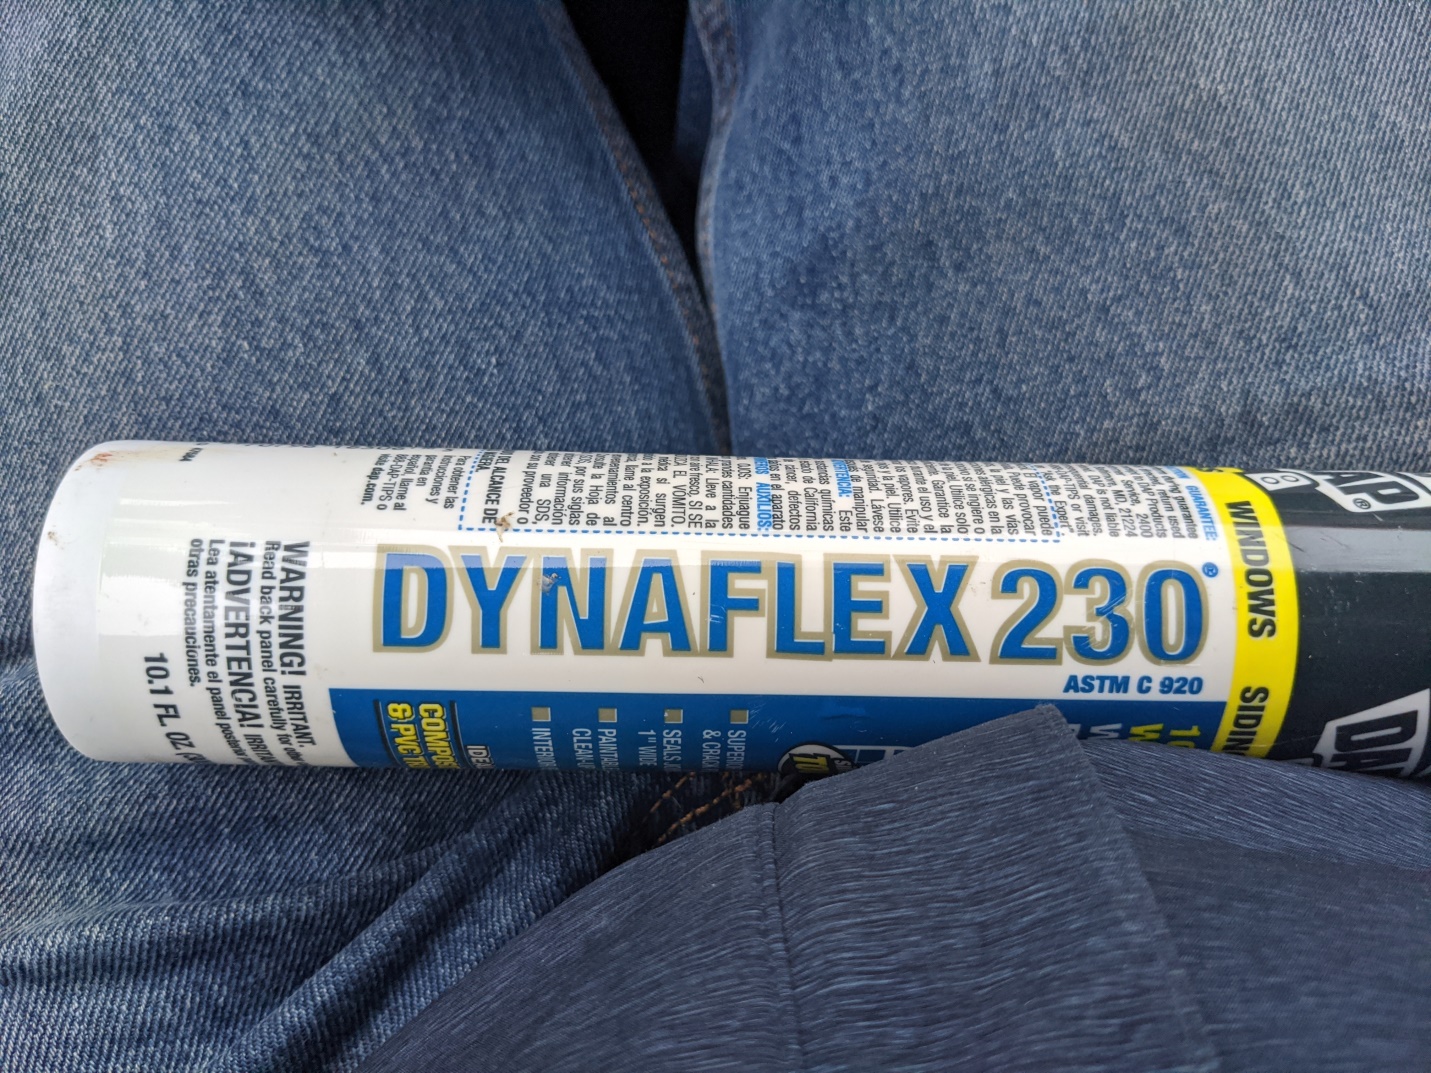 |
Posted By: abikerider
Date Posted: 04 May 2023 at 2:46am
I also decided the lower bunk did not have adequate support. The side supports were pulling out of the walls! Here's my remedy. The front wall was tricky with the odd angles. I think I ended up doing 22 degree cuts if I remember correctly. A table saw came in very handy.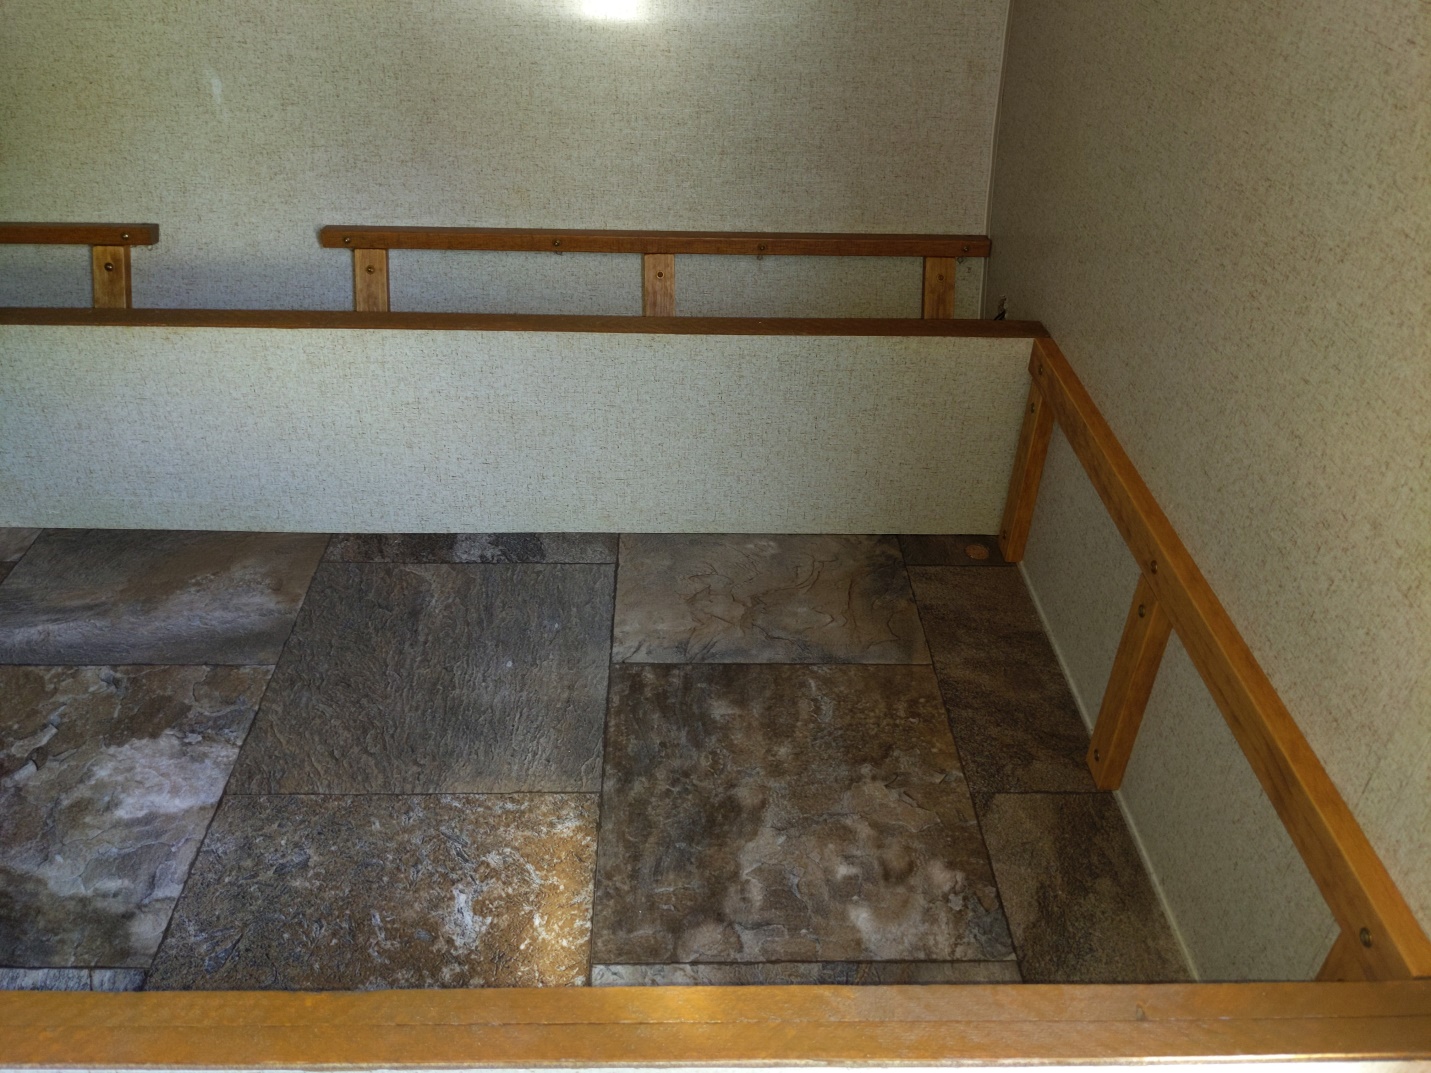 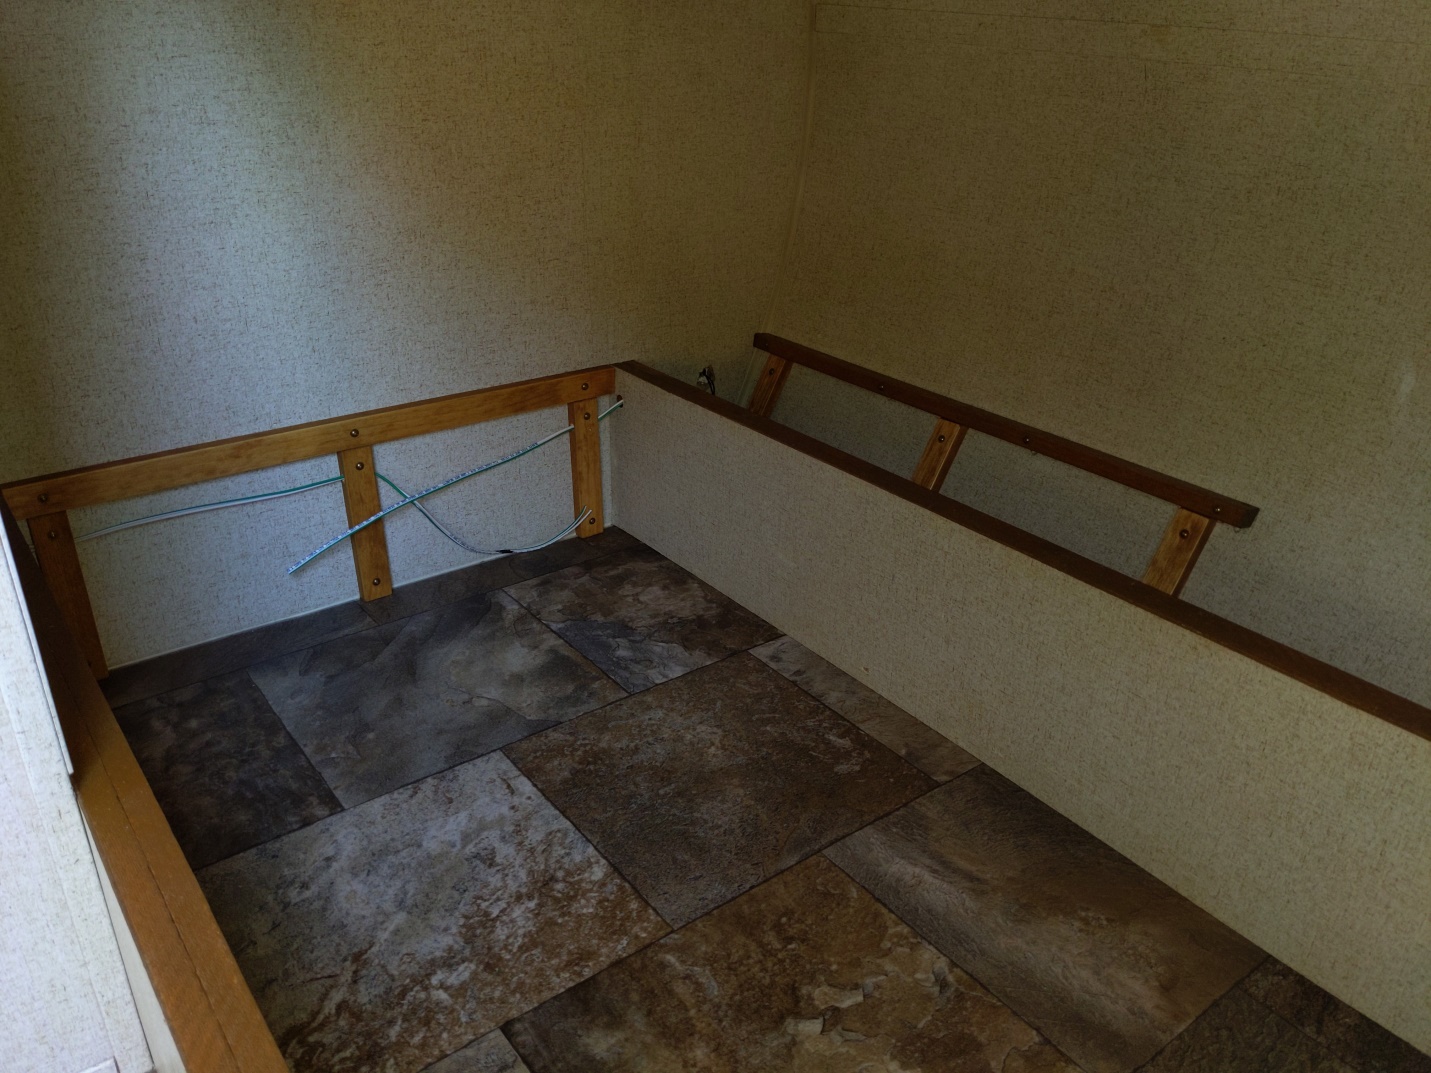 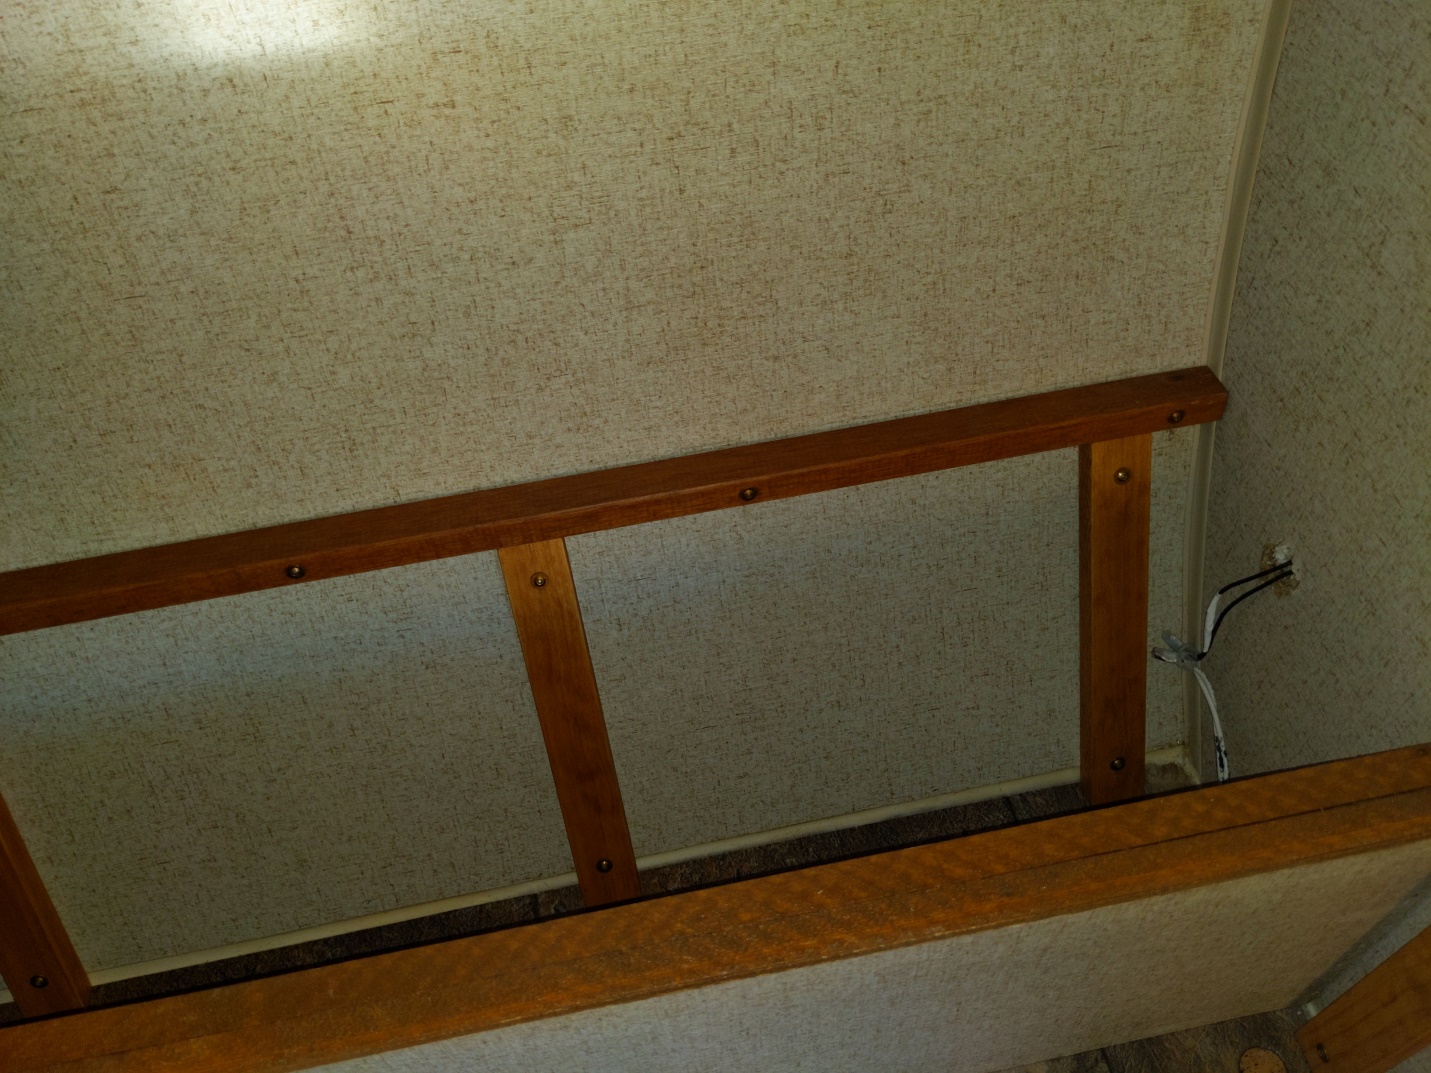  v
|
Posted By: abikerider
Date Posted: 04 May 2023 at 2:54am
| I tried to get the old Dometic 3 way fridge working but it was a lost cause and would have cost more than I spent on a replacement. I decided to go with a 12 volt Everchill for about half the price of a new Dometic 3 way. It was around $600. I figure I can buy some Lithium ion batteries with the money I saved. I also fabricated my own solid covers to replace the fridge vents since the 12 volt fridge does not need the ventilation. It's kind of crazy that no one makes this considering how 12 volt fridges are getting more popular. I'll try to post some pics of the covers I made. |
Posted By: abikerider
Date Posted: 04 May 2023 at 3:03am
|
To go with the future Lithium ion batteries, I am replacing the old converter charger with one that can charge the new batteries. I also replaced the old propane detector and CO/smoke detector. The pathetic plastic mechanical strut for the cabinet over the stove was broken so I bought these on Amazon. https://www.amazon.com/gp/product/B0B15B76GF/ref=ppx_yo_dt_b_search_asin_title?ie=UTF8&psc=1 I also added a variable speed controler to the fantastic fan to replace the inefficient 3 speed control. Here's what I used. https://www.amazon.com/gp/product/B00F839VNQ/ref=ppx_yo_dt_b_search_asin_title?ie=UTF8&psc=1 The heater was not working so I took it apart and cleaned the sail switch. Now it works. Here are pics showing the two screws that need to be removed to take the outer shell off. 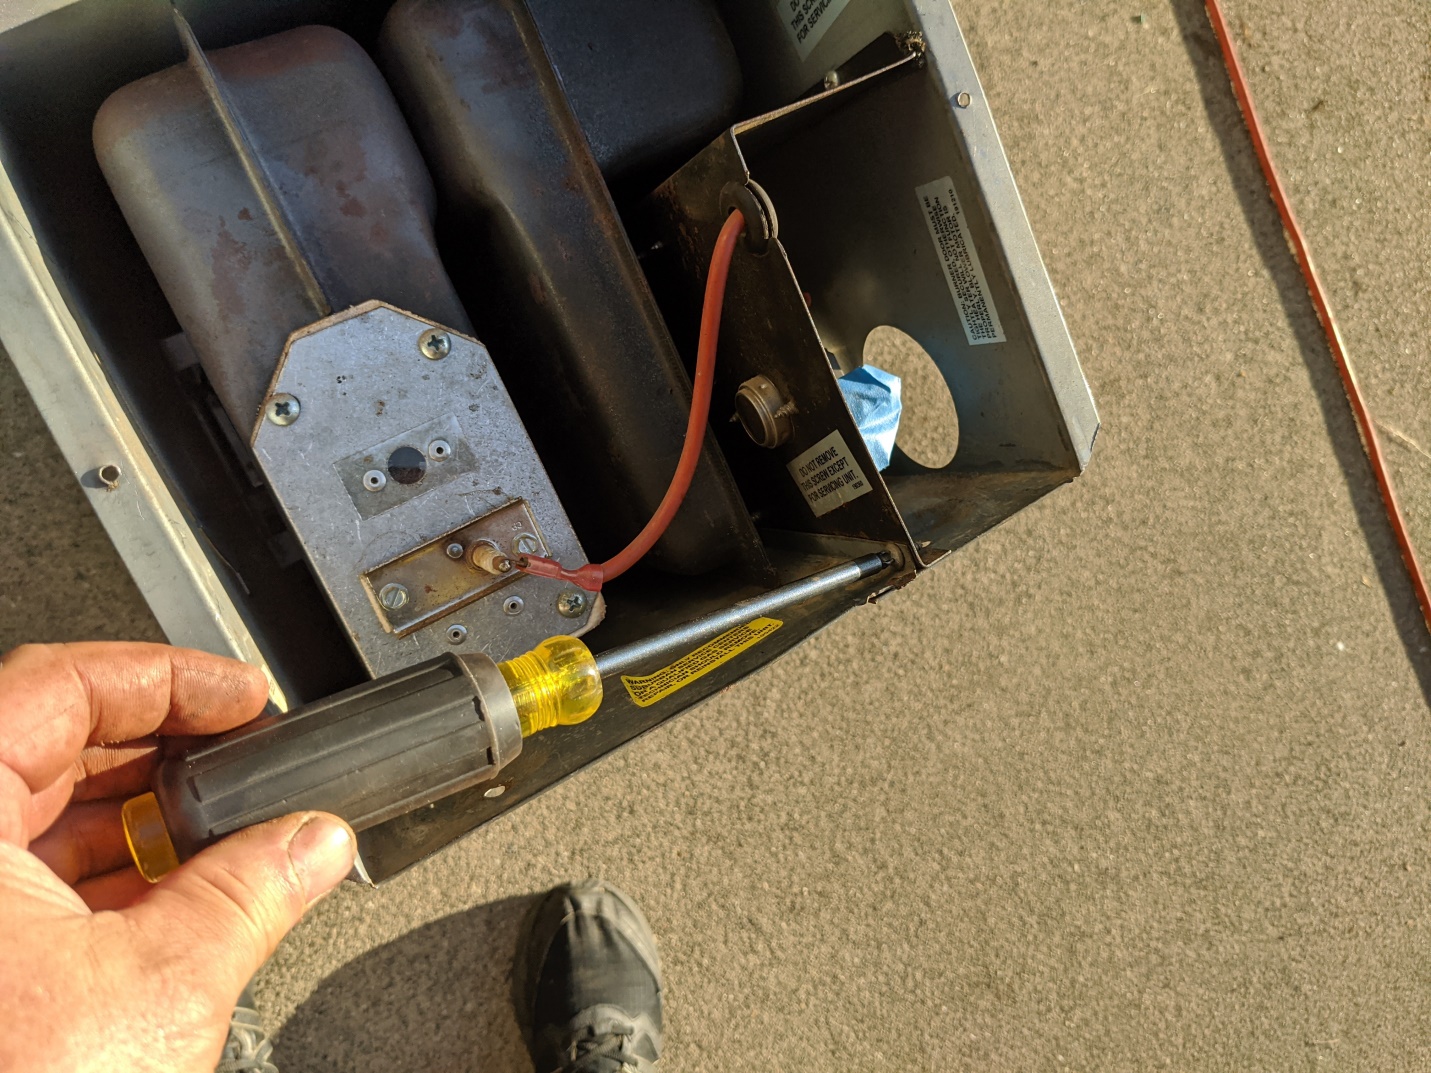 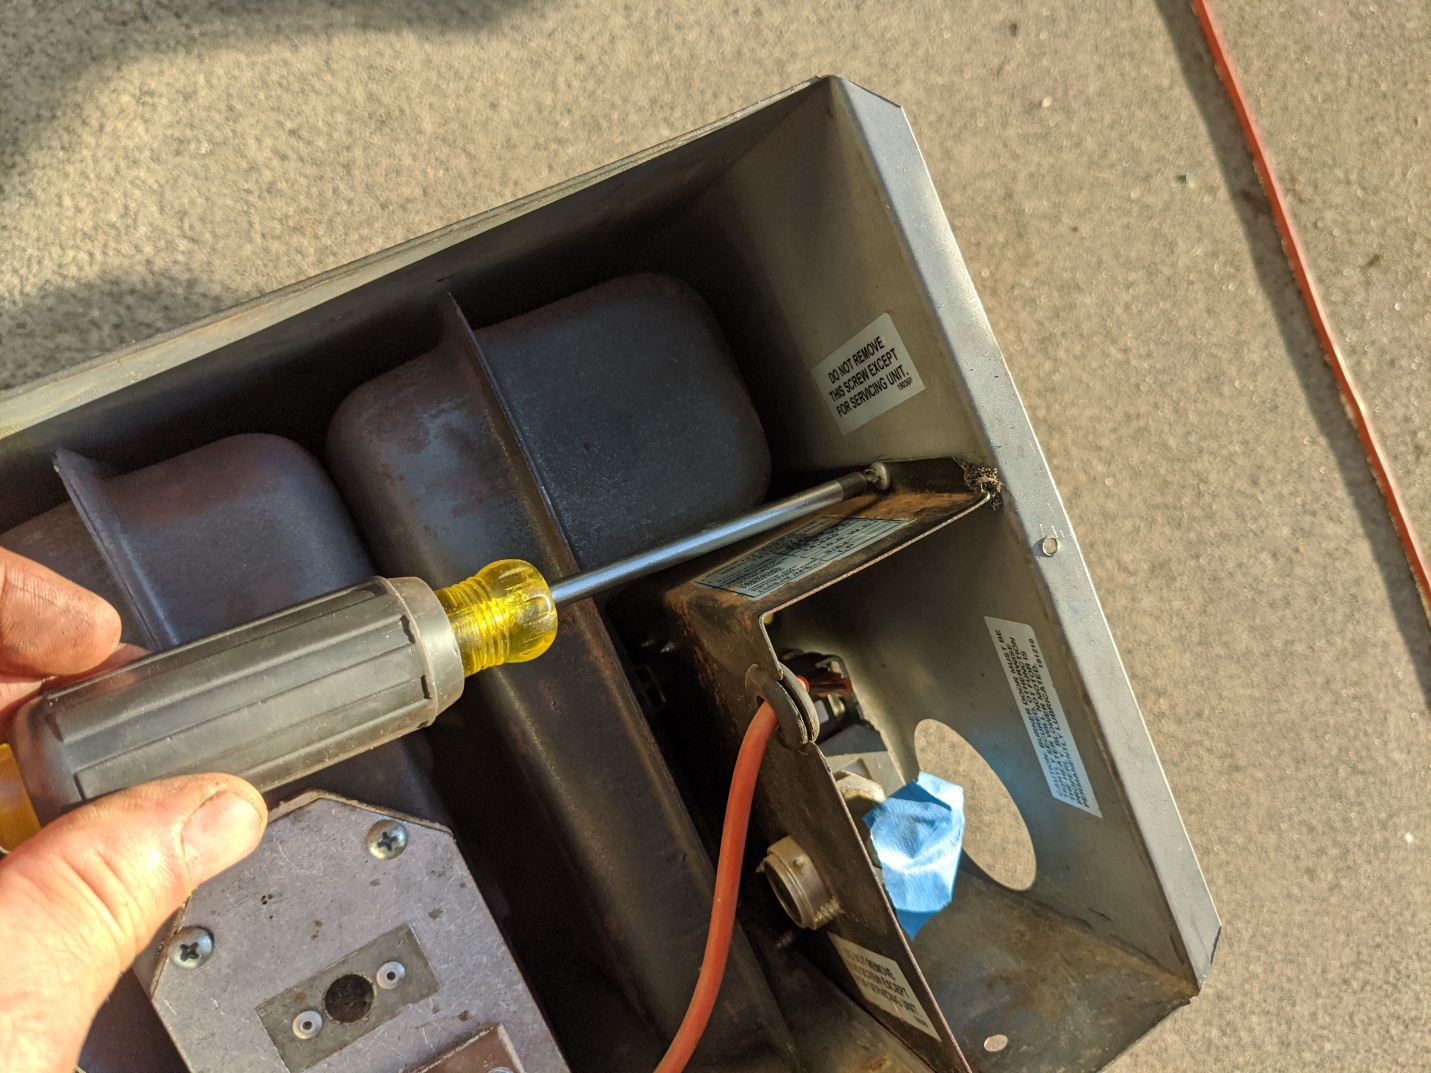 And then it slides apart like this. I used compressed air to get ride of most of the dust. 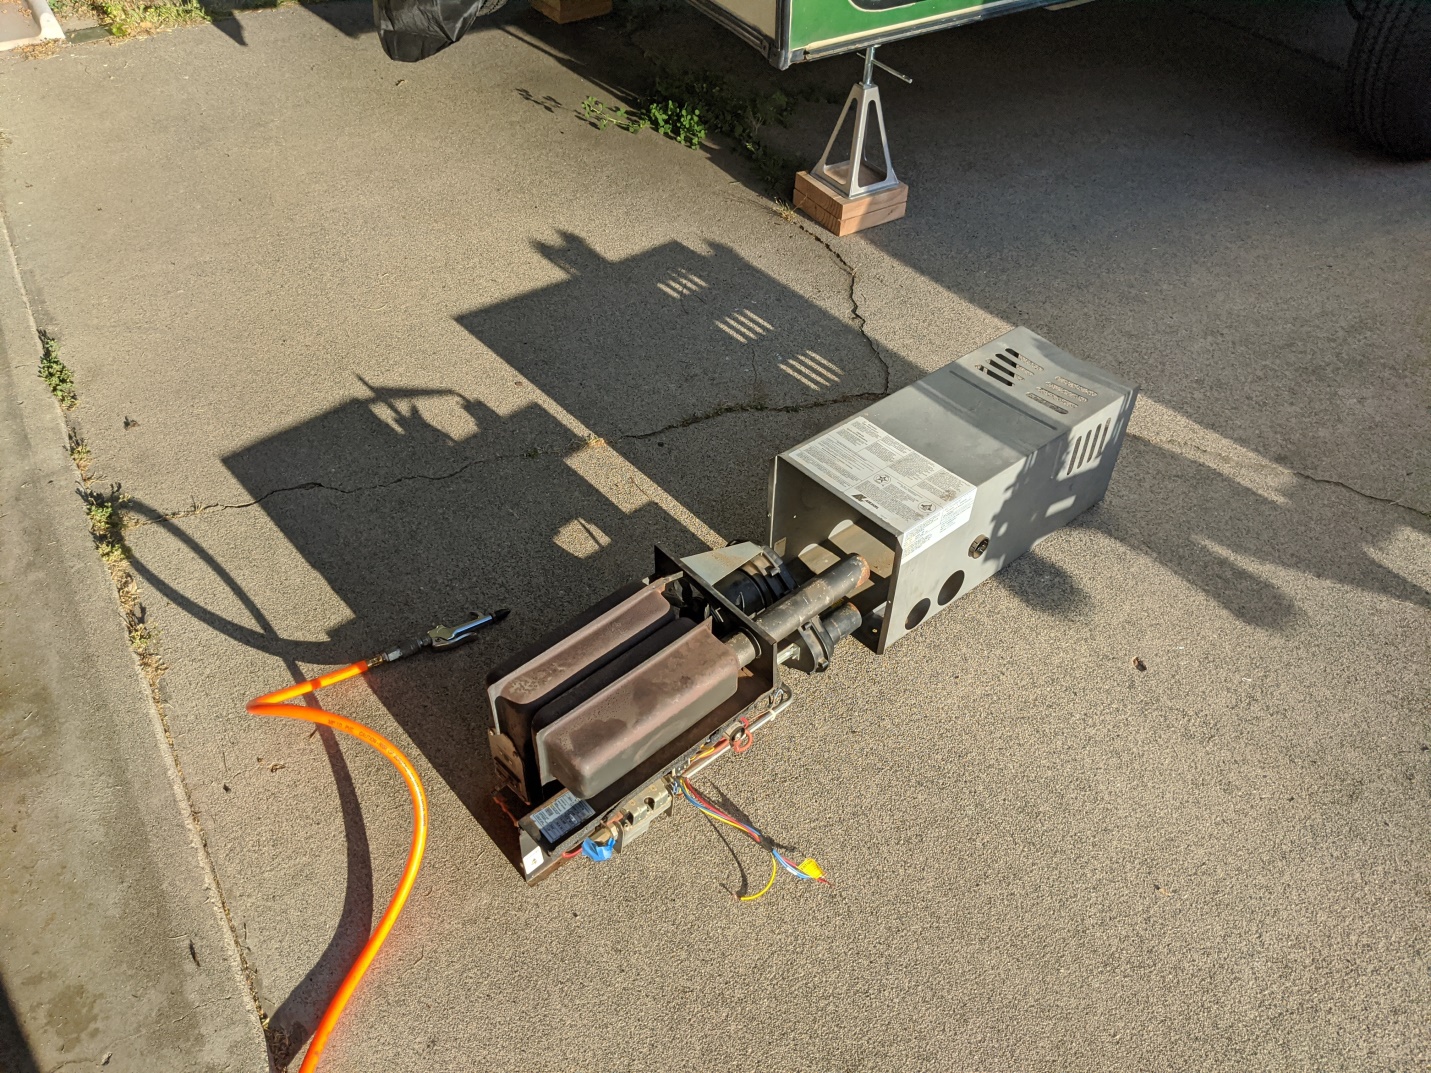 Here are pics of the sail switch and how I cleaned the switch and its contacts with contact cleaner. 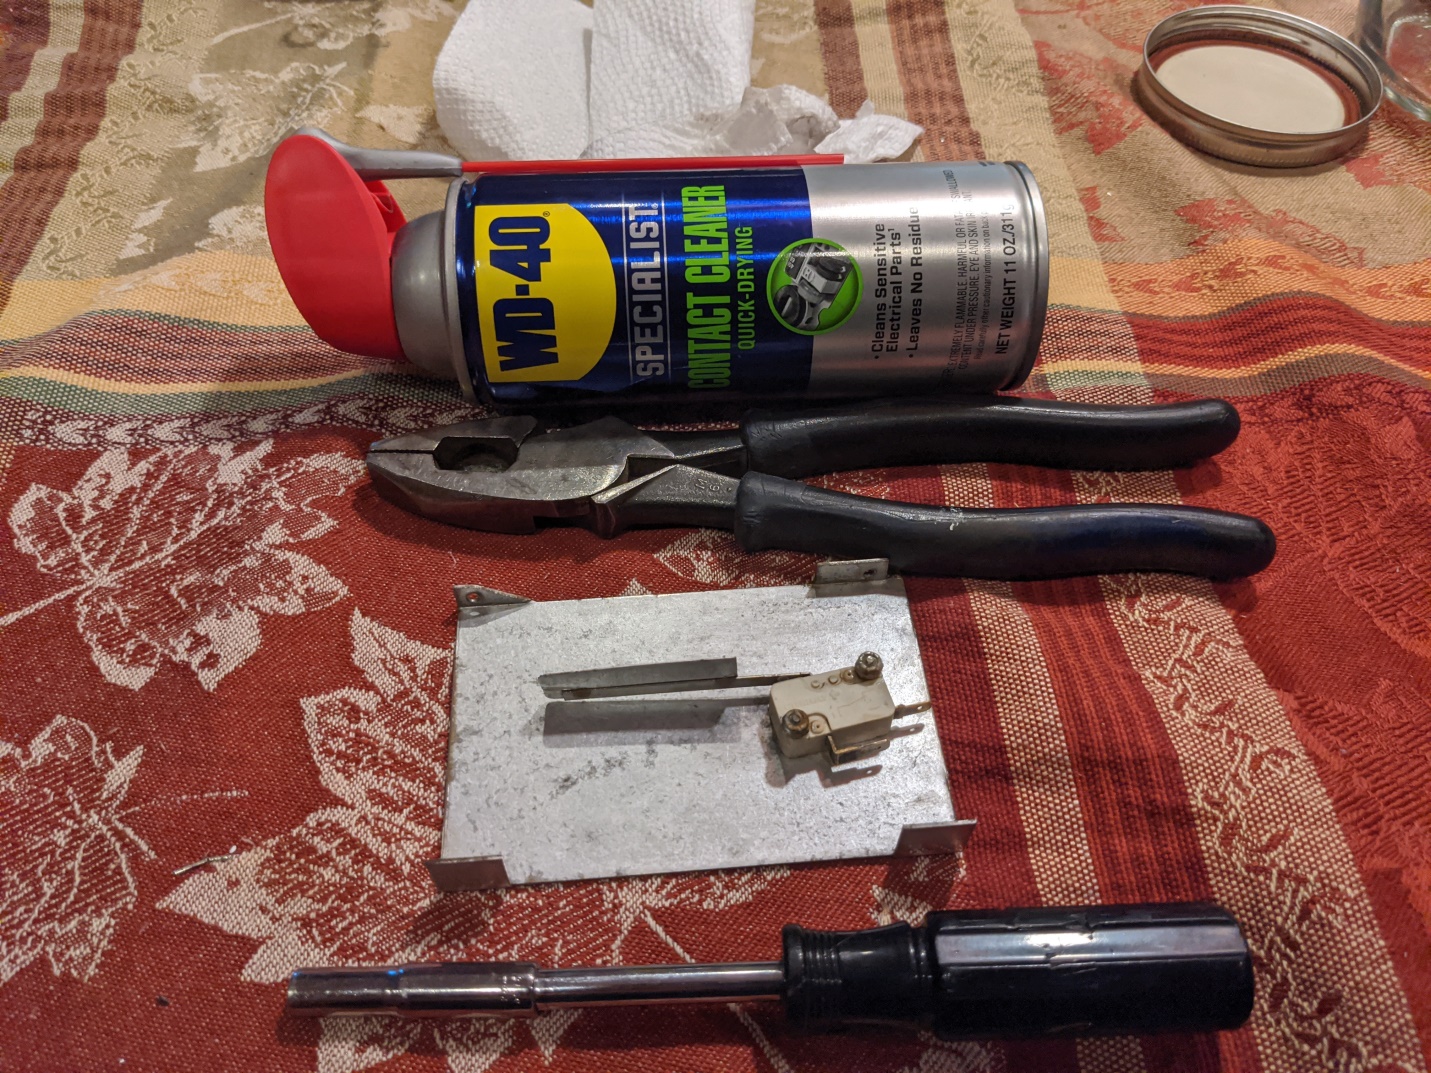 There were some tiny screw heads that I had to use my linesman pliers to remove. 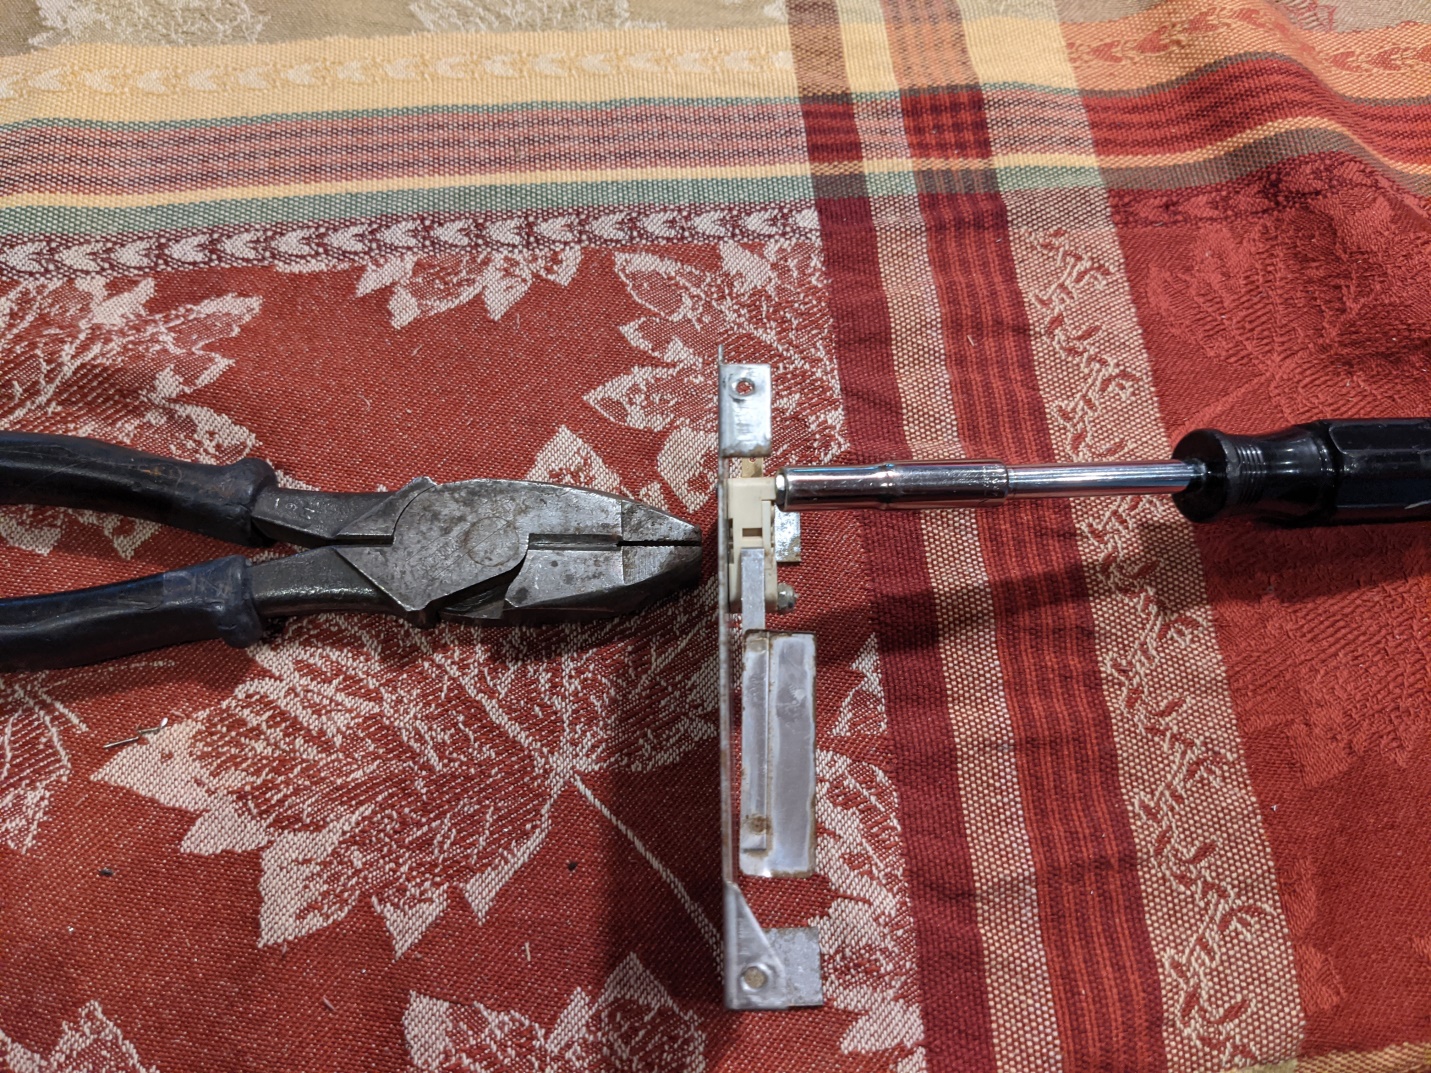 The water heater gas worked but the electric did not. I replaced the disintegrating anode, flushed the tank, cleaned up and painted the outside of the water heater, and replaced the bad electric heating element. To be continued...
|
Posted By: lostagain
Date Posted: 04 May 2023 at 5:47am
|
Some very nicely done projects on your 172. The counter for the stove and sink is really nice. It looks like you took out the bunkbed and replaced it with an expanded lower berth. We did the that in our 172 and kept part of the upper bunk between the head and the front wall as a shelf. ------------- Never leave footprints behind. Fred & Maria Kearney Sonoma 167RB Our Pod 172 2019 Ford F-150 4x4 2.7 EcoBoost |
Posted By: jato
Date Posted: 04 May 2023 at 5:52am
|
Very nice ! There is probably a job opening at FR for you; you could be in charge of upgrading the substandard build of the R-Pod and could watch sales skyrocket! I like your faucet, did the same on our 2011 177 a number of years ago when the chincy handle broke. That is some workmanship you should be proud of!! Noticed you still have the old curtains over the back window. Something we did back in 2013 was to replace that with a 2x cellular shade from Blinds.com; still very functional today. We like it as it can be raised and lowered instantly for instant view or privacy. A few years ago when our fridge turned 10 years old, I replaced it with the same model. Even now I would do the same since boondocking is our normal way to camp, propane is king for us as we do not utilize either solar or use a generator. Glad it works for you. Thanks for your updates.
------------- God's pod '11 model 177 '17 Ford F-150 4WD 3.5 Ecoboost Jim and Diane by beautiful Torch Lake "...and you will know the Truth and the Truth will set you free." |
Posted By: abikerider
Date Posted: 04 May 2023 at 11:11am
Thanks. I did not remove the upper bunk yet, but the thought crossed my mind. Also, I treated the wood supporting the bed with the same Interbuild hard wax oil used on the countertop to make it water resistant. I also painted the plywood bed support with Rustoleum enamel for the same purpose.
|
Posted By: abikerider
Date Posted: 04 May 2023 at 11:20am
Thanks. I am wondering what to do with that back window. Could you post a link to the blinds you used or the model number? I'm very interested in that. We plan on getting some solar panels for when we boondock. I'm not sure how often we will do that. The 12 volt fridge is just much less complex and therefore has less to go wrong with it. Hopefully it is reliable for us.
|
Posted By: StephenH
Date Posted: 04 May 2023 at 12:13pm
|
I like the countertop. What is the weight of it compared with the original. I would think that it weighs more, but it certainly will be more durable. ------------- StephenH Happy is the man that findeth wisdom,... http://www.rpod-owners.com/forum_posts.asp?TID=7712 - ouR escaPOD mods Former RPod 179 Current Cherokee Grey Wolf 24 JS |
Posted By: jato
Date Posted: 04 May 2023 at 3:13pm
Just go to Blinds.com. Many different colors and cell thicknesses (we used 2x). Simply measure your width and length. Their reps. are very helpful if you need assistance. We went with a shade that was 2" wider than the window and 2" longer. ------------- God's pod '11 model 177 '17 Ford F-150 4WD 3.5 Ecoboost Jim and Diane by beautiful Torch Lake "...and you will know the Truth and the Truth will set you free." |
Posted By: abikerider
Date Posted: 04 May 2023 at 4:11pm
I actually weighed them both and took pictures of the scale. After reviewing the pictures, the original weighed 12.4 lbs. and the butcherblock weighed 9 lbs. This did not include the flip up sections or the hardware that supports them, just the main countertop. Pressed wood is heavier than solid wood.
|
Posted By: abikerider
Date Posted: 04 May 2023 at 4:13pm
Thanks for the info. I was wondering what the 2x meant.
|
Posted By: jato
Date Posted: 04 May 2023 at 7:04pm
|
Sorry. 2x means double cell, 3x is triple cell and so on. The double cell worked well, not too wide for the application and gave more insulating value than the single cell shade. ------------- God's pod '11 model 177 '17 Ford F-150 4WD 3.5 Ecoboost Jim and Diane by beautiful Torch Lake "...and you will know the Truth and the Truth will set you free." |
Posted By: gpokluda
Date Posted: 04 May 2023 at 8:41pm
|
Very nice mods. Love the butcher block. What really caught my eye has nothing to do with your Rpod, but your Surly Long Haul Trucker in the background. I covered a lot of miles on mine until it was stolen. Mine was Utility Blue. Replaced it with a Kona Sutra. ------------- Gpokluda 2017 Rpod 179(sold 2023) 2022 Escape 5.0TA 2022 Ford F150 4X4 3.5EB Kawasaki KLR650 |
Posted By: lostagain
Date Posted: 05 May 2023 at 5:33am
|
abikerider, we also raised the level of the lower bed when we took out the upper bunk. I put it at almost at the same height of the dinette seats. It comfortably accommodated both me and my wife. ------------- Never leave footprints behind. Fred & Maria Kearney Sonoma 167RB Our Pod 172 2019 Ford F-150 4x4 2.7 EcoBoost |
Posted By: abikerider
Date Posted: 05 May 2023 at 10:01am
Hi lostagain, That actually sounds like a good idea. I just measured and we could gain an extra 2" of width to make it 46" wide and have an extra deep storage area that could hold a propane generator if needed. I was about to cut a memory foam mattress to size, but now am reconsidering it. Hmmm, that means more work for me. It would also be nice to have the domed roof above the bed; it would feel much less claustrophobic. Thank you.
|
Posted By: abikerider
Date Posted: 05 May 2023 at 10:05am
Hi gpokluda, I love my LHT. It hasn't seen much use lately, but I have used it a lot in the past as a commuter and for some on/off road bikepacking trips. It's a real workhorse. With the ability to put mountain bike tires on it, it's my do-anything bike.
|
Posted By: abikerider
Date Posted: 08 May 2023 at 1:55pm
| Well I started removing both bunk beds over the past weekend and building a new bed platform at a height of 18" which will change the bed width from 44" to 46" and every little inch counts. I've changed the original design and now it mimics USA house construction with 1"x2" studs at less than 16" on center. The stud wall supporting the bed will go all the way around the perimeter and I think will double the weight bearing ability of the bed without adding much weight. I'm doing lots of precision cutting with my chop saw and table saw since the two sides are not exactly symetrical. It's very time-consuming, but I think the final product will be worth it. It really changes the feel of the bed area, much less claustrophobic. |
Posted By: abikerider
Date Posted: 23 May 2023 at 3:32pm
Here are some pics of the new bed frame being built. I used the paneling that was on the bottom of the top bunk for the front of the bed to match the other cabinets. The frame height is 18 inches. Still painting the plywood for the top so I will show that next.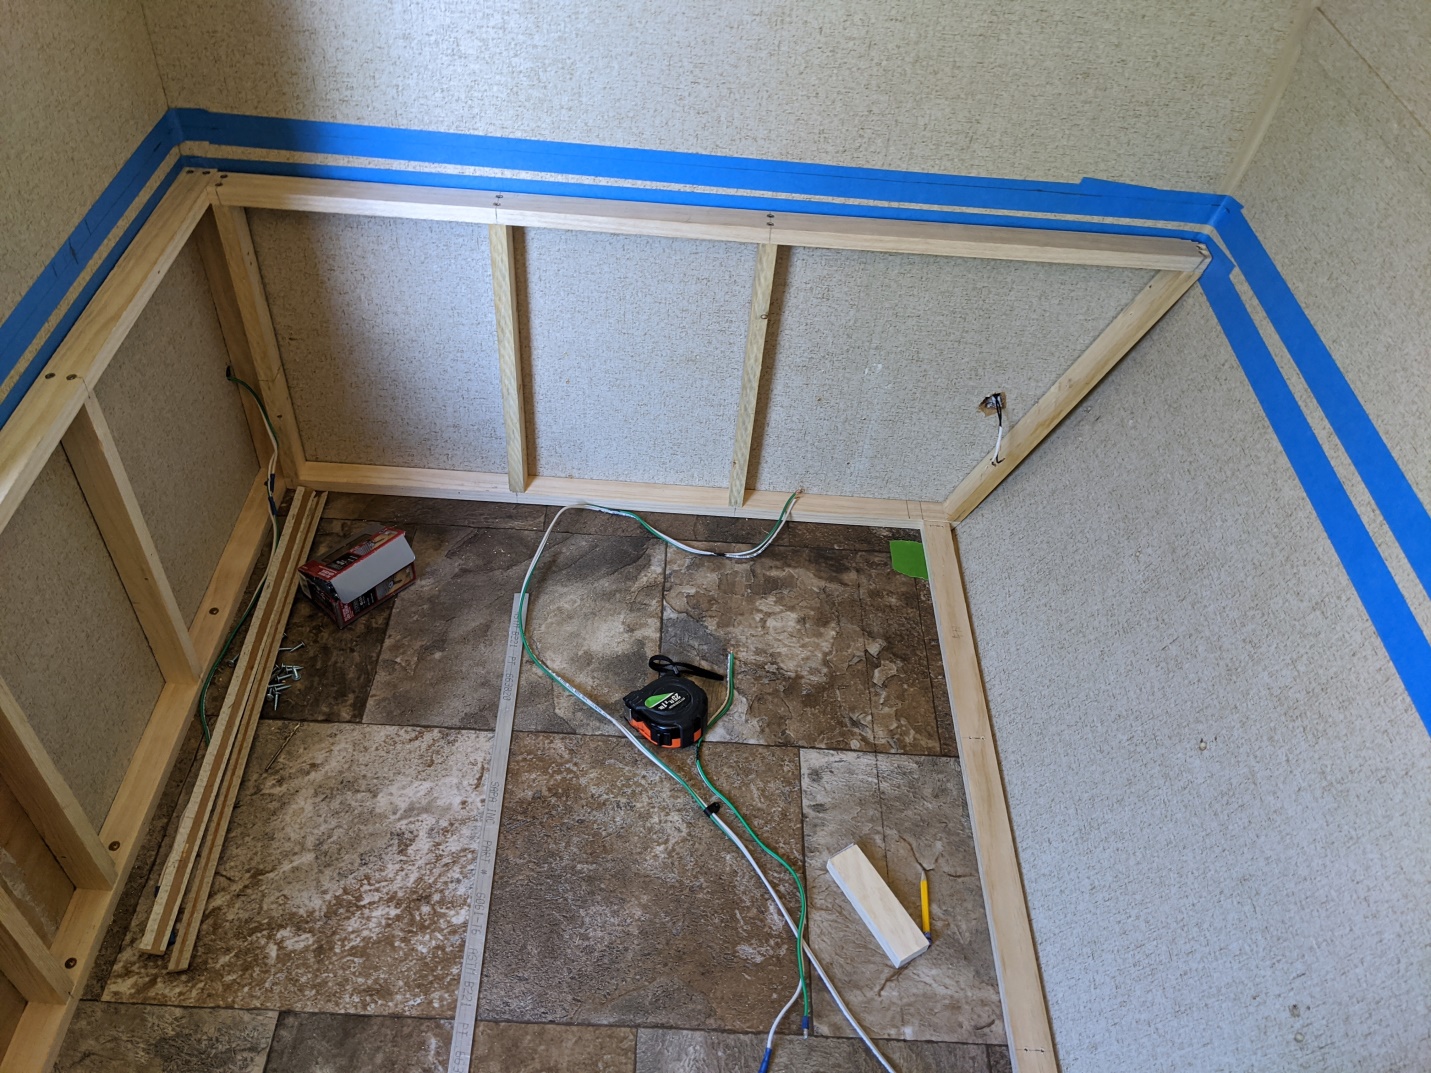 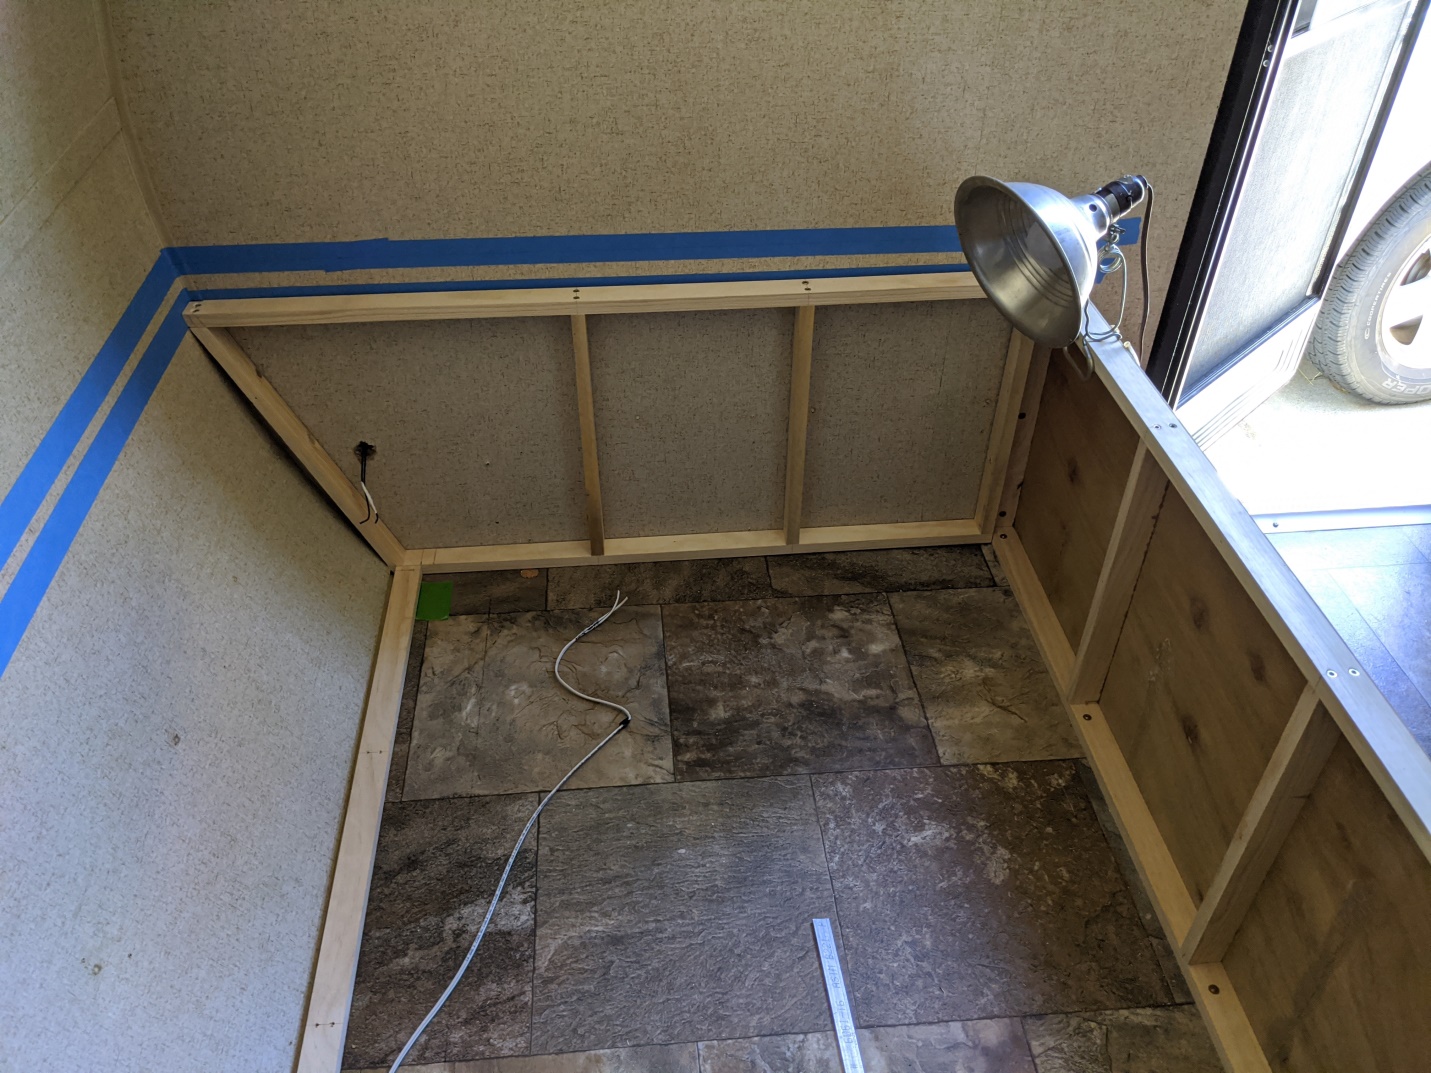 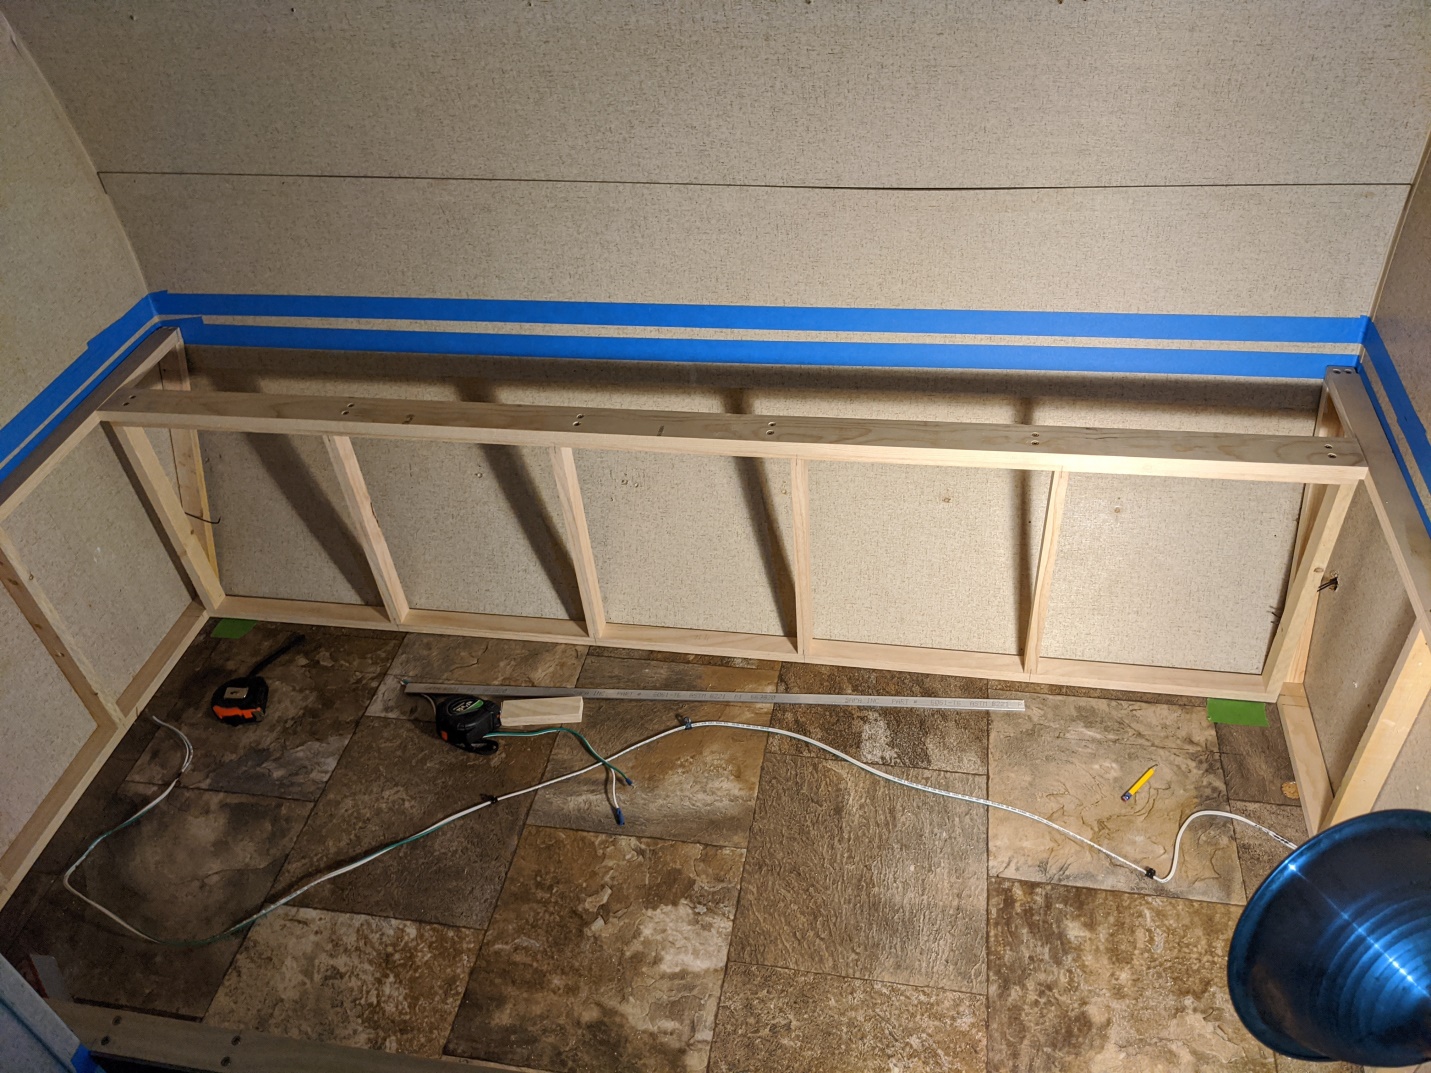 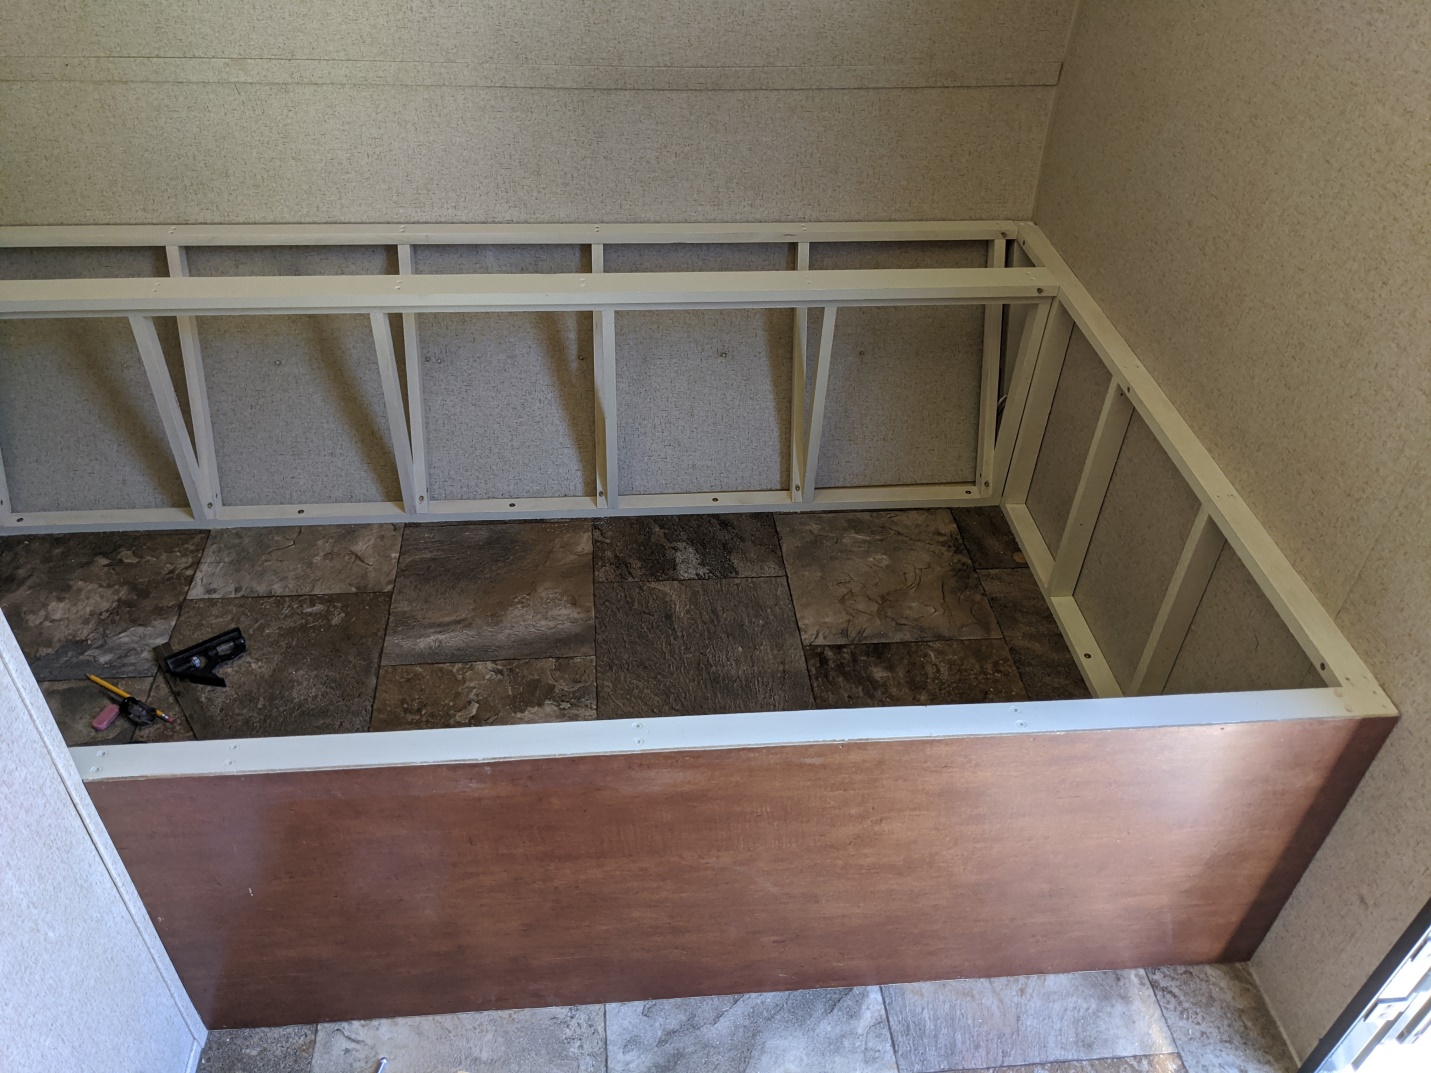  |
Posted By: EchoGale
Date Posted: 24 May 2023 at 10:55am
|
Very Nice! Your use of the paneling is clever. I'm not sure how you feel about the storage in the 172 but there wasn't enough for me and, for me, lifting the bed or the cushions to get under them was to hard. I removed the paneling under the bed and under the dinette seats and added storage boxes that can pull out like drawers. I used trim to finish off the rough pieces of wood that made the frame. I think the 172 is one of the most versatile floor plans ever. :) ------------- Julie |
Posted By: lostagain
Date Posted: 24 May 2023 at 2:14pm
|
Very nice work. Looks like the same concept we used to raise and widen the bed. Did you leave any of he upper bunk in place. We left it in where it was next to the head on the port side wall. it made some handy storage. We also reused the plywood that matched the other wood for the side of the bed. ------------- Never leave footprints behind. Fred & Maria Kearney Sonoma 167RB Our Pod 172 2019 Ford F-150 4x4 2.7 EcoBoost |
Posted By: abikerider
Date Posted: 24 May 2023 at 4:21pm
| No, I did not leave any of the upper bunk. I may add a shelf later though. |
Posted By: lostagain
Date Posted: 24 May 2023 at 5:01pm
|
I should have taken it out and put it up higher. It became a knee knocker in the bed. ------------- Never leave footprints behind. Fred & Maria Kearney Sonoma 167RB Our Pod 172 2019 Ford F-150 4x4 2.7 EcoBoost |