
|
|
Post Reply 
|
| Author |
 Printable Version Printable Version Google Google Delicious Delicious Digg Digg StumbleUpon StumbleUpon Windows Live Windows Live Yahoo Bookmarks Yahoo Bookmarks reddit reddit Facebook Facebook MySpace MySpace Newsvine Newsvine Furl Furl Topic Search Topic Search  Topic Options Topic Options
|
jarpod 
Newbie 
Joined: 11 May 2014 Online Status: Offline Posts: 18 |
 Topic: 175 head banger moved Topic: 175 head banger movedPosted: 15 Aug 2014 at 1:48pm |
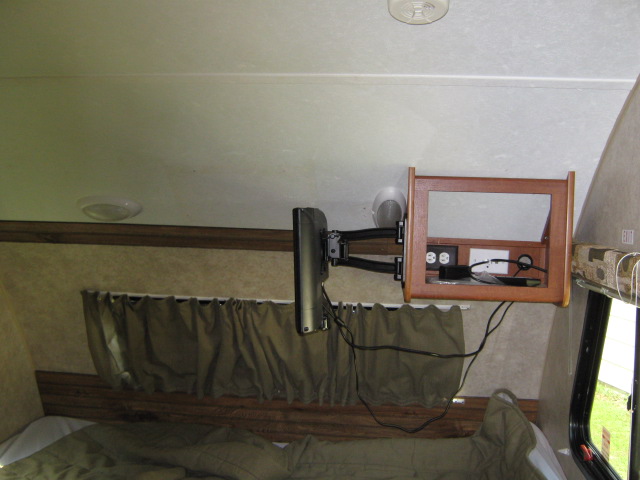 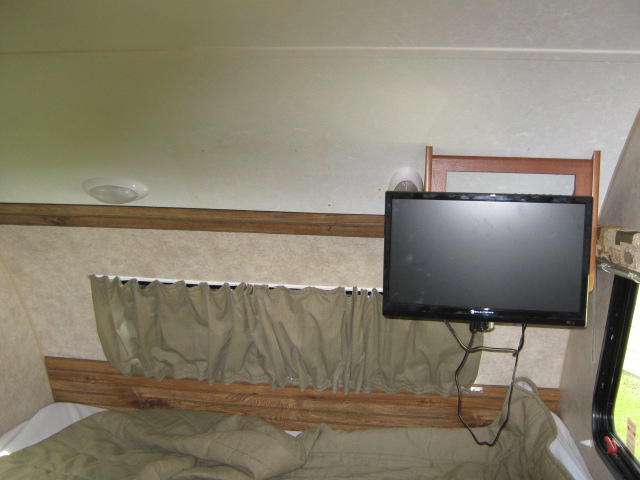 i have read where others had moved their overhead tv cabinet and had looked for pics but could not find them so decided to post several pics of mine. i moved the outlets for the 110 and the antenna booster over also. it is so much easier to get in and out of the bed with out smacking your head. installed a 19in tv on a articulating arm and will put a cheap walmart dvd player in the cabinet . only issues when moving the 110 outlet the trailer wiring i think is 14 ga and all i had was 12/2 and of course the stock outlet would not work since it is a clip in type. so i changed the whole outlet out . and had to extend the 12v wires for the booster . i have read where others had moved their overhead tv cabinet and had looked for pics but could not find them so decided to post several pics of mine. i moved the outlets for the 110 and the antenna booster over also. it is so much easier to get in and out of the bed with out smacking your head. installed a 19in tv on a articulating arm and will put a cheap walmart dvd player in the cabinet . only issues when moving the 110 outlet the trailer wiring i think is 14 ga and all i had was 12/2 and of course the stock outlet would not work since it is a clip in type. so i changed the whole outlet out . and had to extend the 12v wires for the booster .
|
|
 |
|
|
fionasol
Newbie

Joined: 15 Oct 2014 Location: United States Online Status: Offline Posts: 13 |
Posted: 16 Oct 2014 at 10:18am |
|
Thanks for posting this! We just picked up our (used) 177 last week and I'd love to do this mod. Haven't had a chance to fiddle with the cabinet yet and I wondered how difficult it was to move the wiring.
|
|
|
|
|
techntrek
Admin Group - pHp 
Joined: 29 Jul 2009 Location: MD Online Status: Offline Posts: 9062 |
Posted: 16 Oct 2014 at 12:15pm |
|
Youl would think the designers would spend a day inside a mock-up of their creations so they could learn what works before building it...
Welcome, fionasol.
|
|
|
|
|
jarpod
Newbie
Joined: 11 May 2014 Online Status: Offline Posts: 18 |
Posted: 25 Oct 2014 at 12:41am |
|
fionasal
sorry that havent replied earlier been busy and my computer died. the wiring was not difficult i used wire nuts to connect the 110 wire together then taped them up real good. the trailer 110 wiring is a smaller than 12 /2 and 12/2 was what i had on hand so used it but the 12/2 is to thick to fit in the wire slots on the outlet so i changed the outlet out with a regular household one. also depending how much slack/excess wiring you may have you may not have to splice any in i had to mine was to short . the antenna booster 12v is pretty easy with the crimps on or wire nuts. my camper had water damage when i bought it and instead of buying expensive paneling from the dealer i just installed paneling from mernards. which worked out good. also when they built the camper the wire holes where to high up for the original trim to cover them. if you have any more ? let me know will be glad to help . it makes getting out of bed so much better and the tv on the articulating arms is great
|
|
|
|
|
jarpod
Newbie
Joined: 11 May 2014 Online Status: Offline Posts: 18 |
Posted: 25 Oct 2014 at 12:50am |
|
fionasal also on the cabinet i should have slipped a piece of 1/2 thick wood between the paneling so when reinstalling it would make for a better anchor for the screws and on the side next to the window i went and put short screws through the side of the cabinet into the side of the valance box that covers the blinds it made the cabinet pretty solid. and back to the wiring when i moved it over i pulled the paneling away from the wall stud so i could lay the wiring. on the other r pod forum is where saw pictures of another who had already done this mod. hope this helps
|
|
|
|
|
fionasol
Newbie
Joined: 15 Oct 2014 Location: United States Online Status: Offline Posts: 13 |
Posted: 23 Mar 2015 at 2:48pm |
|
Jarpod,
Thanks for all the answers. Finally got around to trying this mod in the last week. Not quite finished yet, but very close. I had some luck, all the wires were long enough to get to the edge of the back wall, where I built a new box for the outlets out of parts of the old cabinet. A friend with a table saw and lots of scrap wood is cutting me a nice wide piece of trim to cover the big holes. Hoping to get that today and finish up with this project. 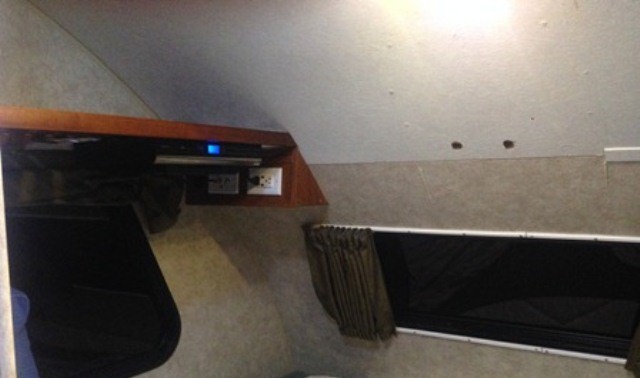 |
|
|
|
|
jarpod
Newbie
Joined: 11 May 2014 Online Status: Offline Posts: 18 |
Posted: 23 Mar 2015 at 4:06pm |
|
fionsal
looks good and a lot better than smacking your head when getting out of bed. I see that you moved yours to the left side I went to the right and is why my wires were to short. when the factory installed the lights ect they cut huge holes so I could not cover them with the original trim so went ahead and used the paneling I had left over form repairing the water damaged wall. |
|
|
|
|
fionasol
Newbie
Joined: 15 Oct 2014 Location: United States Online Status: Offline Posts: 13 |
Posted: 09 Apr 2015 at 10:48am |
|
Since we'd both searched the forums for how to do this mod, I added another post on what I did. If you are interested in seeing the final product http://www.rpod-owners.com/forum_posts.asp?TID=6052&PID=58736#58736
|
|
|
|
|
jarpod
Newbie
Joined: 11 May 2014 Online Status: Offline Posts: 18 |
Posted: 09 Apr 2015 at 11:02am |
|
fionasol
nice job , I like the 12v plug idea will be doing that myself thanks |
|
|
|
|
Post Reply
|
| Forum Jump | Forum Permissions You cannot post new topics in this forum You cannot reply to topics in this forum You cannot delete your posts in this forum You cannot edit your posts in this forum You cannot create polls in this forum You cannot vote in polls in this forum |


 175 head banger moved