
|
List Your Mods: |
Post Reply 
|
Page <1 3233343536 77> |
| Author |
 Printable Version Printable Version Google Google Delicious Delicious Digg Digg StumbleUpon StumbleUpon Windows Live Windows Live Yahoo Bookmarks Yahoo Bookmarks reddit reddit Facebook Facebook MySpace MySpace Newsvine Newsvine Furl Furl Topic Search Topic Search  Topic Options Topic Options
|
JandL 
Senior Member 
Joined: 29 Mar 2014 Location: California Online Status: Offline Posts: 364 |
 Post Options Post Options
 Quote Reply Quote Reply
 Topic: List Your Mods: Topic: List Your Mods:Posted: 27 Aug 2015 at 10:52pm |
|
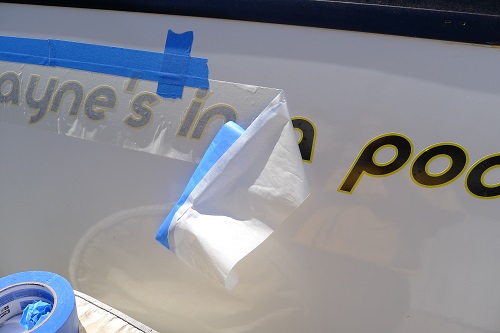
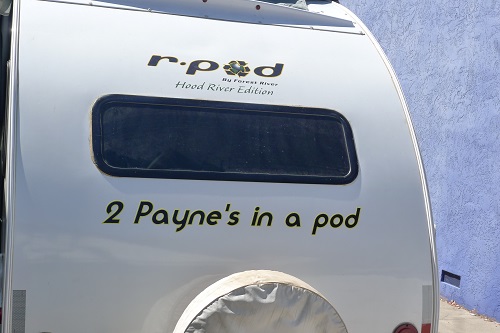
Vinyl lettering for pod names
I finally got around to putting a name on the pod. I ordered the letters from “Do it yourself lettering.com”. There are quite a few web sites that can make the decals but this one made it very easy to look at different lettering options and colors and it had the closest font that matched the R-pod font. I used the font called Moderna with black lettering and both the Bold and Italic boxes checked and 4" high. The new R-pods have a different font. I then added a border at 150% and the color I picked was yellow. Once I got it outside and next to the trailer I see I should have ordered the border color as Sunflower. I was trying to get it to match the r-pod colors. The other change I would have done is ordered the Reflective vinyl because it is thicker, the standard is 3 mil. I looked at some u-tube videos on how to install the letters and they were helpfull. I bent back ½ the backing paper and started squeegeeing the letters. I was so busy concentrating on trying to get the air bubbles I did not notice the backing paper was coming off before I wanted it to, when that happened it goes fast. I have a few air bubbles I will have to work on but I am happy with the results.  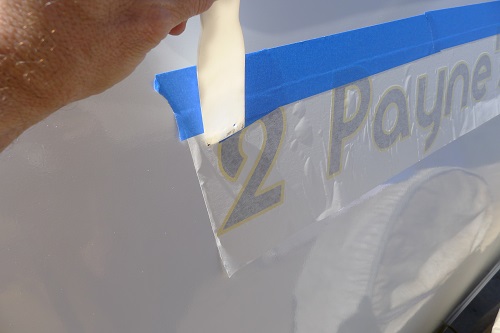
|
|
|
JandL
2013 Honda Ridgeline 2012 177 2 Paynes in a Pod |
|
 |
|
|
rsgmd
Newbie 
Joined: 08 Aug 2015 Online Status: Offline Posts: 7 |
Post Options
Quote Reply
Posted: 25 Aug 2015 at 6:59pm |
This is the model that will work best as it will not have the springs:
http://www.carefreeofcolorado.com/products/pioneer-lite.html The installation is done with a bolt and plate/washer without locating any beams. |
|
|
|
|
Leo B
podders Helping podders - pHp

Joined: 13 Jan 2012 Location: Lyndonville, VT Online Status: Offline Posts: 4508 |
Post Options
Quote Reply
Posted: 25 Aug 2015 at 3:41pm |
|
really nice cutting board!
|
|
|
Leo & Melissa Bachand
2017 Ford F150 2021 Vista Cruiser 19 csk Previously owned 2015 Rpod 179 2010 Rpod 171 |
|
|
|
|
regdave
Newbie
Joined: 06 Apr 2015 Location: Oklahoma Online Status: Offline Posts: 7 |
Post Options
Quote Reply
Posted: 25 Aug 2015 at 1:41pm |
|
A couple of items we've found recently that might be useful.
Found a plastic framed metal wall mirror at Lowe's for $6. Weighs around 5lbs and is indestructible. Screwed into the inside of the bathroom door with #8 wood scres (heads painted to match) and caulked: http://www.lowes.com/pd_33107-28392-72462_1z11oomZ2z8vj__?productId=3698032 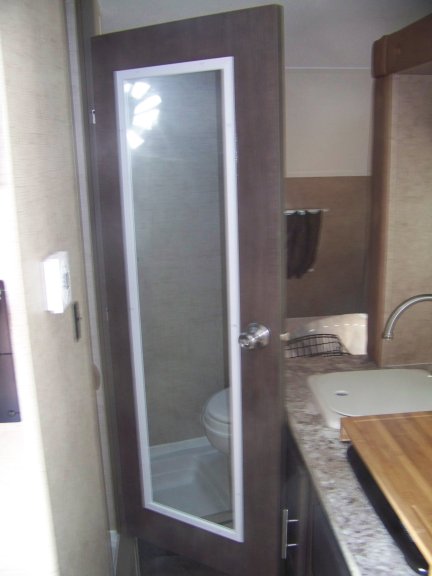 Found a bamboo cutting board for the range cover. Glued on 1/4" spacers and then some rubber non-skid pads to get the proper clearance (1-3/4"). Costs between $15 to $25. Google: "Lipper International Bamboo Large Over the Sink/Stove Cutting Board" for a local price. A little wider and a narrower than the range top but works very nicely and stows on the counter behind the stove. 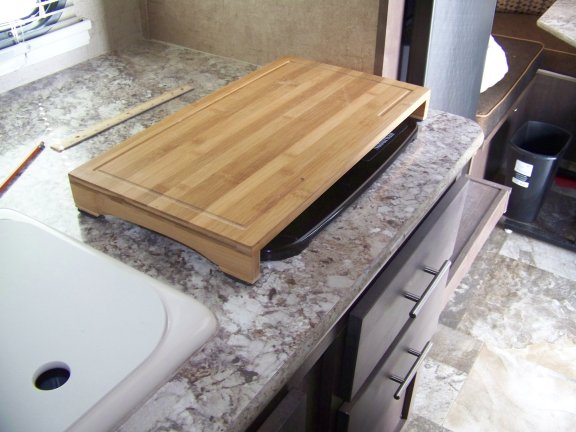 - Dave and Adele R |
|
|
Dave & Adele
|
|
|
|
|
SeattleMALCKS
Newbie

Joined: 12 Jun 2013 Location: United States Online Status: Offline Posts: 3 |
Post Options
Quote Reply
Posted: 25 Aug 2015 at 11:31am |
|
Hi,
Can you please provide the exact model number of the awning. Also, did you have to locate beams in the wall (if there are any) or was the installation a bolt and plate on each side of the wall? Thanks ! |
|
|
|
|
hammockmadness
Groupie 
Joined: 07 Jul 2015 Location: Middleburg, FL Online Status: Offline Posts: 61 |
Post Options
Quote Reply
Posted: 25 Aug 2015 at 11:19am |
|
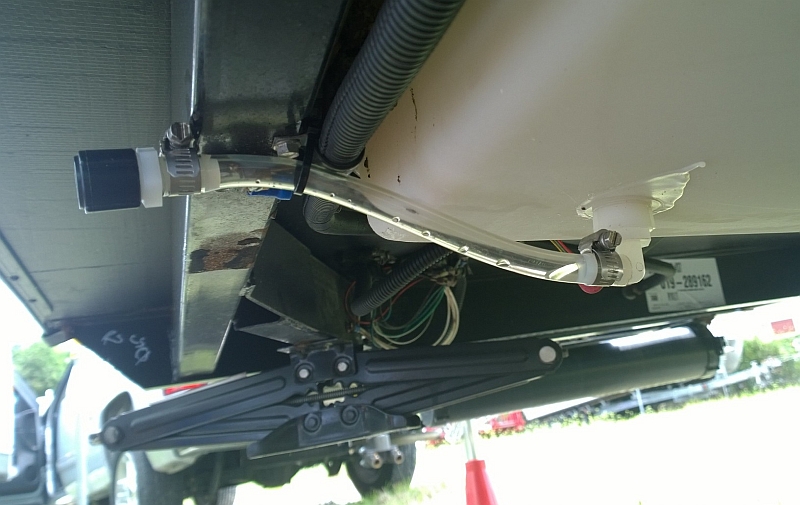
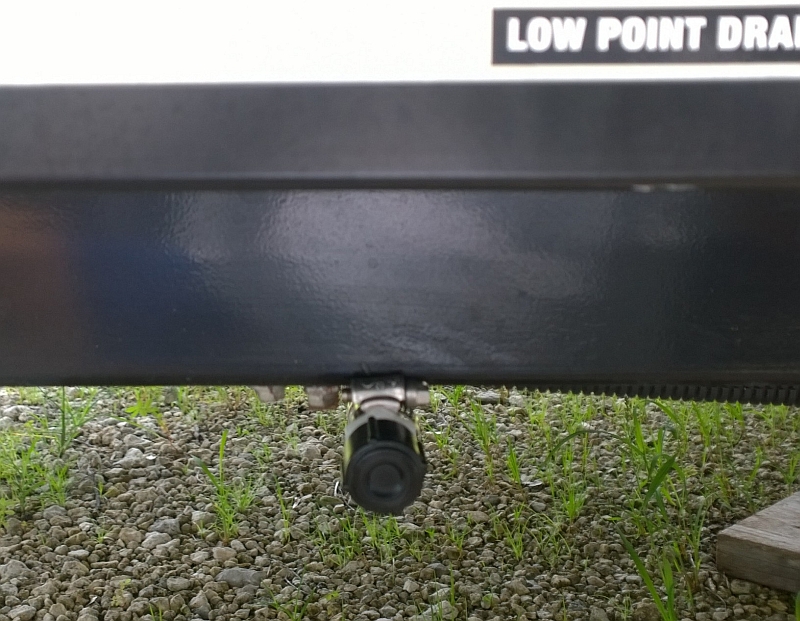
To make life easier when draining the fresh water tank, I extended the drain cap to the outside of the frame and used a zip tie to hold it to a clamp that retains a wire bundle. The 1/2" nylon fittings are available at Home Depot. In the picture, it appears that the cap is above the bottom of the tank, however it's actually at the same level as the bottom. The bottom of the elbow in the tank is about 3/4" higher than the original setup. Problem solved!
  |
|
|
Dana & Regina
Fleetwood & Jasper 2014 181-G 2014 Silverado 4X4 |
|
|
|
|
KrogPod
Newbie
Joined: 07 Jul 2013 Location: Central TX Online Status: Offline Posts: 26 |
Post Options
Quote Reply
Posted: 24 Aug 2015 at 8:56pm |
|
As for finding the aluminum studs, I managed to find them using a carpenters stud finder.
|
|
|
2014 RP-172, AKA KrogPod
2003 S10 ExCab V6 4.3L Automatic Central Texas 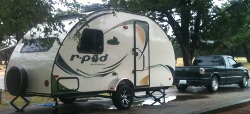
|
|
|
|
|
techntrek
Admin Group - pHp 
Joined: 29 Jul 2009 Location: MD Online Status: Offline Posts: 9059 |
Post Options
Quote Reply
Posted: 24 Aug 2015 at 7:44pm |
|
A molly bolt will work fine if you can't hit stud.
|
|
|
|
|
wcurry
Newbie

Joined: 30 Jun 2015 Location: Rock Springs Wy Online Status: Offline Posts: 2 |
Post Options
Quote Reply
Posted: 24 Aug 2015 at 12:42am |
|
After looking at the Wall Construction on the internet, it appears to me that the aluminum stud runs horizontally above and below the window. Could you at least get one screw into this stud for support? May have to turn the L bracket upside down so it doesn't interfere with awning of window/blind? http://www.rpodnation.com/uploads/270/DSC_0128_modified.jpg Tell me what you think? Thanks, Wally |
|
|
Wally
|
|
|
|
|
wcurry
Newbie
Joined: 30 Jun 2015 Location: Rock Springs Wy Online Status: Offline Posts: 2 |
Post Options
Quote Reply
Posted: 24 Aug 2015 at 12:31am |
 Found this shelf which is 8 ft x 16 inches from John Louis Home. You can purchase hardware from them as well (L brackets) and wood angle brackets (if desired) to maybe?? hang a garment bar from? The nice thing about this shelve is that it will fit the entire width on a 178/179 and can be cut to size. Will this work and....is there an easy way to find the aluminum studs on the inside walls to mount L brackets to? Stud finder? Thanks, Wally |
|
|
Wally
|
|
|
|
|
Post Reply
|
Page <1 3233343536 77> |
| Forum Jump | Forum Permissions You cannot post new topics in this forum You cannot reply to topics in this forum You cannot delete your posts in this forum You cannot edit your posts in this forum You cannot create polls in this forum You cannot vote in polls in this forum |


