
|
|
Post Reply 
|
Page 12> |
| Author |
 Printable Version Printable Version Google Google Delicious Delicious Digg Digg StumbleUpon StumbleUpon Windows Live Windows Live Yahoo Bookmarks Yahoo Bookmarks reddit reddit Facebook Facebook MySpace MySpace Newsvine Newsvine Furl Furl Topic Search Topic Search  Topic Options Topic Options
|
frog queen 
Newbie 
Joined: 13 Feb 2017 Location: west Colorado Online Status: Offline Posts: 10 |
 Topic: Some stuff I've done Topic: Some stuff I've donePosted: 22 Apr 2017 at 5:40pm |
|
Wow....the mods you have shared are what I like about to hear here. Great job and outside the box designing. Keep your ideas coming. I can't wait to see you next designs.
|
|
 |
|
|
Patchwork
Newbie

Joined: 04 May 2015 Location: Michigan Online Status: Offline Posts: 2 |
Posted: 21 Sep 2015 at 4:05pm |
|
Re the backrest....sounds overly simple, but we have a couple small (13-14") throw pillows on each bench of the dinette. Tucked behind the back, they lend support either facing the table or using the benches as a sort of recliner, leaning up against the wall.
|
|
|
Happy adventuring!
|
|
|
|
|
Guests
Guest Group 
|
Posted: 11 Jul 2015 at 8:54am |
|
The OEM table in my Coleman is not the folding type, usually found in the Rpods. I am keeping it in storage for when I trade in or sell the unit. I can put the unit back to original.
If you haven't already, you may want to check with a dealer to find the cost/availability of a replacement. In the alternative, places like Camping World sell small portable tables. Good luck! |
|
|
|
|
steviegronow
Newbie
Joined: 10 Jul 2015 Location: Howell, Michiga Online Status: Offline Posts: 3 |
Posted: 10 Jul 2015 at 9:48pm |
|
DO YOU BY CHANCE STILL HAVE THE FACTORY DINETTE FOLDING TABLE? I AM LOOKING FOR ONE ! CALL ME AT 810-599-5147. THANKS, STEVE
|
|
|
STEVIE
|
|
|
|
|
Marx
Senior Member 
Joined: 18 Jul 2014 Location: Charleston Online Status: Offline Posts: 103 |
Posted: 27 Jun 2015 at 7:11pm |
|
That's some good modding work right der! I like that prop idea, may have to barrow that. Good looking camper and truck too!
|
|
|
2014 R-POD 177
|
|
|
|
|
techntrek
Admin Group - pHp 
Joined: 29 Jul 2009 Location: MD Online Status: Offline Posts: 9059 |
Posted: 02 Apr 2015 at 6:30pm |
|
Yes, very nice.
|
|
|
|
|
Guests
Guest Group
|
Posted: 02 Apr 2015 at 3:17pm |
|
Thank you very much!
I like looking at what others have done, as it gives me ideas about what I can/could do, in my situation. Having used this for a year, it has worked much better than the OEM arrangement. I have thought of some ways to do it better. It is a work in progress. PS - I made the back of the "main seat" above separate/removable so that I can take the mattress out, if I need to. Elsewise, I would have just made it a one piece unit. |
|
|
|
|
Luv2Q
Senior Member

Joined: 30 Aug 2014 Location: Central TX Online Status: Offline Posts: 309 |
Posted: 02 Apr 2015 at 1:16pm |
|
All very nicely done, David. Thanks for posting. Nice-looking rig, too.

|
|
|
John & Teri
Tundra 5.7L V8 / RP 180 E2 WDH / Integrated controller (POS) replaced by Tekonsha P3 |
|
|
|
|
Guests
Guest Group
|
Posted: 02 Apr 2015 at 12:36pm |
|
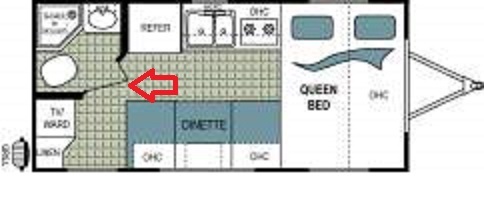
Here are some pictures, as promised. First is the floor plan, as from the factory. The arrow points to what was a "bottle neck" problem, plus, I needed floor space more than I needed seating for 4.
Next, the new "main seat". The brown denim fabric was purchased on close out at Walmart for $2 per yard. I purchased 2 yards. 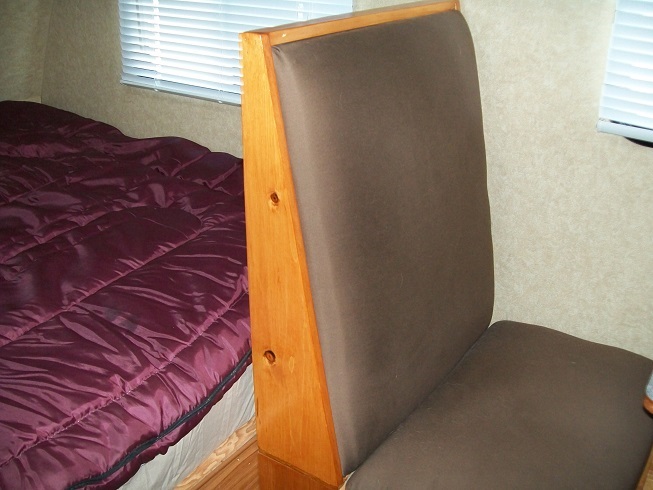
Inside of the base. 2X2 construction, glued and screwed, covered by 1/4" luan plywood. I doubled up the dividing 2X2 to help keep things in place. In view are the red/black 12v. wires and larger black coax cable for the ham radio. I made a "seat prop" out of some 1X2, a screw and some washers. 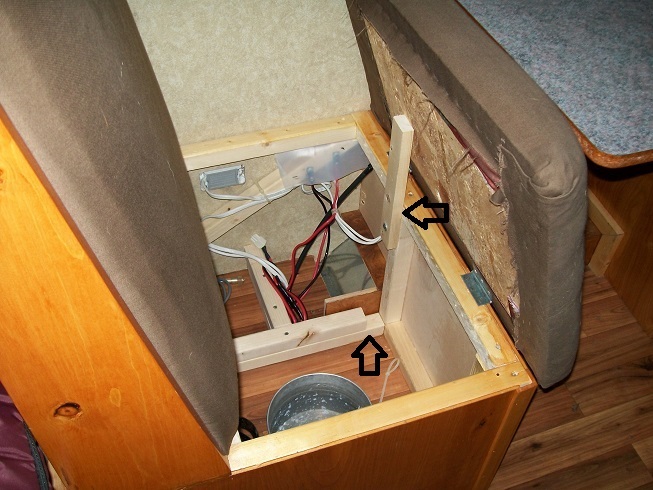
The back was made of 1X8 #2 pine cut tapered to 1 1/2" at the top. The "waste" scraps were used for "nailing surface" for the back. The arrow points to a cavity that I use to store keys, wallet, etc. out of sight. 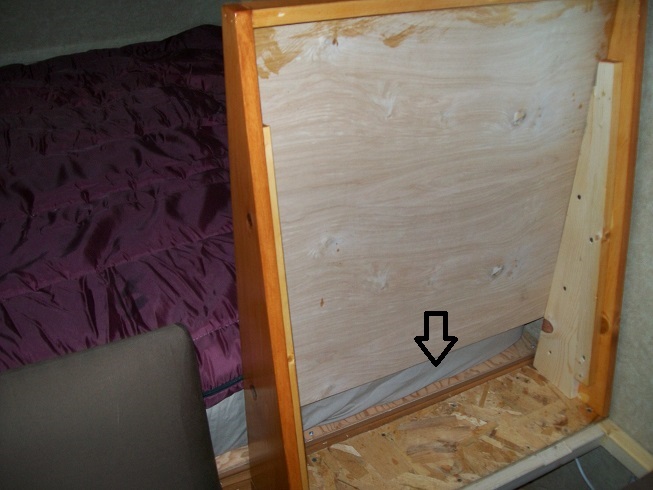
I can access the cavity from the bed side, as I left the back of the seat a little short. Here, I am pulling back the mattress to show. 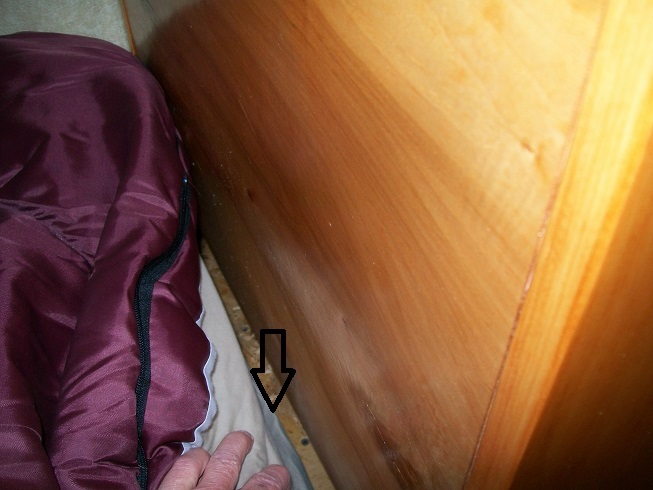
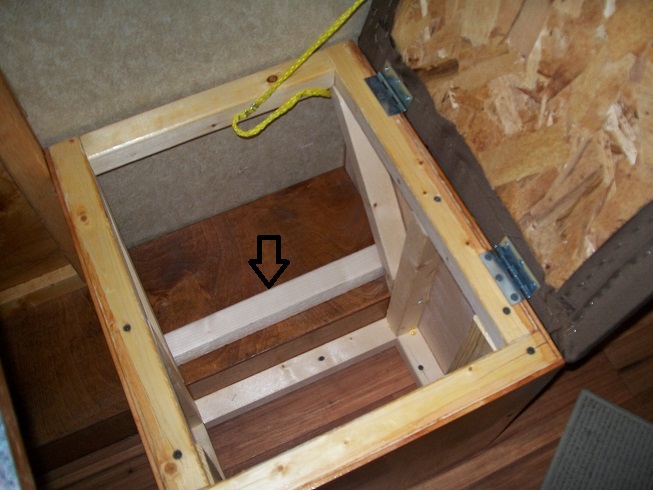
On the other side of the table, I made that seat as a stool or ottoman, with storage under. Here, I decided a small length of rope could hold the cushion up, as needed. The small 2X2 helps to keep things from shifting. The wheel well makes this 2 level storage. Speaking of which, I did have to make a cover for the wheel well, as it was covered by the original seats and was bare shiny metal. 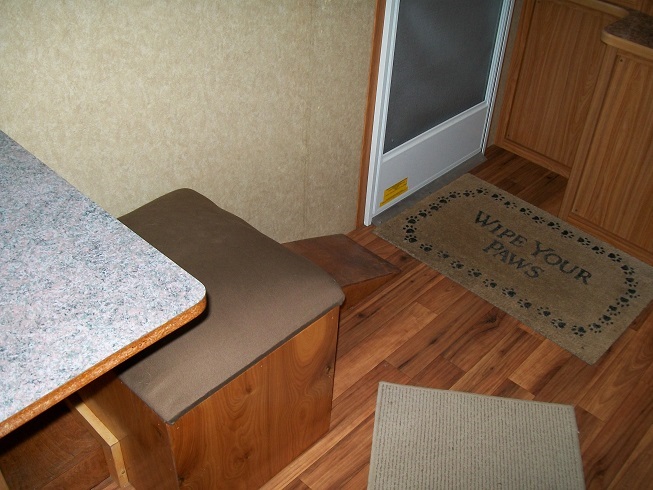
Here is where my "monitor panel was. A small patch of stained luan covers the hole. 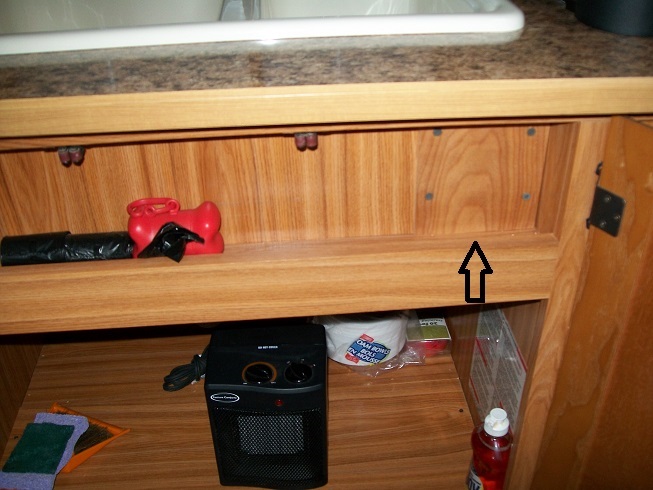
Here is were I moved it. Much better as I can see if I left the pump on and/or at certain times, easily access it from the bath door when I forget to turn it on. 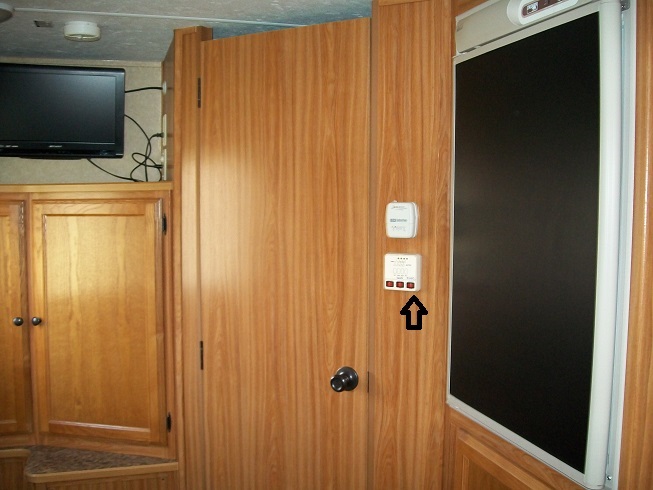
Here is the Vortex fan unit mentioned earlier: 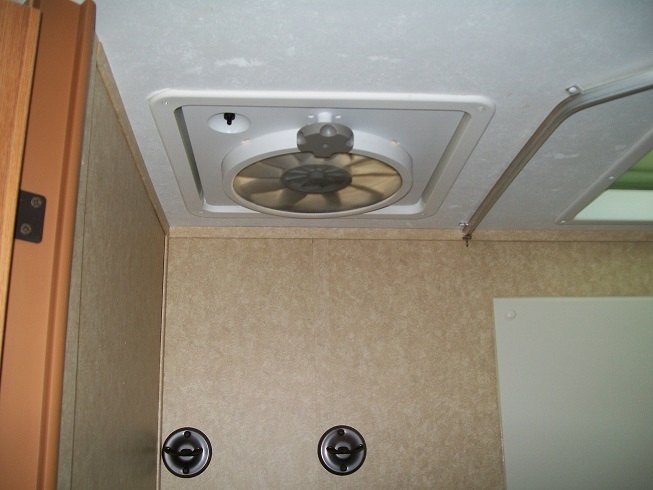
Here is my inverter with it's own circuit mounted inside of the wardrobe cabinet. 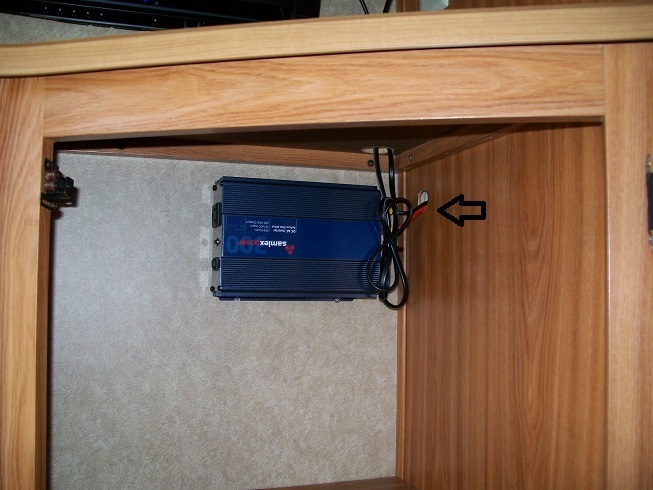
And here is the master switch for the DVD player and switch for the outdoor porch light. If I put any more switches in there, I'll have to get out the label maker. 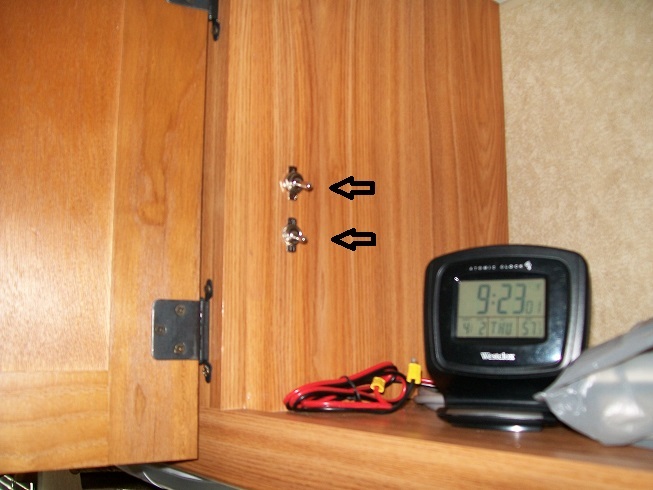
As mentioned, I have new and improved seating on the drawing board that will allow for more and adjustable reclining. I may go ahead and put a small back on the other seat (ottoman)and make it a couple of inches wider. It is 18" now and 20" would be better. I made the main seat 22" wide and will reduce it to 20" (also). |
|
|
|
|
Guests
Guest Group
|
Posted: 29 Mar 2015 at 2:22pm |
|
I'll be happy to post some pics, once I take the cover off in a couple/three weeks. I challenged myself to build everything from scraps of wood that I had in the mini-barn. I used 2X2 framing and covered that in 1/4" Luan plywood - stained to match. For the table, my neighbor had a "sink cut-out" left over from his counter top replacement project that he gave to me. It works out perfect for me. The backs of the seating could have been made shorter than I did, as they go about 6" taller than my noggin. The seat bottoms are on hinges, to access the storage. The factory seat storage was on the side so, I had to be on hands and knees to see/get whatever was in there.

Thanks for the reminder about weight distribution! |
|
|
|
|
Post Reply
|
Page 12> |
| Forum Jump | Forum Permissions You cannot post new topics in this forum You cannot reply to topics in this forum You cannot delete your posts in this forum You cannot edit your posts in this forum You cannot create polls in this forum You cannot vote in polls in this forum |


 Some stuff I've done
