
|
My 2014 172 podmods |
Post Reply 
|
Page <1234> |
| Author |
 Printable Version Printable Version Google Google Delicious Delicious Digg Digg StumbleUpon StumbleUpon Windows Live Windows Live Yahoo Bookmarks Yahoo Bookmarks reddit reddit Facebook Facebook MySpace MySpace Newsvine Newsvine Furl Furl Topic Search Topic Search  Topic Options Topic Options
|
abikerider 
Newbie 

Joined: 25 Dec 2022 Location: CA Online Status: Offline Posts: 25 |
 Post Options Post Options
 Quote Reply Quote Reply
 Topic: My 2014 172 podmods Topic: My 2014 172 podmodsPosted: 04 May 2023 at 2:54am |
|
I tried to get the old Dometic 3 way fridge working but it was a lost cause and would have cost more than I spent on a replacement. I decided to go with a 12 volt Everchill for about half the price of a new Dometic 3 way. It was around $600. I figure I can buy some Lithium ion batteries with the money I saved. I also fabricated my own solid covers to replace the fridge vents since the 12 volt fridge does not need the ventilation. It's kind of crazy that no one makes this considering how 12 volt fridges are getting more popular. I'll try to post some pics of the covers I made.
|
|
 |
|
|
abikerider
Newbie
Joined: 25 Dec 2022 Location: CA Online Status: Offline Posts: 25 |
Post Options
Quote Reply
Posted: 04 May 2023 at 2:46am |
|
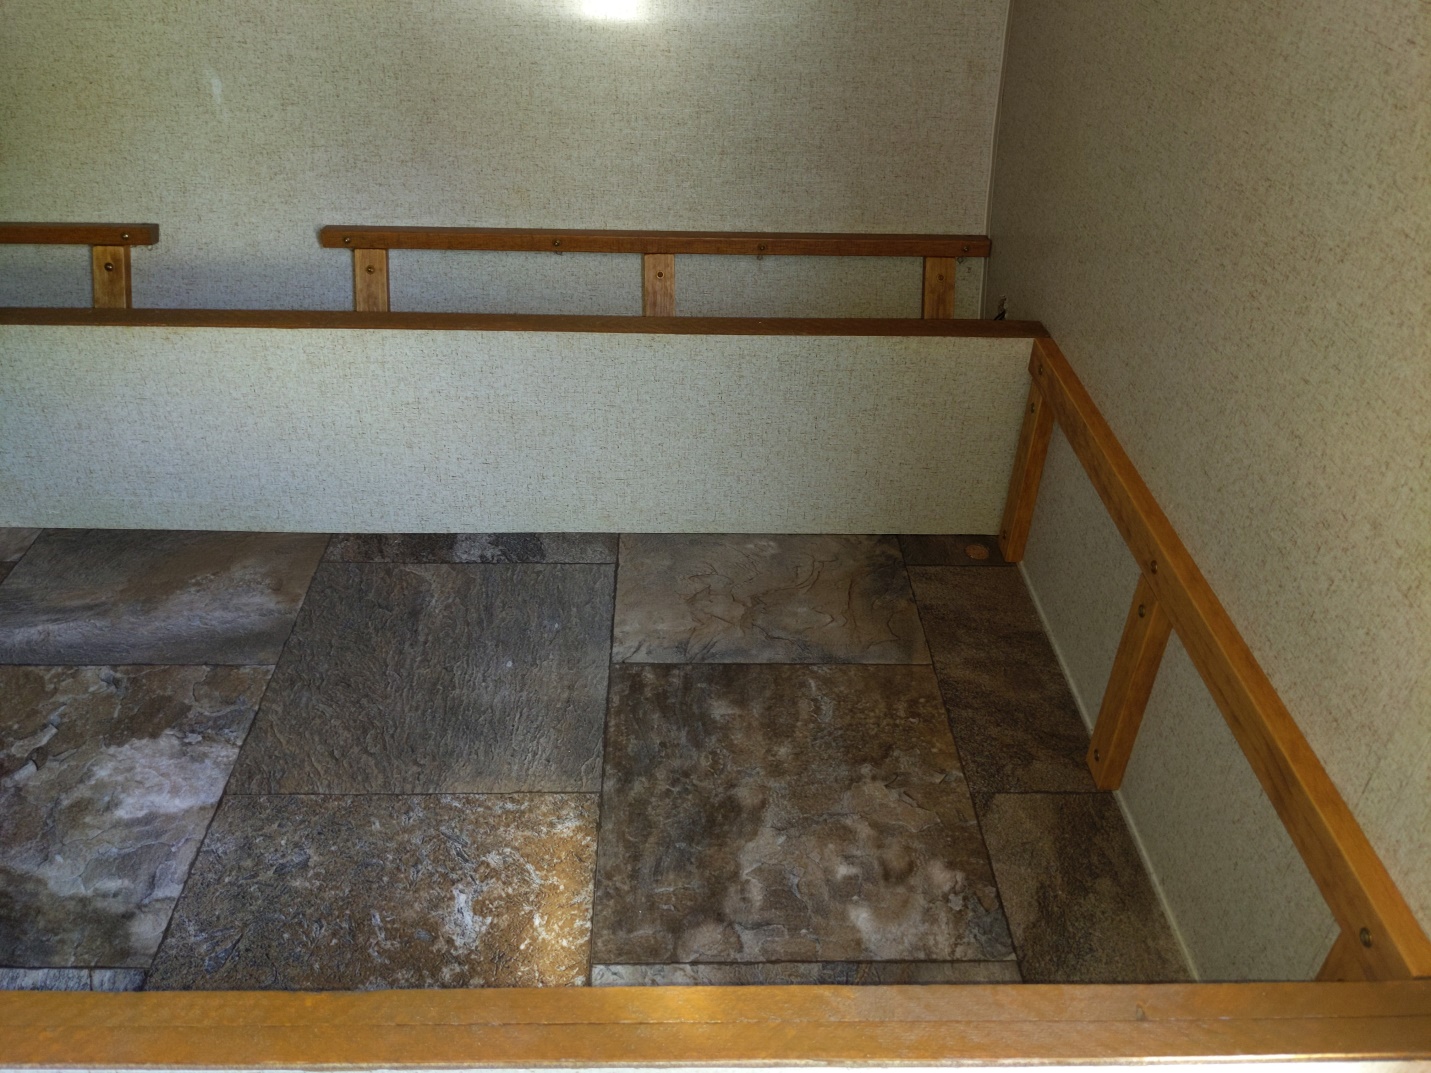
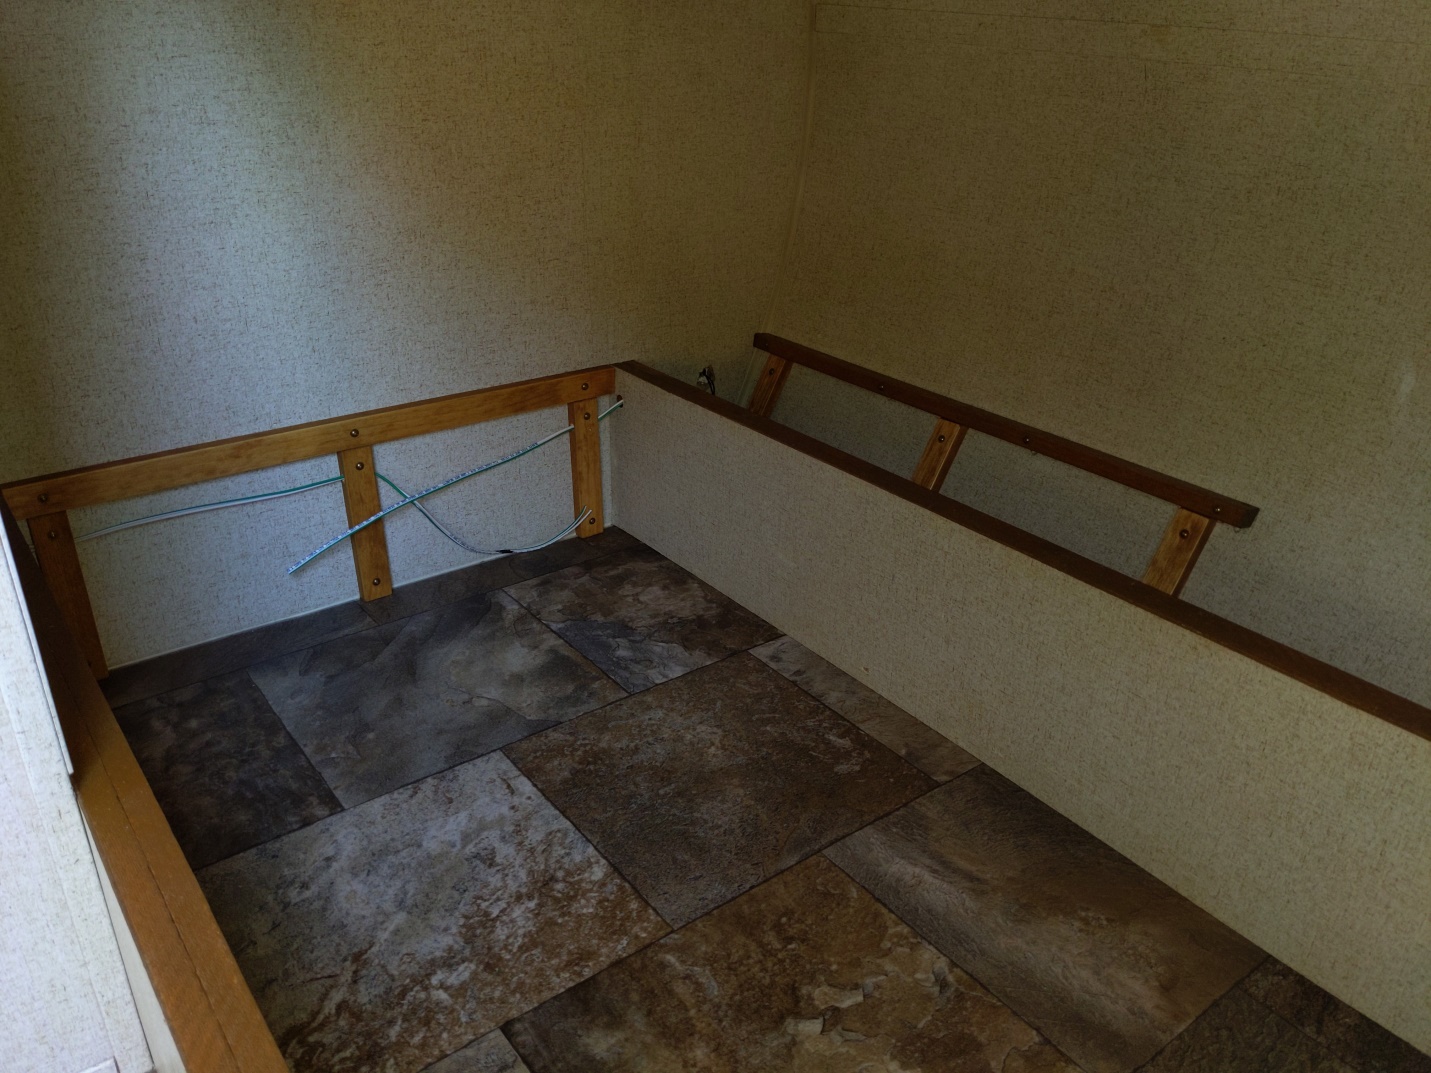
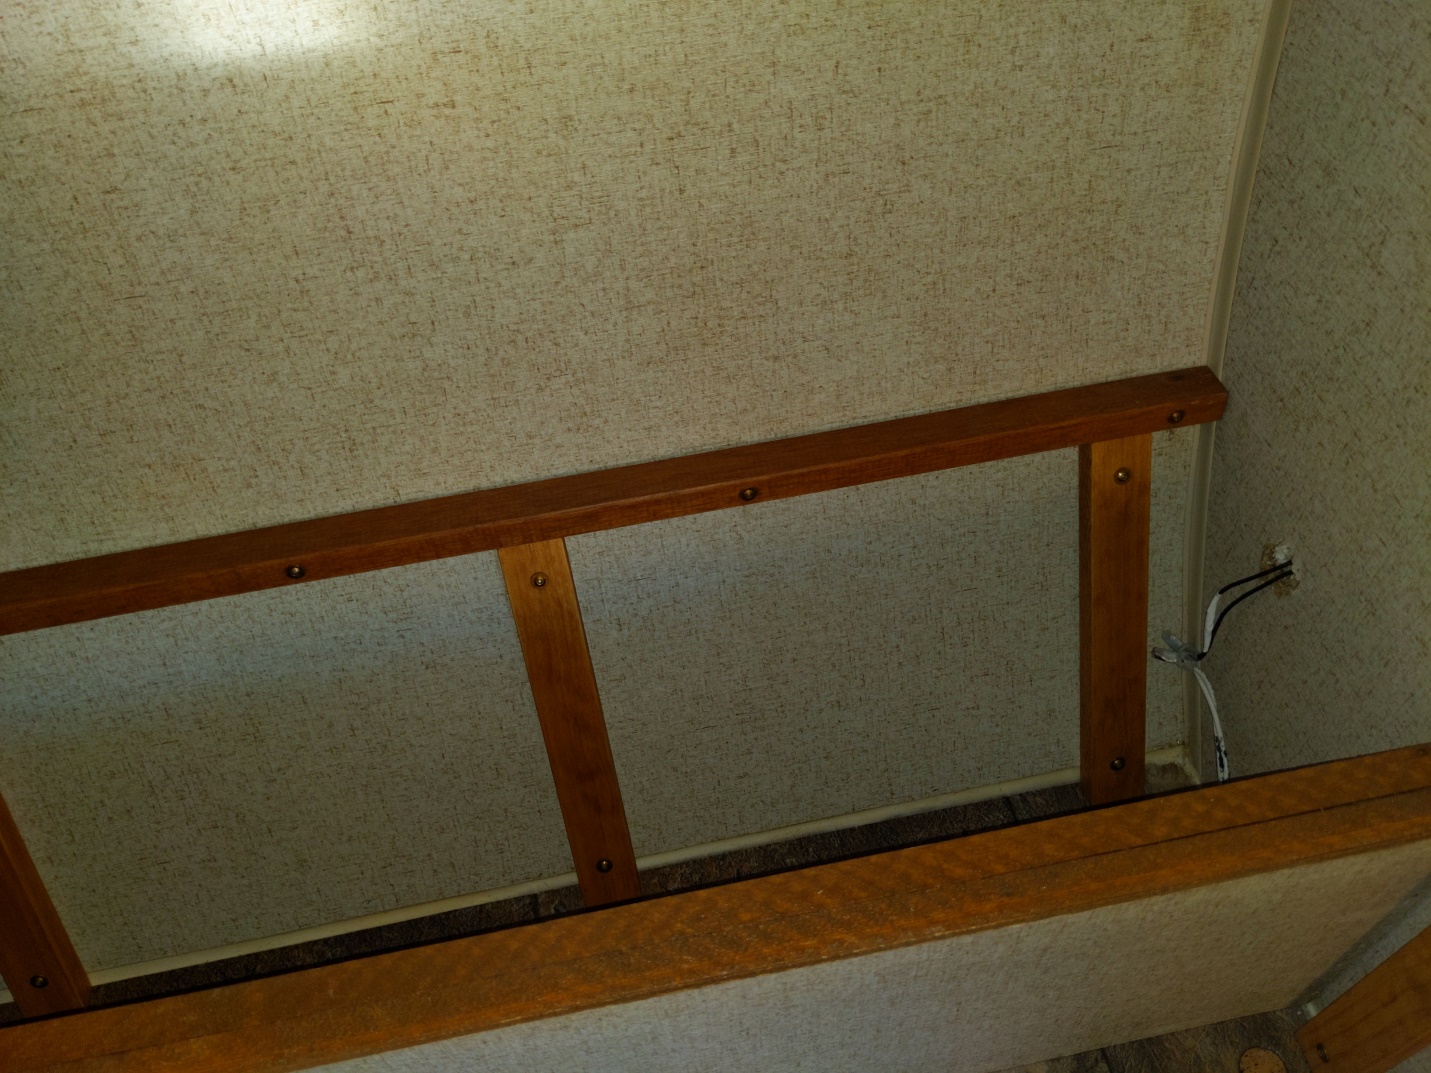
I also decided the lower bunk did not have adequate support. The side supports were pulling out of the walls! Here's my remedy. The front wall was tricky with the odd angles. I think I ended up doing 22 degree cuts if I remember correctly. A table saw came in very handy.
    v
|
|
|
|
|
abikerider
Newbie
Joined: 25 Dec 2022 Location: CA Online Status: Offline Posts: 25 |
Post Options
Quote Reply
Posted: 04 May 2023 at 2:37am |
|
I also removed the bathroom sink as it was pretty useless and took up valuable space. I'm posting pics of the process in the hope that it will help others to do the same. I have seen others do this but with very few pictures that show the process.
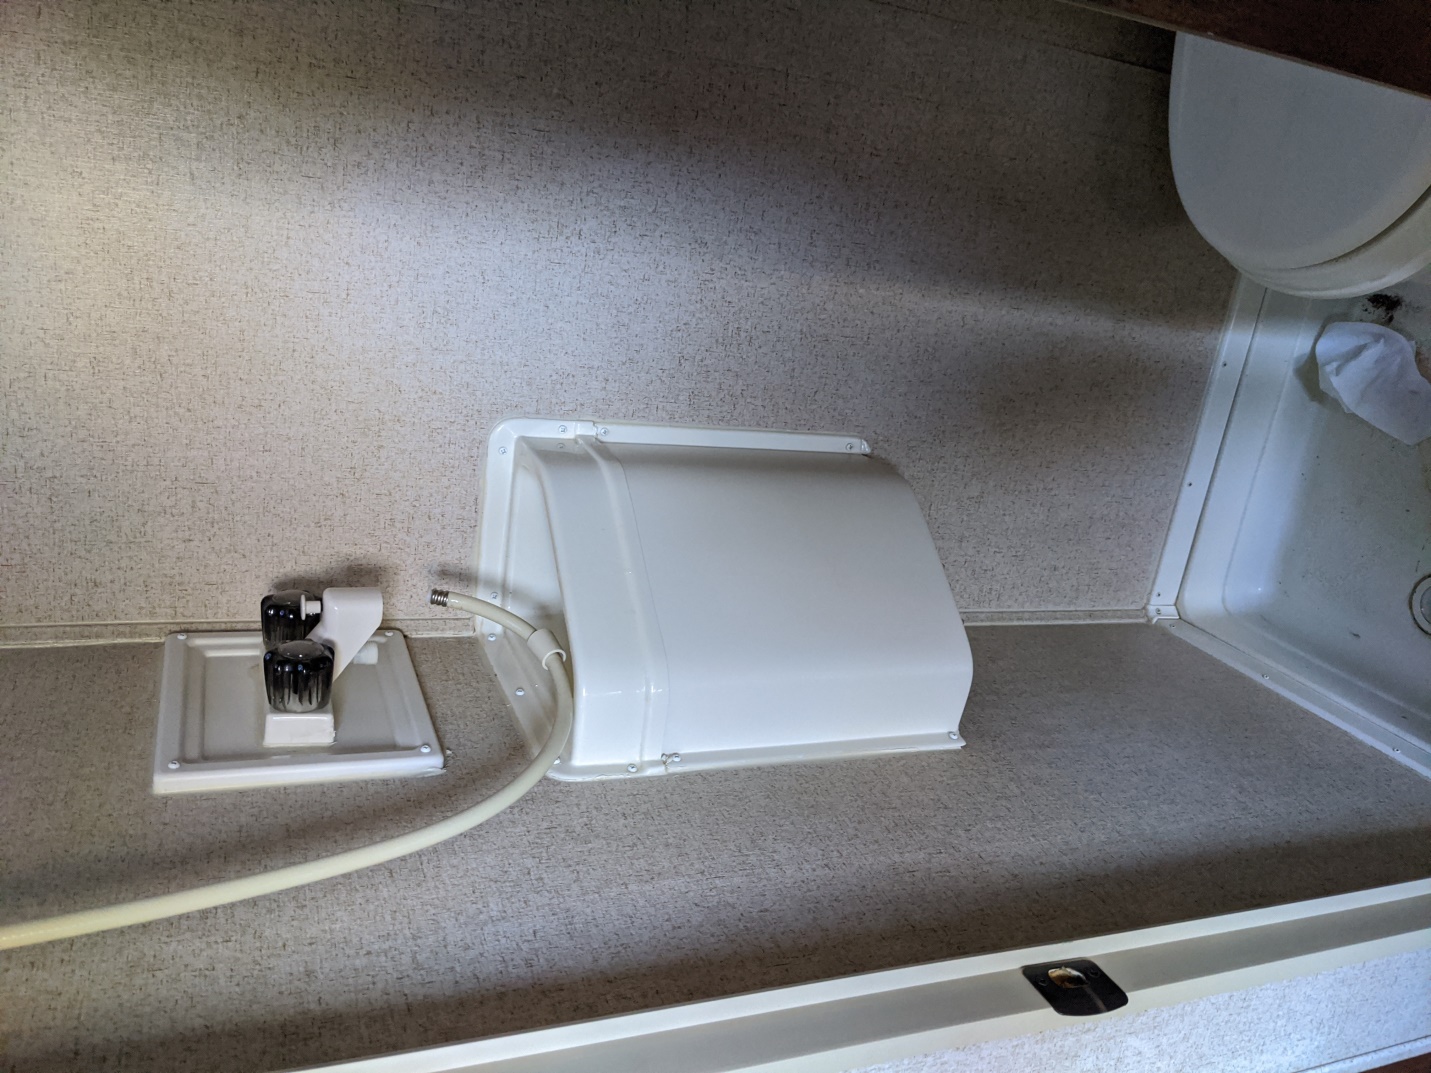  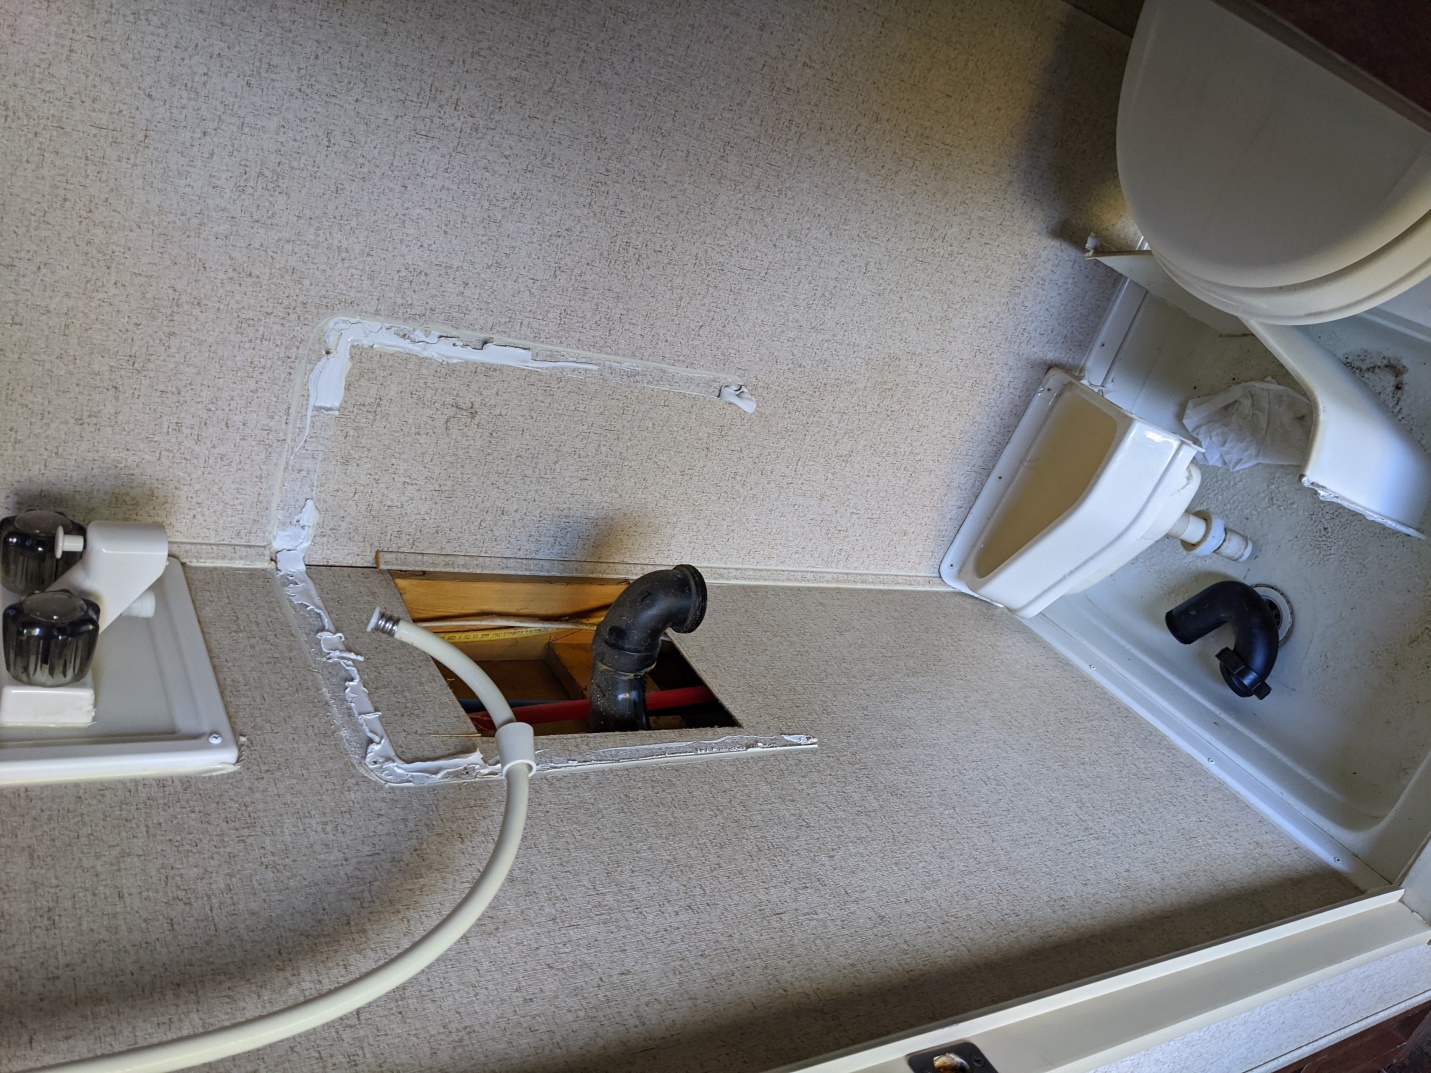 I had to cap off this drainpipe. I ended up cutting it right at the hub of the elbow and used a rubber cap to seal it.I had to widen the opening to get the saw in there. 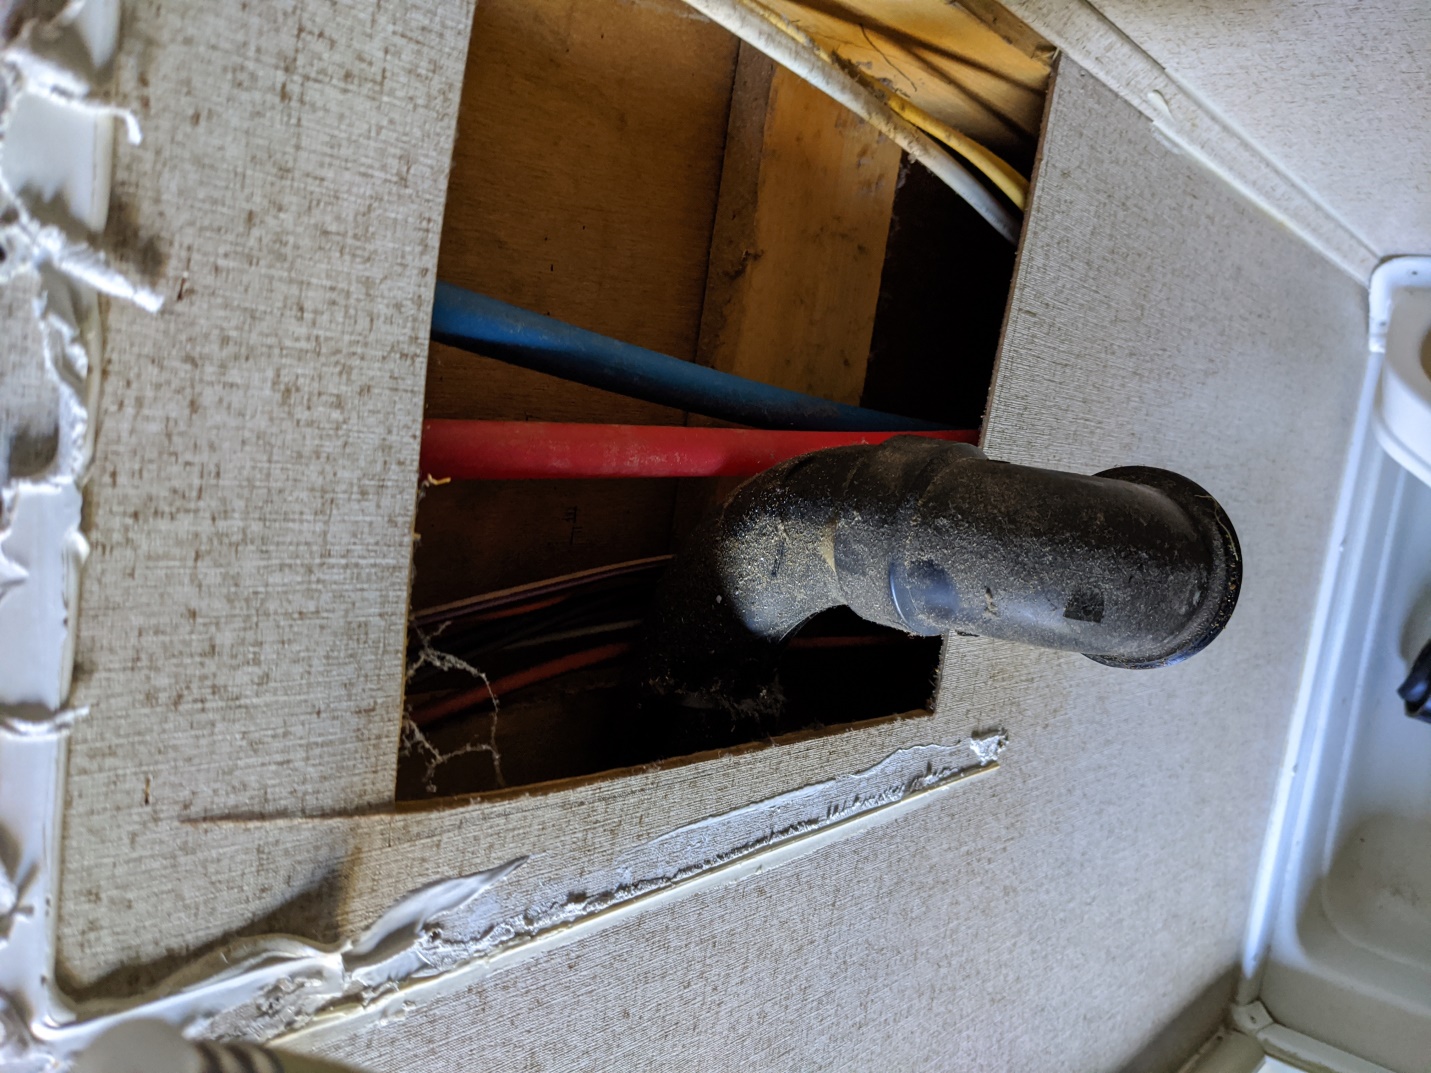  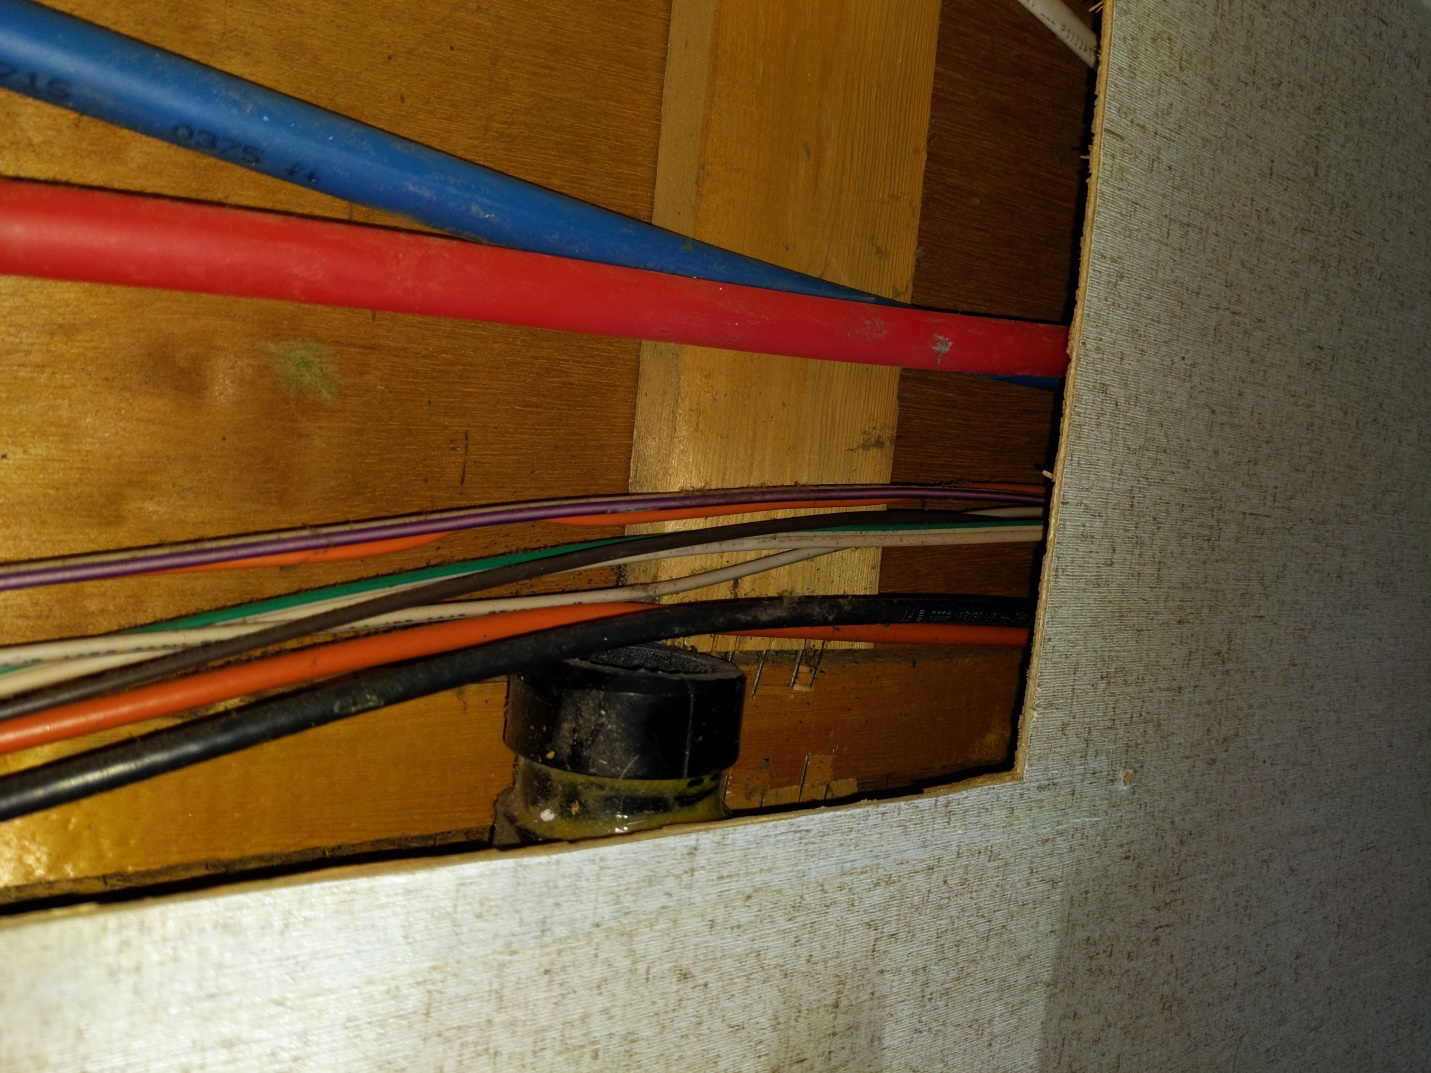 Don't worry, I used a hose clamp to keep it in place.  I found this matching piece of wall behind the broken refrigerator and carefully cut it to size since I did not have a second chance. 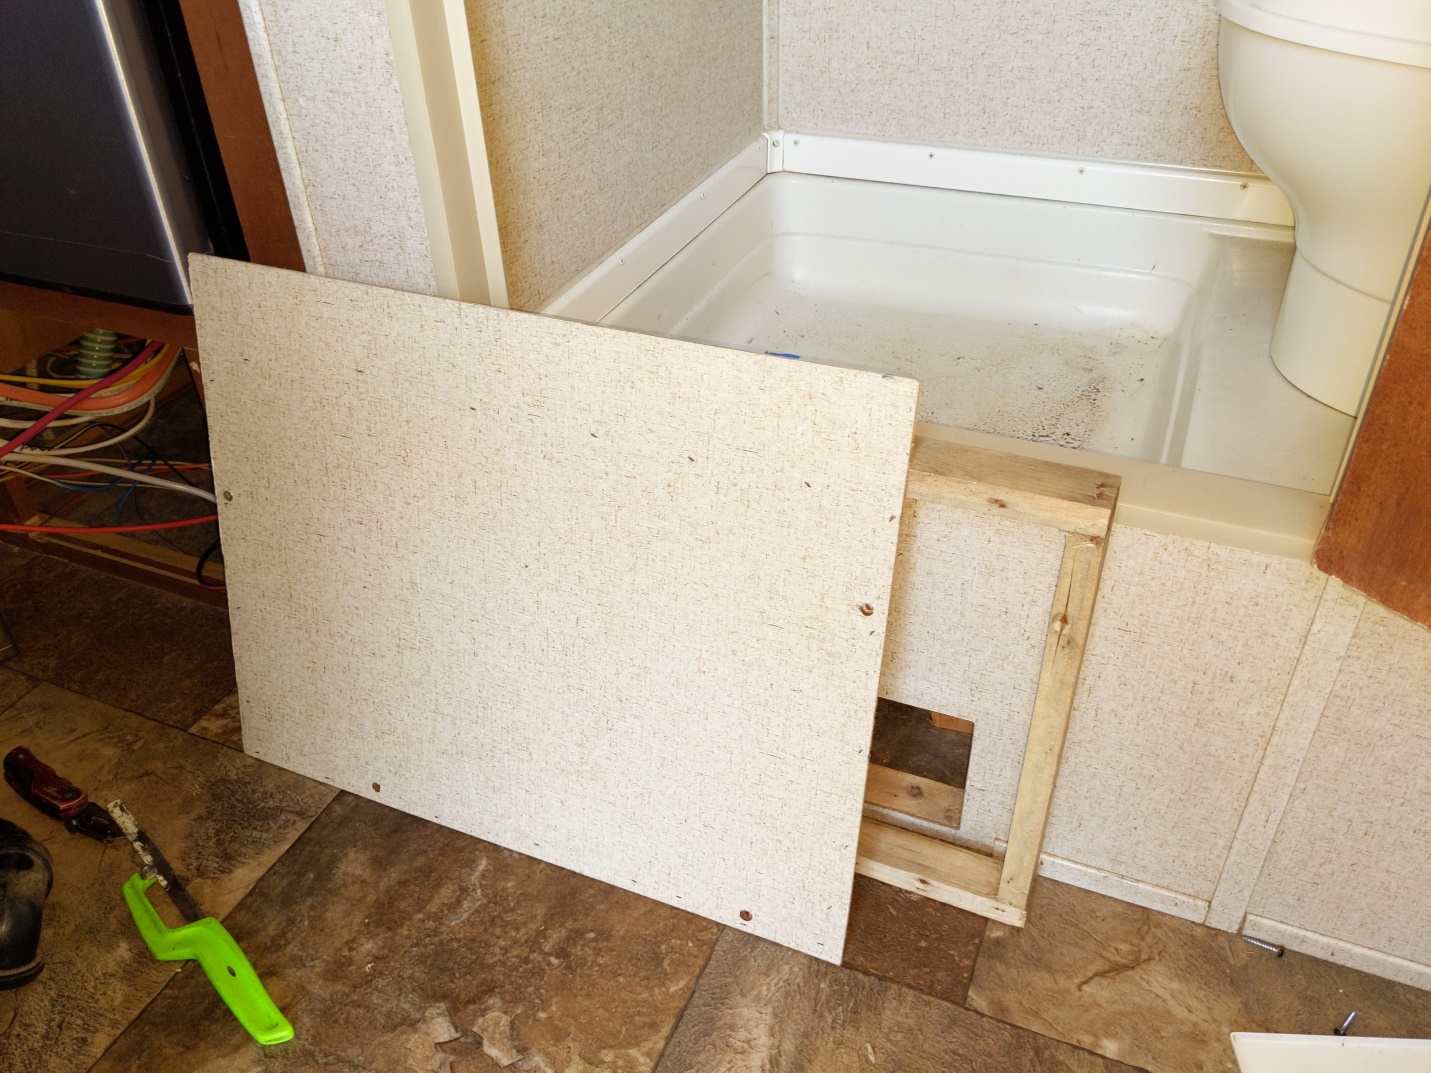 Here's the rubber cap with the hose clamp on it. 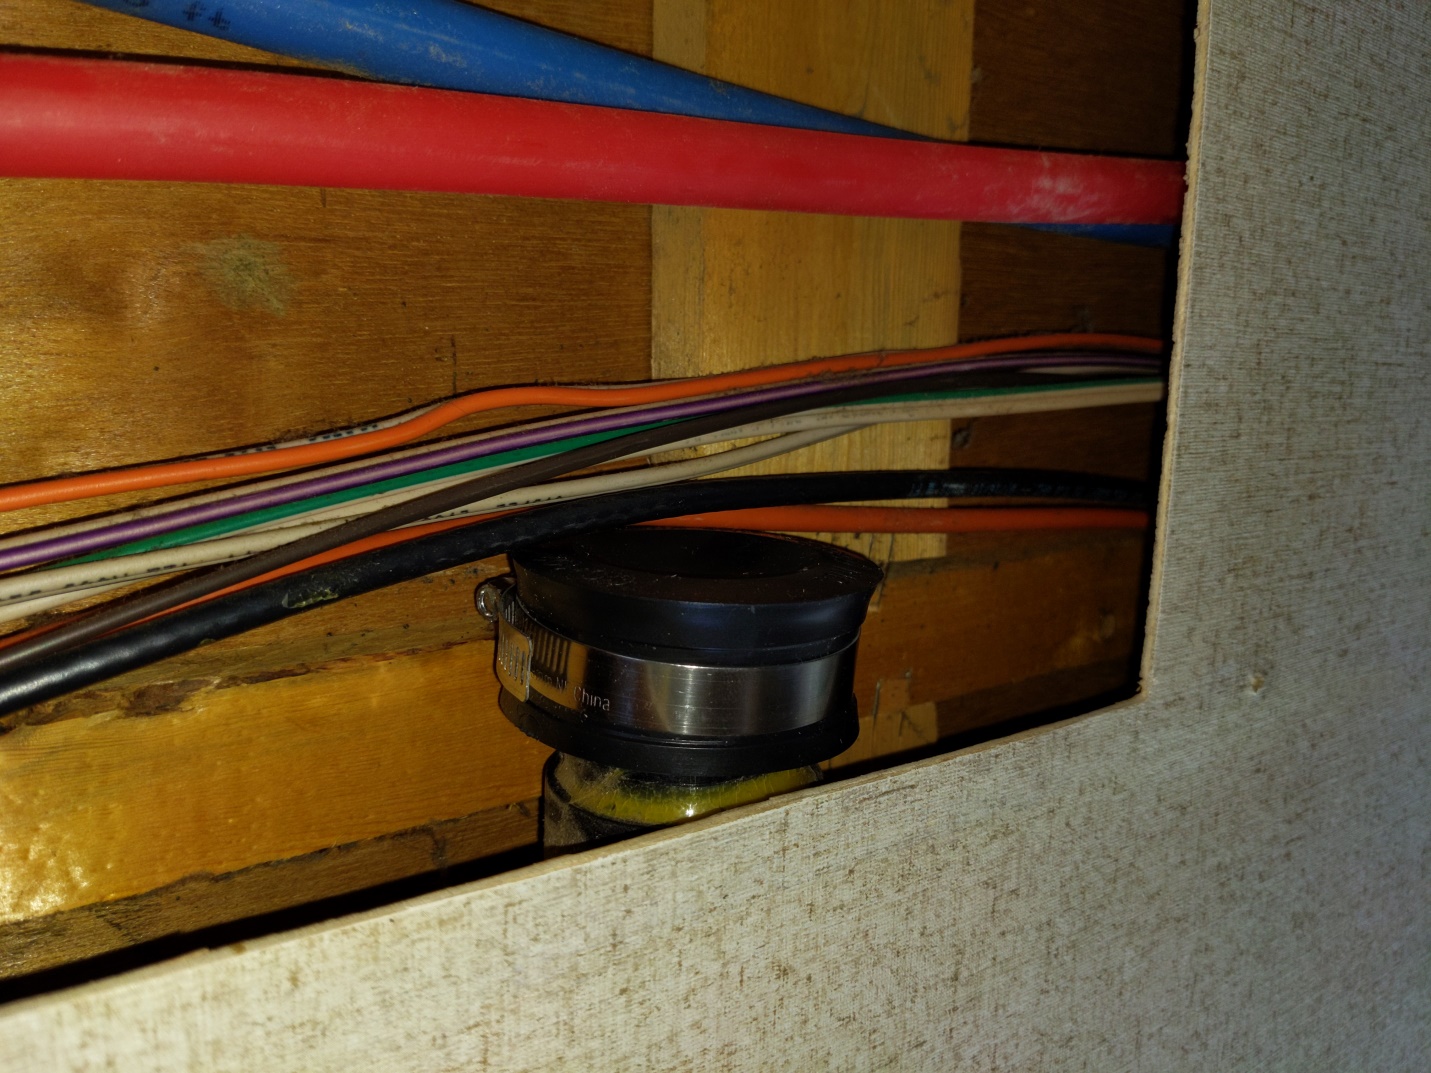 After squaring up the hole (a utility knife works really well on this thin stuff), I glued and clamped these pieces of 1 x 3 around the perimeter so that I could glue the new piece in there. 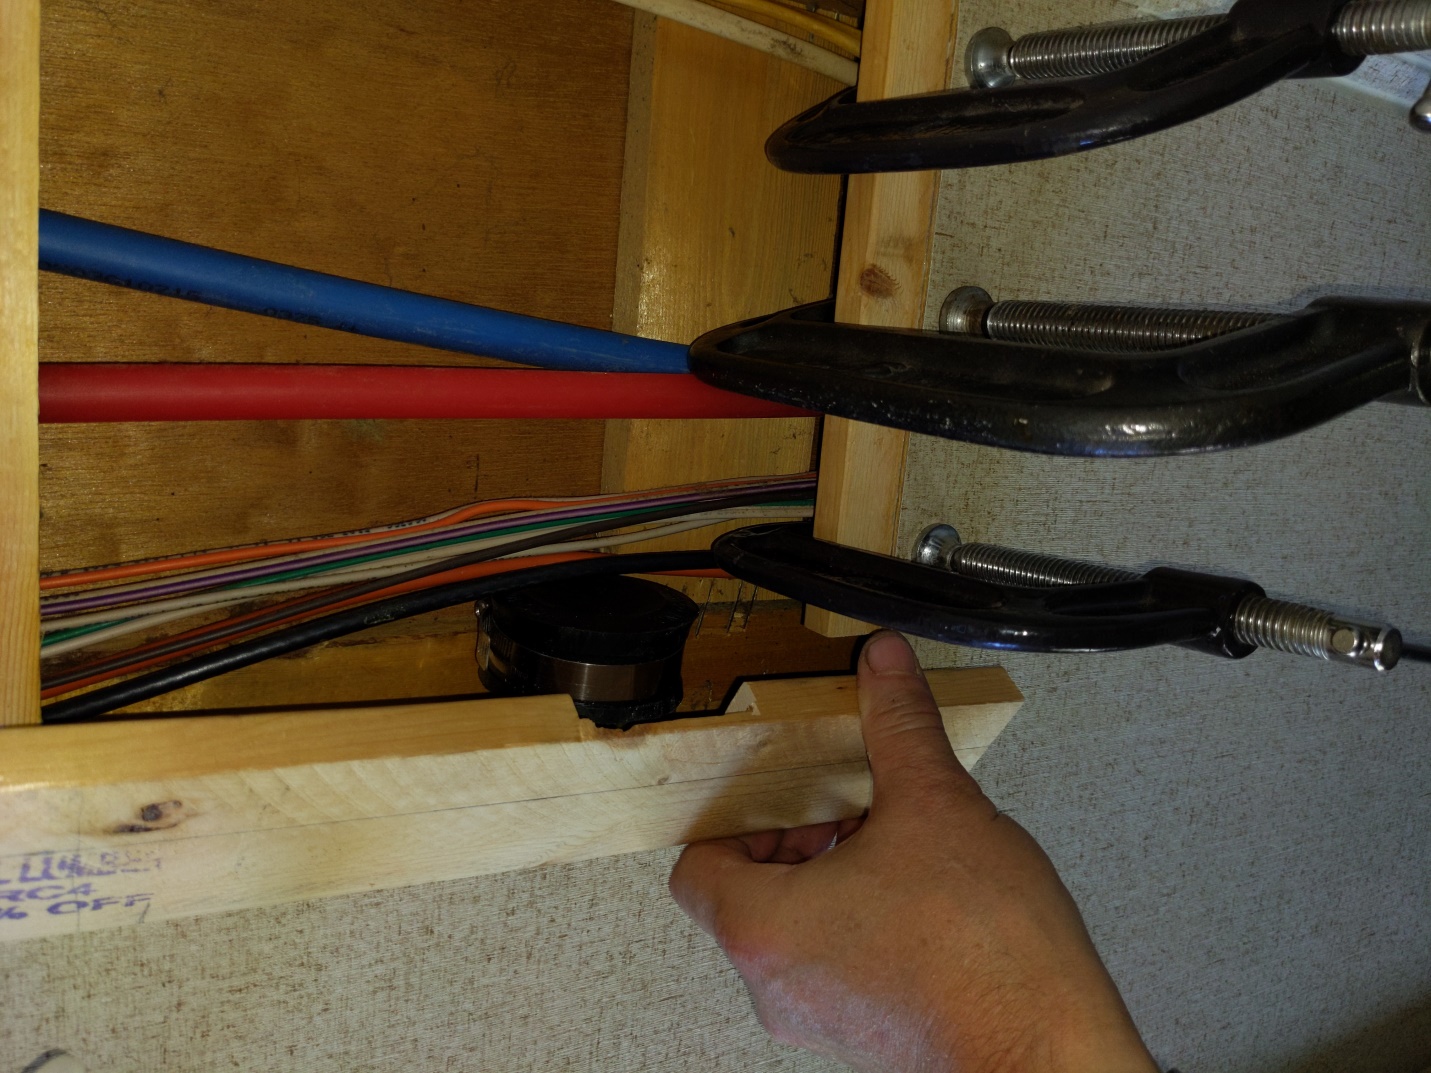 Here it is all glued into place. It doesn't match exactly, but it's good enough for me. I also need to put in some kind of corner molding since the one in there has a big gap. 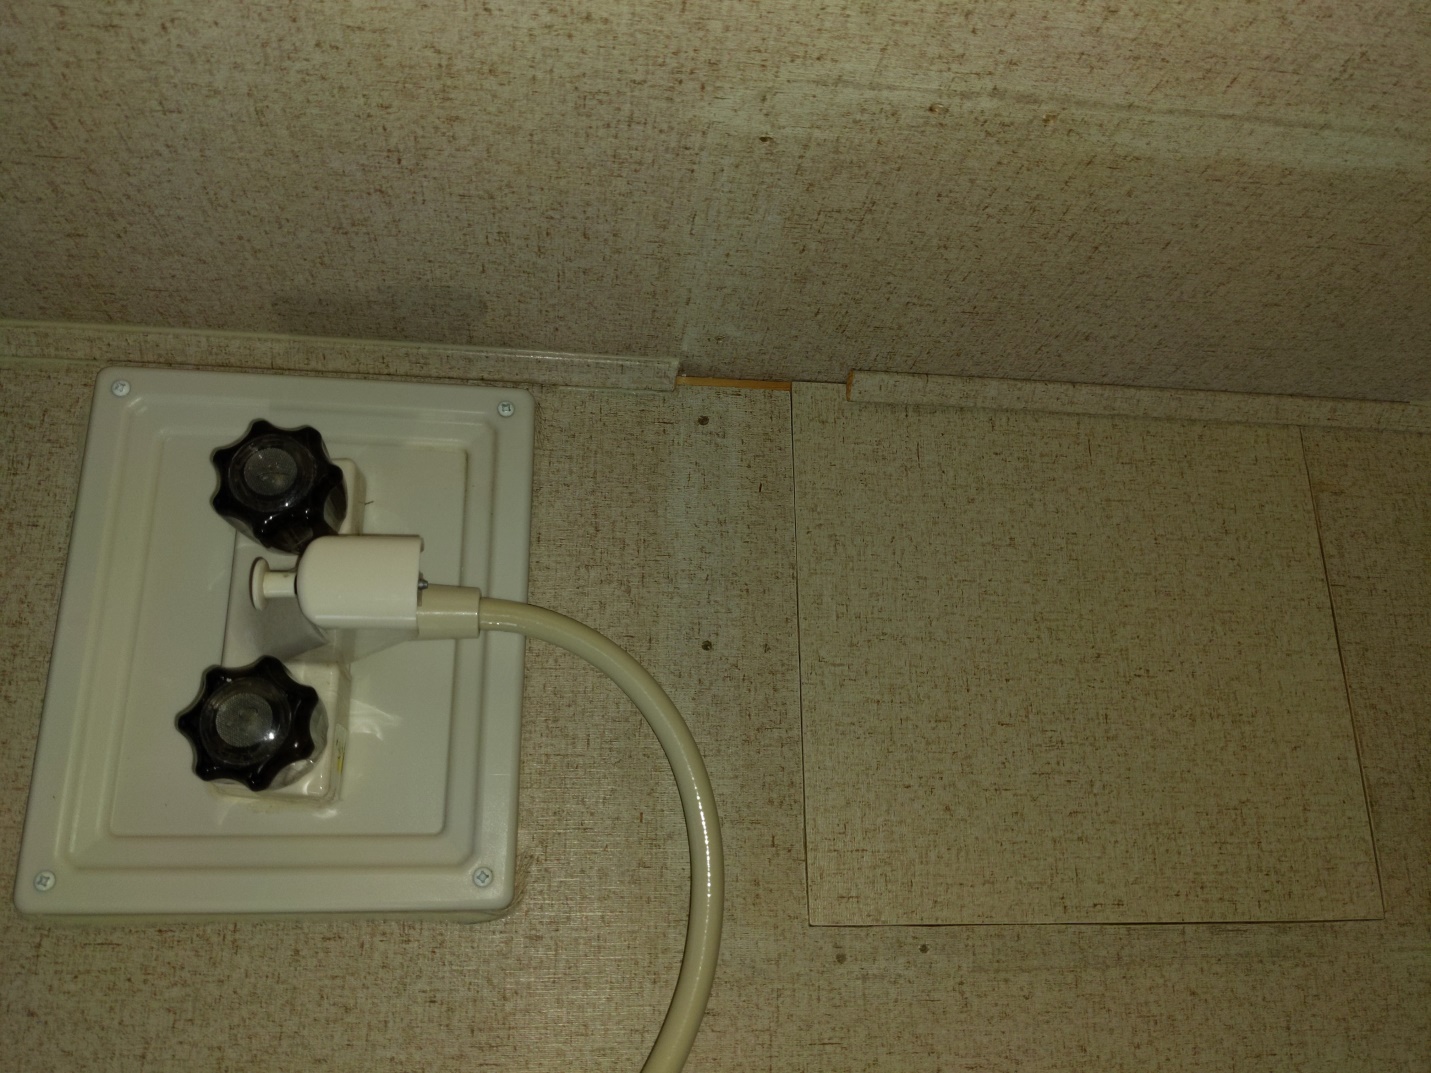 This is what I used to caulk it.  |
|
|
|
|
abikerider
Newbie
Joined: 25 Dec 2022 Location: CA Online Status: Offline Posts: 25 |
Post Options
Quote Reply
Posted: 04 May 2023 at 2:10am |
|
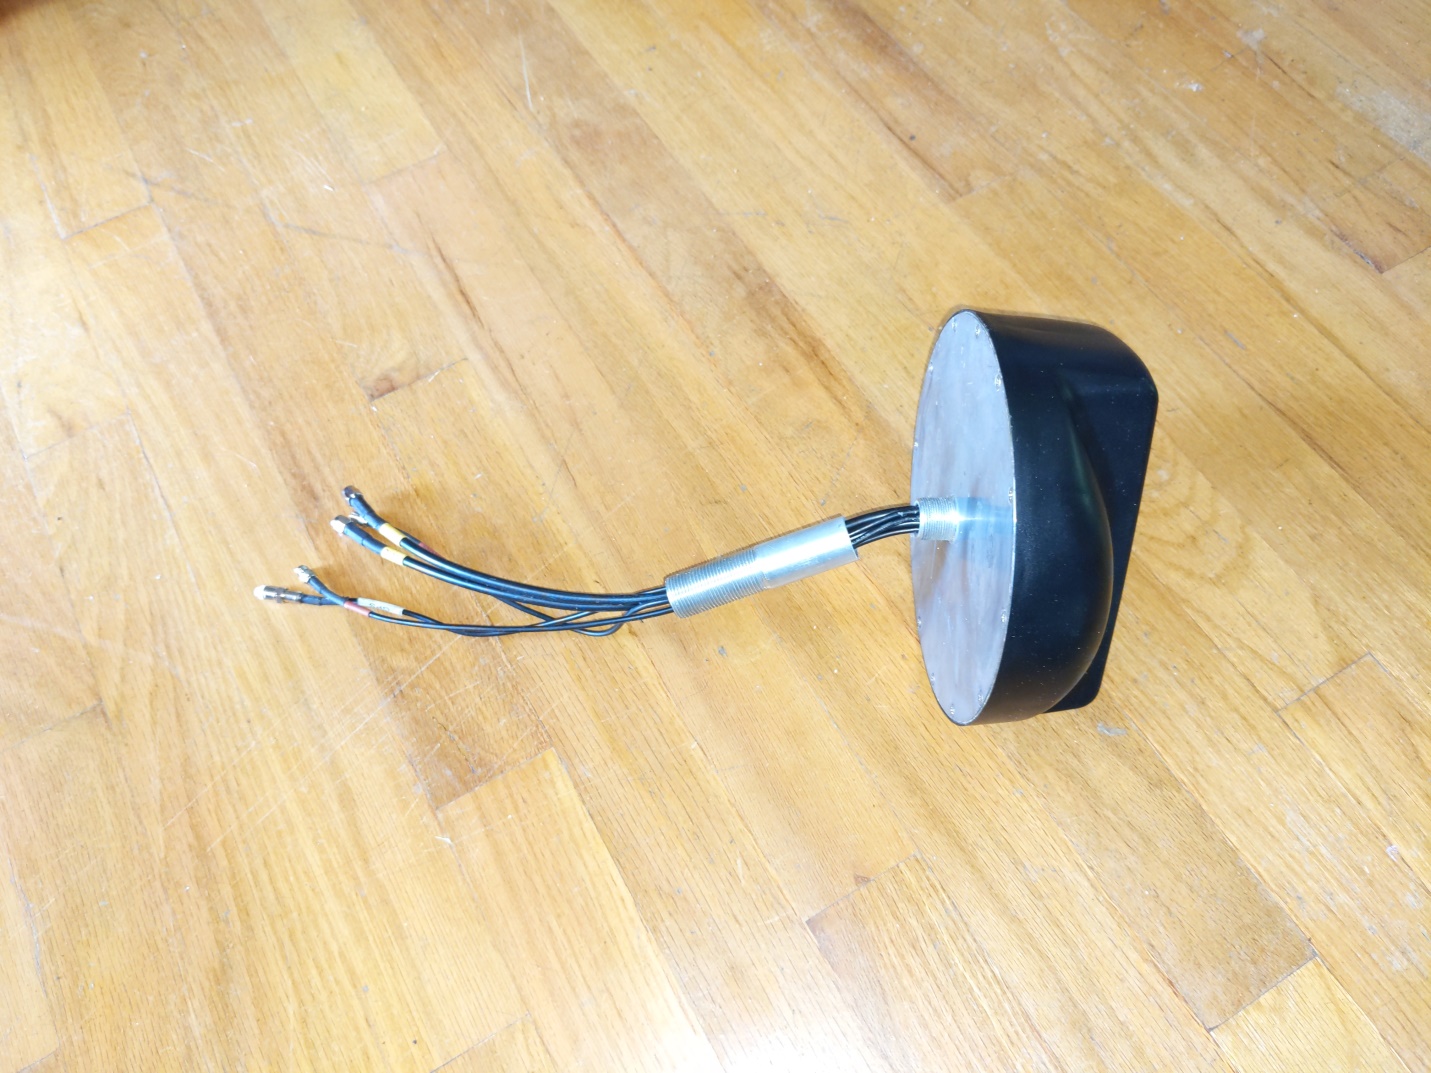
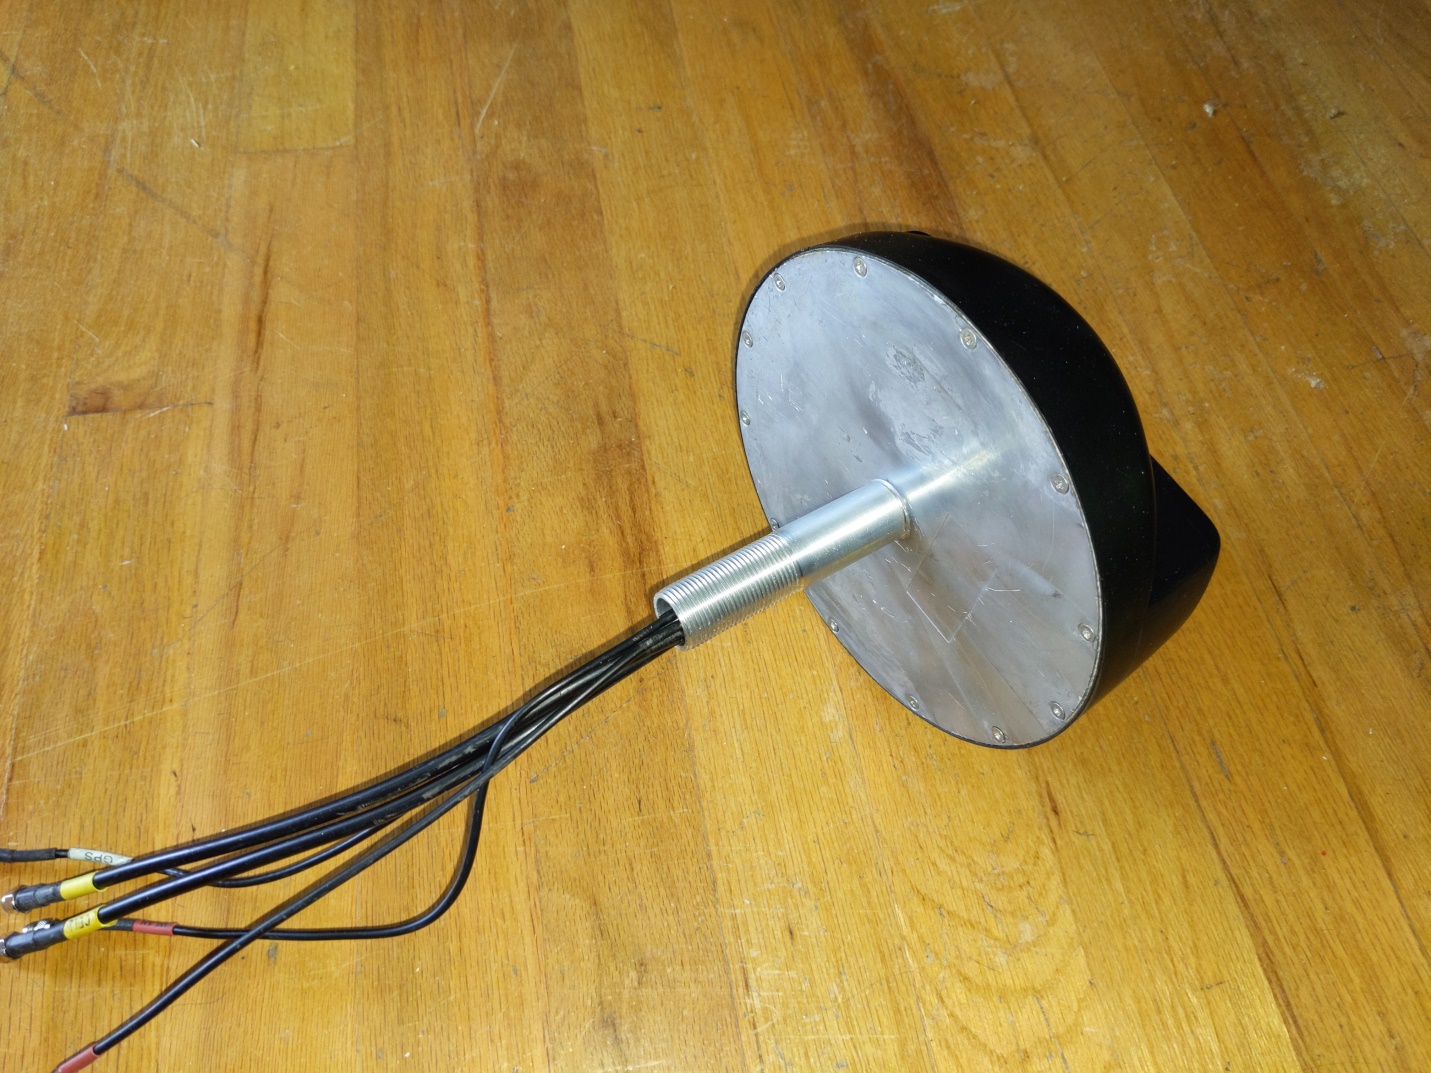
The TV antenna was very corroded and had started to leak water so I removed it and put in a Panorama combination Wifi/cellular/GPS antenna. We really don't watch TV but we do like our Internet. Because this antenna is made for thinner roofs and the extender offerred by the manufacturer still was not long enough, I had to fabricate my own 80mm mount extension. Here's some pics of it. It was not easy to make since it required some very fine and large metric taps and dies to fabricate. Let me know if you'd like me to make one for you. I have all the tools now.
   v
|
|
|
|
|
abikerider
Newbie
Joined: 25 Dec 2022 Location: CA Online Status: Offline Posts: 25 |
Post Options
Quote Reply
Posted: 04 May 2023 at 2:02am |
|
Some other things I did to the outside when weather permitted was remove and re-caulk the right side roof where it meets the side molding using geocell, gradually replace every screw with stainless steel ones, remove and re-apply Dicor self leveling compound to the fantastic fan and plumbing vents, remove flaking and rusty paint from the frame and coat with Rustoleum enamel, and remove some of the decals on the front, rear, and right side that were peeling. Those stickers were a b*tch to remove.
Also replaced corroded door and storage locks, step handle, front outside light (bad switch), new safety chains (old ones were very rusty), dual propane tank mounts and cover, propane regulator and hoses, aluminum diamond plate battery box, new end caps on original sewer hose storage tube, new 15' Rynoflex sewer hose and longer second storage tube, new wheels and tires ( it had the original 10 year old tires on corroded rims without a spare, and a spare tire holder on back (it was missing and I had to adapt one off of Amazon).
|
|
|
|
|
abikerider
Newbie
Joined: 25 Dec 2022 Location: CA Online Status: Offline Posts: 25 |
Post Options
Quote Reply
Posted: 04 May 2023 at 1:21am |
|
Here I am measuring twice and cutting once.
      I rounded the corners of the flip-up counters using my router. I think it looks pretty good. It's a huge improvement over the stock countertop. |
|
|
|
|
abikerider
Newbie
Joined: 25 Dec 2022 Location: CA Online Status: Offline Posts: 25 |
Post Options
Quote Reply
Posted: 04 May 2023 at 1:06am |
|
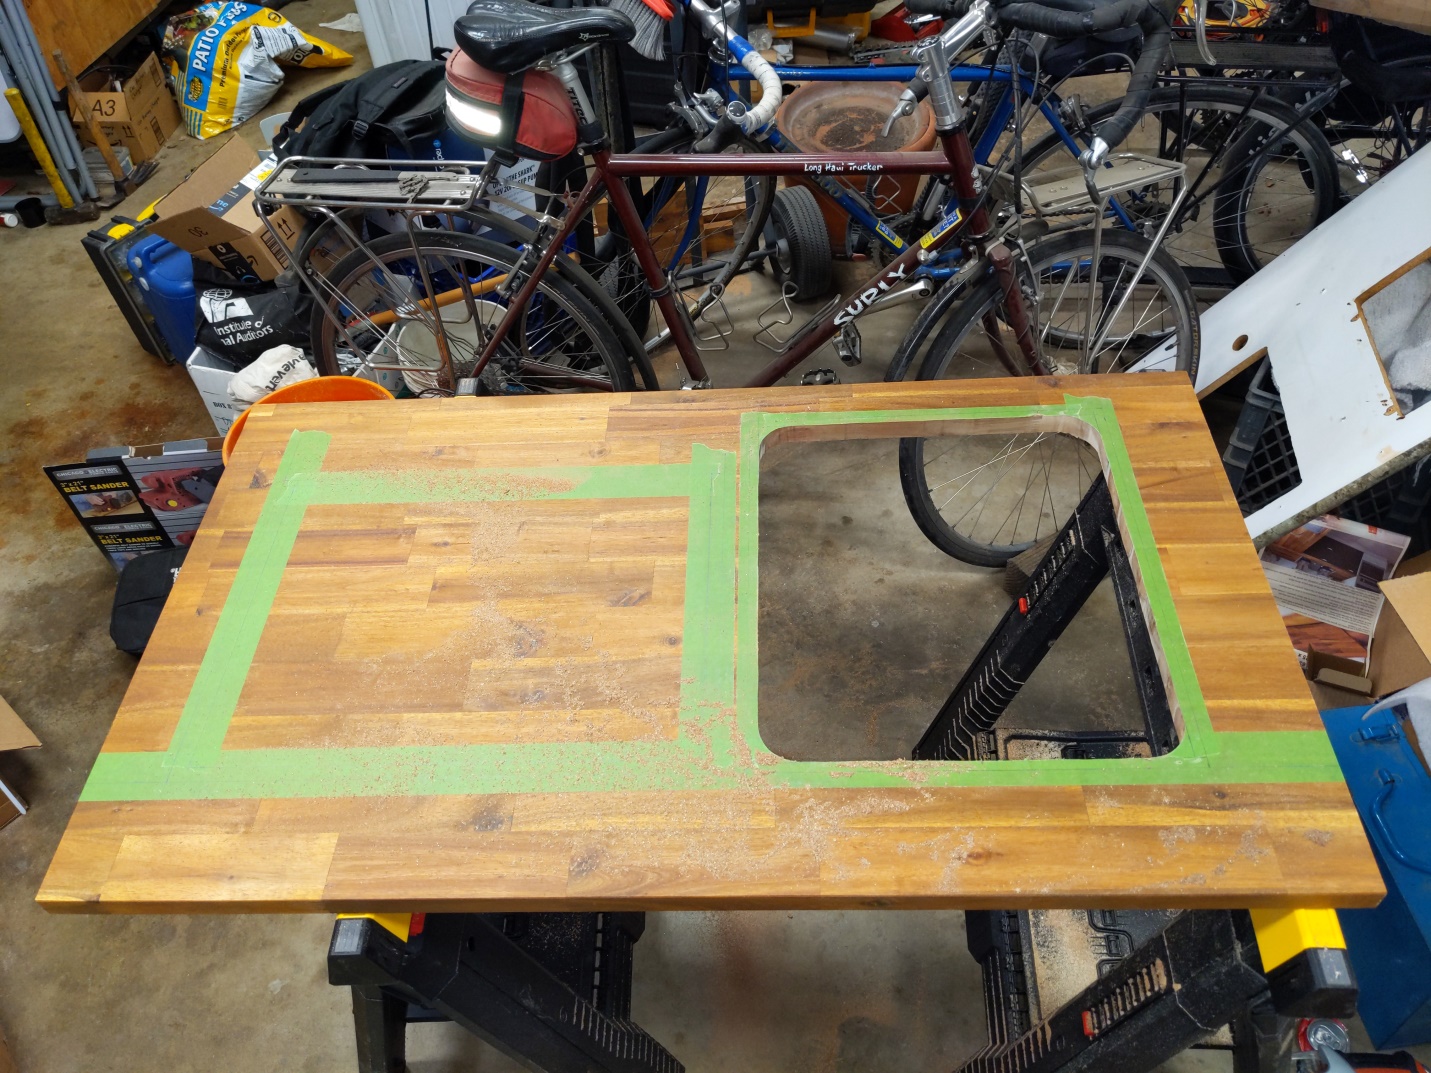
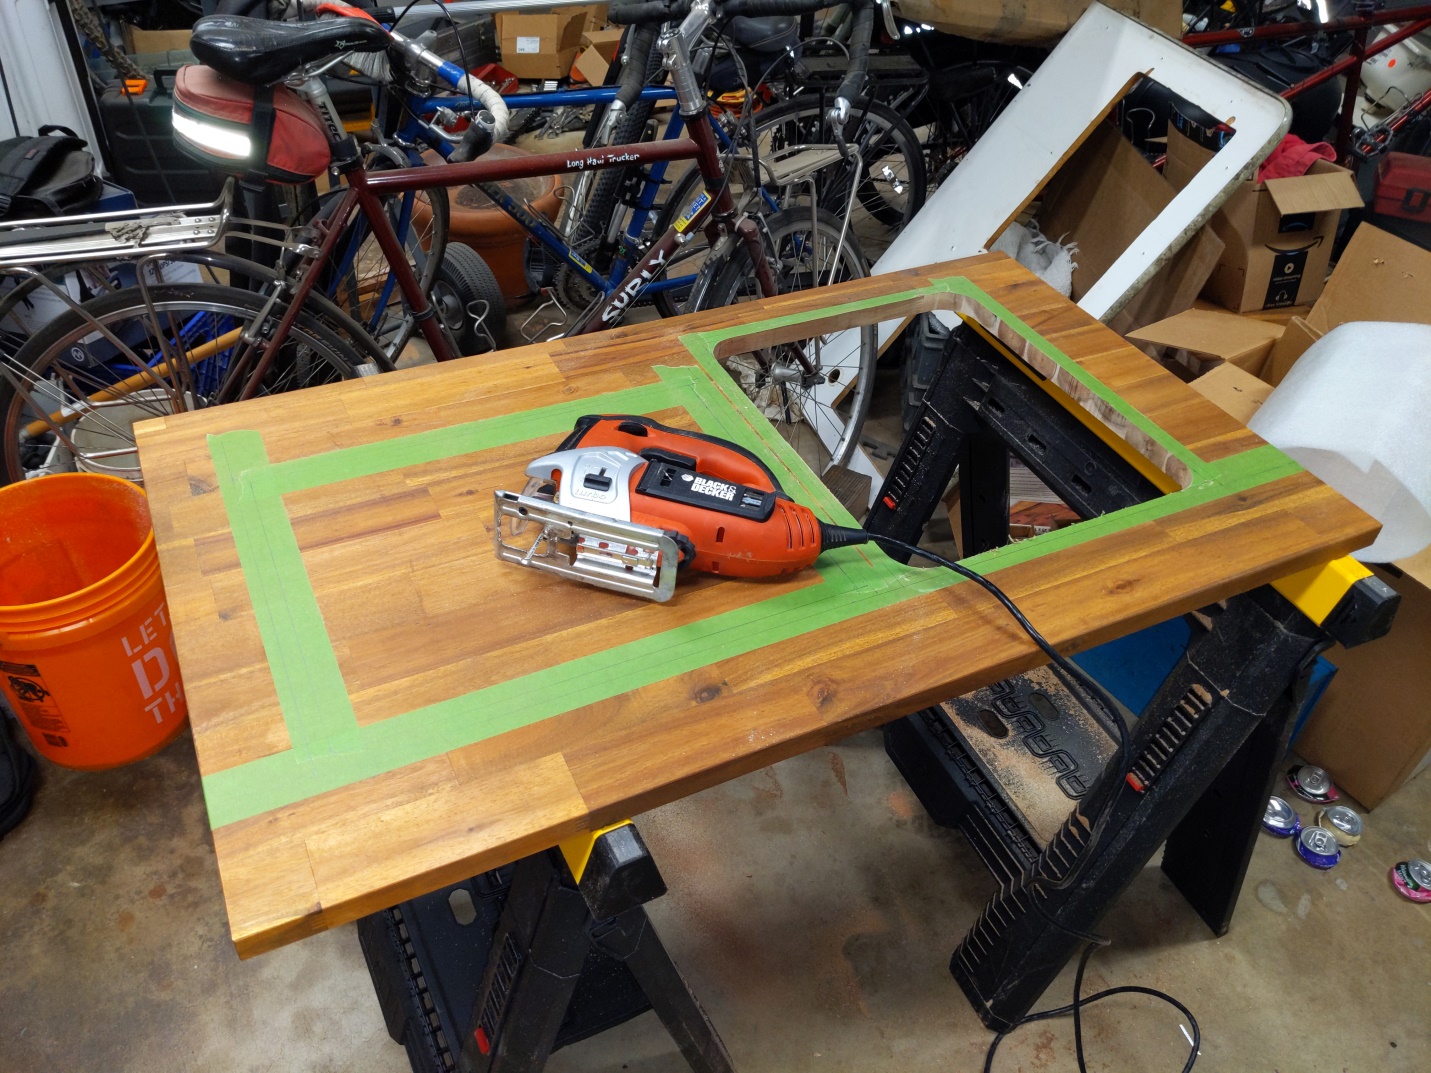
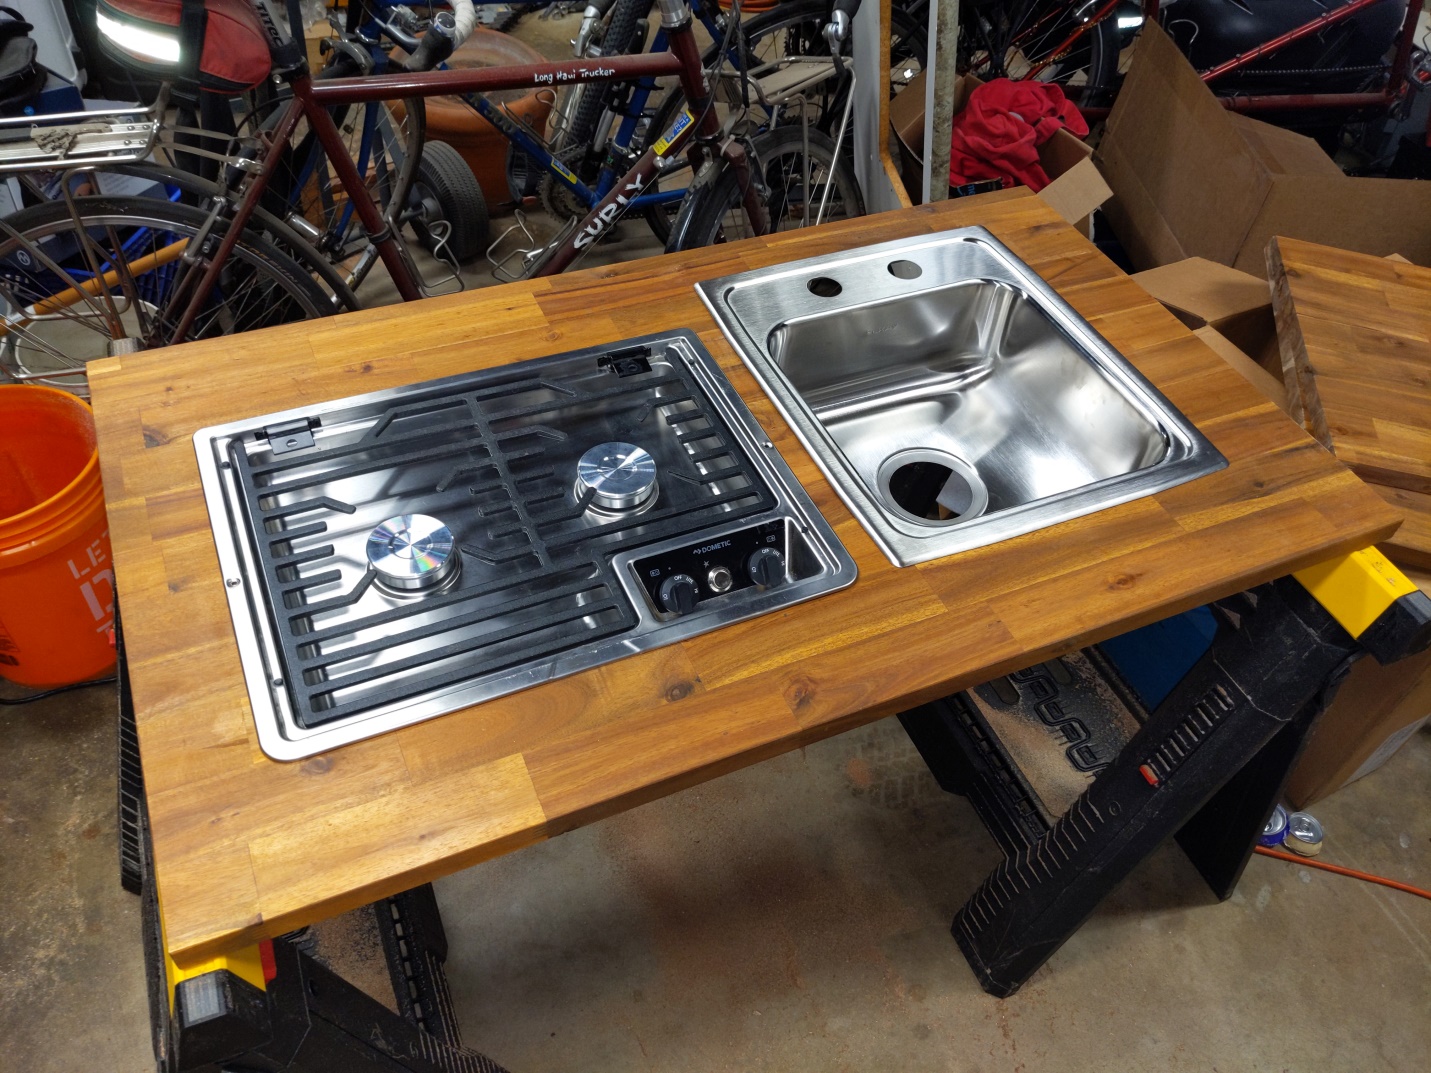
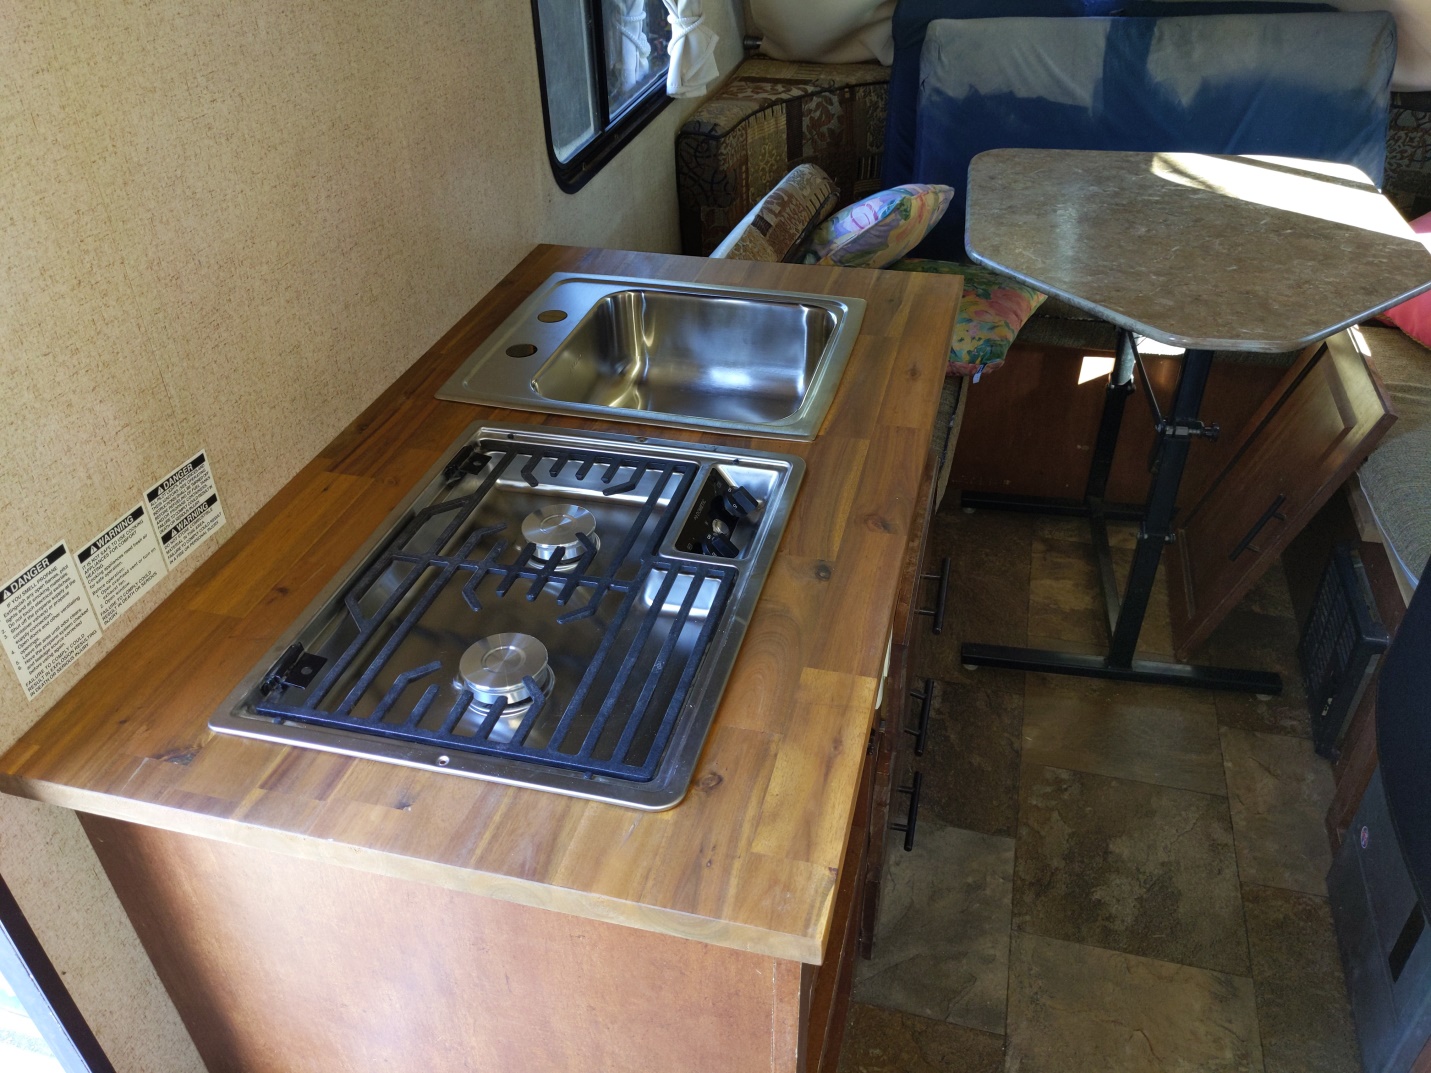
The first thing I decided to do was get rid of that awful laminate countertop and dinette table and replace it with something nice. I found this 1" x 25" x 72" butcherblock at Home Depot for $159 and bought two.
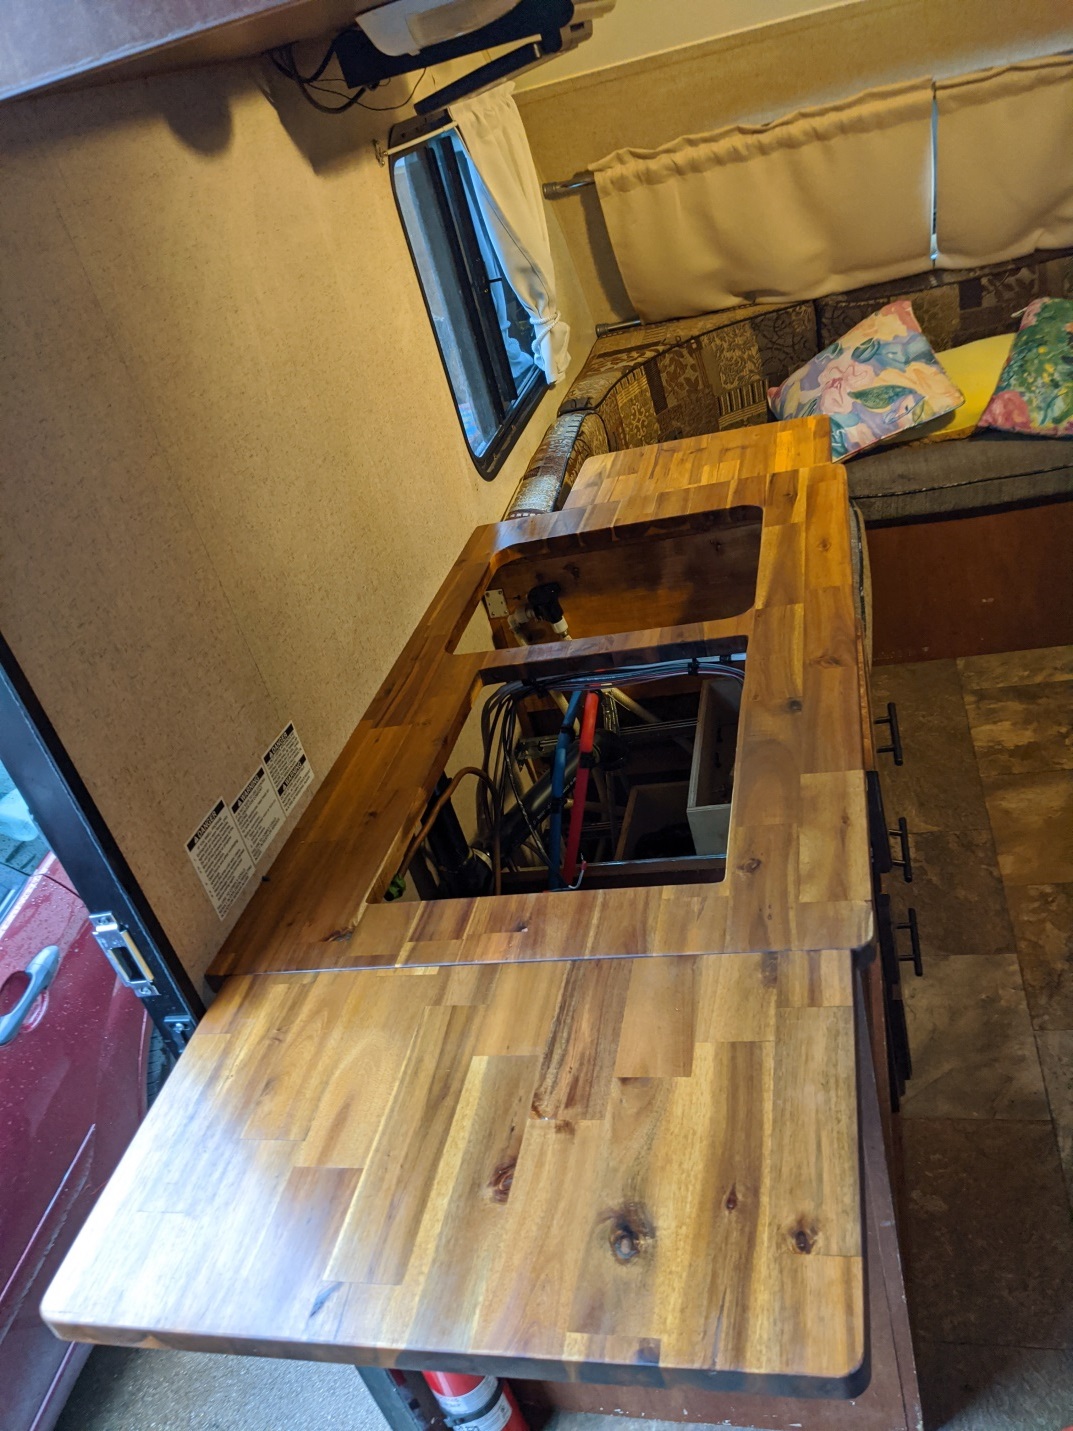
https://www.homedepot.com/p/Interbuild-6-ft-L-x-25-in-D-Acacia-Butcher-Block-Standard-Countertop-in-Golden-Teak-with-Square-Edge-675781/317198293 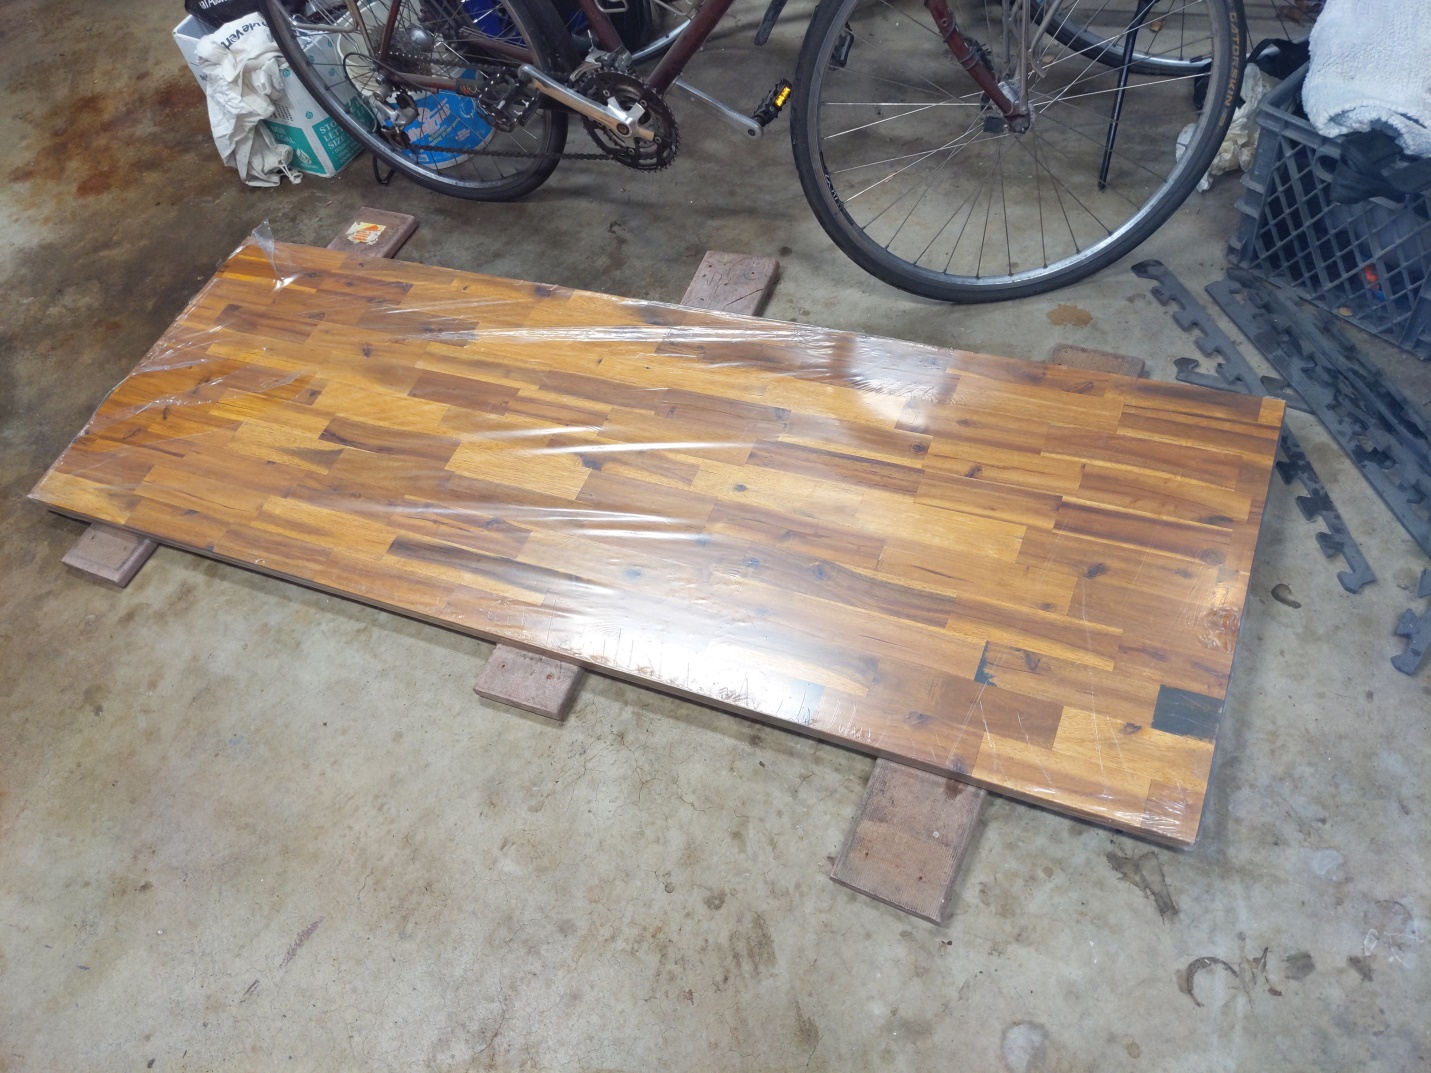 Here's a before and after. 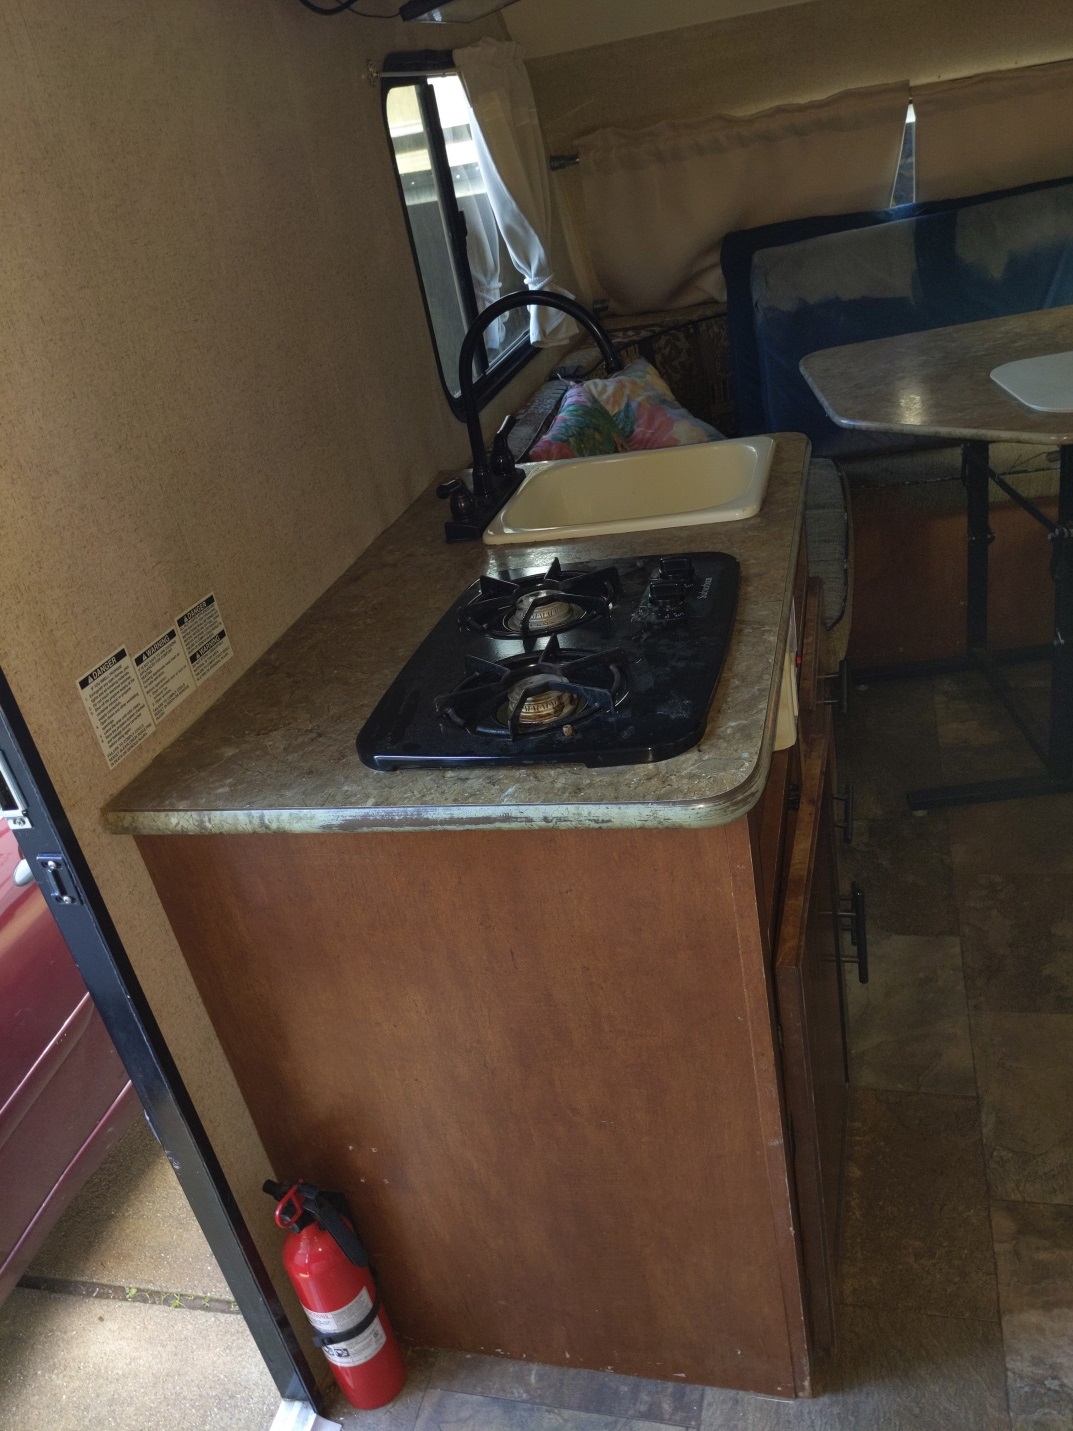 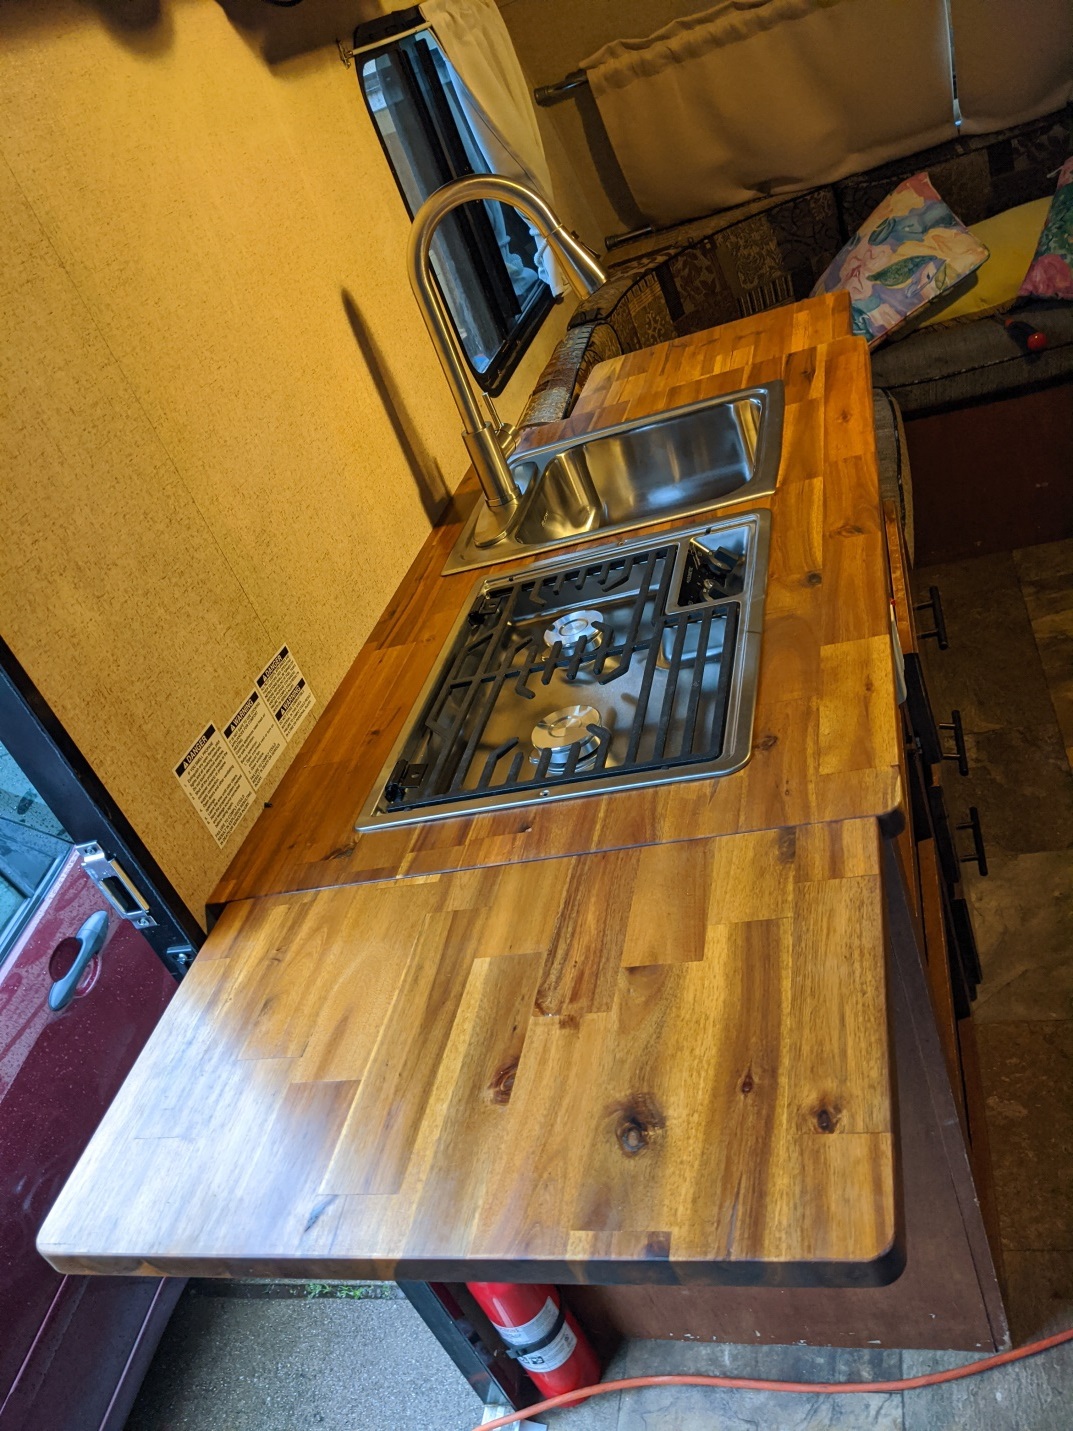 As you can see, I added some flip-up countertop on each side to make the kitchen much more user-friendly and a nice shiny SS sink and stovetop from ebay. Here are some pics of the build process. First I removed the old countertop and added some 1 x 12 pine boards to each side for mounting the flip-up countertops. 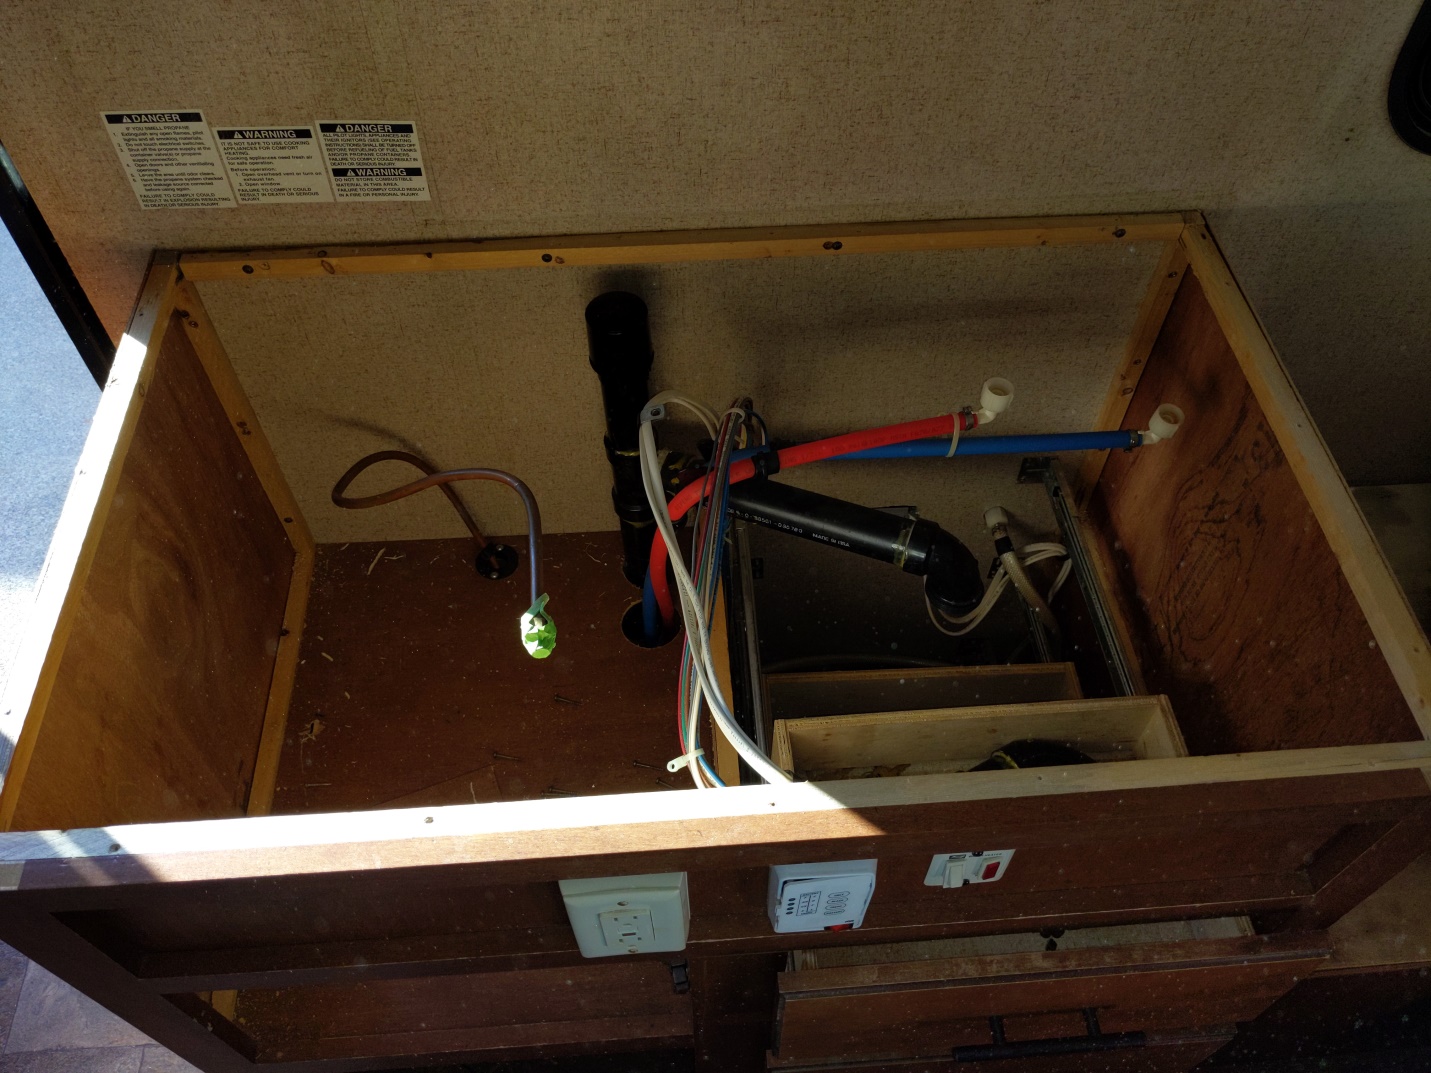 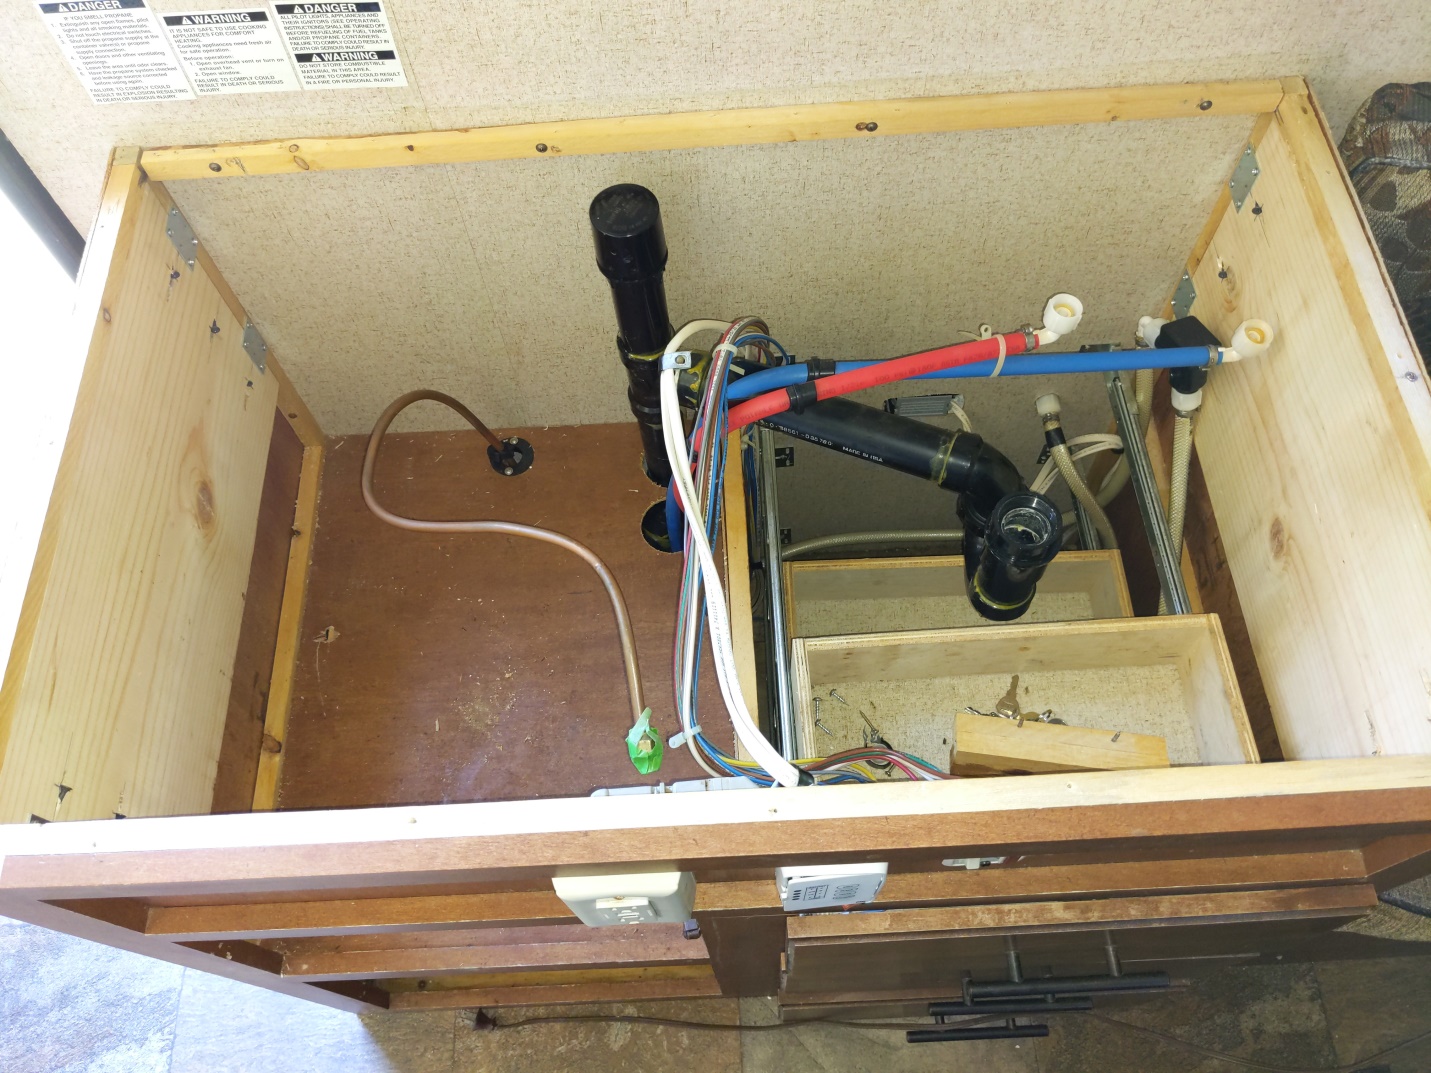 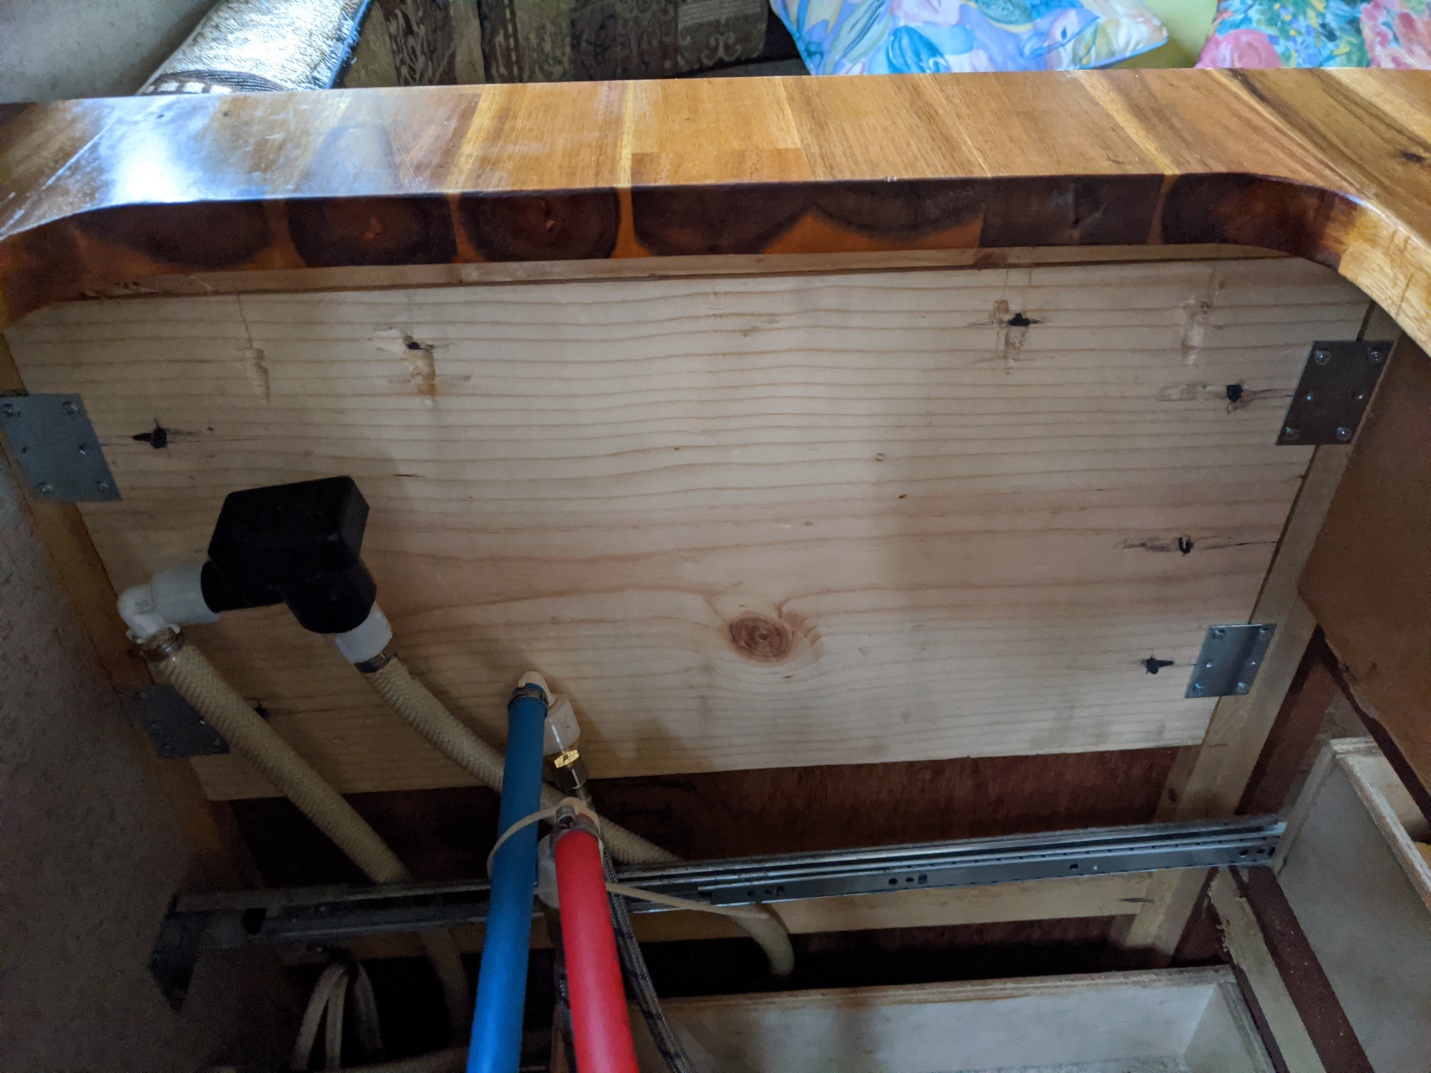 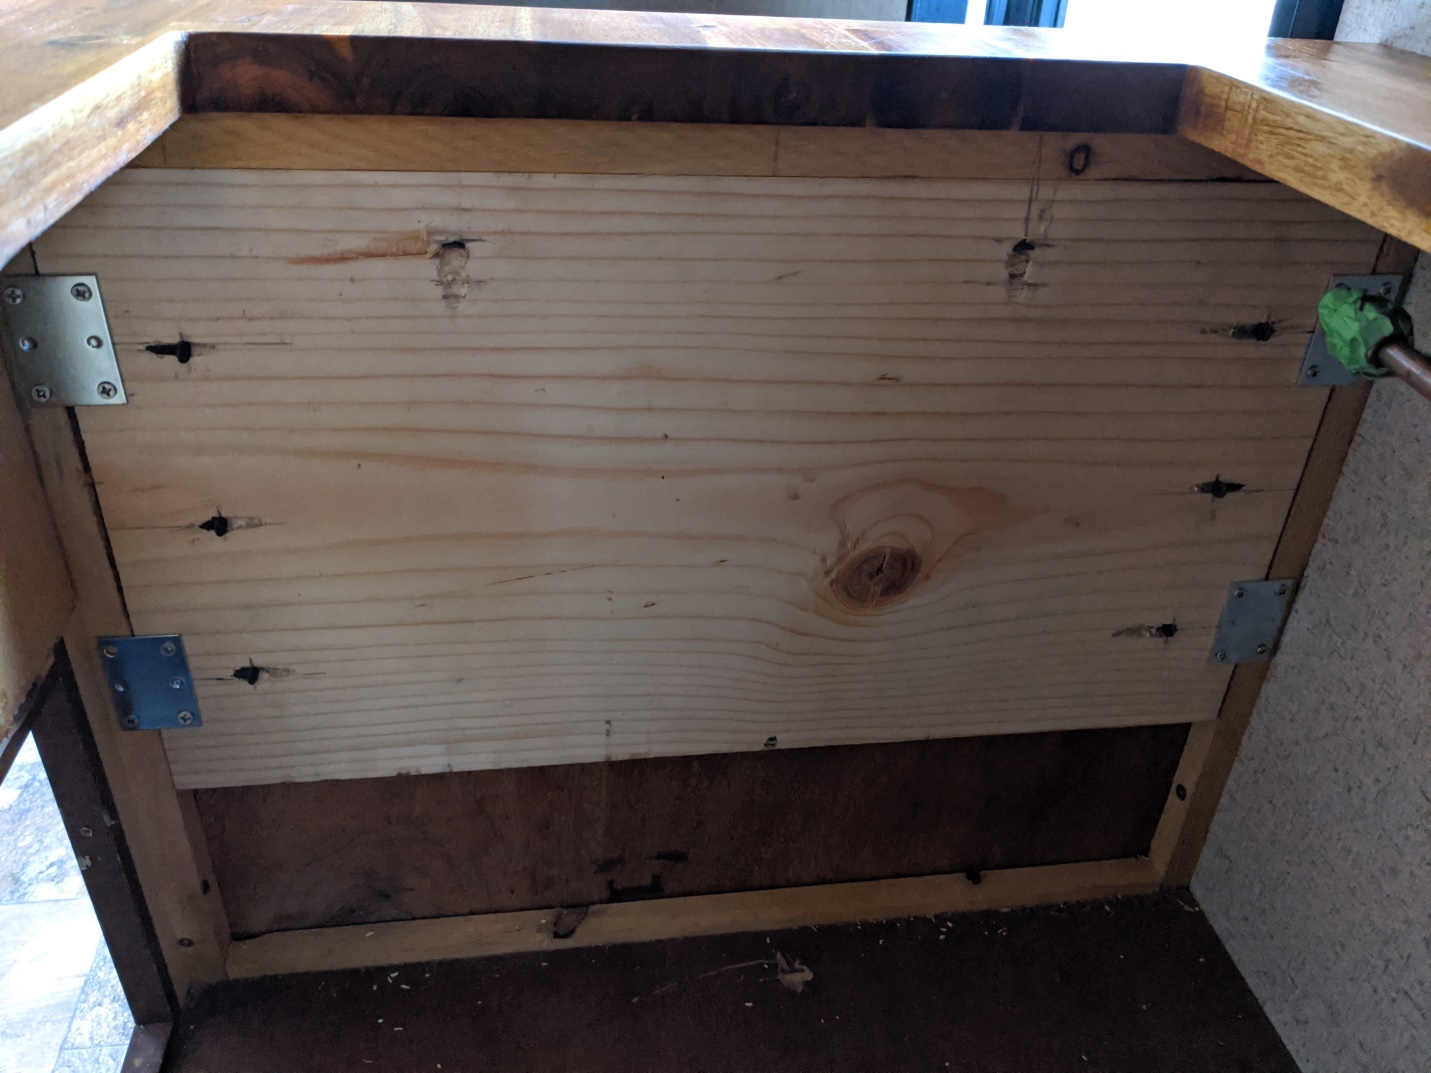 Continued on next post. |
|
|
|
|
abikerider
Newbie
Joined: 25 Dec 2022 Location: CA Online Status: Offline Posts: 25 |
Post Options
Quote Reply
Posted: 03 May 2023 at 11:17pm |
|
Thanks Stephan H, that helps. The only thing is that it limits it to 1000 kB pics. I'll have to resize my images.
|
|
|
|
|
Rpodrrr
Newbie

Joined: 21 May 2022 Location: Vancouver BC Online Status: Offline Posts: 24 |
Post Options
Quote Reply
Posted: 16 Apr 2023 at 8:54pm |
|
Do yourself a favour and buy some Eternabond tape from Amazon. Cut some thin strips and tape it along the side rails at on the roof.also use it over the spoiler if you have one and it will most certainly seal the roof from any future leaks. The spoilers are notorious for leaking. I also took all the screws out from the trim that joins the vertical walls to the roof and replaced them with stainless and a bit of sicaflex. Many screws holes were drilled by the manufacturer but didn’t have screws and the trim is like a gutter and causes leaks. One day they may actually come to the conclusion that good manufacturing will create more sales. 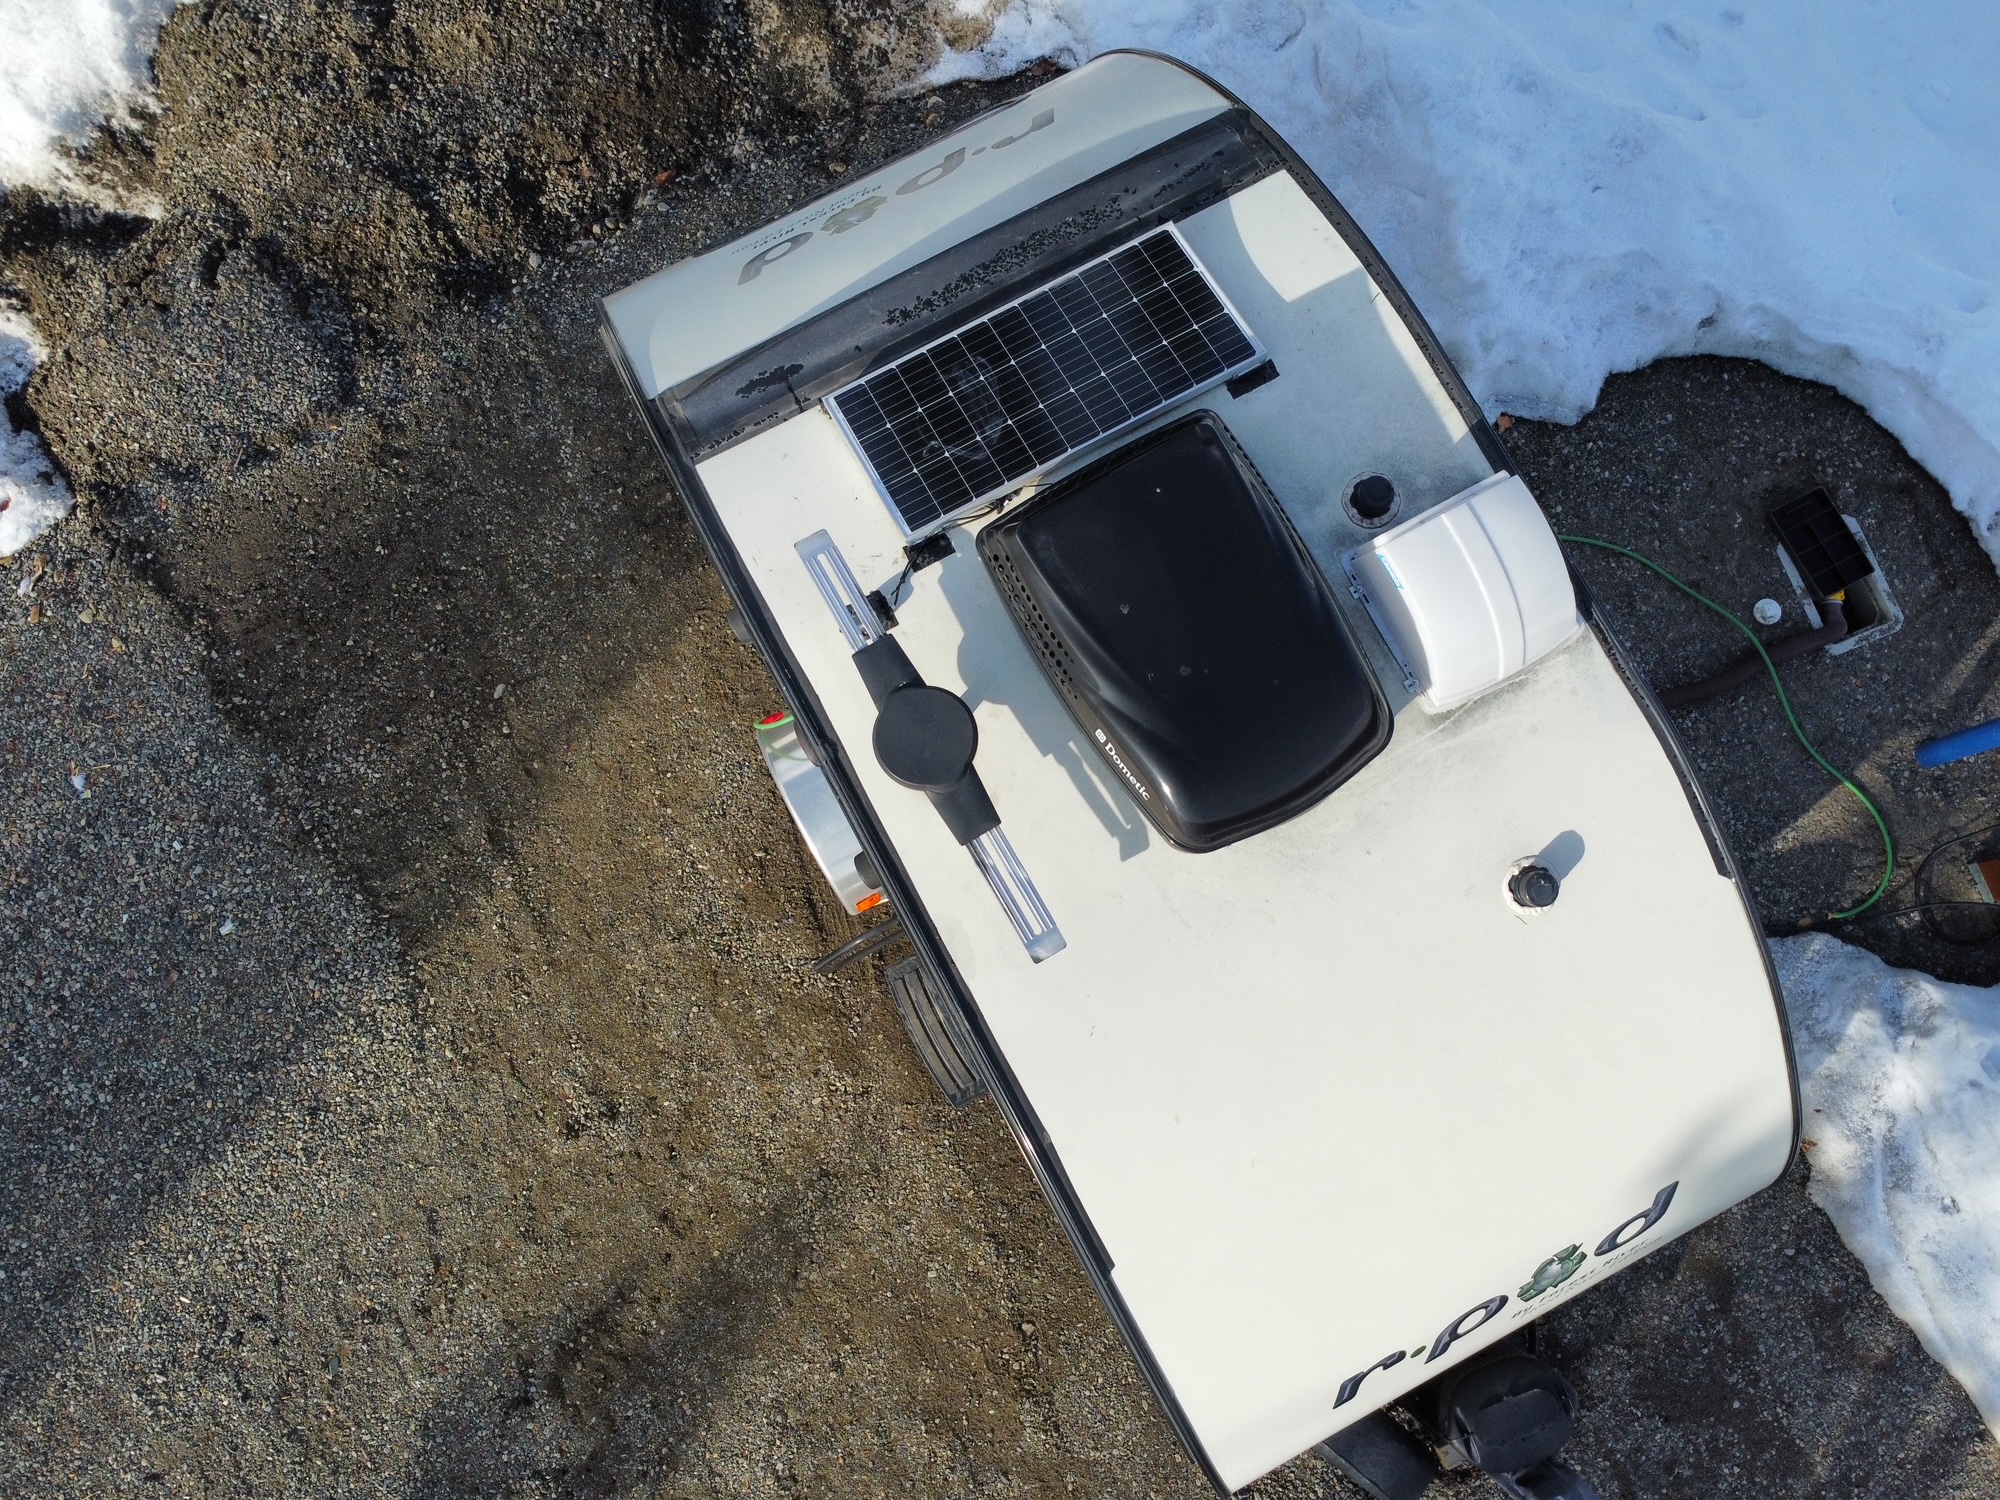
|
|
|
|
|
Rpodrrr
Newbie
Joined: 21 May 2022 Location: Vancouver BC Online Status: Offline Posts: 24 |
Post Options
Quote Reply
Posted: 16 Apr 2023 at 8:48pm |
|
Congratulations on the 172. It took me a good year to clean up the poor construction but now that it’s settled in I just hook it up to the truck and go. Check the outside walls at the corners at each end of trailer to make sure they are sealed properly.
|
|
|
|
|
Post Reply
|
Page <1234> |
| Forum Jump | Forum Permissions You cannot post new topics in this forum You cannot reply to topics in this forum You cannot delete your posts in this forum You cannot edit your posts in this forum You cannot create polls in this forum You cannot vote in polls in this forum |


