
|
|
Post Reply 
|
Page 123 4> |
| Author |
 Printable Version Printable Version Google Google Delicious Delicious Digg Digg StumbleUpon StumbleUpon Windows Live Windows Live Yahoo Bookmarks Yahoo Bookmarks reddit reddit Facebook Facebook MySpace MySpace Newsvine Newsvine Furl Furl Topic Search Topic Search  Topic Options Topic Options
|
Lindsay7186 
Newbie 

Joined: 17 Jun 2020 Location: Alabama Online Status: Offline Posts: 4 |
 Topic: Extreme Water Damage Topic: Extreme Water DamagePosted: 17 Jun 2020 at 2:41pm |
|
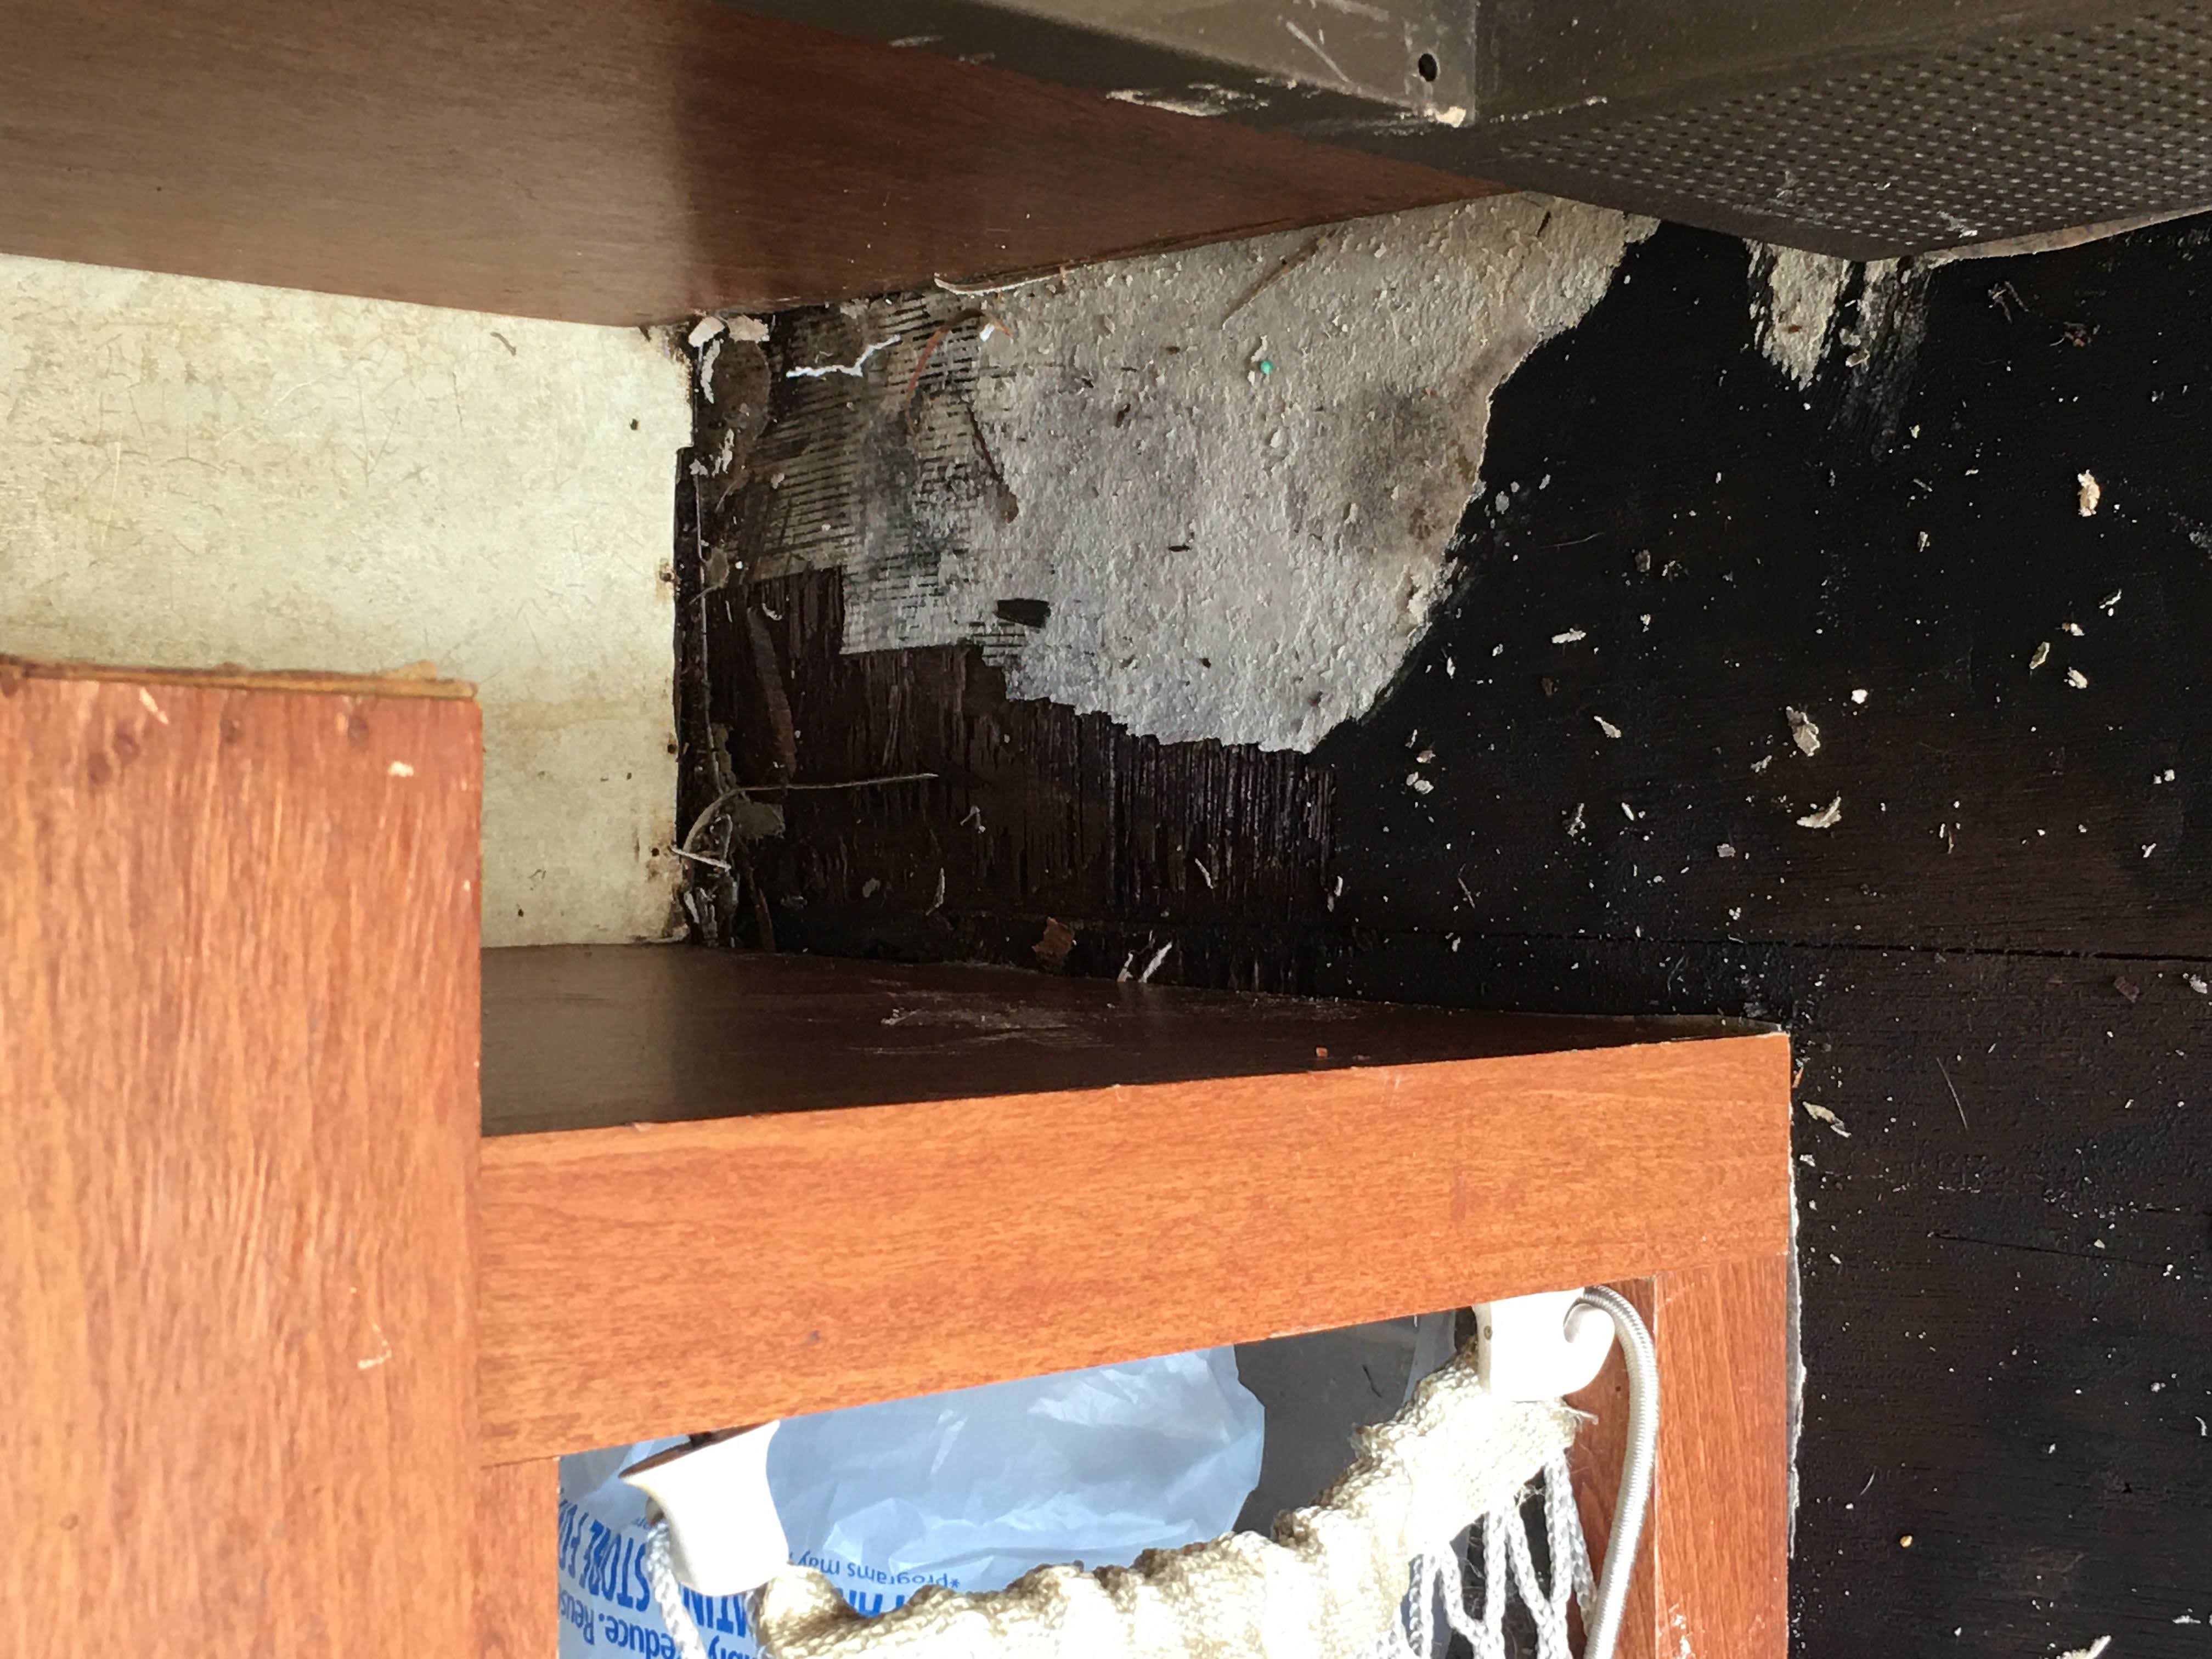
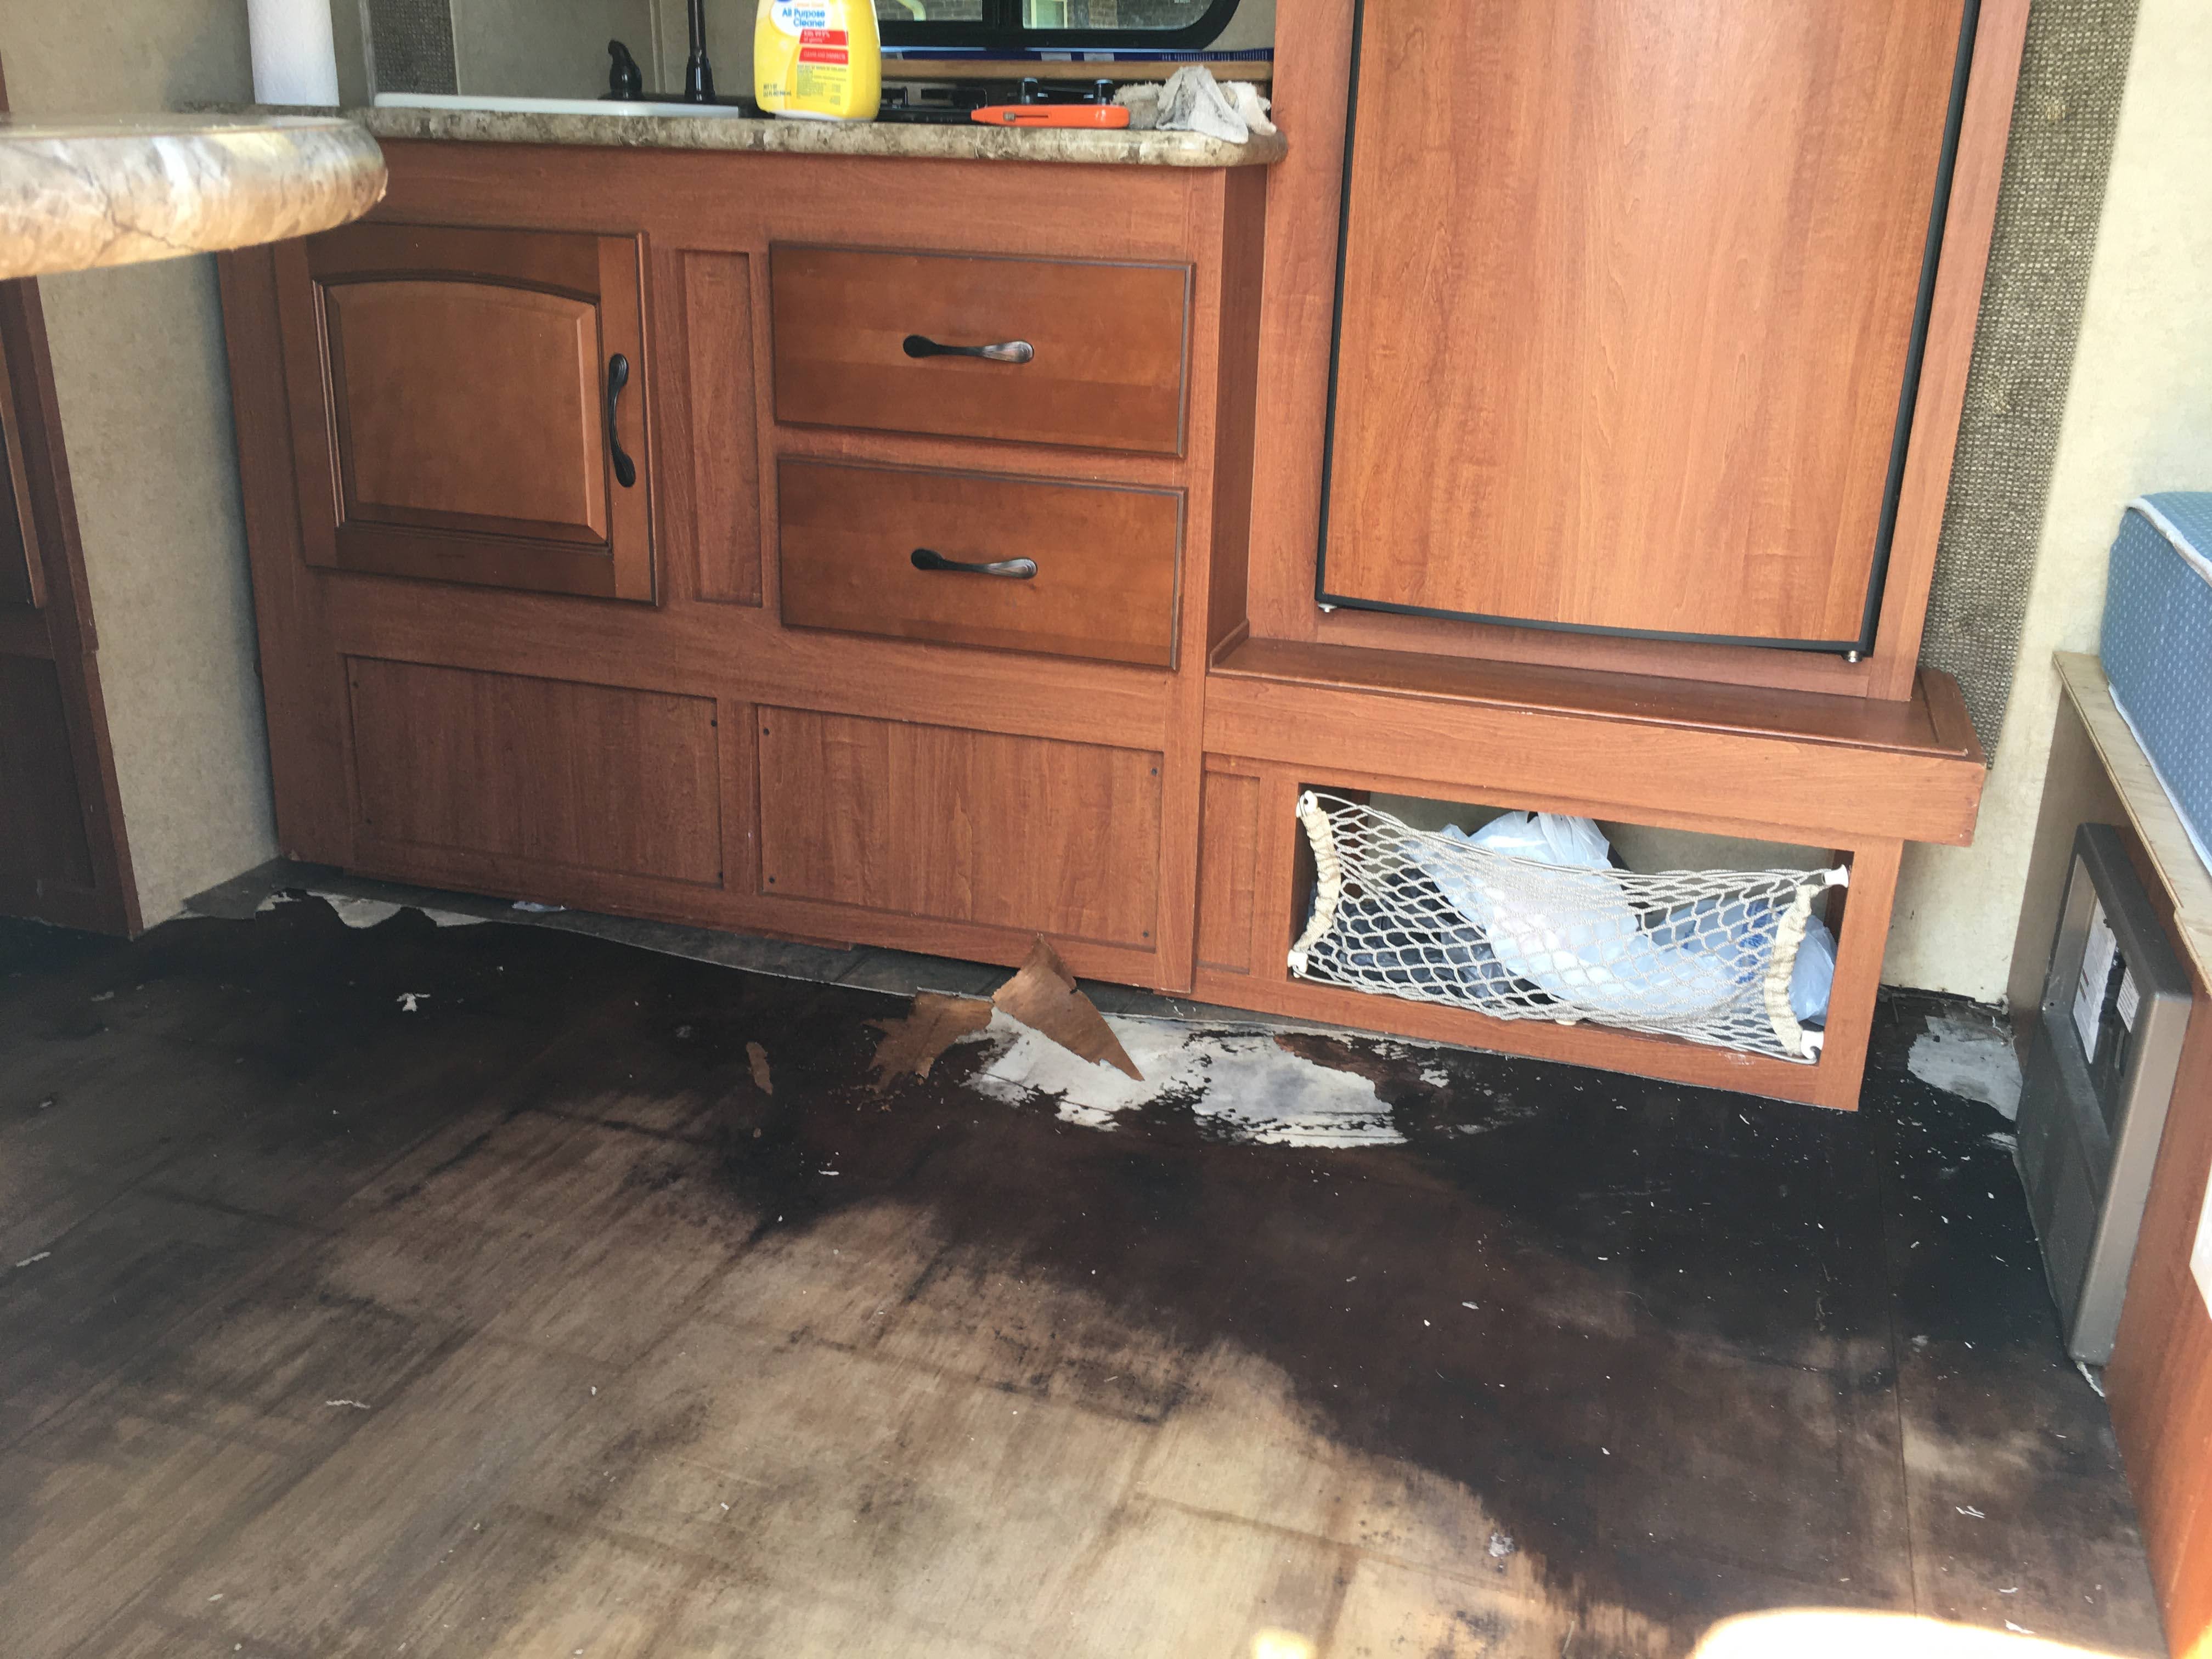
We just purchased a 2012 r-pod 181G the other day, and everything seemed in great condition. It did have a musty smell, but the person who had it lived in it for some time, and we thought that it was just because it had been closed up for a little while before selling (foolish us!). My husband happened to step in just the right place yesterday and found a soft spot. We looked at the underbelly, and you could see every step being made. We have 3 dogs (great dane, shih, tzu, and pit bull), a 6-year old, and us, so I decided to pull up linoleum to make sure there were no major issues (we originally thought that we just needed to somehow reinforce the underbelly). Joke was on us, because almost the entire sub-floor is completely rotten and will need to be replaced. Thankfully the section at the bottom of the slide-out is hollow, and I think we will be able to avoid having to completely remove it to repair sub-floors. However, I am having issues finding any information on a complete overhaul of an r-pod.
Has anyone been through this before? I would like to go ahead and remove the ceiling while we work on it and replace with plywood so that we don't have any surprises down the road. Or is there another material we should use? We sold our 1958 Century this past weekend because we couldn't undertake the project, only to buy something that is going to be an even BIGGER project. I'm thinking the rear garage will need to be removed as well, and at this point I would rather just tear down the separation there and make a bigger living space. I'm not sure if this is possible, though. Any information that could be provided would be so greatly appreciated! I really do love the camper!! We just don't know where to start. 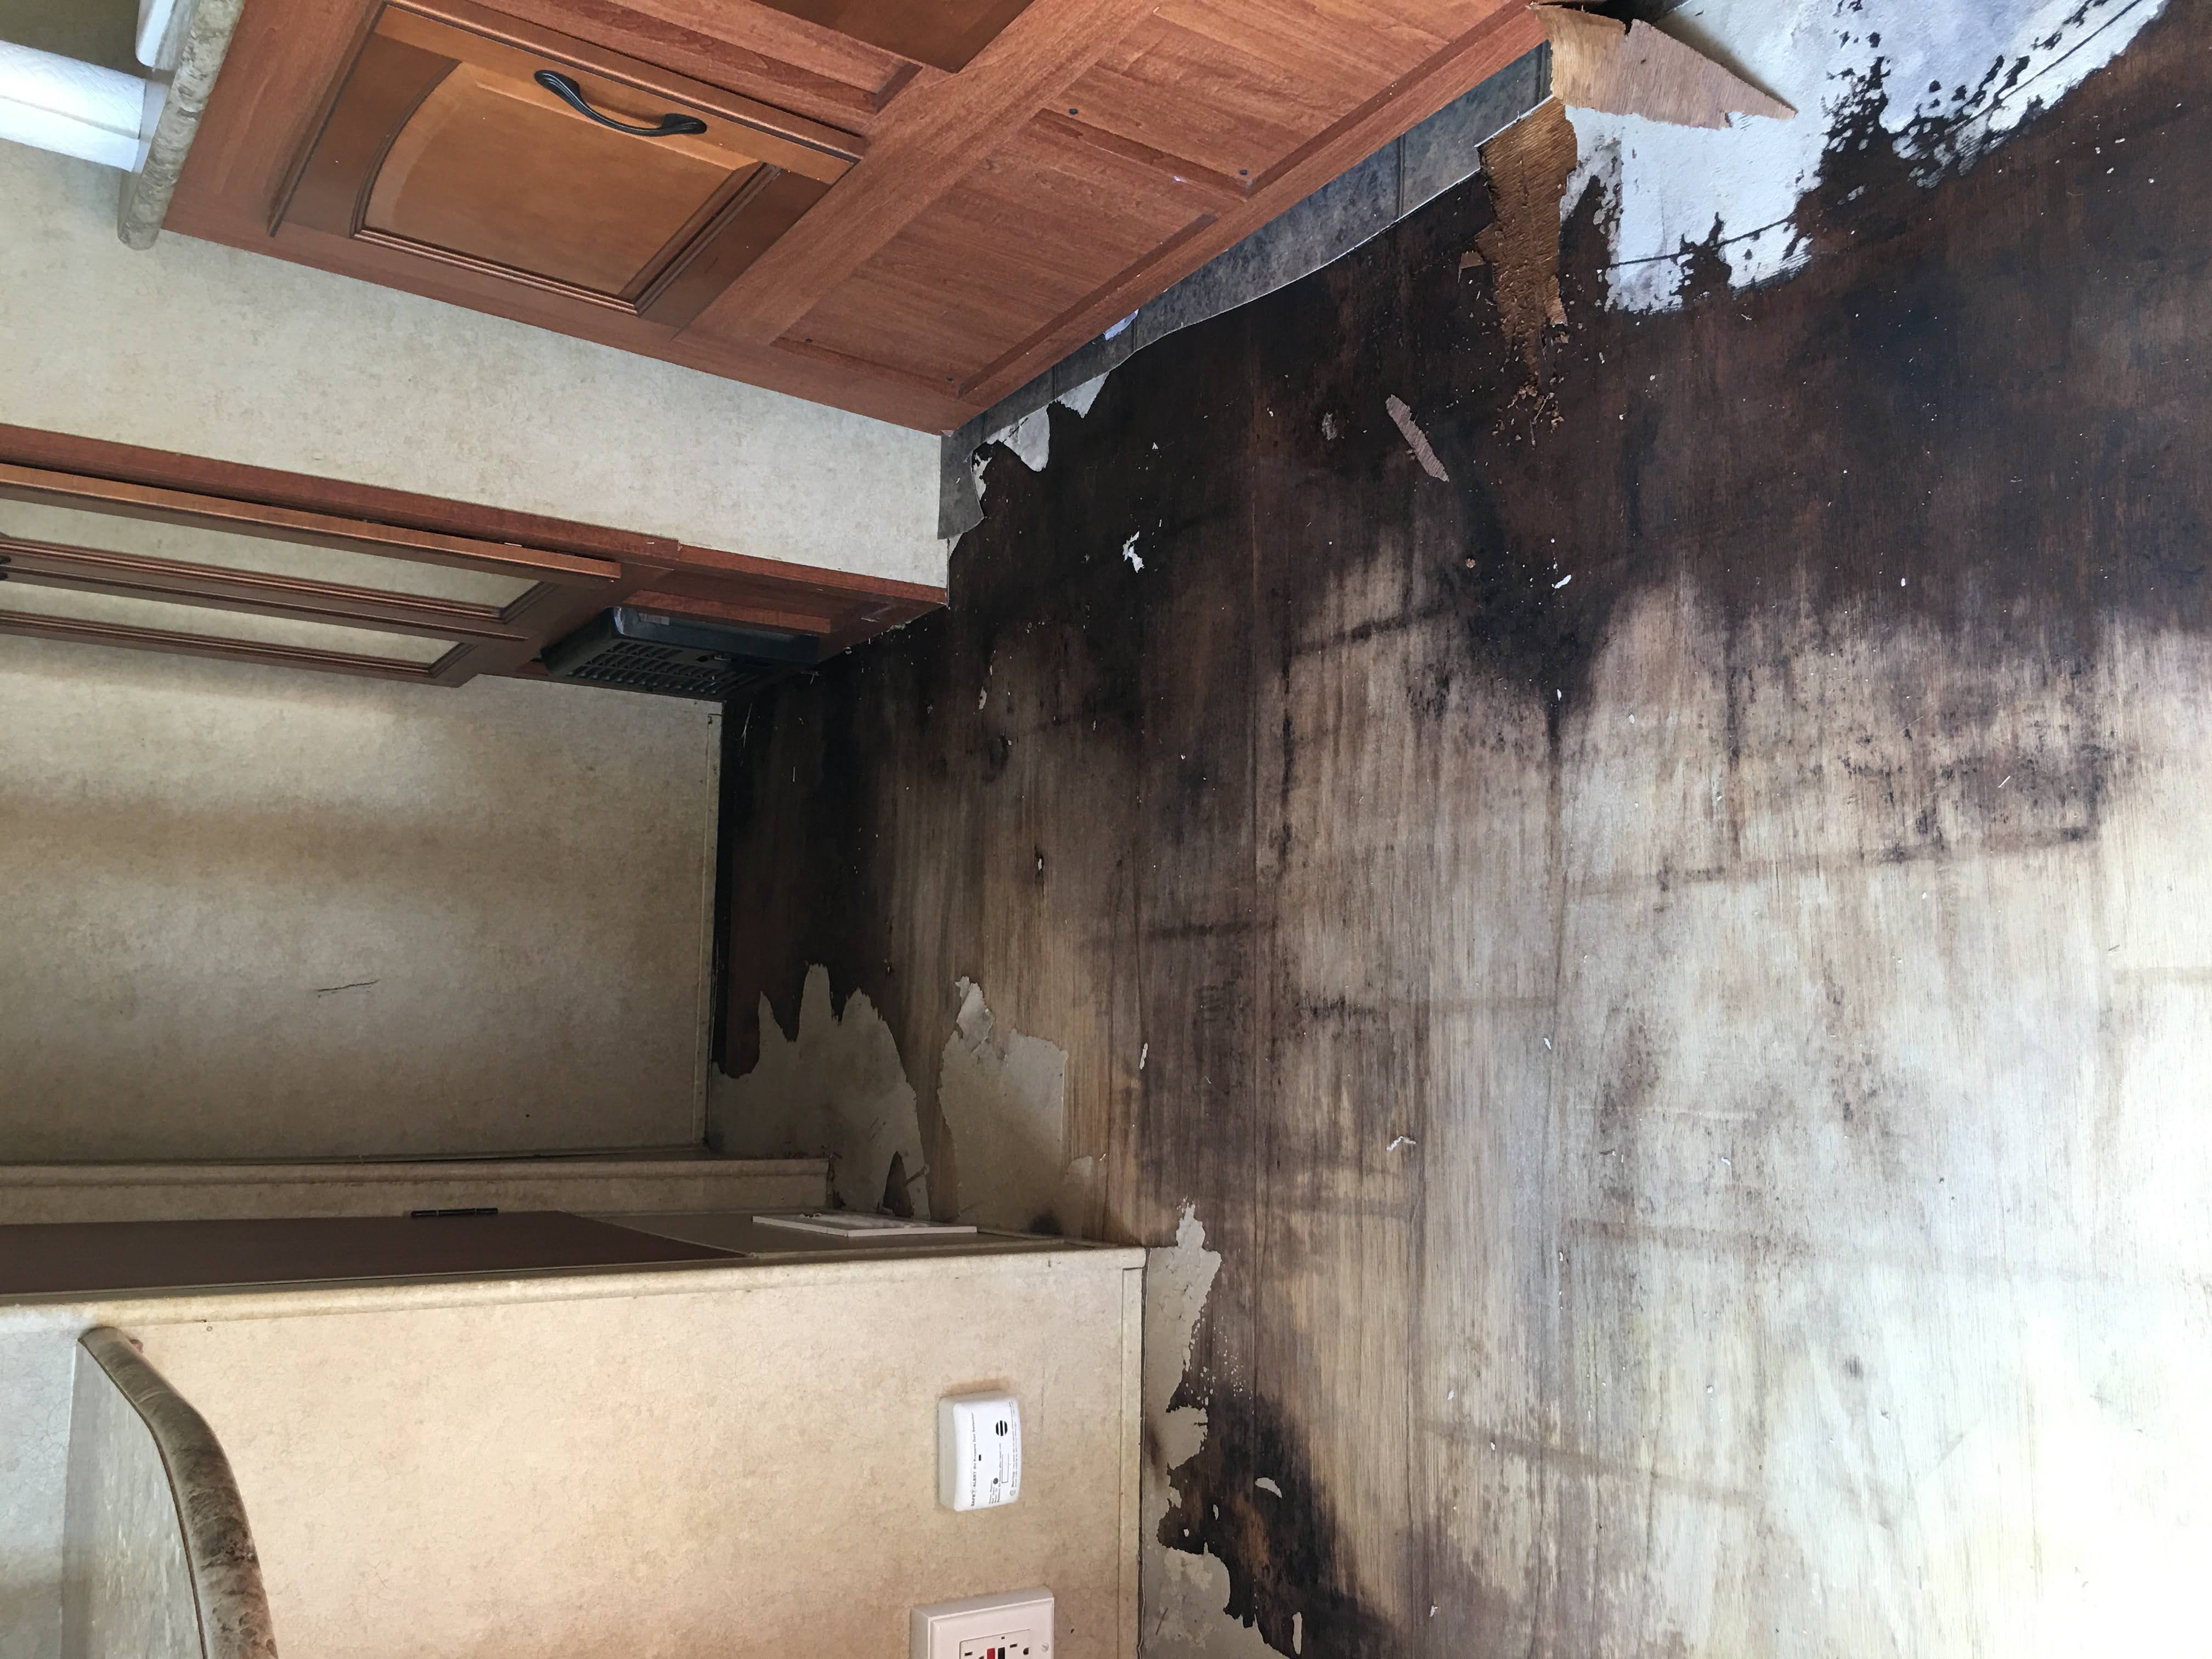 |
|
 |
|
|
Lindsay7186
Newbie
Joined: 17 Jun 2020 Location: Alabama Online Status: Offline Posts: 4 |
Posted: 17 Jun 2020 at 2:43pm |
|
This is the area of the floor between the slide-out and the bed.
 |
|
|
|
|
Lindsay7186
Newbie
Joined: 17 Jun 2020 Location: Alabama Online Status: Offline Posts: 4 |
Posted: 17 Jun 2020 at 2:48pm |
|
I'm thinking that the water is coming from the slide-out, because the rubber strip on the bottom was tucked in in a couple of places when the slide was popped out. The camper was sold "as-is", which we didn't think was an issue! I know that all of this is fixable, but it is so disheartening.
 |
|
|
|
|
StephenH
podders Helping podders - pHp 

Joined: 29 Nov 2015 Location: Wake Forest, NC Online Status: Offline Posts: 6422 |
Posted: 17 Jun 2020 at 3:01pm |
|
I'm sorry you did not find this out before you bought it. I don't have any advice about fixing it, but I sympathize with you. You do need to get rid of what looks like black mold. That is definitely not healthy. There are stronger than household bleach products for cleaning. Use them with a respirator and good ventilation. You will want to find the source of the water to fix that. I don't know if allowing the floor to dry will restore any rigidity to it. That is a question for much more knowledgeable people.
|
|
|
StephenH
Happy is the man that findeth wisdom,... ouR escaPOD mods Former RPod 179 Current Cherokee Grey Wolf 24 JS |
|
|
|
|
offgrid
Senior Member
Joined: 23 Jul 2018 Online Status: Offline Posts: 5290 |
Posted: 17 Jun 2020 at 4:14pm |
|
Welcome to the forum but very sorry about the circumstances.
There is no good way that I'm aware of to replace the whole floor as is serves as the platform for construction of the whole trailer. It might help you to view a video of how rpods are constructed.
As you can see, the floor is a layer of plywood over foam. Your plywood appears to be delaminated, it won't regain structural integrity. After cleanup, dryout, and and leveling any low spots with you may be best off just to cut out and glue and screw down a new floor layer. I didn't follow why you wanted to remove the ceiling, is that water damaged as well? |
|
|
1994 Chinook Concourse
1995 RV6A Experimental Aircraft 2015 Rpod 179 - sold |
|
|
|
|
Lindsay7186
Newbie
Joined: 17 Jun 2020 Location: Alabama Online Status: Offline Posts: 4 |
Posted: 17 Jun 2020 at 4:51pm |
|
Thank you so much for your help and the video!! There is a slight soft spot on our ceiling near one of the seams, but the rest of the ceiling is sound. I'm honestly not sure if it damaged or not. I'm just so afraid that we are going to get the flooring fixed, get everything built and put back in, only to find that there is another issue. I guess I thought we would be proactive since we'll have everything out of the r-pod anyway!

|
|
|
|
|
offgrid
Senior Member
Joined: 23 Jul 2018 Online Status: Offline Posts: 5290 |
Posted: 17 Jun 2020 at 5:48pm |
|
The rpod roof is a single piece of fiberglas so it will only leak where there are holes in it. A notorious place is under the spoiler on the rear of the trailer. If the roof soft spot is under there then you should remove the spoiler and re-seal it. Multiple discussions on that on this forum.
if the soft spot is somewhere else and not discolored then I wouldn't suggest removing the ceiling. You have enough on your hands without getting into that.... Good luck!
|
|
|
1994 Chinook Concourse
1995 RV6A Experimental Aircraft 2015 Rpod 179 - sold |
|
|
|
|
mcarter
podders Helping podders - pHp

Joined: 07 Apr 2016 Location: Greenbrier, TN Online Status: Offline Posts: 3419 |
Posted: 17 Jun 2020 at 6:15pm |
|
The first thing I would do is get it inside where it can't get wet again. I have never refloored a camper but I have done boats with severe water damage. It needs to dry to address mold. Once you have mold issue resolved and entire floor is dry you can recover floor. When I say recover, you may need to cover floor with new wood, I'd look for a way to not remove the existing floor only after I knew it was dry and mold free. Get it inside with fans and heat and get it dry.
|
|
|
Mike Carter
2015 178 " I had the right to remain silent, I just didn't have the ability." |
|
|
|
|
Junkinpod
Newbie
Joined: 04 Jun 2019 Location: ON Online Status: Offline Posts: 18 |
Posted: 22 Jun 2020 at 7:43pm |
|
I have a 182g 2014 with similar water damage that appears to have come in around the slide out. I've taken out all of the linoleum - and its now all dry. The floor has dropped about 1-2" on the outside edge - from the slide out to the rear of the garage. Following this thread - hoping to see how to fix this.
|
|
|
Belinda
|
|
|
|
|
ToolmanJohn
Senior Member
Joined: 23 Apr 2014 Location: Connecticut Online Status: Offline Posts: 451 |
Posted: 11 Jul 2020 at 5:28pm |
|
Hitch it up and take it near a cliff. Make believe you have to unhitch to take care of some other problem, and "accidentally" let it roll off the cliff. Insurance. Also make sure to delete all your posts concerning htis problem.
. LOL.I'm sorry, I make fun, but it does ultra SUCK for you to be stuck in this situation. The R-Pod is essentially a floor on the frame, then the interior parts are installed, then the aluminum frame goes on then the roof. To install a new plywood floor complete, would mean doing the entire thing backwards. My recommendation is to take it to a Forest River dealer with a big service department and see what they say about it. Who knows. Maybe a couple thousand and a month of labor.? Keep us updated on solution or end result.
|
|
|
2017 ATC 7X20 Custom Toy Hauler
2013 R-Pod 177 (SOLD) 2013 VW Touareg TDI |
|
|
|
|
Post Reply
|
Page 123 4> |
| Forum Jump | Forum Permissions You cannot post new topics in this forum You cannot reply to topics in this forum You cannot delete your posts in this forum You cannot edit your posts in this forum You cannot create polls in this forum You cannot vote in polls in this forum |


 Extreme Water Damage