Extreme Water Damage
Printed From: R-pod Owners Forum
Category: R-pod Discussion Forums
Forum Name: I need HELP!!!
Forum Discription: Perplexed/need help with a problem - ask here
URL: http://www.rpod-owners.com/forum_posts.asp?TID=13671
Printed Date: 07 Jun 2025 at 10:48am
Software Version: Web Wiz Forums 9.64 - http://www.webwizforums.com
Topic: Extreme Water Damage
Posted By: Lindsay7186
Subject: Extreme Water Damage
Date Posted: 17 Jun 2020 at 2:41pm
|
We just purchased a 2012 r-pod 181G the other day, and everything seemed in great condition. It did have a musty smell, but the person who had it lived in it for some time, and we thought that it was just because it had been closed up for a little while before selling (foolish us!). My husband happened to step in just the right place yesterday and found a soft spot. We looked at the underbelly, and you could see every step being made. We have 3 dogs (great dane, shih, tzu, and pit bull), a 6-year old, and us, so I decided to pull up linoleum to make sure there were no major issues (we originally thought that we just needed to somehow reinforce the underbelly). Joke was on us, because almost the entire sub-floor is completely rotten and will need to be replaced. Thankfully the section at the bottom of the slide-out is hollow, and I think we will be able to avoid having to completely remove it to repair sub-floors. However, I am having issues finding any information on a complete overhaul of an r-pod. Has anyone been through this before? I would like to go ahead and remove the ceiling while we work on it and replace with plywood so that we don't have any surprises down the road. Or is there another material we should use? We sold our 1958 Century this past weekend because we couldn't undertake the project, only to buy something that is going to be an even BIGGER project. I'm thinking the rear garage will need to be removed as well, and at this point I would rather just tear down the separation there and make a bigger living space. I'm not sure if this is possible, though. Any information that could be provided would be so greatly appreciated! I really do love the camper!! We just don't know where to start. 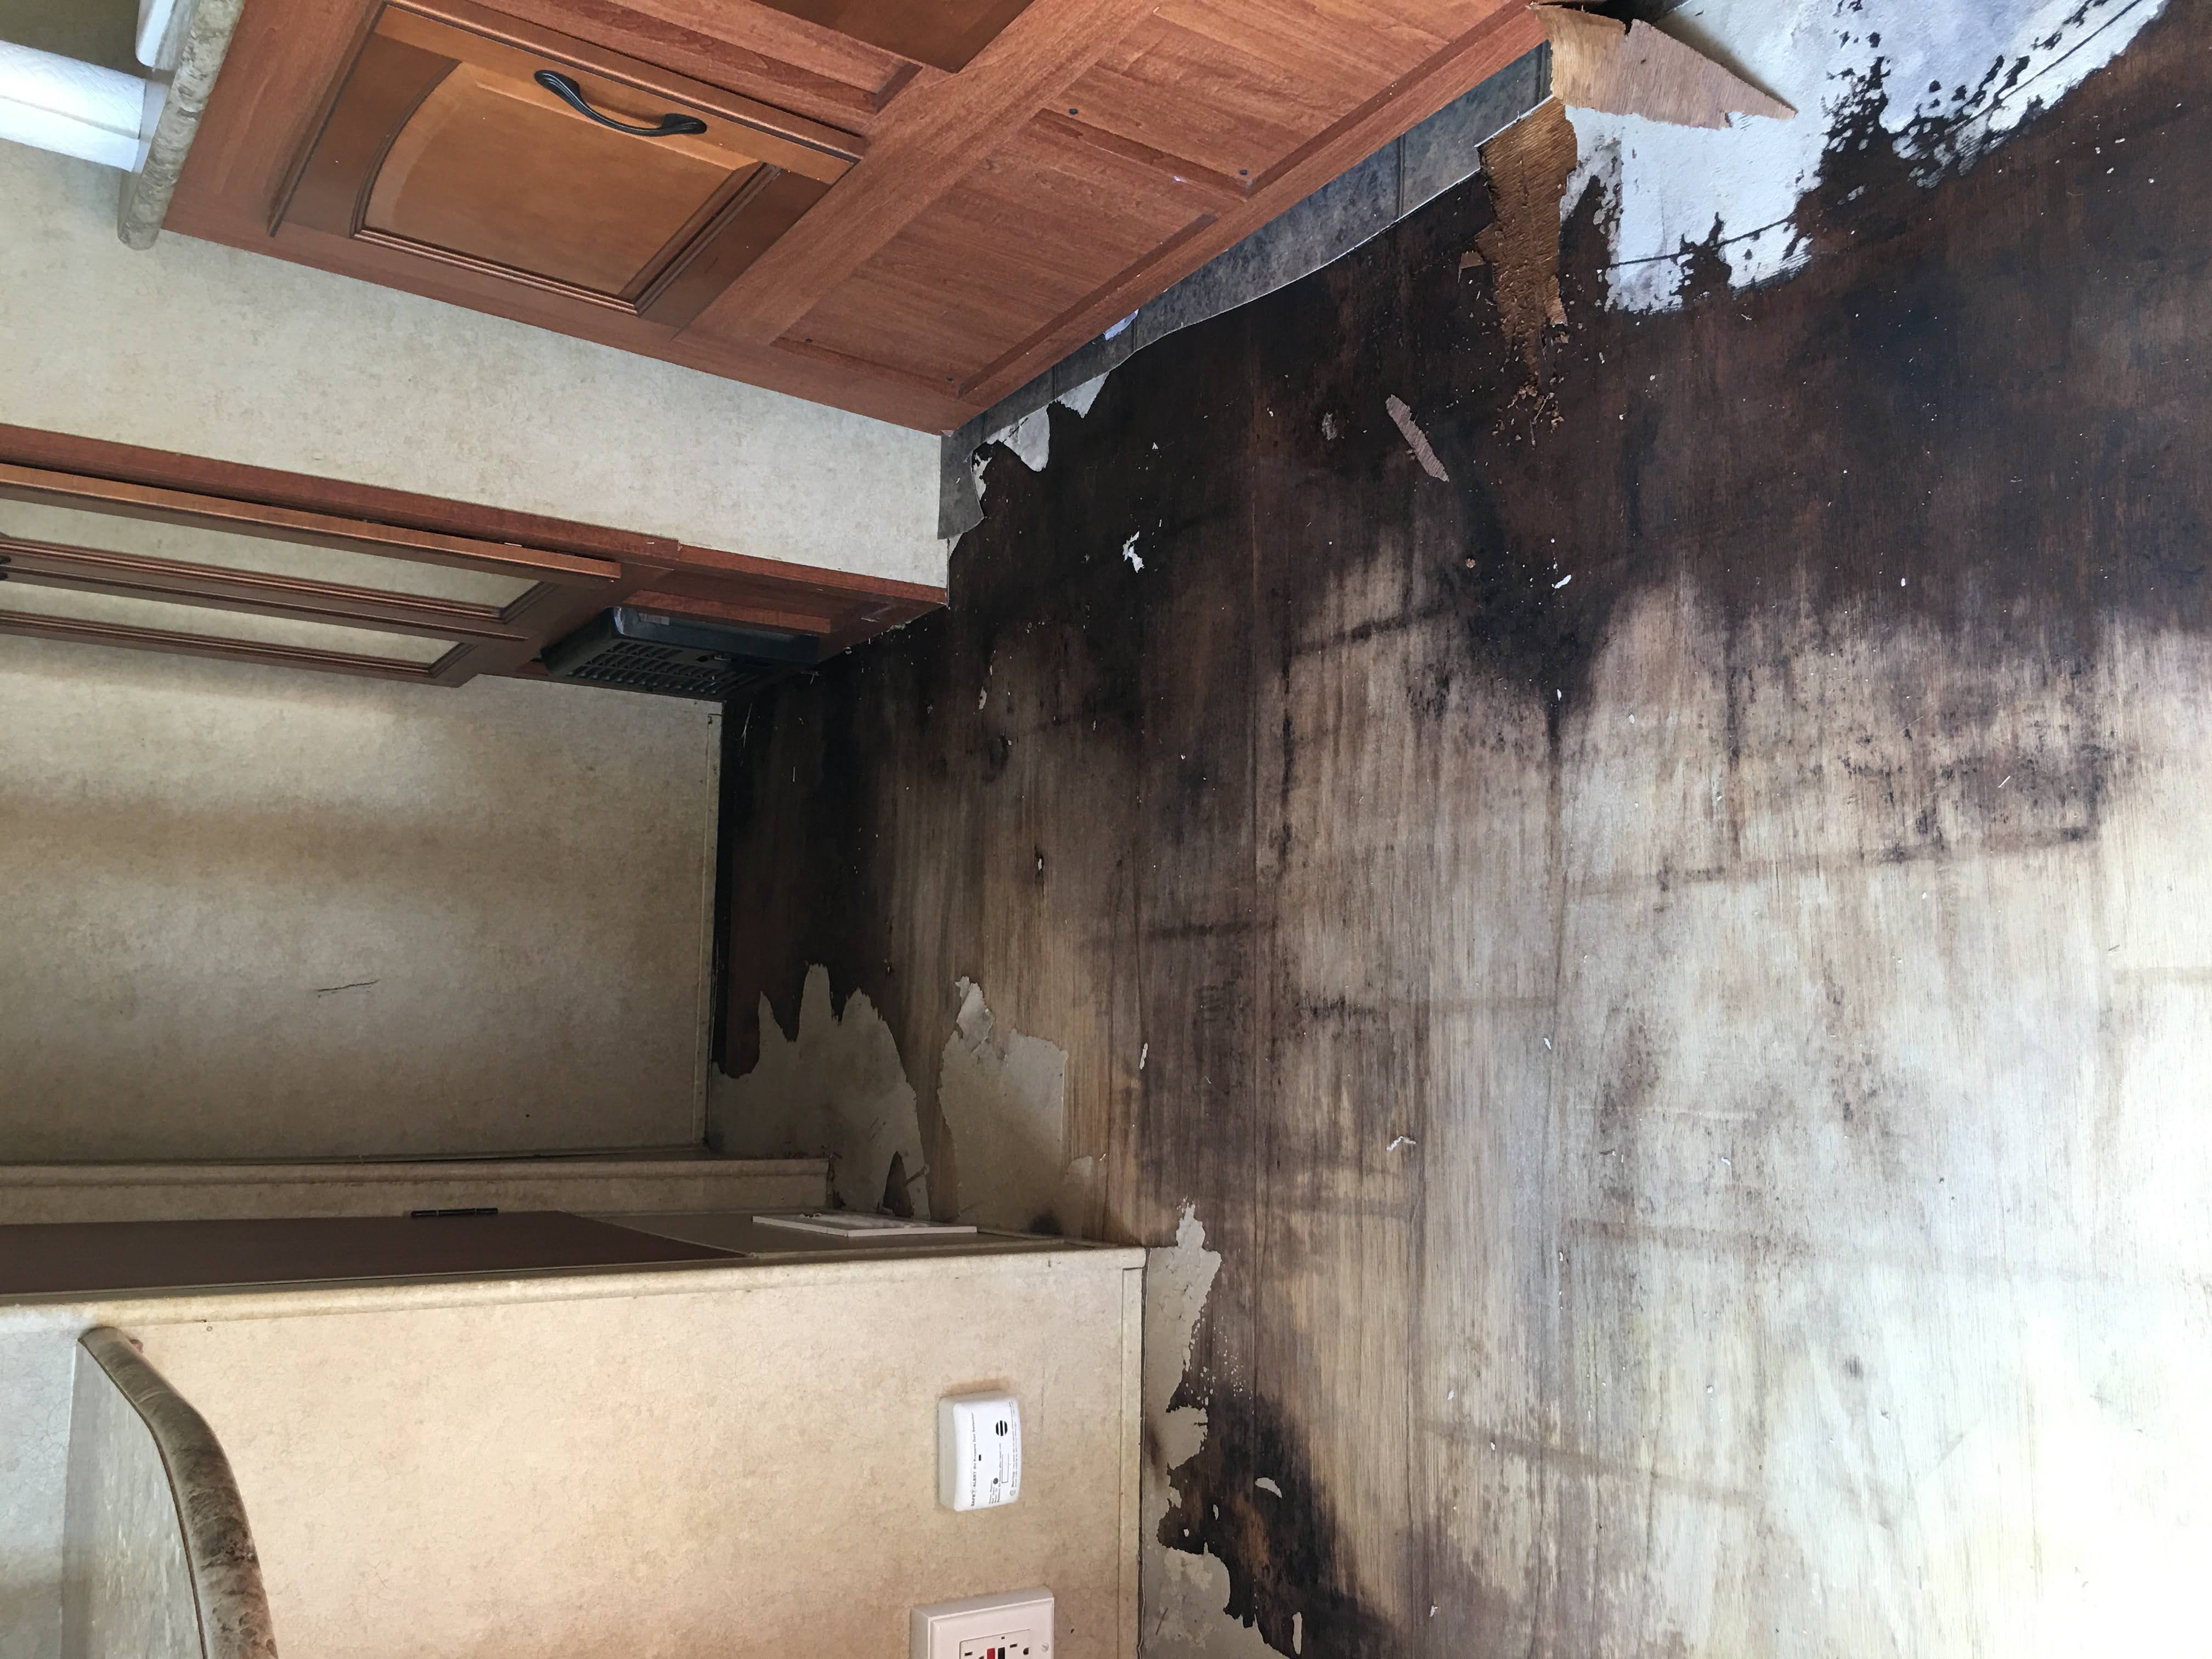 |
Replies:
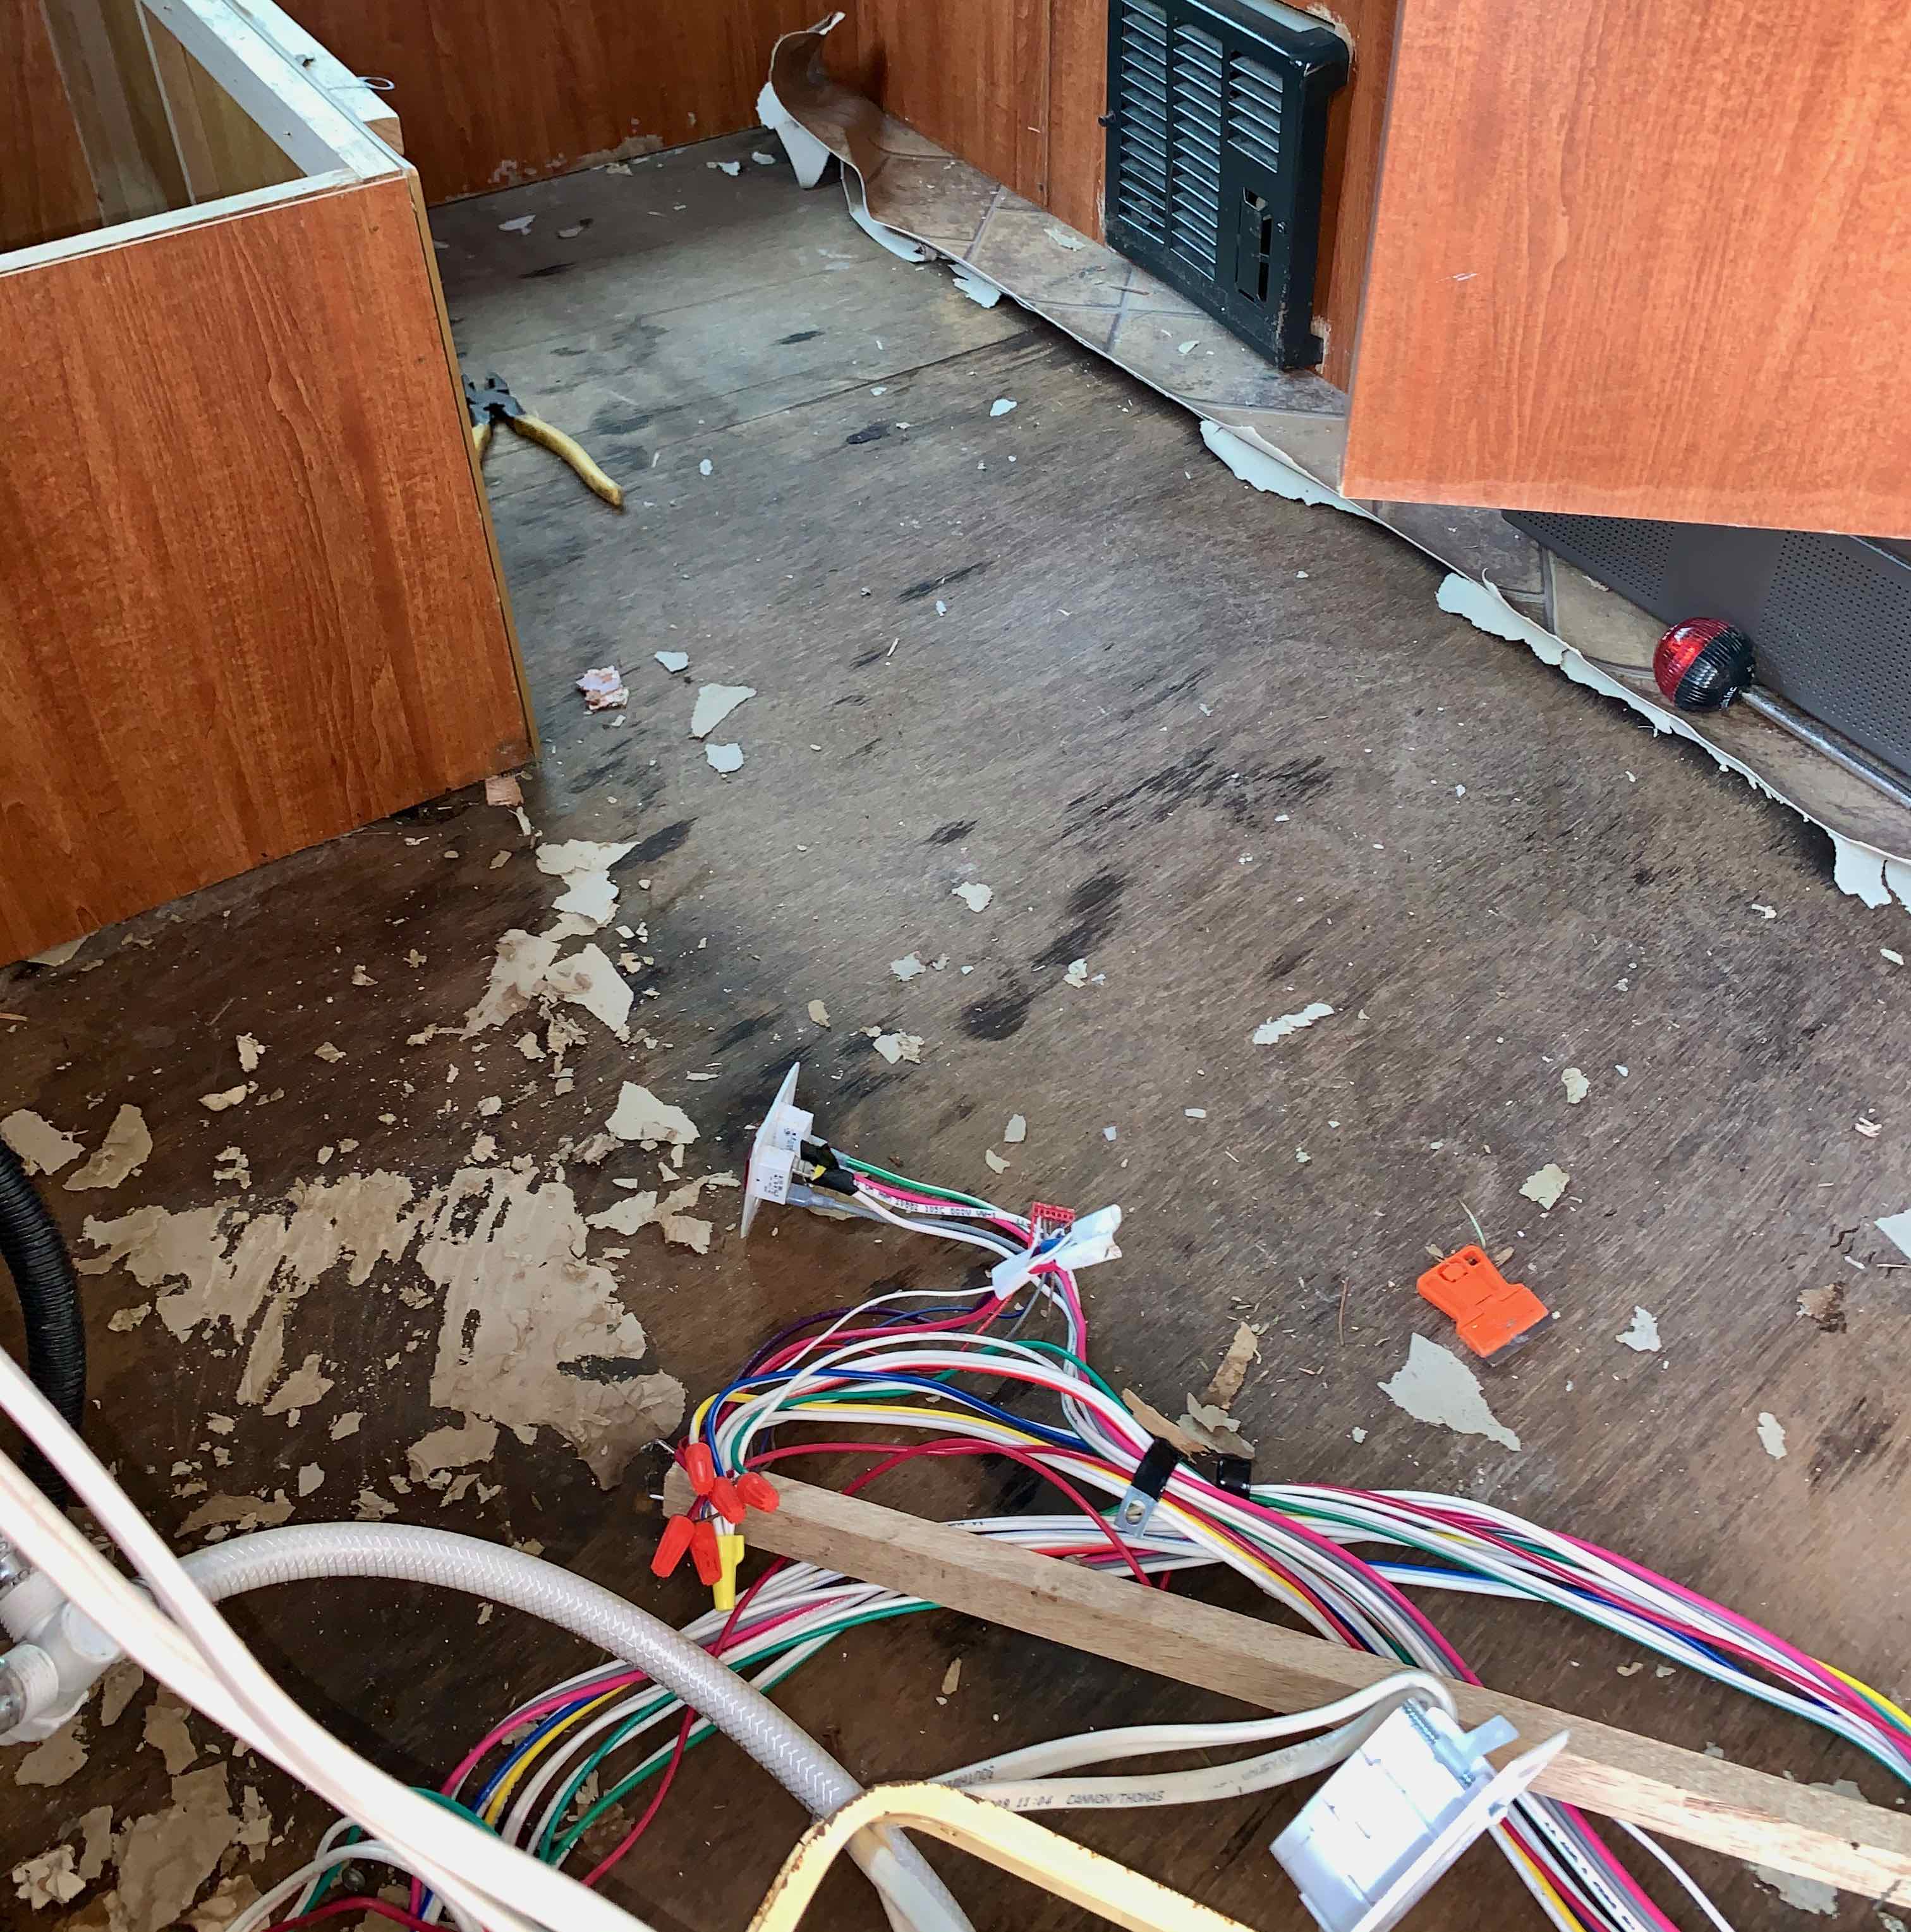
Posted By: Lindsay7186
Date Posted: 17 Jun 2020 at 2:43pm
This is the area of the floor between the slide-out and the bed.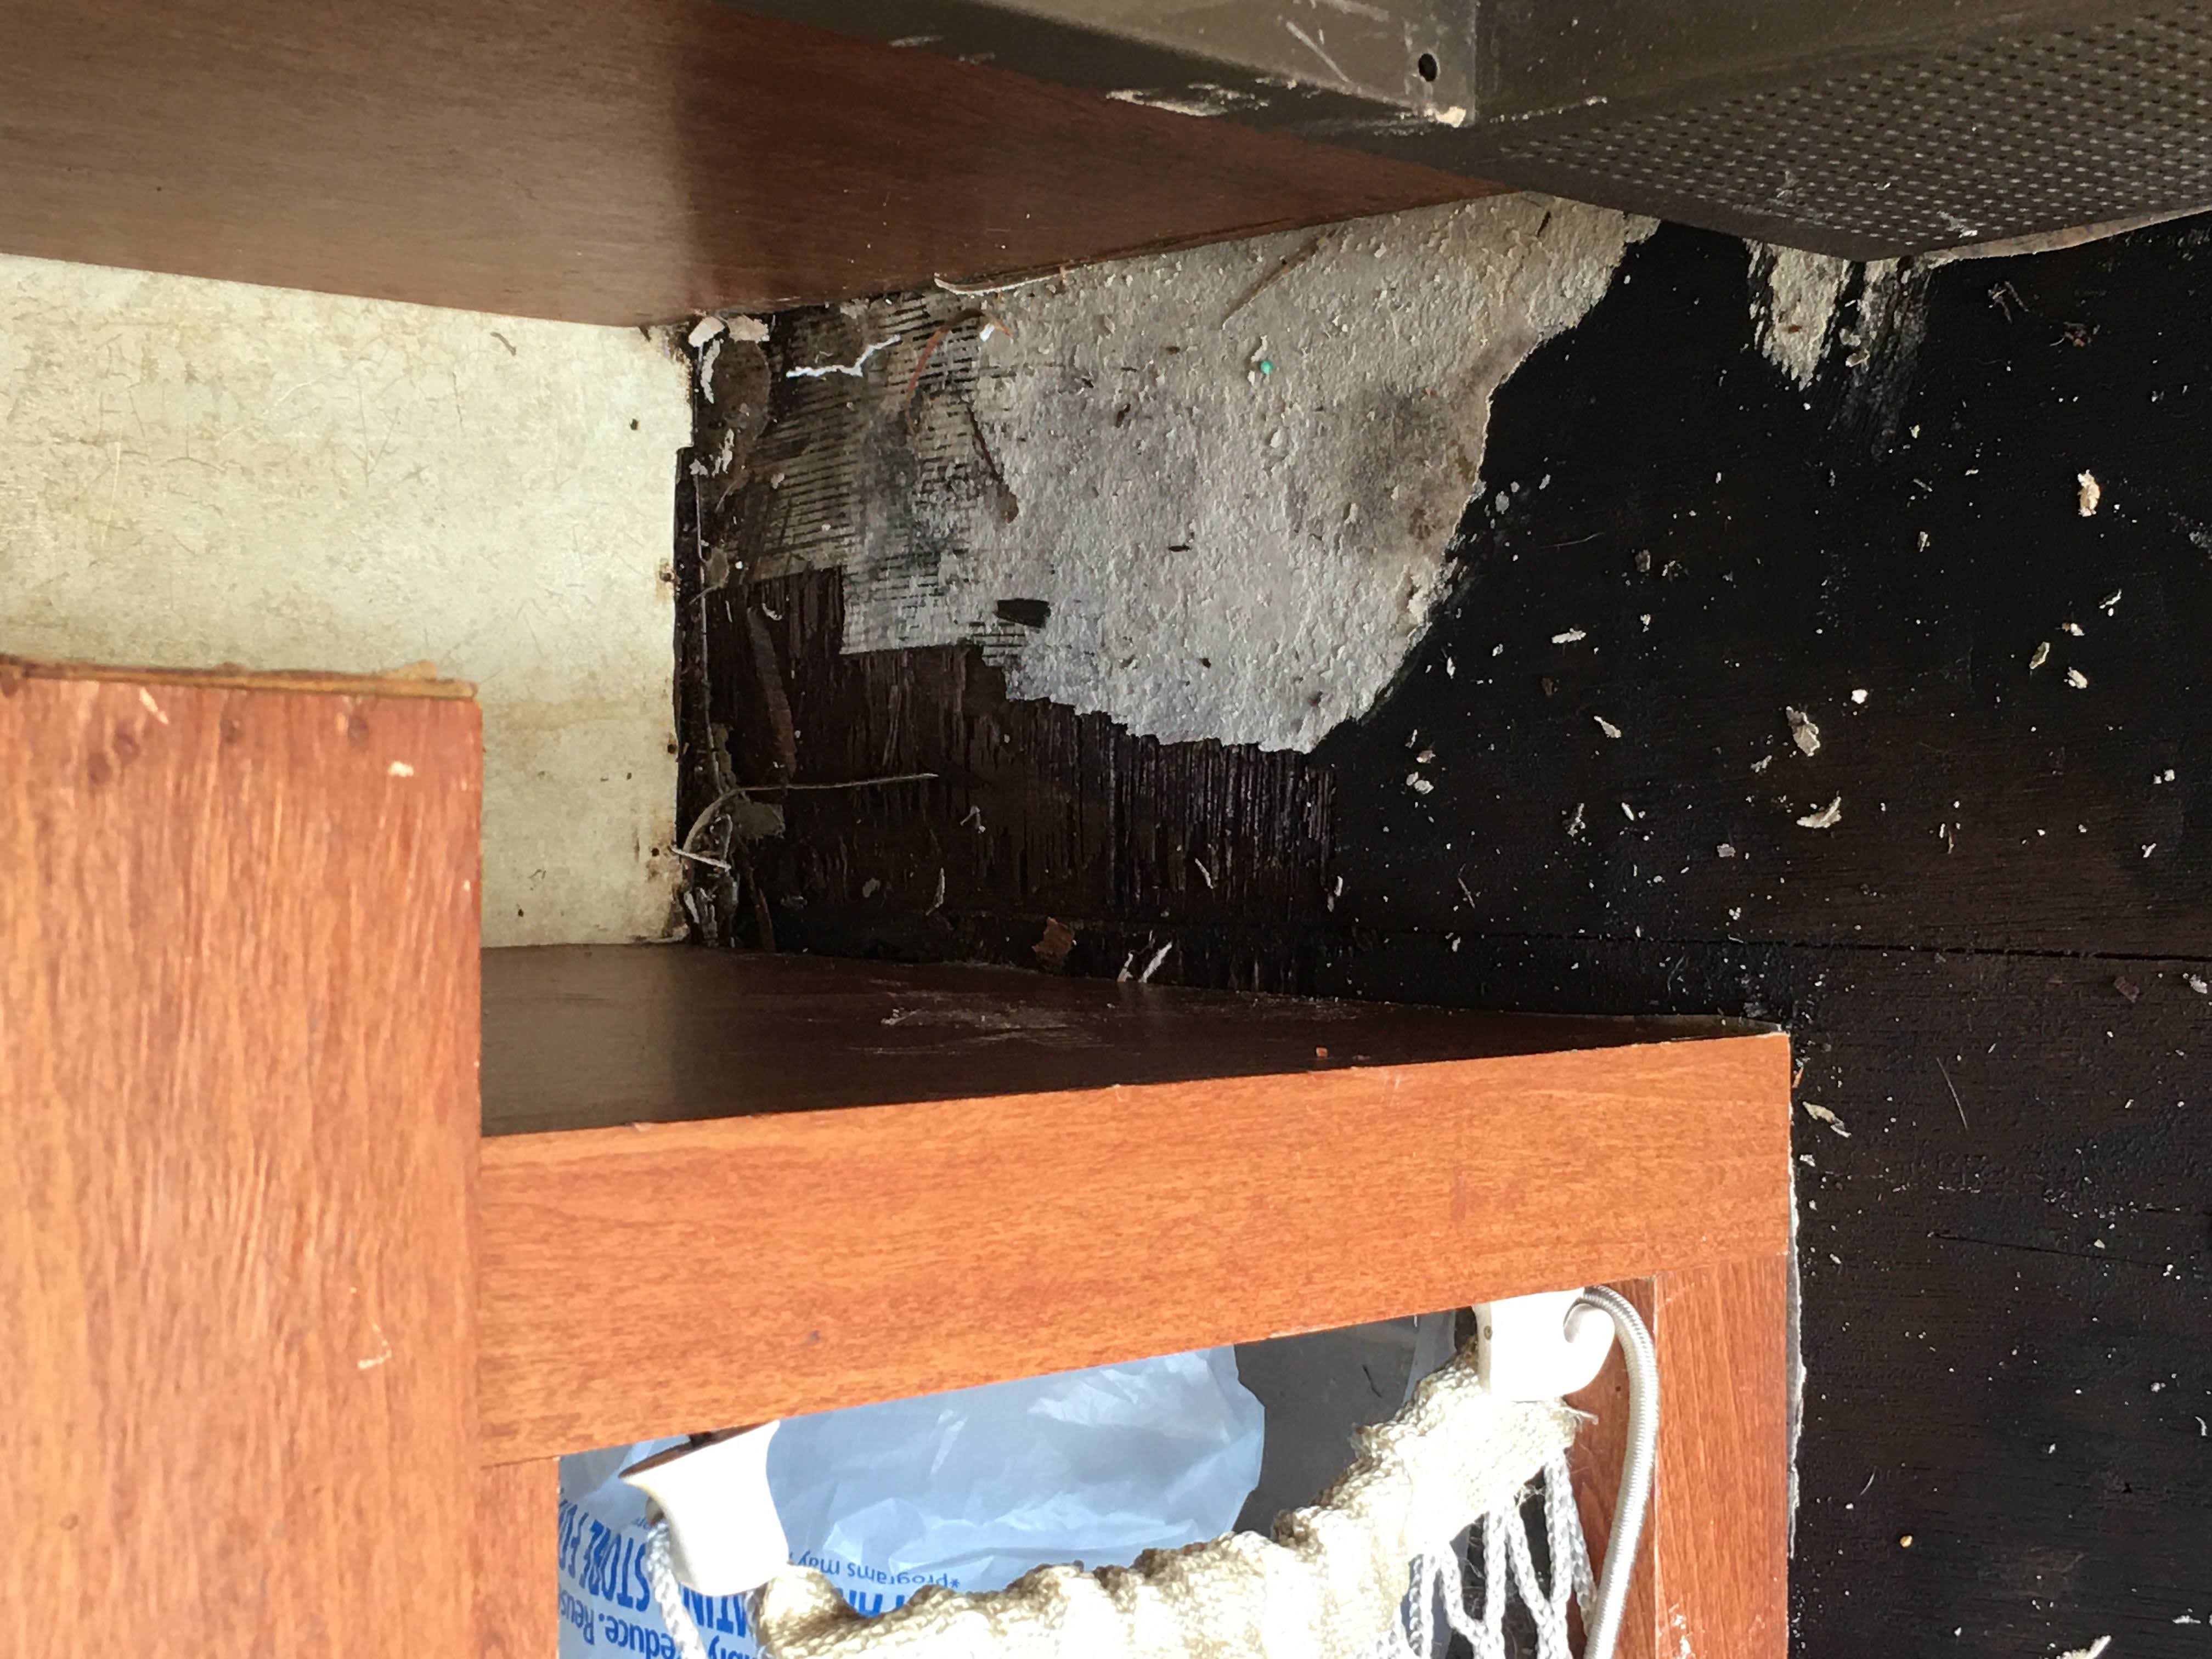 |
Posted By: Lindsay7186
Date Posted: 17 Jun 2020 at 2:48pm
I'm thinking that the water is coming from the slide-out, because the rubber strip on the bottom was tucked in in a couple of places when the slide was popped out. The camper was sold "as-is", which we didn't think was an issue! I know that all of this is fixable, but it is so disheartening.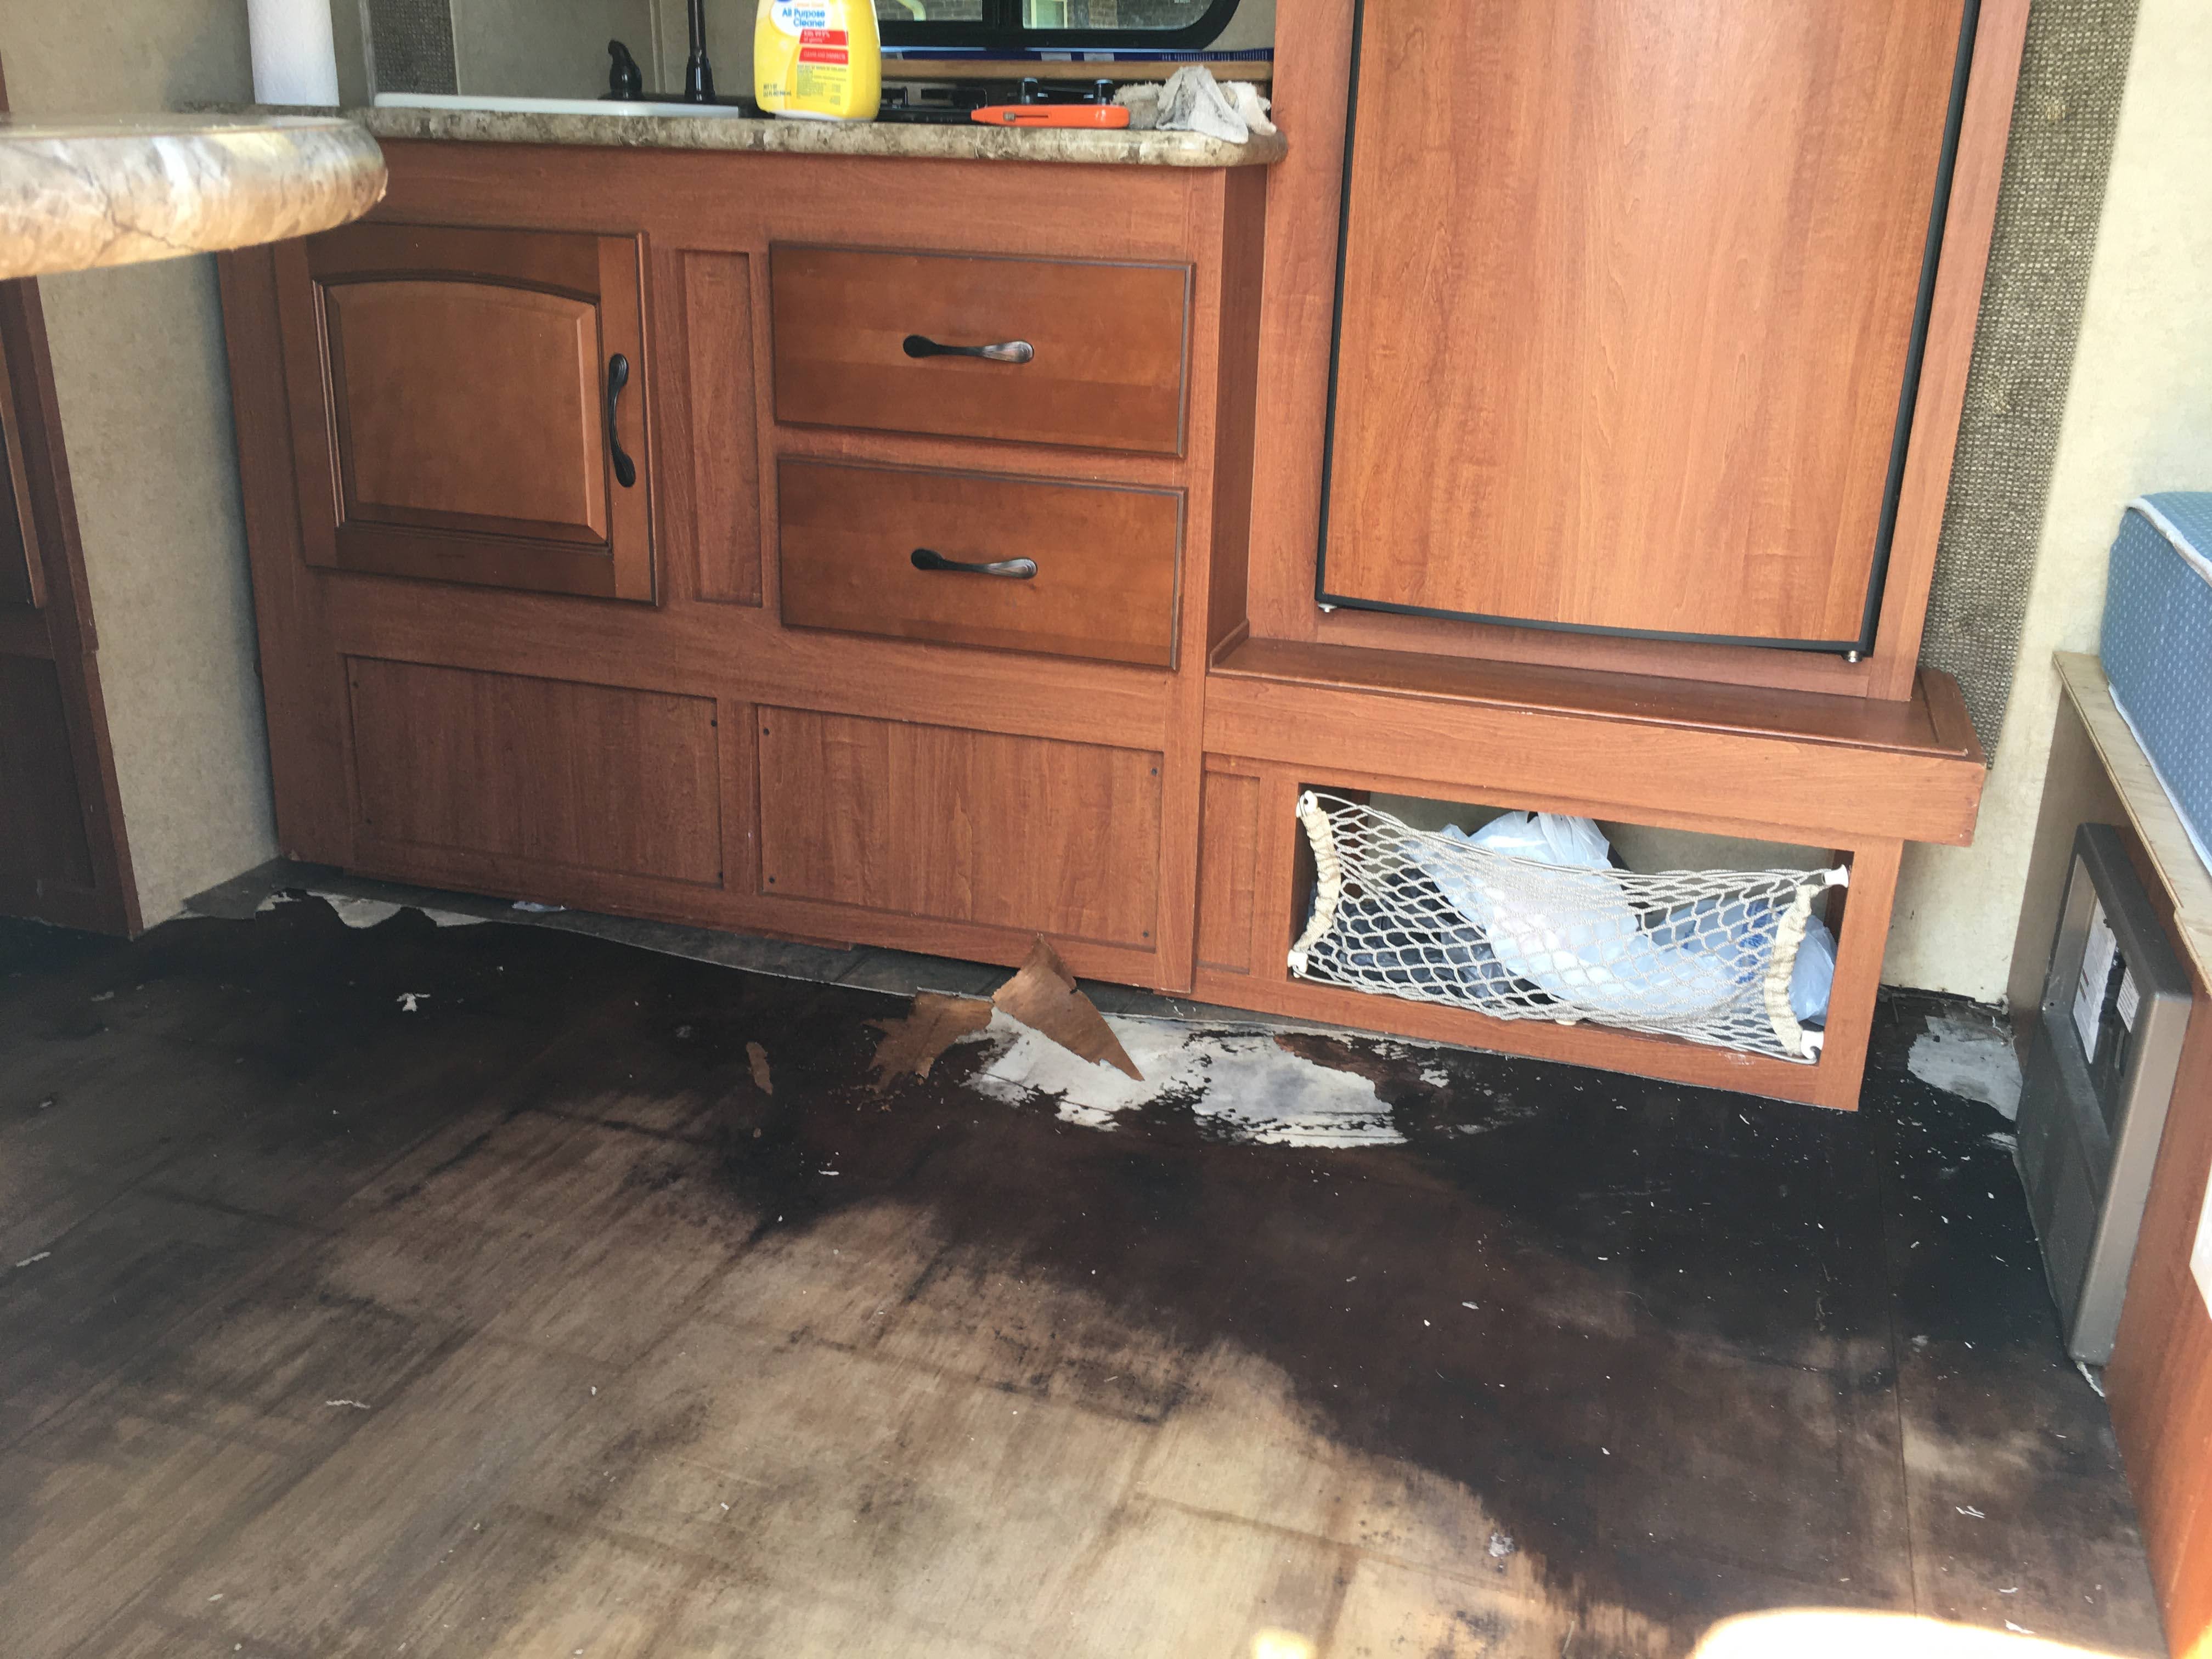 |
Posted By: StephenH
Date Posted: 17 Jun 2020 at 3:01pm
|
I'm sorry you did not find this out before you bought it. I don't have any advice about fixing it, but I sympathize with you. You do need to get rid of what looks like black mold. That is definitely not healthy. There are stronger than household bleach products for cleaning. Use them with a respirator and good ventilation. You will want to find the source of the water to fix that. I don't know if allowing the floor to dry will restore any rigidity to it. That is a question for much more knowledgeable people.
------------- StephenH Happy is the man that findeth wisdom,... http://www.rpod-owners.com/forum_posts.asp?TID=7712 - ouR escaPOD mods Former RPod 179 Current Cherokee Grey Wolf 24 JS |
Posted By: offgrid
Date Posted: 17 Jun 2020 at 4:14pm
|
Welcome to the forum but very sorry about the circumstances. There is no good way that I'm aware of to replace the whole floor as is serves as the platform for construction of the whole trailer. It might help you to view a video of how rpods are constructed. https://www.youtube.com/watch?v=QXNYA73rCNE - https://www.youtube.com/watch?v=QXNYA73rCNE As you can see, the floor is a layer of plywood over foam. Your plywood appears to be delaminated, it won't regain structural integrity. After cleanup, dryout, and and leveling any low spots with you may be best off just to cut out and glue and screw down a new floor layer. I didn't follow why you wanted to remove the ceiling, is that water damaged as well? ------------- 1994 Chinook Concourse 1995 RV6A Experimental Aircraft 2015 Rpod 179 - sold |
Posted By: Lindsay7186
Date Posted: 17 Jun 2020 at 4:51pm
Thank you so much for your help and the video!! There is a slight soft spot on our ceiling near one of the seams, but the rest of the ceiling is sound. I'm honestly not sure if it damaged or not. I'm just so afraid that we are going to get the flooring fixed, get everything built and put back in, only to find that there is another issue. I guess I thought we would be proactive since we'll have everything out of the r-pod anyway! 
|
Posted By: offgrid
Date Posted: 17 Jun 2020 at 5:48pm
|
The rpod roof is a single piece of fiberglas so it will only leak where there are holes in it. A notorious place is under the spoiler on the rear of the trailer. If the roof soft spot is under there then you should remove the spoiler and re-seal it. Multiple discussions on that on this forum. if the soft spot is somewhere else and not discolored then I wouldn't suggest removing the ceiling. You have enough on your hands without getting into that.... Good luck! ------------- 1994 Chinook Concourse 1995 RV6A Experimental Aircraft 2015 Rpod 179 - sold |
Posted By: mcarter
Date Posted: 17 Jun 2020 at 6:15pm
|
The first thing I would do is get it inside where it can't get wet again. I have never refloored a camper but I have done boats with severe water damage. It needs to dry to address mold. Once you have mold issue resolved and entire floor is dry you can recover floor. When I say recover, you may need to cover floor with new wood, I'd look for a way to not remove the existing floor only after I knew it was dry and mold free. Get it inside with fans and heat and get it dry. ------------- Mike Carter 2015 178 " I had the right to remain silent, I just didn't have the ability." |
Posted By: Junkinpod
Date Posted: 22 Jun 2020 at 7:43pm
|
I have a 182g 2014 with similar water damage that appears to have come in around the slide out. I've taken out all of the linoleum - and its now all dry. The floor has dropped about 1-2" on the outside edge - from the slide out to the rear of the garage. Following this thread - hoping to see how to fix this. ------------- Belinda |
Posted By: ToolmanJohn
Date Posted: 11 Jul 2020 at 5:28pm
|
Hitch it up and take it near a cliff. Make believe you have to unhitch to take care of some other problem, and "accidentally" let it roll off the cliff. Insurance. Also make sure to delete all your posts concerning htis problem. . LOL. I'm sorry, I make fun, but it does ultra SUCK for you to be stuck in this situation. The R-Pod is essentially a floor on the frame, then the interior parts are installed, then the aluminum frame goes on then the roof. To install a new plywood floor complete, would mean doing the entire thing backwards. My recommendation is to take it to a Forest River dealer with a big service department and see what they say about it. Who knows. Maybe a couple thousand and a month of labor.? Keep us updated on solution or end result.
------------- 2017 ATC 7X20 Custom Toy Hauler 2013 R-Pod 177 (SOLD) 2013 VW Touareg TDI |
Posted By: ChewadaJ
Date Posted: 26 Aug 2020 at 5:49pm
Lindsay, any update on your repair? I have a 2010 172 that had some similar damage. Not a whole lot of floor drop, but a lot of mold and the whole floor under the vinyl got wet and stayed wet for while. I did have some major plywood rot happening, and the smell when I removed all the viny! Whew! Like a swamp. Currently it's drying. I had to pretty much take up everything I could (kithchen area, the bottom bunk, storage in the rear) to get it cleaned up. I'm looking at a remodel now, and wondering how I can get the floor to stop smelling before I put something new on top of it.  |
Posted By: offgrid
Date Posted: 27 Aug 2020 at 7:11am
|
I have had some luck sealing subfloor with gflex epoxy from West Systems. It will even adhere to a damp surface and it creates an impermeable barrier. It is slightly flexible after cure which is good. But you have to start with a solid intact surface for the epoxy to stick to. The plywood in the rpod floor apparently does not use very water resistant adhesives so you will need to allow it time to fully dry and then see if the plywood is delaminating. Very likely it is, in which case it will be difficult to seal. I would also assume that the floor sandwich is no longer structurally sound and plan on adding "outriggers" to support the walls as some others here have done. Do that before sealing the floor on the interior. And then a new plywood layer on top of the existing sealed-up floor. ------------- 1994 Chinook Concourse 1995 RV6A Experimental Aircraft 2015 Rpod 179 - sold |
Posted By: ChewadaJ
Date Posted: 28 Aug 2020 at 2:07pm
|
Thank you offgrid. Amazingly, the floor hasn't dropped and is overall in good condition considering. I need to get under the shower and the bin where the hot water heater is to try to get the vinyl up there still. I'm in the south, and my storage place doesn't have power so I'm using the batter to run a fan and small dehumidifier, and recharging the battery as needed....so it's slow going. My current plan is once it's dry, treat the plywood with something to prevent more mold and treat the smell, and then put 1/8" plywood on top of everywhere I can. Keep it like that for a season and see if i got all the leaks, and then put some floor down. I'll be remodeling the kitchen area (probably taking out the sink and stove, as we usually cook outside anyways).  |
Posted By: ChewadaJ
Date Posted: 28 Aug 2020 at 2:15pm
|
Posted By: lostagain
Date Posted: 28 Aug 2020 at 5:48pm
|
Remember even after the water is dried out, mold and mildew persist in the air inside the trailer. Some people can be very sensitive to mold and mildew spores, wet or dry. Mycotoxicosis can be a serious problem for those who are sensitive to mold. So be careful and pay attention to how you are feeling when inside your Pod. Hopefully, no one will have any symptoms. ------------- Never leave footprints behind. Fred & Maria Kearney Sonoma 167RB Our Pod 172 2019 Ford F-150 4x4 2.7 EcoBoost |
Posted By: ChewadaJ
Date Posted: 01 Sep 2020 at 6:52am
|
Thank you Lost and offgrid. All good points. Somehow, the floor isn't falling through at any point right now. I have a dehumidifier running at nigh, and fans on 24/7. I'm having to get the vinyl up in small chunks under the fridge and the bath/shower. I don't want to remove, nor do I thing I can remove those really. From what I can tell, the layering on the bottom went Vinyl floor/linoleum paper plyboard foam plyboard black waterproof sheet I'm wondering if that bottom plyboard is wet too? It's hard to tell, but the smell is horrible after removing the vinyl flooring. I feel like I'll need to get rid of the mold I can see up top (I've read threads about people using everything from anti freeze, to expensive mixtures), sand sand some of the board, and then put some type of sealant down on top of that. Then put a layer of new plywood down on the open area (flooring not underneath anything). Anyone have any experience with this: |
Posted By: lostagain
Date Posted: 01 Sep 2020 at 7:47am
|
Once the wood is contaminated with mold, it is very difficult to eliminate the odor. You can mask it by using something that overpowers your nose, but the mold remains and as soon as the masking fragrance evaporates you'll smell the mold again. Bleach will kill the mold on the surface of the wood, but will not kill the hyphae [roots] inside the wood, so you can count on it returning when ever it has enough moisture to sustain itself. Supposedly vinegar will kill the hyphae, as will borax, but it is difficult to saturate the wood and substrate with a solution of either, especially under the cabinetry. Most mold remediation requires complete removal of the contaminated material. Keep in mind, when you sand or otherwise disturb the moldy plywood or substrate you are spreading mold spores into the air. If there is sufficient humidity, they'll start growing again. Also, if you are sensitive to mold, you will need adequate PPE when ever you are inside the trailer.
------------- Never leave footprints behind. Fred & Maria Kearney Sonoma 167RB Our Pod 172 2019 Ford F-150 4x4 2.7 EcoBoost |
Posted By: offgrid
Date Posted: 01 Sep 2020 at 7:48am
|
That floor construction sounds about right, here is a video so you can see the floor laminate assembly. Its hard to imagine the bottom ply layer not being wet if the top one is, gravity being what it is. Drill a couple of inspection holes in the bottom layer in your wettest areas to see if the water got in there. taking care to avoid hitting any plumbing and electrical. You can always re-seal them later. It's important to note that it is a laminated sandwich assembly, and derives much of its strength from the adhesive bond tying the whole assembly together. If your floor has wet through, even if you dry it out, you won't be able to count on the floor being strong enough to support the walls or the center areas of the floor (any areas distant from the main frame rails). So, consider adding "outriggers" tied back to the frame rails to provide external support to the walls, and additional cross bracing between the frame rails for any soft center areas. Both of these mods have been done before so you aren't the first, you can do a search on the forum for them. I doubt you can ever get rid of the small totally. Once everything is fully dried, if it was me I would apply a coating of West Systems g-Flex epoxy to the entire old floor surface to seal it up. Then add your new plywood on top of that. I once did that in a room in a house I remodelled where the previous owners left dogs to urinate and it worked for that smell. It's not cheap though. https://www.youtube.com/watch?v=vMXneKc_fDo - https://www.youtube.com/watch?v=vMXneKc_fDo ------------- 1994 Chinook Concourse 1995 RV6A Experimental Aircraft 2015 Rpod 179 - sold |
Posted By: ChewadaJ
Date Posted: 01 Sep 2020 at 2:03pm
|
Great thank you all! Offgrid, what would you use to seal the water barrier if I drill through it to test for water? I like the idea of having a seal above it all if nothing else. It's only a 172 so it's not a lot of space (6x17 really?). I think it's going to take a lot longer to dry out than I first imagined. As it continues to dry, the plyboard is breaking apart more and more in the really damaged area right up front where the bottom bunk would be). Today I pulled some more out, and pretty easily got down to the styrofoam layer. So, best not to begin, but once begun better finish! Read that some where years ago. I'm committed now! I think I'll only need 'outriggers' in that front area. I'll send more pics as I get it going.
|
Posted By: offgrid
Date Posted: 01 Sep 2020 at 2:49pm
|
I think any good quality polyurethane roofing caulk would be fine. You're only taking about a few small holes. You might want to buy one of these. They're cheap and you might be able to just push the pins through the underlayment to check the moisture level in there. And to see if the top is getting dry too. Very handy tool. https://www.amazon.com/Proster-Moisture-Handheld-Detector-Measuring/dp/B01MV3PSF6/ref=asc_df_B01MV3PSF6/?tag=hyprod-20&linkCode=df0&hvadid=309786256292&hvpos=&hvnetw=g&hvrand=2367466680454414073&hvpone=&hvptwo=&hvqmt=&hvdev=c&hvdvcmdl=&hvlocint=&hvlocphy=9008704&hvtargid=pla-560861937242&psc=1 - https://www.amazon.com/Proster-Moisture-Handheld-Detector-Measuring/dp/B01MV3PSF6/ref=asc_df_B01MV3PSF6/?tag=hyprod-20&linkCode=df0&hvadid=309786256292&hvpos=&hvnetw=g&hvrand=2367466680454414073&hvpone=&hvptwo=&hvqmt=&hvdev=c&hvdvcmdl=&hvlocint=&hvlocphy=9008704&hvtargid=pla-560861937242&psc=1 If the top ply layer is delaminating as it dries then it has basically lost all its structural strength. You can't remove all of it without also removing the interior walls and lifting up the sidewalls. so you will need to adhere/attach your new top plywood layer well to the existing damaged plywood so it can be a substitute. That will require getting things as dry as possible. which will take forever in South Carolina this time of year. Maybe try putting a heater in the rpod to accelerate getting the humidity out, or wait for lower humidity this fall/winter, One nice thing about the g flex epoxy is that it adheres well to wood that is still a little damp. ------------- 1994 Chinook Concourse 1995 RV6A Experimental Aircraft 2015 Rpod 179 - sold |
Posted By: ChewadaJ
Date Posted: 03 Sep 2020 at 7:42am
|
Today I learned that awesome device exists! That's awesome. My wife had the same idea about turning on the heater. I think I'll try that for a few days. I have 2 box fans going in it now, and a small dehumidifier going in it at night. It's def drying out more!
|
Posted By: ChewadaJ
Date Posted: 03 Sep 2020 at 8:04am
|
Offgrid, any thoughts on this product as an alternative? https://www.rotdoctor.com/products/cpes.html
|
Posted By: offgrid
Date Posted: 03 Sep 2020 at 8:29am
|
No experience with them. Maybe someone else does. Lots of this stuff was developed for wooden or composite wood/fiberglaa boat building and repair. I'd guess that their epoxies are probably similar to the West Systems ones. I would check that whatever you use retains flexibility and is proven to adhere to damp wood. Don't know how polyurethanes would work in your application. Let us know what you wind up using and how it works for you. ------------- 1994 Chinook Concourse 1995 RV6A Experimental Aircraft 2015 Rpod 179 - sold |
Posted By: ChewadaJ
Date Posted: 15 Sep 2020 at 8:56am
|
So, rpod floor update! After a week or more of drying, I ended up taking out most of the wood from the inside. It turns out not only did I have a leak at the rear window, but also some of the openings (the outlet by right wheel well, the shore power outlet). So, I have scraped up the top layer of all the plywood. Pulled off part of the wall to expose the wet areas and start drying it out. The humidity tester tool was crucial here, as it showed me where things were still damp where I couldn't see, thank you again Dennis! The worse area was in the rear storage, under the seat where the table is in the 172. I took up the sub floor, down to the styrofoam, and part of lower plywood next to the water proofing. I see there are 2 places where I will need to get someone to weld in a few riggers. The back area, and the very front. My concern now, is waiting for it to finish drying (slow but surely, I'm using a few small DC fans, and charging the battery as needed), and what to do about the lower plywood (next to the water proofing). It seems like the entire lower plywood is WET! I saw another post of a guy who works on boats who took all his floor out. I've DM'd him, but he hasn't gotten back to me. I want to know if he took out his fridge, etc...I can see how I could take out all the styrofoam and wood except for below the appliances. Replacing the lower wood, and cleaning or replacing the styrofoam would not be that hard, but if I don't expose the wood by the water proofing below the fridge and under the bathroom, I'm worried that little bit of moisture left there will end up making this all happen again. Thoughts? Anything encouragement or guidance is appreciated!
|
Posted By: offgrid
Date Posted: 15 Sep 2020 at 11:10am
|
That other forum member hasn't been active for a couple of years so probably you won't hear from him. If it was me I wouldn't try to remove the lower plywood, just remove the foam and the weatherproofing and let it dry. I would assume that could take several months. As the weather cools the humidity will drop and you can add some heat, that will speed things up. If you take the time to let it dry thoroughly you won't need to worry about the inaccessible areas wicking water back into your repaired areas. When everything is dry I would add the outriggers and an additional plywood layer under the lower one, wrapped in new weatherproofing, caulked, and supported from underneath by outriggers and support rails extending between the frame rails. This is how FR has repaired soft floors under warranty. Pilotpodder has a nice video of what they did in his case. The original floor got its rigidity from being a laminated "sandwich". That is no longer possible in your case so you will likely need more supports than you think under your new floor to compensate for that. Then new foam from above and a new top ply layer. ------------- 1994 Chinook Concourse 1995 RV6A Experimental Aircraft 2015 Rpod 179 - sold |
Posted By: ChewadaJ
Date Posted: 22 Sep 2020 at 7:14am
|
Well, stage one complete. I really didn't want to remove all the styrofoam, but after seeing how wet it was underneath in one section, I went ahead. It was actually easy for most of it. The lower plywood I left in place, except where it was coming up easilly. What I found with mine, is that there are basically 6 sections if you look from underneath. 3 of those sections are not able to be seen from below bc of the clean, grey, and black tanks. Then there are open sections at the rear, in the middle,and in the front. I'll be putting some sort of support in those areas like you mentioned. Not sure exactly what yet, but it makes sense what you're saying and how it's needed. I found the foam at Lowes, and it's really inexpensive, but thickness isn't exactly the same. The foam I took up measured at 1 3/4", and Lowes only has 1/2, 3/4, and 2....so I'll have to go with the 2 or use several layers together to get it the same size.  The front and rear were the most damaged by water--from the floor and one corner/side ended up being pretty wet. I exposed the wall on those areas, and actually took off the back molding in the rear corner to let it dry further. We're having a glorious week here in SC. Cool temps, low humidity, and sunshine! I'll have to do some wood filler repair on the exposed walls, as well put in new plywood on the inner back panel, and some sort of wall paper. That will be the easy part! The inside is now down to only a bit of framing around the hot water tank and heater, and of course the fridge and bathroom areas. Everything else is down to the waterproofing wrap! I decided I need to recaulk those areas, and might as well do the whole thing it's really not that much more. So next steps is scraping and resealing while the inside dries. I'm definitely happy to be done with the tear down, that part was not fun and felt like I just kept finding more and more wet areas. Time to put it back together, and I'm actually excited now about the possibility of what the inside can look like now and being able to sleep in it again!
|
Posted By: offgrid
Date Posted: 22 Sep 2020 at 7:54am
|
Sounds like good albeit messy progress. Layering the foam is fine to get to the thickness you want. You can use some spray adhesive to bond the layers, just be sure that the materials are compatible. For sure use a closed cell foam. You might want to use an epoxy mix to fill the wood rather than off the shelf wood filler. That would bond better and resist future moisture and rot. West Systems has some good tutorials you can download. https://www.westsystem.com/instruction-2/ - https://www.westsystem.com/instruction-2/ ------------- 1994 Chinook Concourse 1995 RV6A Experimental Aircraft 2015 Rpod 179 - sold |
Posted By: ChewadaJ
Date Posted: 22 Sep 2020 at 7:43pm
|
Thanks offgrid. It's definitely been an adventure. I ended up tearing up most of the bottom plywood bc it was so loose. This morning, when I opened it up, it was the first time the smell wasn't overwhelming, so that's a good sign! Do you have any experience caulking rpods? The seams are so slight, putting the caulk bead on there will be a delicate job. Do you have a link the to the video you mentioned? |
Posted By: offgrid
Date Posted: 23 Sep 2020 at 6:41am
|
If by caulking you mean sealing the bottom of the trailer others might have more experience than I do. I tend to lean toward procedures and products used for marine applications since I used to have a wood/epoxy composite sailboat. For that, I used mostly 3M 4200 and 5200 polyurethane adhesive/sealants. 4200 if you want to be able to ever take things apart later, 5200 if you never do. That stuff is so strong you can hang a lead keel on with it. Not sure what you mean by video link? I put a link to West Systems' instructions page in my last post, there are both some videos and text documents in there worth looking at.
------------- 1994 Chinook Concourse 1995 RV6A Experimental Aircraft 2015 Rpod 179 - sold |
Posted By: ChewadaJ
Date Posted: 23 Sep 2020 at 7:54am
|
The video I was mentioning was the one you talked about here: "This is how FR has repaired soft floors under warranty. Pilotpodder has a
nice video of what they did in his case. The original floor got its
rigidity from being a laminated "sandwich". That is no longer possible
in your case so you will likely need more supports than you think under
your new floor to compensate for that." |
Posted By: offgrid
Date Posted: 23 Sep 2020 at 8:43am
|
Here it is https://www.youtube.com/watch?v=vGOfQqqu18o&t=696s - https://www.youtube.com/watch?v=vGOfQqqu18o&t=696s ------------- 1994 Chinook Concourse 1995 RV6A Experimental Aircraft 2015 Rpod 179 - sold |
Posted By: Chananain
Date Posted: 13 Sep 2021 at 4:44am
| And really, it's a pity that you didn't notice it. It would be possible to eliminate the cause in advance. I don't even know which is worse when it happens accidentally due to breakdowns. |