| Author |
 Share Topic Share Topic  Topic Search Topic Search  Topic Options Topic Options
|
Footslogger03 
Senior Member


Joined: 21 Jul 2011
Location: Laramie, WY
Online Status: Offline
Posts: 362
|
 Topic: Latest Mods ... Topic: Latest Mods ...
Posted: 04 Jul 2012 at 5:18pm |
|
Even though it's a holiday, the forest fires in the area have us pretty much hunkered down. So, I thought I'd go ahead and knock out some mods in our 177.
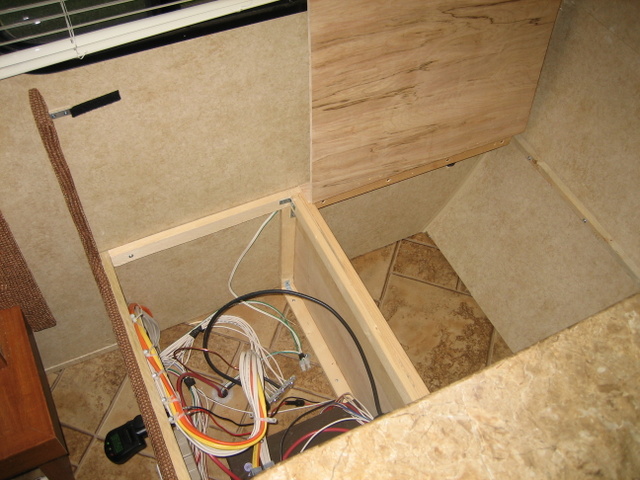
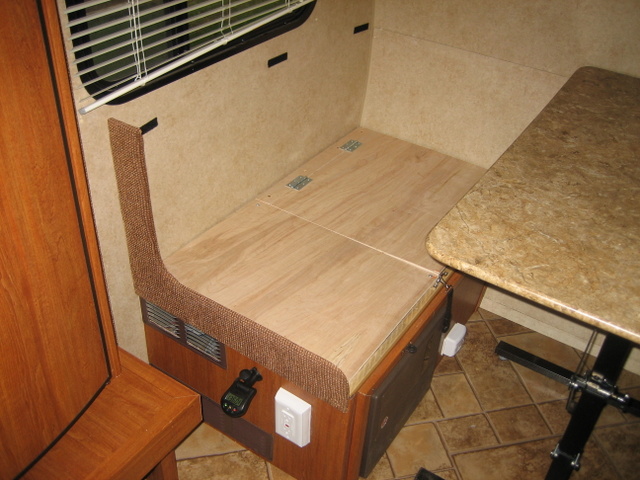
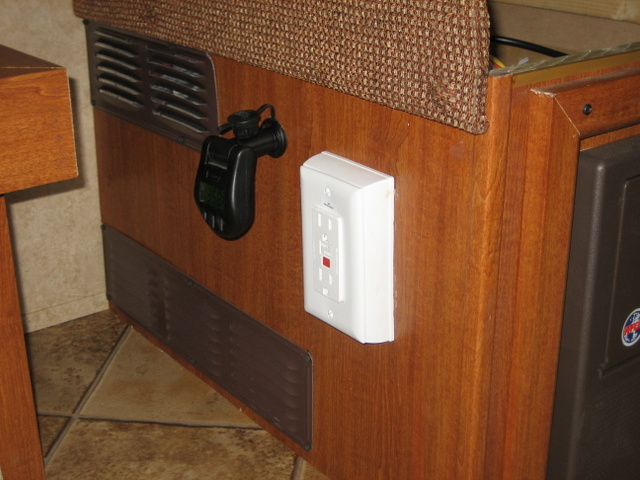
I divided the area under the dinnette seat on the driver's side so that half was for electronics and half was for storage. Added an intake grate for inflow of air and one for outflow on the side of the seat near the top of the seat cabinet. Gave us loads of new storage room.
While I was under the seat and near the electronics ...I went ahead and added a 12 VDC outlet. Mounted the outlet on the side of the cabinet (seat base) near the current 110V outlet. Wired it directly to the same lines that feed the propane detector, so it's HOT all the time. Stuck a little digital volt meter in the outlet for the time being so that I can monitor battery activity.
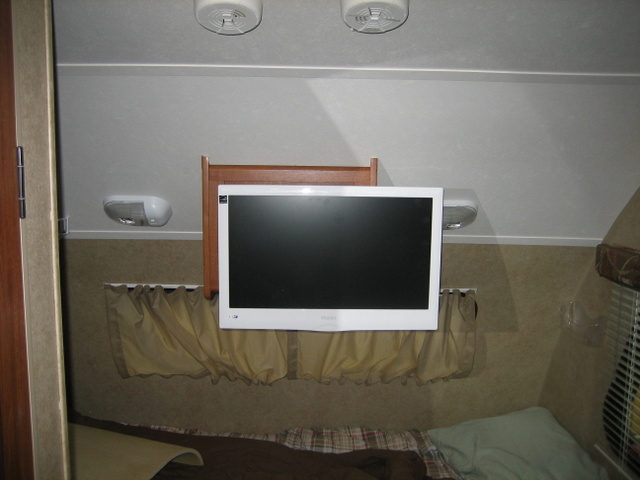
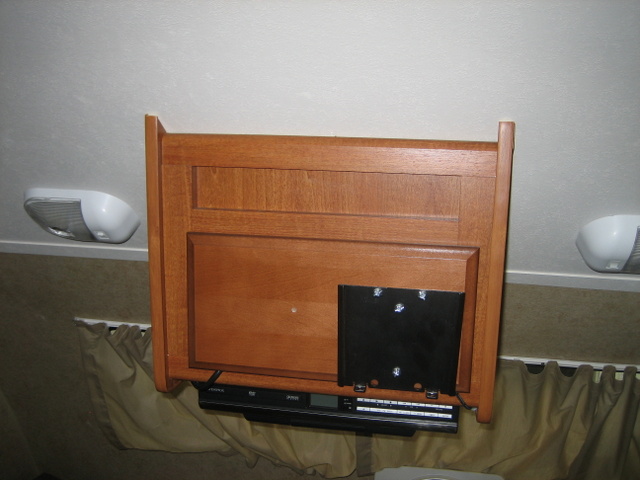
Installed a slimline flat panel TV plate to the existing door of the entertainmnent unit cabinet over the bed. Ofset it a bit to one side so that when the 22" TV is mounted and running we can easily see it from the dinnette area. Just to be on the safe side, before I used the new TV mount I took 3 pieces of moulding, liquid nailed it to the ceiling of the Pod (this is all INSIDE of the entertainment center) and then screwed those pieces of moulding to the entertainment center frame. With the TV attached to the mount the entertainment center showed NO sign of sagging or pulling away from the ceiling. Nice thing about mounting it there was that there is power and a cable TV source.
Mounted some of those 3M Organizer trays on the walls around the bed so that the wife and I would have a place for our reading glasses, cell phone and anything else we'd need during the night.
All for now ...time to light the grill and pour myself (and the wife, of course) a cold adult beverage.
Happy 4th everybody !!
'Slogger
|
|
Livin' the Dream ...'Slogger
|
 |
Diamondgirlz 
Newbie

Joined: 20 Feb 2012
Location: MT
Online Status: Offline
Posts: 9
|
 Posted: 04 Jul 2012 at 9:05pm Posted: 04 Jul 2012 at 9:05pm |
Could you post pictures, please? thanks
|
|
USAF retired x 2
|
 |
Footslogger03 
Senior Member


Joined: 21 Jul 2011
Location: Laramie, WY
Online Status: Offline
Posts: 362
|
 Posted: 04 Jul 2012 at 9:07pm Posted: 04 Jul 2012 at 9:07pm |
Originally posted by Diamondgirlz
Could you post pictures, please? thanks |
=======================================
I'll take some pics and post them in the morning ...
'Slogger
|
|
Livin' the Dream ...'Slogger
|
 |
dsmiths 
Senior Member


Joined: 10 Oct 2011
Location: Southern Ind
Online Status: Offline
Posts: 866
|
 Posted: 04 Jul 2012 at 9:57pm Posted: 04 Jul 2012 at 9:57pm |
|
good Post Foot Slogger, sounds like you got a lot done.
|
|
Dane and Donna Smith
2011 RP-172
2008 Chevrolet Trailblazer 4X4
lift kit
prodigy wireless brake controller
|
 |
Footslogger03 
Senior Member


Joined: 21 Jul 2011
Location: Laramie, WY
Online Status: Offline
Posts: 362
|
 Posted: 05 Jul 2012 at 11:36am Posted: 05 Jul 2012 at 11:36am |
Here are some photos of the latest mods I've made to our 177. Sorry that some of them are out of sequence - had some problems during upload ...
Here's the underseat mod with the lids open/off.
Here's what the 22" flat panel TV looks like in place and ready for viewing from the dinnette area.
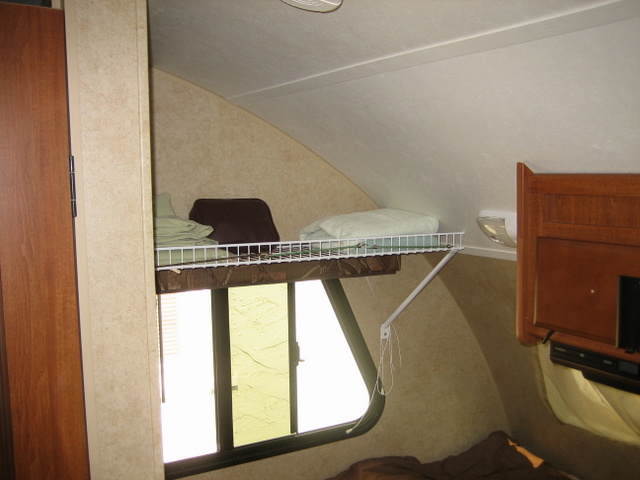
This is an "off the shelf (no pun intended) shelf made by Rubbermaid that I got at Ace Hardware. I mounted the shelf upside down so that there would be a "lip" to hold things back. We use small bungees to keep everything in place while traveling.
Here's what that seat cabinet from above looks like with the lids on. The lid over the electronics is screwed down to avoid accidental access.
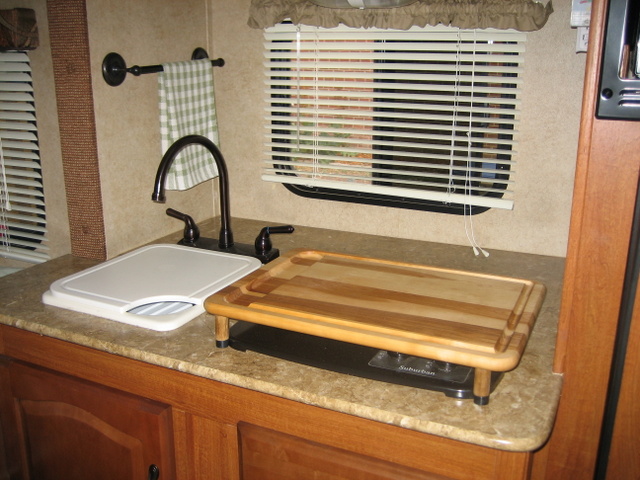
This is an "off the shelf" cutting board from K-mart. I just added legs with rubber feet that fit tightly around the edges of the cooktop. I also added a towel bar.
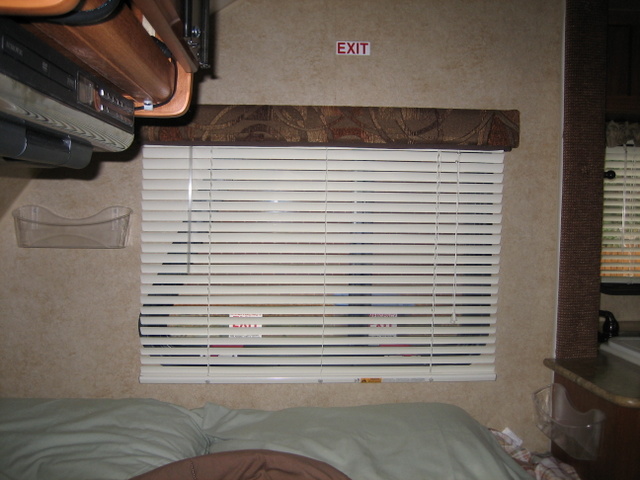
In the upper left and lower right (on cabinet surface) are the 3M organizer trays.
Here's the bracket that supports the 22" flat panel TV. I reinforced the entertainment center cabinet with molding that I attached to the ceiling with Liquid Nails and then screwed to the existing frame (all of this was done INSIDE of the cabinet for aesthetic reasons.
This is the side of that seat cabinet where I installed the input/outflow vents and the 12V outlet.
|
|
Livin' the Dream ...'Slogger
|
 |
techntrek 
Admin Group - pHp


Joined: 29 Jul 2009
Location: MD
Online Status: Offline
Posts: 9062
|
 Posted: 05 Jul 2012 at 2:23pm Posted: 05 Jul 2012 at 2:23pm |
|
The vents look like a good idea.
|
|
|
 |
Diamondgirlz 
Newbie

Joined: 20 Feb 2012
Location: MT
Online Status: Offline
Posts: 9
|
 Posted: 05 Jul 2012 at 5:33pm Posted: 05 Jul 2012 at 5:33pm |
Thanks for the photos Footslogger03! So you have both the flip-down tv and the bigger one? We just took our 1st trip with our 177 and are now trying to figure out the best way to add storage--thanks for the ideas!
|
|
USAF retired x 2
|
 |
Footslogger03 
Senior Member


Joined: 21 Jul 2011
Location: Laramie, WY
Online Status: Offline
Posts: 362
|
 Posted: 05 Jul 2012 at 5:56pm Posted: 05 Jul 2012 at 5:56pm |
Originally posted by Diamondgirlz
Thanks for the photos Footslogger03! So you have both the flip-down tv and the bigger one? We just took our 1st trip with our 177 and are now trying to figure out the best way to add storage--thanks for the ideas! |
==========================
Yes ...the little flip-down TV isn't bad when we're back in bed. But generally, if I put my head on the pillow it's "lights out" so to be honest we really don't watch it much. Nice to have it for a DVD/Movie sometimes.
'Slogger
|
|
Livin' the Dream ...'Slogger
|
 |
Racer|X| 
Senior Member

Joined: 21 Mar 2012
Online Status: Offline
Posts: 237
|
 Posted: 05 Jul 2012 at 10:38pm Posted: 05 Jul 2012 at 10:38pm |
|
Awesome job! Noce mods.
|
 |
this_is_nascar 
Senior Member


Joined: 24 Jan 2010
Location: NJ
Online Status: Offline
Posts: 466
|
 Posted: 06 Jul 2012 at 7:59am Posted: 06 Jul 2012 at 7:59am |
For the shelf and the towel rack, how did you do the mounting to the wall surface? Did you know there are studs there to attach to or did you use something special for mounting?
|
|
"Ray & Connie"
- 2017 R-Pod RP-180
- 2007 Toyota Tacoma TRD-Off Road
|
 |


