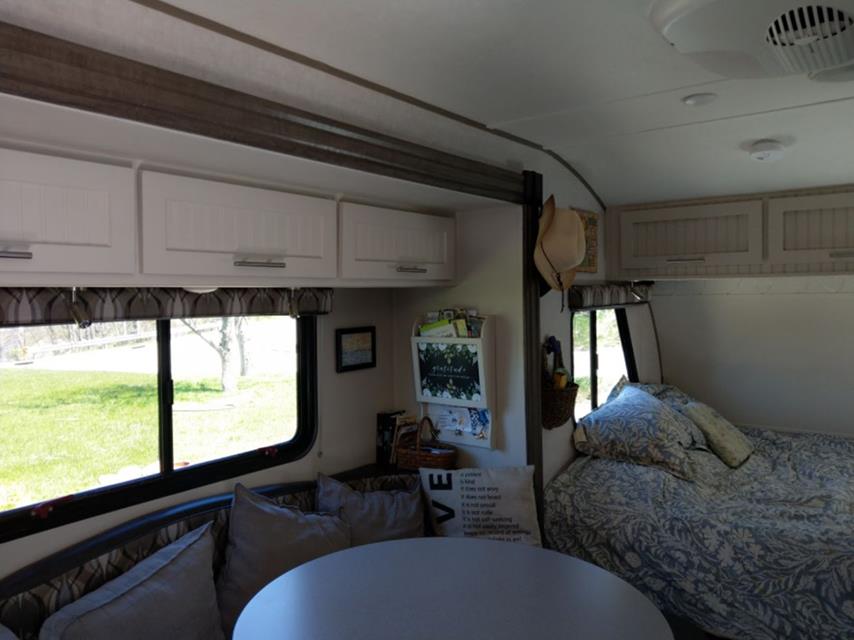
In answer to your question on how I made the over the bed
cabinet in my 179 as nearly as I can remember, I made it 2 ½ years ago, keeping
in mind that I am not a carpenter and my terminology will be a stretch but here
goes. I wanted to keep the cabinet off
and above the window valences. With that
in mind the finished bottom of the cabinet is 18.5 inches deep and the finished
front of the cabinet is 12.75 inches tall.
I used a sheet of 3/16 plywood/bead board for the exterior of the front
and bottom. Using some scraps out the sheet
of plywood I cut two end pieces for the cabinet that looked like a pregnant
triangle to match the curvature of the front wall/ceiling of the trailer. Once those end pieces were cut to the correct
pattern I cut to fit 3 cross members for the cabinet skeleton out of pine 1x2s.
The end pieces were screwed into the
cross members. One cross member at the
bottom back lays flat, the bottom front cross member was in the upright
position when the end plates were screwed on and then the front top cross
member was also in the upright position when the end plates were screwed on. I then used more 1x2s as spanners between the bottom
2 cross members and the front 2 cross members (I think I used 5 spanners on the
bottom and 4 spanners between the front cross members) After the assembling all
these parts it’s installed in the trailer using screws in the end plates into
the aluminum framing (about 6 to 8 screws running on the top edge of the end
plates, then securing the bottom edge and front edge into the wall with screws
and into the aluminum framing if possible.
Using long enough screws and if you can find the wood framing secure the
top cross member and the lower back cross member into the wood framing behind
the wall/ceiling of the trailer. Once
you have the skeleton of the cabinet installed you can install the exterior
finishing (I chose bead board). On the
front of the cabinet using the spanners for the edge support of the door openings
cut out the doors from the front skin and reuse these pieces after trimming them
out to be the doors. Paint; mount the
finished doors with hinges, door supports, and door pulls as to your décor. Install a false bottom on the inside of the
cabinet of luan that you can run the lighting electrical wiring through from
the ceiling light in the cabinet to the head of the bed for installation of a
task reading light. Wala you have a
cloths storage cabinet. The task
lighting, hinges, door supports, and handles were purchased off Amazon. The cabinet is doing what we had in mind for
it and it seems to be holding up. If
need further information or have more questions you can PM me. Hope this helps you.

Once we got the cabinet installed then we had to update the décor on the factory installed cabinet over the dining area, so we changed out the
glass inserts in the cabinet doors with bead board and painted them all. It never ends.


