
|
ouR escaPOD mods |
Post Reply 
|
Page <1 4243444546 58> |
| Author |
 Printable Version Printable Version Google Google Delicious Delicious Digg Digg StumbleUpon StumbleUpon Windows Live Windows Live Yahoo Bookmarks Yahoo Bookmarks reddit reddit Facebook Facebook MySpace MySpace Newsvine Newsvine Furl Furl Topic Search Topic Search  Topic Options Topic Options
|
StephenH 
podders Helping podders - pHp 

Joined: 29 Nov 2015 Location: Wake Forest, NC Online Status: Offline Posts: 6431 |
 Post Options Post Options
 Quote Reply Quote Reply
 Topic: ouR escaPOD mods Topic: ouR escaPOD modsPosted: 19 Jun 2020 at 4:19pm |
|
For a second, I thought that was one weird looking axle
 until I realized that it is two pictures side-by-side shot from different angles. It looks good and I hope it helps. until I realized that it is two pictures side-by-side shot from different angles. It looks good and I hope it helps.  |
|
|
StephenH
Happy is the man that findeth wisdom,... ouR escaPOD mods Former RPod 179 Current Cherokee Grey Wolf 24 JS |
|
 |
|
|
offgrid
Senior Member
Joined: 23 Jul 2018 Online Status: Offline Posts: 5290 |
Post Options
Quote Reply
Posted: 19 Jun 2020 at 8:53pm |
|
Looks good except I would move the ubolts outward as far as possible without interfering with the torsion arms. The upward stress on the axle at the ends is the what causes the problem so might as well transfer as much of that load to the reinforcing angle as soon as possible.
|
|
|
1994 Chinook Concourse
1995 RV6A Experimental Aircraft 2015 Rpod 179 - sold |
|
|
|
|
StephenH
podders Helping podders - pHp
Joined: 29 Nov 2015 Location: Wake Forest, NC Online Status: Offline Posts: 6431 |
Post Options
Quote Reply
Posted: 23 Jul 2020 at 8:55pm |
|
After much thought and after deciding I did not like climbing the ladder to put on and take off my homemade slide-out cover coupled with having to make a new one because the fabric I used was just not sturdy enough to last more than a year or so, I decided to order a slide-out cover. I ordered the Lippert Solera Slide Topper in black. Mike Carter provided a link to installation on the eTrailer site that was helpful. He also recommended Lexel sealant. Delivery was done by a shipping company. It was done first by Estes freight and then the last-mile delivery company made the final delivery. Everything came in one long tube. One end had a metal cap that was taped in place. The other end did not have a metal cap and looked like the tube had been dropped on that end. However, the rest of the tube looked undamaged so I annotated the damage on the delivery document and then accepted the package. Upon opening it, I found that the Awning Rail was bent. That was not an issue as the RPod already had one. The supplied rail will be used in future mods. The awning roll was covered in white plastic that looked somewhat abraded. Whether that was from the factory or from the handling in shipment, I do not know. Solera awnings now use what is called an Access Plate. This gets attached to the slide-out. It does not hold the awning roll, but is meant to be used with the Access Bracket which is attached to the plate with set-screws. Extension rods attach to the Drive and Idler heads with Torsion Arm caps. The arms feed into the Access Brackets after the fabric is fed through the Awning Rail slot. I was able to flex the rain gutter enough to feed the fabric in from the back end toward the front. Per instructions, I sprayed the slot with silicone spray to make it easier to slide through the slot. Once I got that done with help from a friend, I was able to get the extension rods in place and secured with screws. The last step was to put screws through the rail and the polycord in the slot to keep the fabric from shifting. Issues: The instructions stated that there should have been four screws to secure the extension arms to the access brackets. There were only two in the package. Also, the end of the awning roll had one area where the paint was scratched, probably during shipment. The third issue is that the fabric is not centered on the roll. While this does not affect performance, it was not something I anticipated. I looked to see if I could slide the fabric in the roll, but it appears to be well fastened to the roll. It isn't a big difference, but I did notice it after I got the awning installed. I'm waiting on an answer from Liippert about these issues. Opinion: Why did I wait so long? This will definitely be very helpful since I no longer have to worry about weather when we arrive, but can just extend the slide-out and it will be covered. The black fabric and hardware match the RPod so that it blends in and does not stand out visually. Okay, now for some pictures: 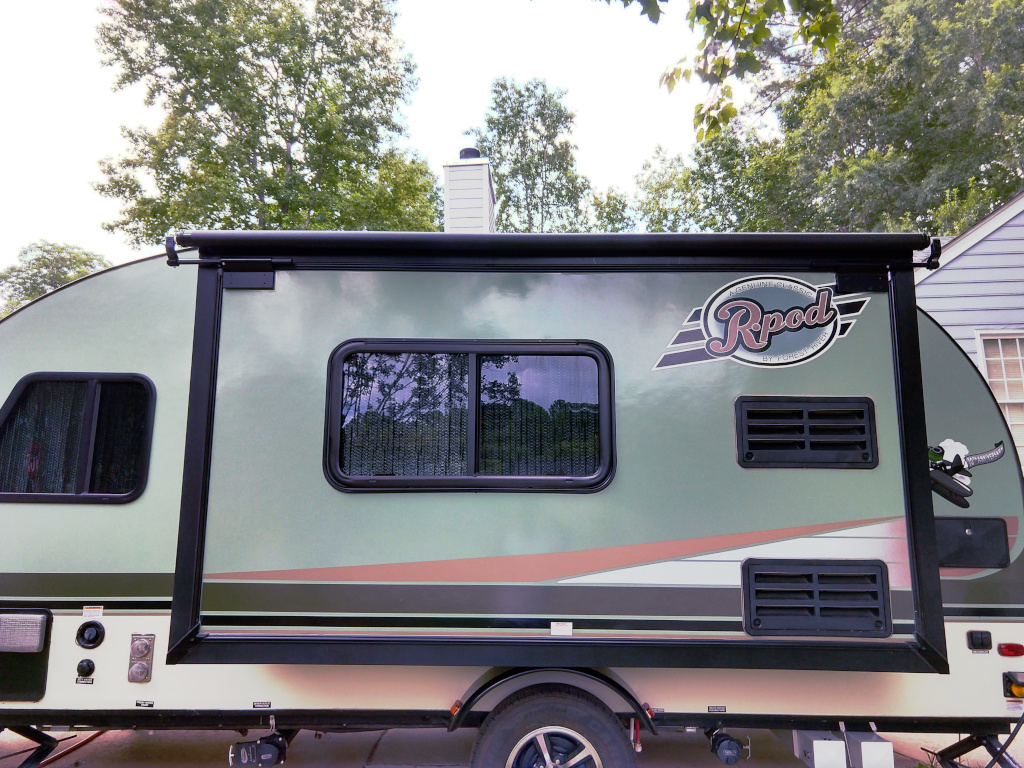 Clearance between the fabric and the flange is good and there is enough tension so that the fabric should allow for good drainage of rain water.
|
|
|
StephenH
Happy is the man that findeth wisdom,... ouR escaPOD mods Former RPod 179 Current Cherokee Grey Wolf 24 JS |
|
|
|
|
Wood River Pod
Senior Member

Joined: 30 Sep 2016 Location: Wood River, ID Online Status: Offline Posts: 153 |
Post Options
Quote Reply
Posted: 26 Jul 2020 at 8:45am |
|
Looks great! Been putting this one off for a while. Keep talking myself out of it. Your link was to the 9.6 ft wide unit. Is this correct? Thanks
|
|
|
|
|
StephenH
podders Helping podders - pHp
Joined: 29 Nov 2015 Location: Wake Forest, NC Online Status: Offline Posts: 6431 |
Post Options
Quote Reply
Posted: 26 Jul 2020 at 11:29am |
|
Yes. I copied the link directly from my orders. Like you, I kept putting it off until the desire to avoid climbing the ladder became greater than my desire to be cheap. We had the funds, so I went for it.
|
|
|
StephenH
Happy is the man that findeth wisdom,... ouR escaPOD mods Former RPod 179 Current Cherokee Grey Wolf 24 JS |
|
|
|
|
Subzilla
Senior Member

Joined: 23 Jan 2017 Location: Concord, NC Online Status: Offline Posts: 302 |
Post Options
Quote Reply
Posted: 26 Jul 2020 at 1:20pm |
|
Did this mod within our first year. No more worry if pine cones and branches falling on the slide. Got tired of climbing the ladder and sweeping!
|
|
|
Mark
Concord, NC 2017 RP 179 "Podzilla" 2011 Silverado 1500 4X4 |
|
|
|
|
StephenH
podders Helping podders - pHp
Joined: 29 Nov 2015 Location: Wake Forest, NC Online Status: Offline Posts: 6431 |
Post Options
Quote Reply
Posted: 26 Jul 2020 at 2:45pm |
|
This is a corollary to the slide-out cover installation. It isn't quite done but is enough so that I will post it now. As I said above, I did not need the awning rail that came with the cover. What I have found lacking was a way to open a window when it is raining for ventilation. Since I now have the Thule awning, adding the door window helped, but that is only one small window. I wanted to do something to allow me to open other windows. This is the first one and, if successful, will probably lead to me adding similar awnings to the other windows. I chose to add one to the dinette window. I cut a 4' length of the awning rail and used Lexel sealant and the screws that came with the rail to attach it just above the window. My homemade slide-out cover provided the material for the awning. I just cut a 4' length of the cover and added another grommet. I cut a driveway marker stake in half to act as support rods and cut a couple fo small lengths of PVC tubing. I used a heat gun to soften one end of these pieces and then flattened them. I am using another driveway marker stake to stiffen the outer edge, so I drilled a hole in each piece. I cut and sealed a slot in the edge and inserted the stake through the pocket and the tubing brackets. One end of the side supports goes there and the other end will eventually sit in a door protector once they arrive. For testing, they are simply resting on the dinette window frame. To hold the awning, I am using short sections of parachute cord and elastic bungee cords. Here are some pictures: 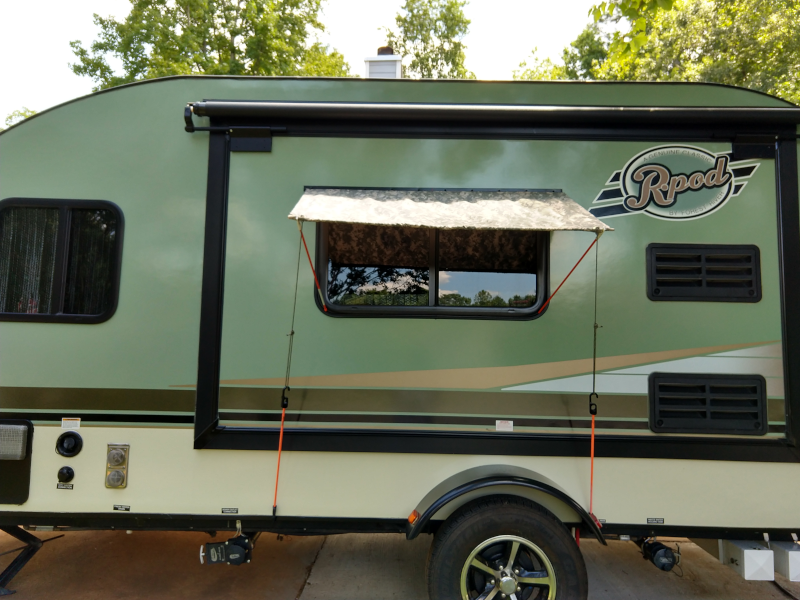 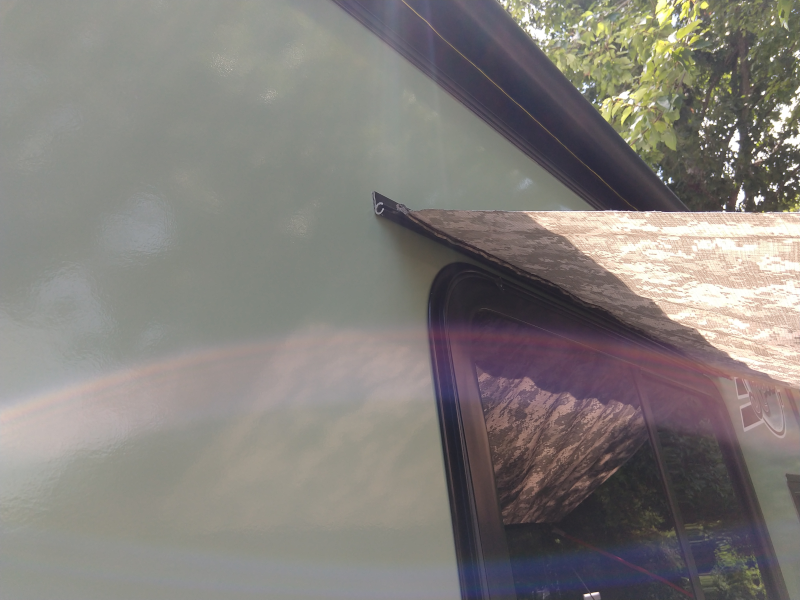 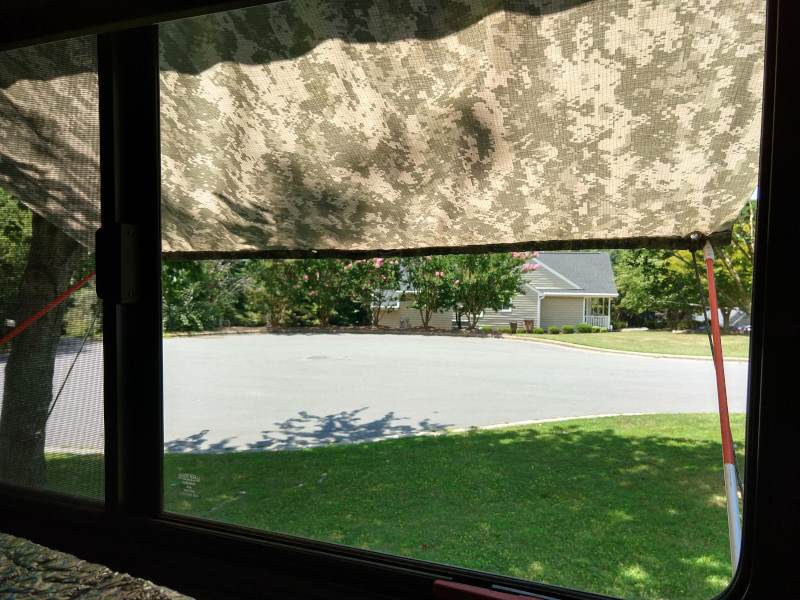 My local stores did not have what I needed to finish. I ordered Small Clear Door Knob Bumpers which will stick on to the wall and provide places for the rods to rest when the awning is on. I will test different locations for the rods before sticking them in place. Since there are a dozen in the package, if one comes off along the way, I won't be too worried. However, I think they will hold on well since I plan on cleaning the surface where I want to stick them with denatured alcohol first.
|
|
|
StephenH
Happy is the man that findeth wisdom,... ouR escaPOD mods Former RPod 179 Current Cherokee Grey Wolf 24 JS |
|
|
|
|
fwunder
Senior Member

Joined: 04 Oct 2013 Location: New Jersey Online Status: Offline Posts: 1676 |
Post Options
Quote Reply
Posted: 26 Jul 2020 at 2:56pm |
|
That's a nice addition, Stephen. It's great to be able to keep that window open in a rain and keep the sun out a bit. |
|
|
2014 RPod 178 => MyMods and Buying Habits
2008 4Runner Limited 4.0-liter V6 Yes, those are wild ponies dining on grass while dumping tanks! |
|
|
|
|
StephenH
podders Helping podders - pHp
Joined: 29 Nov 2015 Location: Wake Forest, NC Online Status: Offline Posts: 6431 |
Post Options
Quote Reply
Posted: 26 Jul 2020 at 3:15pm |
|
Exactly!
|
|
|
StephenH
Happy is the man that findeth wisdom,... ouR escaPOD mods Former RPod 179 Current Cherokee Grey Wolf 24 JS |
|
|
|
|
StephenH
podders Helping podders - pHp
Joined: 29 Nov 2015 Location: Wake Forest, NC Online Status: Offline Posts: 6431 |
Post Options
Quote Reply
Posted: 28 Jul 2020 at 1:10pm |
|
Okay, Dinette Awning 2.0. I did not quite like the looks of it and thought an additional length would provide better protection for when it rained. I lengthened the awning by a foot and now it now only looks better, it should perform better. Since the fabric is longer, I used a short length of copper tube to joint together two pieces of fiberglass driveway stake to strengthen the outside edge. I thought about removing the 4 foot length of keder rail and making that longer too, but I do't want to take the risk of messing up the fiberglass while removing the rail. Plus, I'm not sure the screw holes would line up exactly. The insert is stiff enough to hold the ends and the flex in the outside edge is now up instead of down. That should help it to shed rain better. Plus, the additional fabric should provide better shade as well.  I'm just waiting on Amazon to deliver the stops that will hold the rod ends that are currently resting on the window frame.
|
|
|
StephenH
Happy is the man that findeth wisdom,... ouR escaPOD mods Former RPod 179 Current Cherokee Grey Wolf 24 JS |
|
|
|
|
Post Reply
|
Page <1 4243444546 58> |
| Forum Jump | Forum Permissions You cannot post new topics in this forum You cannot reply to topics in this forum You cannot delete your posts in this forum You cannot edit your posts in this forum You cannot create polls in this forum You cannot vote in polls in this forum |


