Metal Mini-Blinds to Roman Shades
Printed From: R-pod Owners Forum
Category: R-pod Discussion Forums
Forum Name: Podmods, Maintenance, Tips and Tricks
Forum Discription: Ask maintenance questions, share your podmods (modifications) and helpful tips
URL: http://www.rpod-owners.com/forum_posts.asp?TID=6006
Printed Date: 14 Aug 2025 at 7:45pm
Software Version: Web Wiz Forums 9.64 - http://www.webwizforums.com
Topic: Metal Mini-Blinds to Roman Shades
Posted By: fionasol
Subject: Metal Mini-Blinds to Roman Shades
Date Posted: 31 Mar 2015 at 1:37pm
|
Over on the Facebook group, I had some questions about my Roman Shade mod, that needed more explanation than was simple in FB format. So I thought I'd post here. The first mod I did on our Pod, was to remove the metal blinds. Horrible noisy things. And I found this great blog post on how to turn miniblinds into roman shades. http://littlegreennotebook.blogspot.com/2013/02/diy-roman-shades-from-mini-blinds.html - http://littlegreennotebook.blogspot.com/2013/02/diy-roman-shades-from-mini-blinds.html Since I didn't know how well this would turn out, I opted for cheap material. I used curtains I found at a thrift store. For the back windows, I found one big panel, a soft crinkly material, that had white material sewn in as a liner. For the front and kitchen windows, I found a different big panel, a stiffer material that was only one layer of fabric, with some sort of heavy white coating on the window side that acts as a light blocker. The softer material definitely works better with the hardware as you pull them up with the cords, folding in puffs rather than straight folds. I usually have to fuss with these a bit to keep the white liner from showing in front. 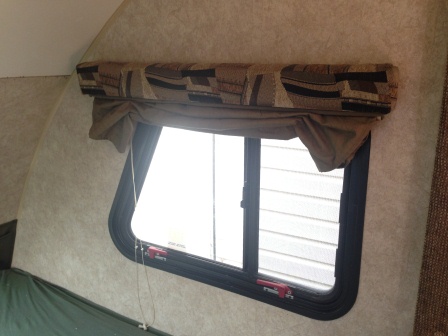 The wrinkly material also does a better job of hiding the fold lines when they are down. 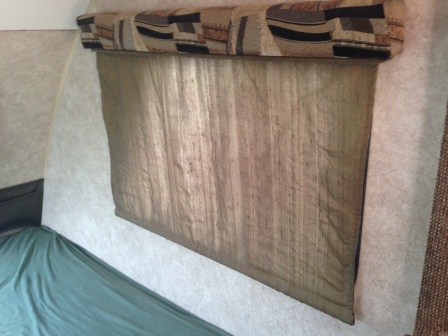 The stiffer material has a harder time when pulling the shades up, I have to help the creases fold along the right lines for this look. 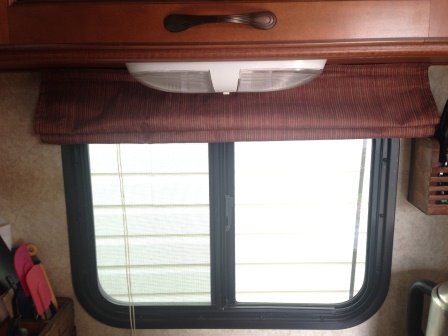 The stiffer material definitely show wrinkles when down. 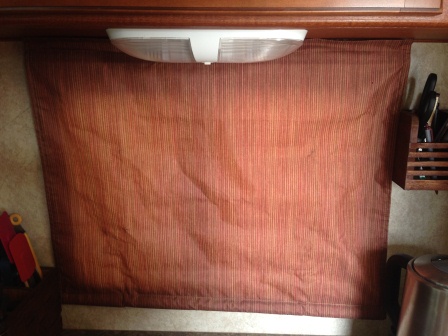 I'm guessing that the material will eventually "remember" the fold lines with more use, but I'm pretty sure that the white coating is eventually going to wear out along the fold lines. When I remake these someday, I'll mostly like go with a heavier fabric that won't need a liner, and with a texture that will help hide the wrinkles. What I did differently from the blog instructions: I cut the material long enough to have a finished folded edge at all edges, as wide as the top mechanism. I cut it long enough (don't forget to account for the finished seams) to touch the wall above the top mechanism (so it could fold over the top and hide the visible cord workings) and to fall just below the bottom of the window (don't forget to include enough on the bottom to create a pocket for the bottom slat, described below). In step 8, she used a new wood slat and glue for the bottom. Since I didn't have a piece of wood on hand that was the right size, I just reused the bottom piece of the existing blinds. I popped out the plug that held the cords. For the bottom seam of the shade, I used the holes in the slat to measure the gaps I would need in the seam to feed the cord through. Then I folded the material at the bottom to make a pocket just big enough to hold the slat. I also popped off the end caps of the slat, and used a small piece of material to cover them and re-inserted them into the slat. Since I sewed this pocket, I didn't need glue for the bottom.  Here's an example of the "gap" in the bottom seam. Notice that I locked the stitching on each side of the gap. (I didn't want to pull these down just to take pics, so they're a little upside down wonky in the photos) 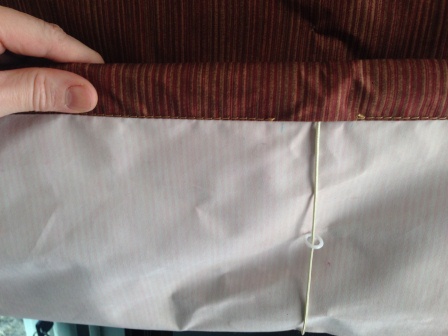 Make sure to lock the stitches on the gap well, because you need to fuss with sliding the cord through the hole in the slat and then to tie it. You can tuck the loose end of the cord and the knot into the slat pocket after tying it. 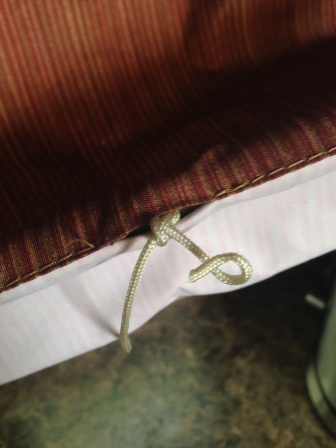 I also had a hard time getting the fabric glue to hold to the blind mechanism. I ended up using a hot glue gun instead. Make sure to leave room for the brackets to lock at the top for when you reinstall them in the pod. I didn't think of it, so I needed to carefully pull my glued fabric away to let them lock into place correctly. The valance boxes hide the tops, so you don't need to fuss with the top too much if you are planning on keeping the boxes. However, I popped off the end caps on the top mechanism and fabric covered them as well, since I may be removing the valance boxes eventually. Since the kitchenette window doesn't have a top box, this is what it looks like ( I left the extra top material standing straight up, but it will also fold flat over the top of the top blind mechanism). 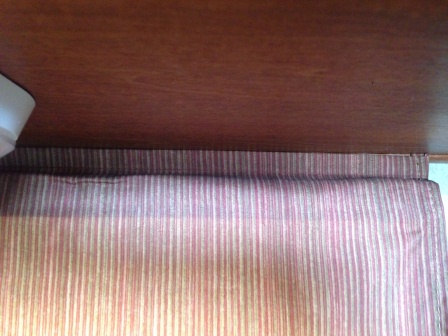 Toward the left top, you can see the wrinkle where the bracket locks the shades into place. If I hadn't glued that so tightly down, it would be less obvious. I had enough of the back window material to re-do the skinny back window as well. Removed the clips at each end of the back window tracks. Removed the curtains. Carefully used a seam ripper to remove the tape from the old curtains. Used the old material as a pattern (remembered to add the seam allowance), cut the material and sewed the tape back on. Slid the curtain back on to the skinny back window tracks.  (This was the only picture I had on my phone from the back curtain, the middle gap closes better than pictured.) ------------- 2011 RP 177 2013 Silverado 1500 https://plus.google.com/photos/100553643014997418884/albums/6071238082127747745 - HodgePod Album http://kayakdancer.blogspot.com/ - Travel Blog |
Replies:
Posted By: techntrek
Date Posted: 31 Mar 2015 at 9:17pm
|
Nice. ------------- Doug ~ '10 171 (2009-2015) ~ 2008 Salem ~ http://www.rpod-owners.com/forum_posts.asp?TID=1723 - Pod instruction manual 
|
Posted By: Leo B
Date Posted: 31 Mar 2015 at 9:18pm
|
Great pictures ! ------------- Leo & Melissa Bachand 2017 Ford F150 2021 Vista Cruiser 19 csk Previously owned 2015 Rpod 179 2010 Rpod 171 |
Posted By: David and Danette
Date Posted: 01 Apr 2015 at 5:54am
|
Great idea! Looks a little challenging but the results look great. We have the day night shades which are difficult to raise and lower. May be a future project for us. Thank you, for the good explanations and pictures. ------------- 2018 Vista Cruiser 19BFD (2018- 2012 Vibe 6503 (2014-2019) 2009 r-pod 171 (2009-2014) Middle Tn 2014 Ram 1500 Quad cab |