Mods to our 173
Printed From: R-pod Owners Forum
Category: R-pod Discussion Forums
Forum Name: Podmods, Maintenance, Tips and Tricks
Forum Discription: Ask maintenance questions, share your podmods (modifications) and helpful tips
URL: http://www.rpod-owners.com/forum_posts.asp?TID=5195
Printed Date: 20 Aug 2025 at 10:01am
Software Version: Web Wiz Forums 9.64 - http://www.webwizforums.com
Topic: Mods to our 173
Posted By: Pod People
Subject: Mods to our 173
Date Posted: 23 Aug 2014 at 6:33pm
|
We have owned our 2009 R Pod 173 for 3 years. We bought it used-one owner used it for 3 trips and decided it was too small. We have used it primarily for long term, long distance traveling. We live in central North Carolina and have used the pod in Florida twice, Canada, Wisconsin, New York, Michigan’s upper peninsula and a 10 week, 11,000 mile western trip to Colorado, Arizona, New Mexico, Nevada, California and Utah. We will leave on September 14 for about 6 weeks of travelling to the Finger Lakes and Adirondacks in New York. I have learned a great deal about pods and mods from this forum. We have done extensive renovation to the pod. Some of our mods have been taken from this and other forums. Some ideas are copies, some are modifications to other’s ideas and some are original. Thanks to all of the owners that post here-it really is a great idea sharing forum. I feel very comfortable undertaking mods on our pod. We owned and operated a residential remodeling company for 20 years-it’s in my blood. The R Pod is a great trailer to personalize. We are retired, with a great shop, lots of tools and plenty of time –so there is more to come. This is a long post that is broken down into 7 different categories of mods. Laura took all of the pictures-I hope they help to explain the mods. I’m happy to answer any questions.
Vann
Here are some of our mods----
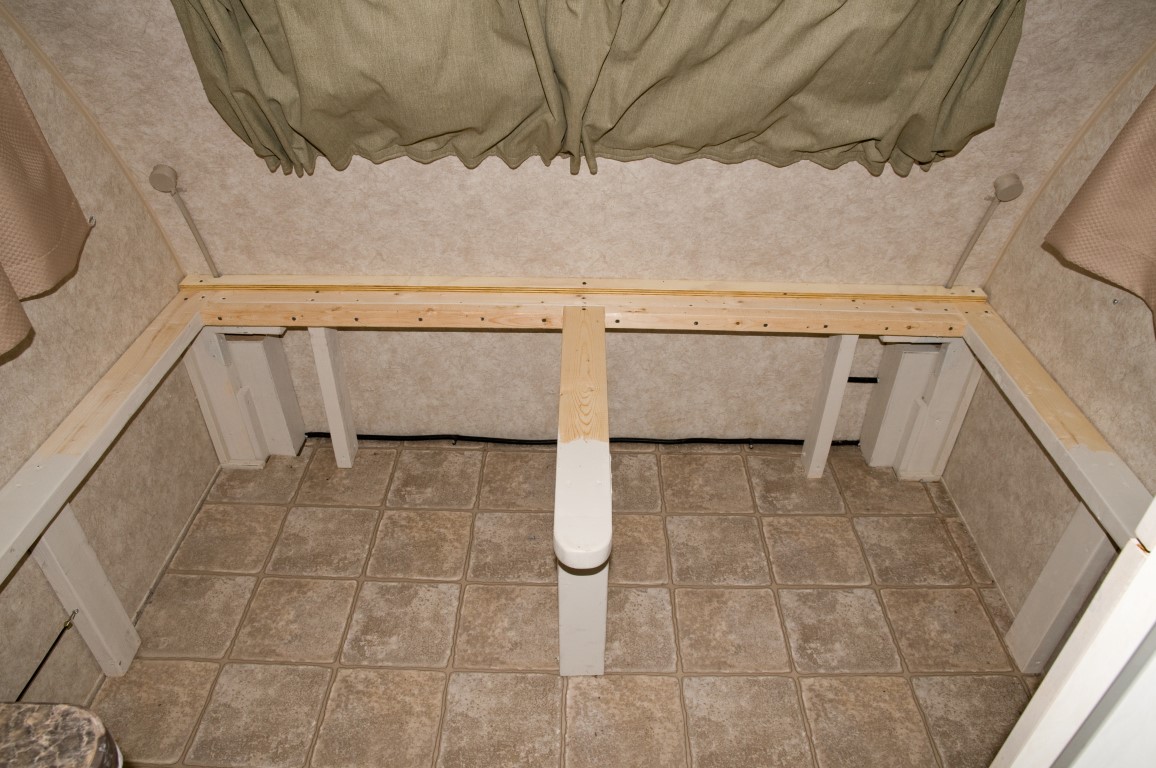
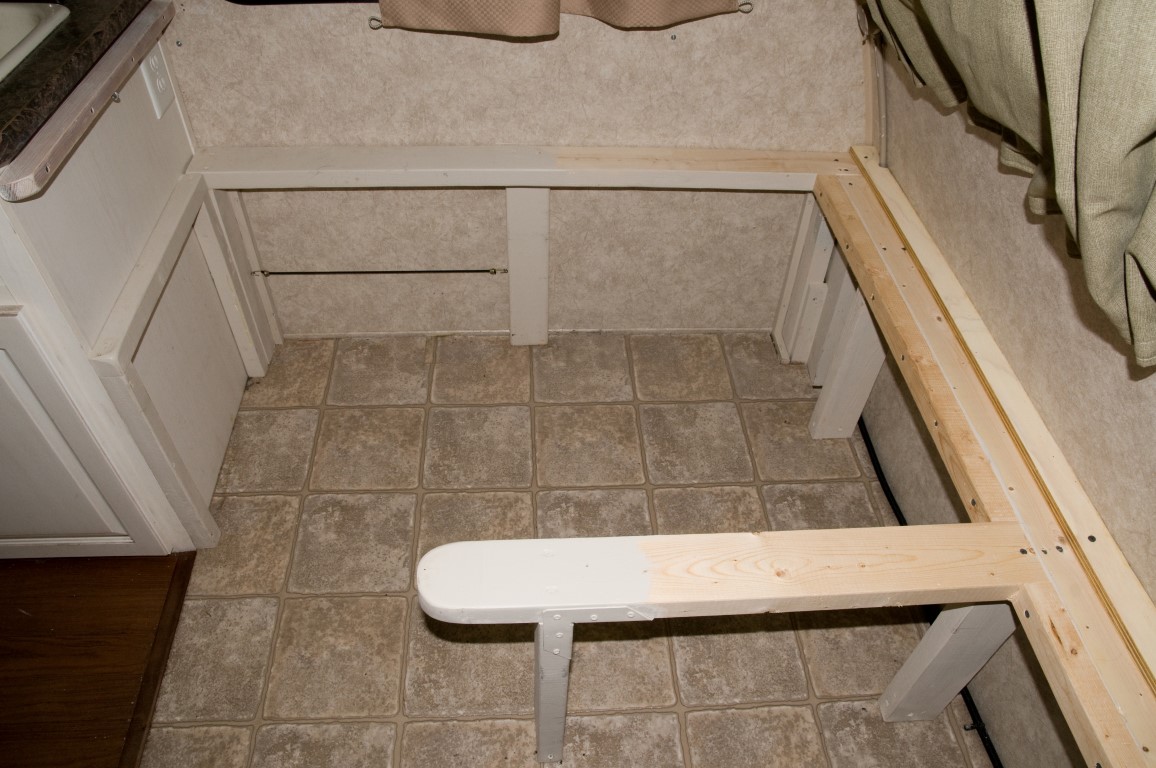
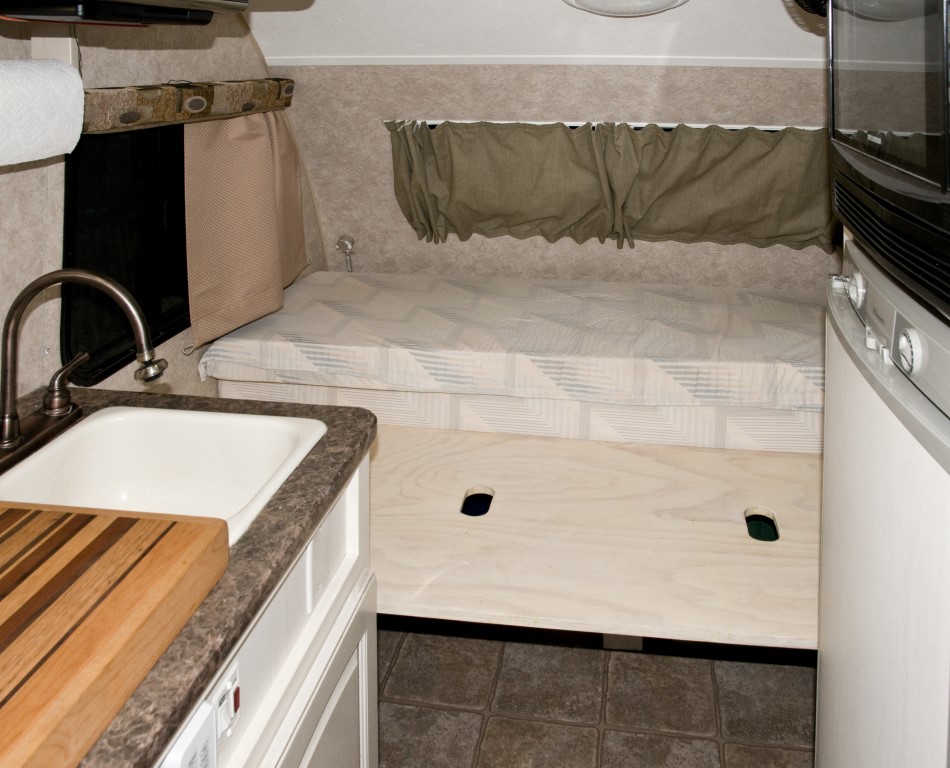
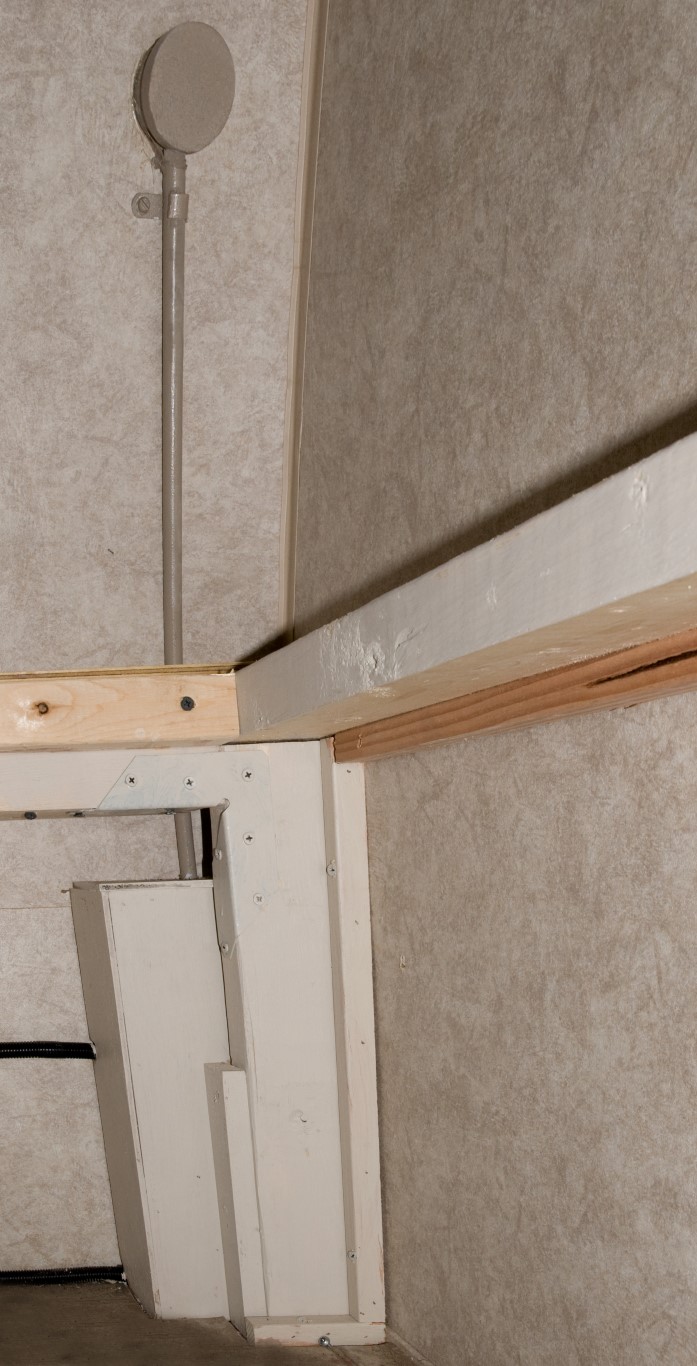
Jack knife sofa removal and bed construction We didn’t like the dinette being converted to a bed-too much trouble, problematic storage of the extra cushions, make it up each time, uncomfortable foam quality, etc. We also thought that the jack knife sofa that came with our 173 was pretty useless for us. We thought a lot about different ideas and really liked the 171 floor plan for the bed area. We measured everything and realized that the area with the sofa was almost the same size as the dinette area. We removed the sofa and built a custom bed unit in it’s place. We designed it so that it was not only our bed, but also a kitchen countertop and prep area with major storage underneath. I first built a framework of 2x2 and 2x4 lumber all around the outside edges and a center support. Each corner had support down to the floor as well as to the walls. It looked almost original after everything was sanded and painted.
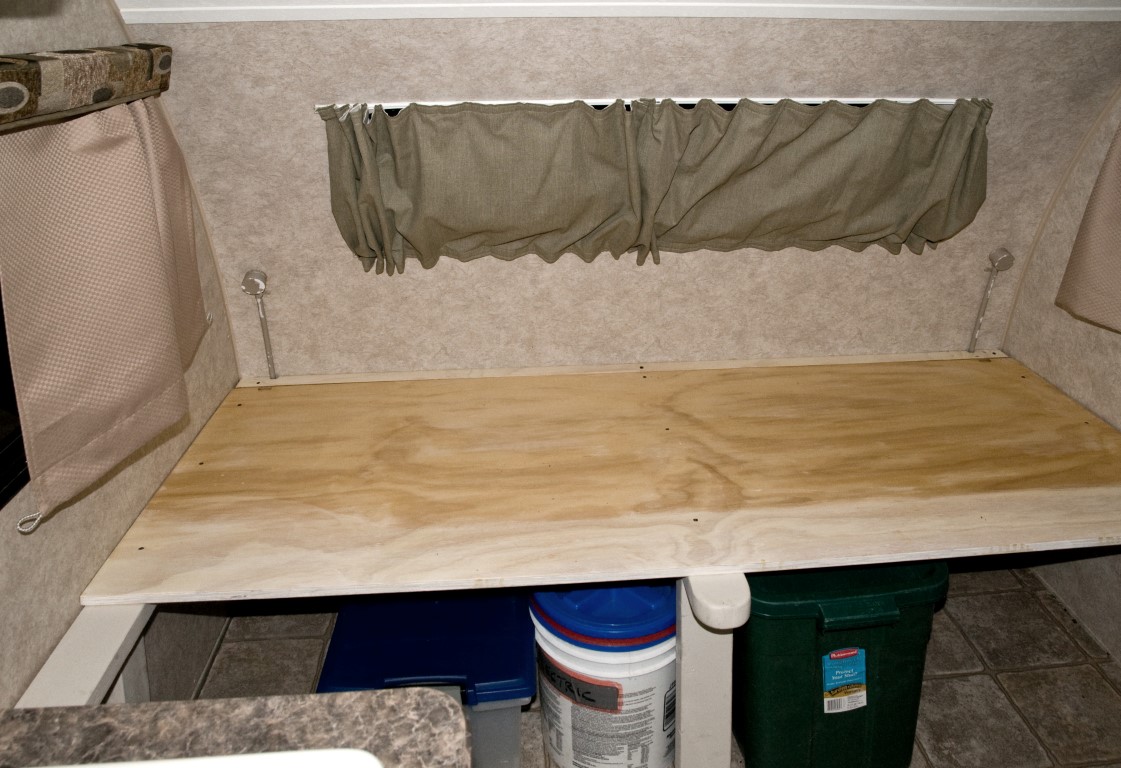
The platform top was built with 2 pieces of ¾” plywood.
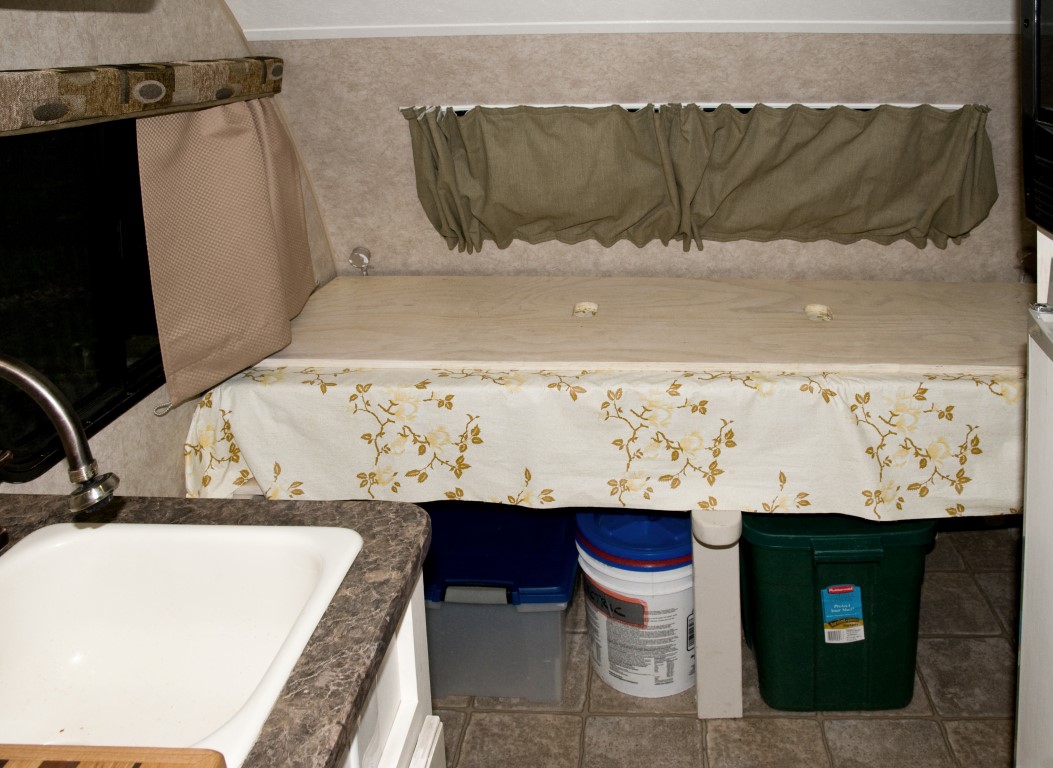
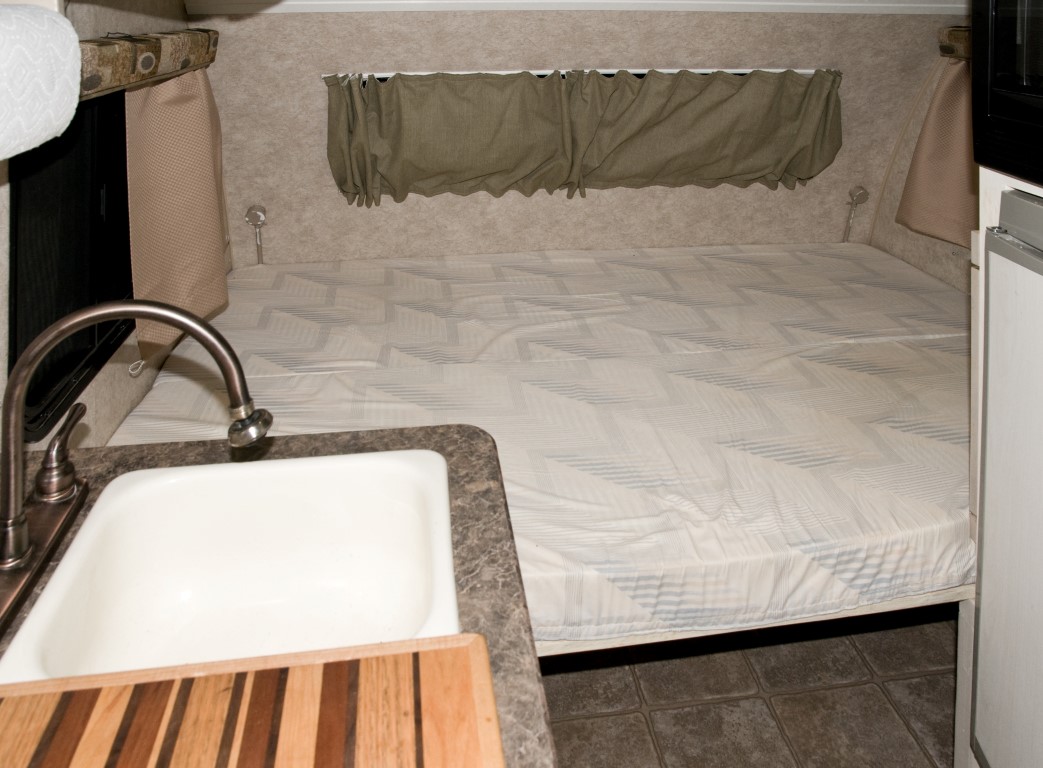
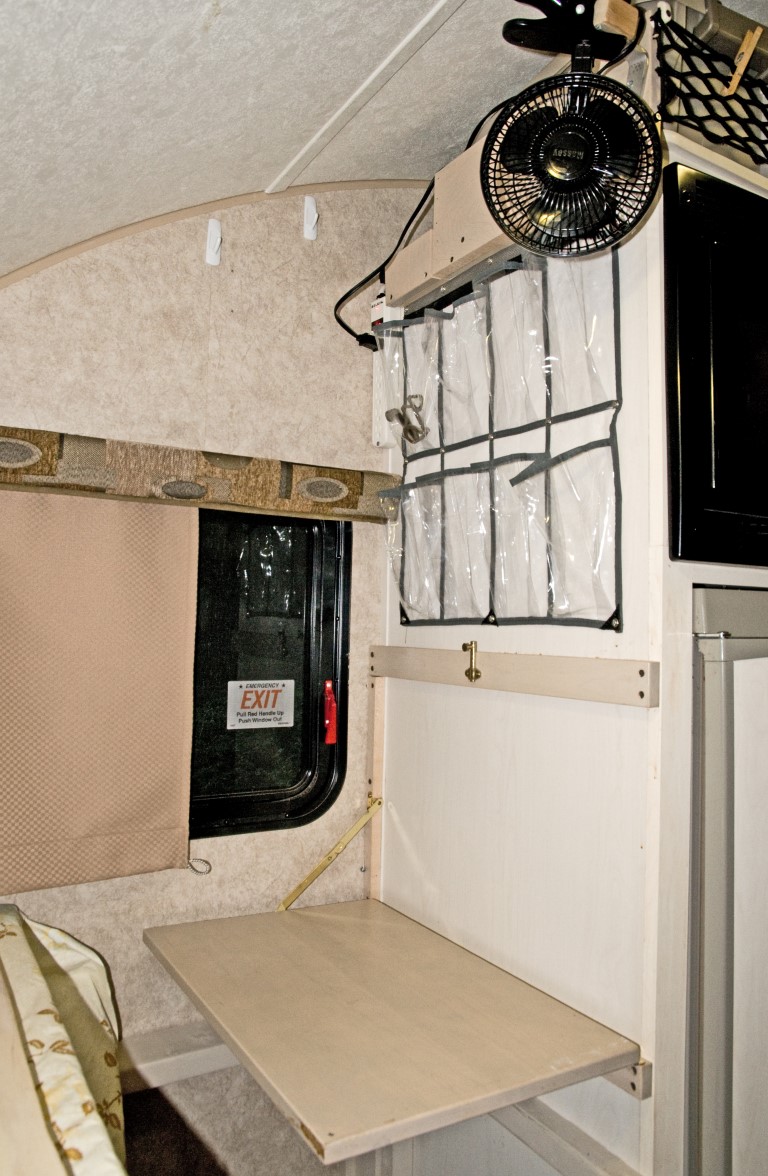
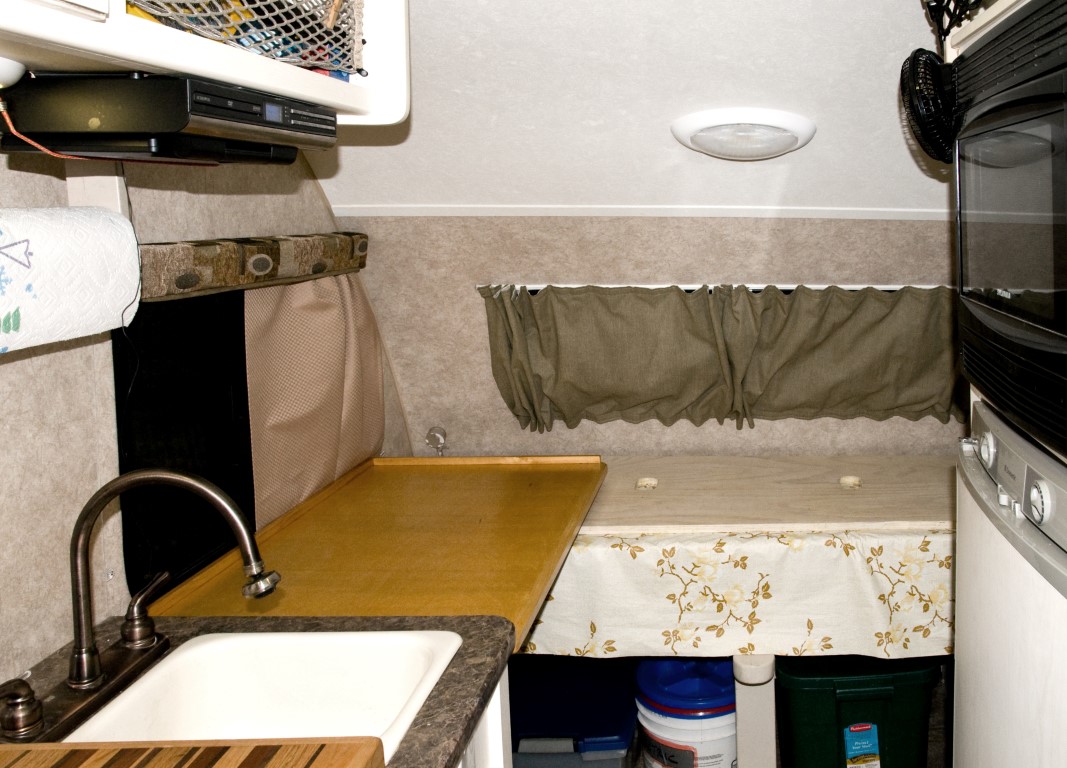
We used 2 pieces of 4” foam as the mattresses. Laura made a custom fitted sheet for each mattress that covers all 6 sides of each piece of foam. The sheet‘s long side seam uses velcro to close the seam and make everything tight.. They are easily removed for washing. When not in use, the 2 mattresses stack on top of each other and on top of the rear fixed platform. The mattresses are pushed all the way to the rear of the platform. We then cover the mattresses with an oilcloth tablecloth to protect them from everything. The second plywood platform goes on the very top. It makes a very stable countertop that is the same height as the main stove/sink countertop. It takes about 5 minutes to set the bed up for sleeping. We pull the top plywood platform piece down onto the 2x2 frame. Then we remove the oilcloth mattress cover and pull the top mattress down to the front platform. We then have a bed that is 52” wide by 75” long. We have a window at each end and a small fan aimed at our heads. Laura made curtains that are lined with blackout material and they are fastened to the wall at the bottom with stretch loops to hold them tight. I made a rear window cover from insulation board. One side is black to absorb heat in the winter and the other side is bright aluminum covered bubble wrap to reflect heat in the summer. We sleep well.
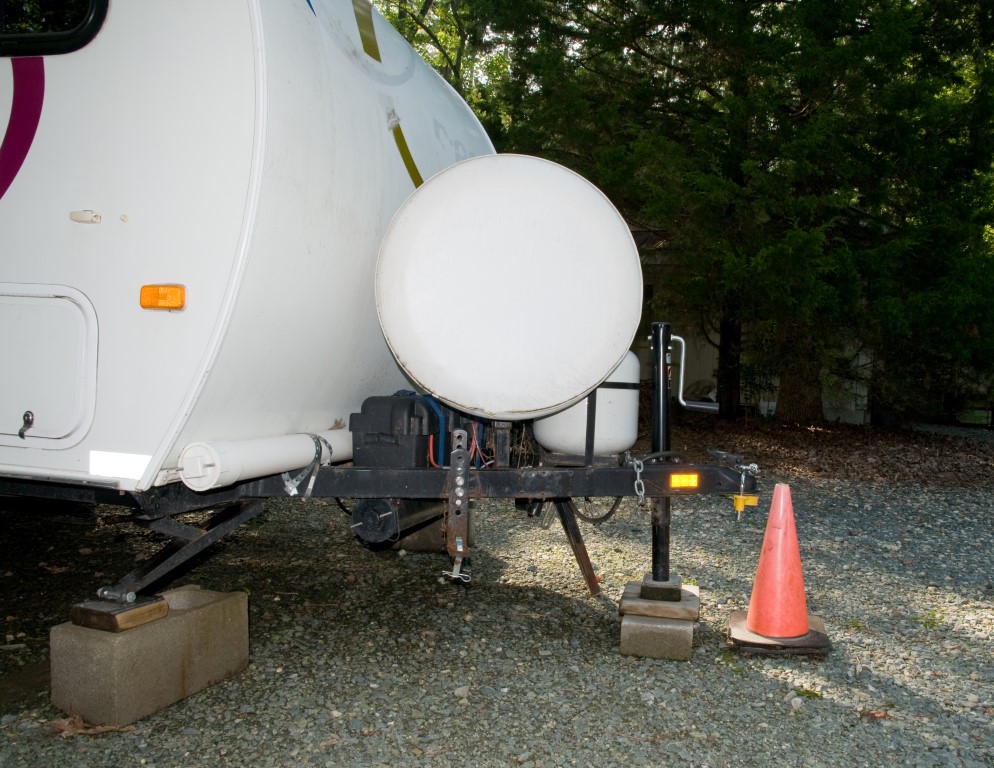
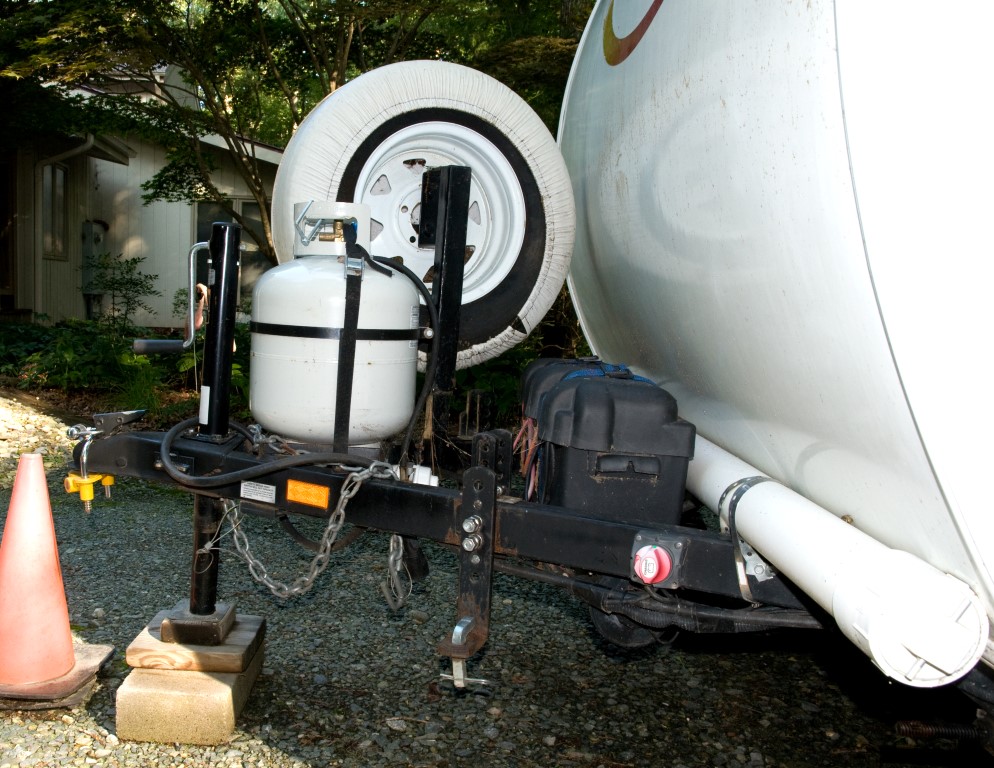
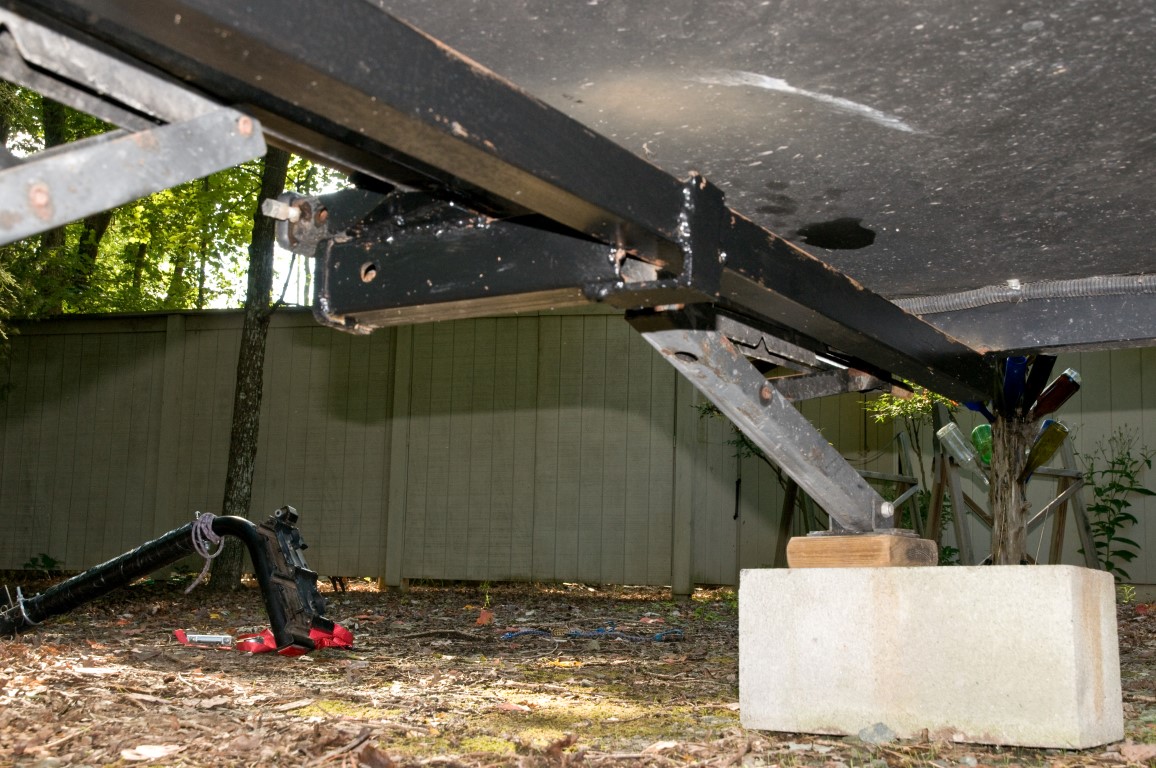
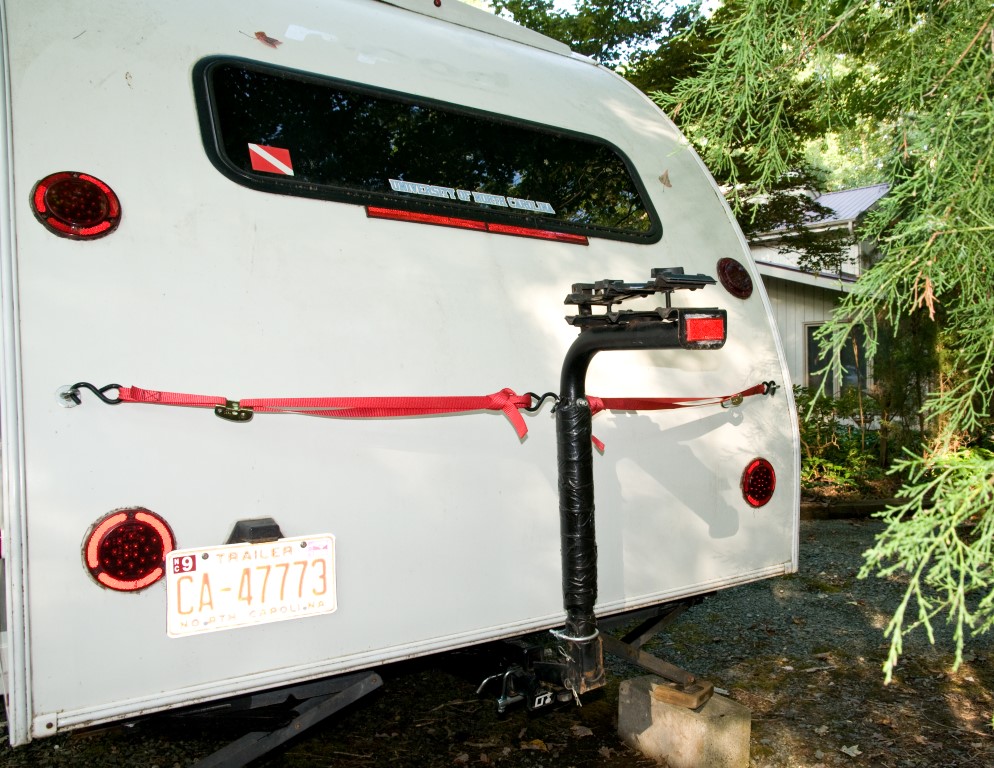
Rear Bike Rack Installation I’ve read a lot of RV forums with horror stories about rear mounted bike racks. I agree that most rv’s rear bumper and frame aren’t made to handle the bike rack dynamics. But that doesn’t mean that you can’t make it work if the installation is engineered correctly. We mounted our bike rack on the rear of our R Pod. But it took a lot of welding. Actually, I didn’t do this work- I was only the customer of a very good local iron shop. I had the ideas, the desire and the money-Billy did the welding. The first thing we had to do was move the spare tire to the front A frame. Billy used the original tire bracket and cut it to fit the new location. However, not so fast. There’s not enough room on the A frame unless you move the propane tank forward about 3”. So, he moved the propane tank mount forward 3” then mounted the spare tire.
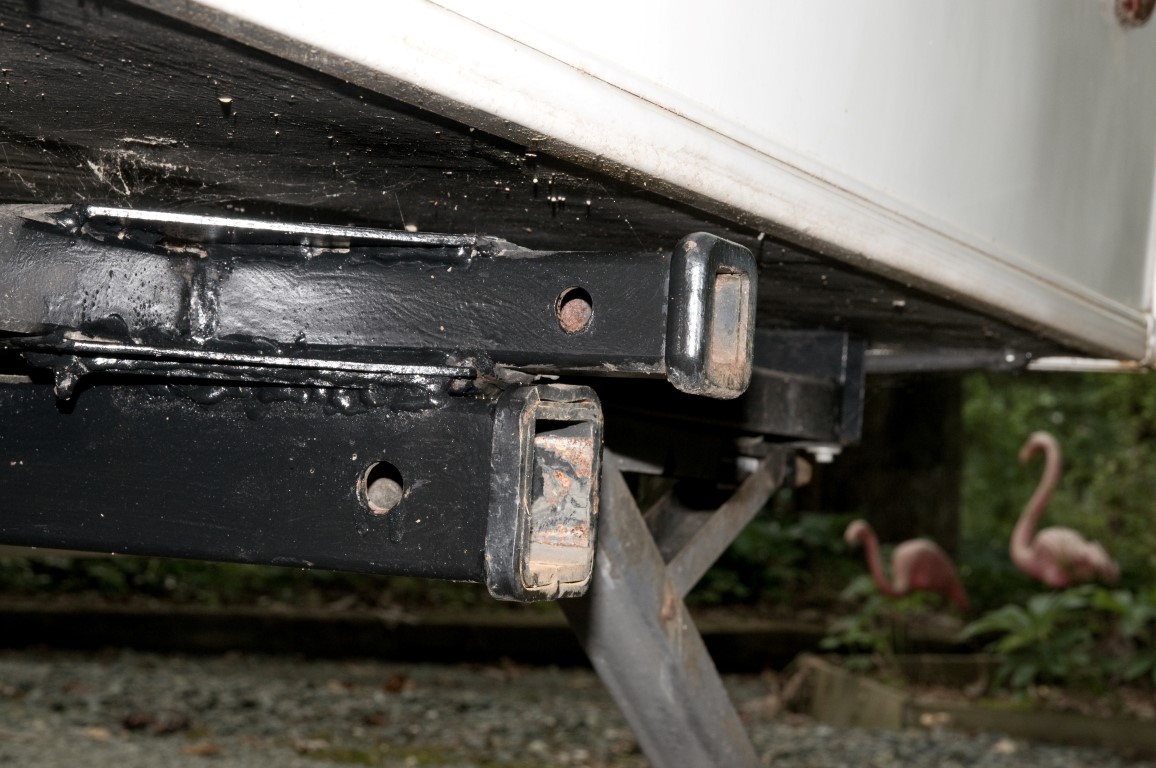
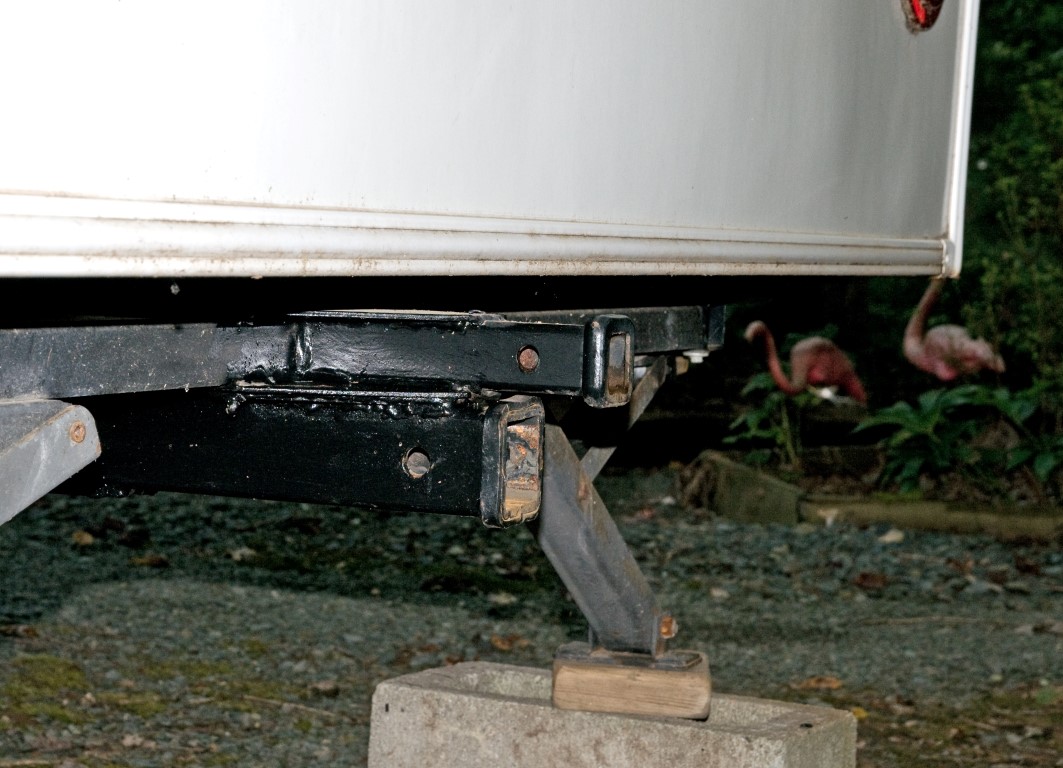
Next, Billy welded triangle gusset plates on the top and bottom of the existing 1 ¼” receiver-reinforcing the receiver/frame connection. He then added a 2” receiver below the original receiver and welded another triangle gusset plate under the new receiver.
Next, Billy welded a square metal beam (1 ½” x 1 ½” ) that connects each side frame member to the rear of the 2” receiver. The weld between the new cross frame member and the rear of the new 2” receiver was reinforced with a small angle iron. I think we added about 11 pounds of steel to the frame. I modified the bike rack to accept cam straps with a hook. The straps are connected to 6” eye bolts that are screwed into the interior bed framing. They are well caulked and sturdy.
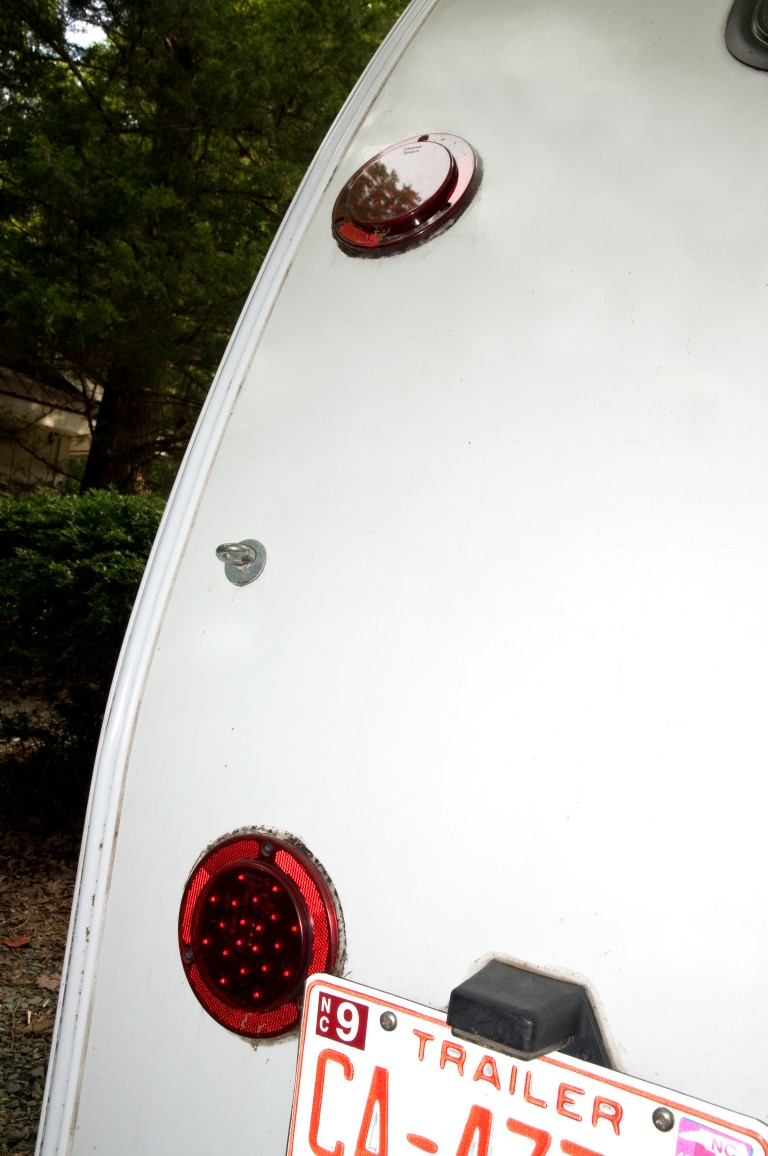
Note that I also added a second set of tail lights because I thought the original ones were obstructed with the bikes in place. The new lights are exactly like the originals-I ordered them from the same manufacturer. I was able to tap into all of the wiring at the rear of the pod. They are fully functional(running lights, brake, turn signals).
We also use a quiet hitch pin to further decrease the amount of motion in the receiver. http://www.campingworld.com/shopping/item/quiet-hitch-for-2-inch-hitch-receivers/53713 - http://www.campingworld.com/shopping/item/quiet-hitch-for-2-inch-hitch-receivers/53713 We used this system for our 2 bikes on our 10 week, 11,000 mile trip last year. One of the places that we went to was Chaco Canyon –the bumpiest 20 miles (each way) I have ever driven. The bikes, rack, receiver and frame show no evidence of stress. I feel confident that this installation is not hurting the frame of the pod. The overall weight of the bikes, the new steel reinforcement and the rack are about 8 pounds more that the original spare tire and bracket. We did add to the tongue weight with the addition of the spare to the front.
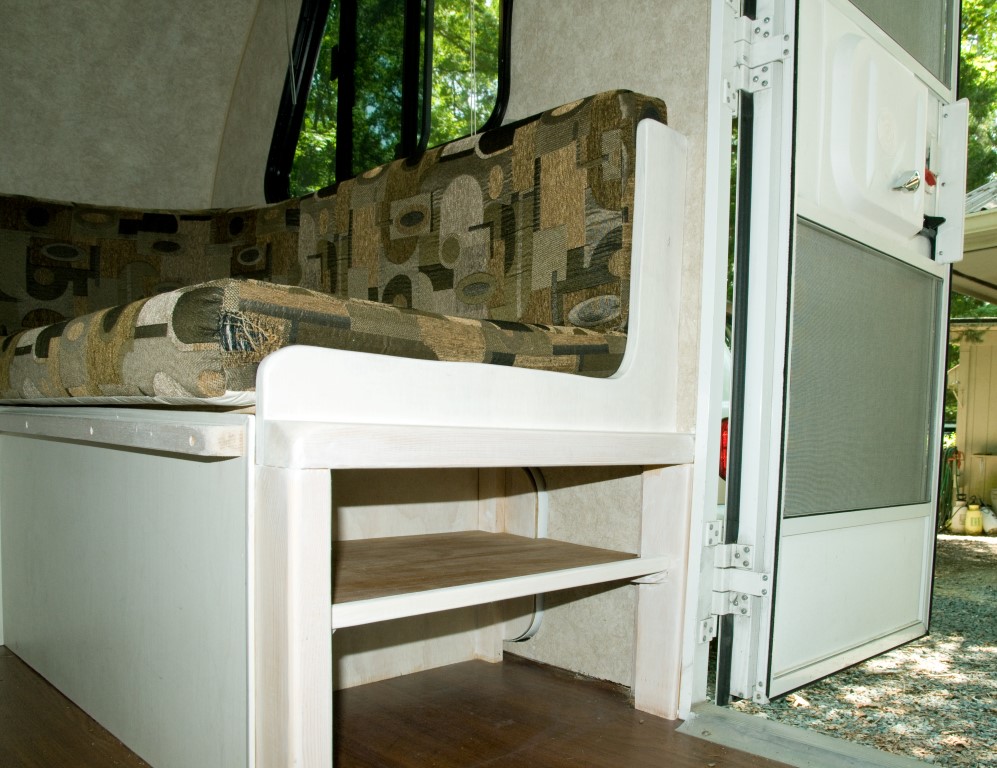
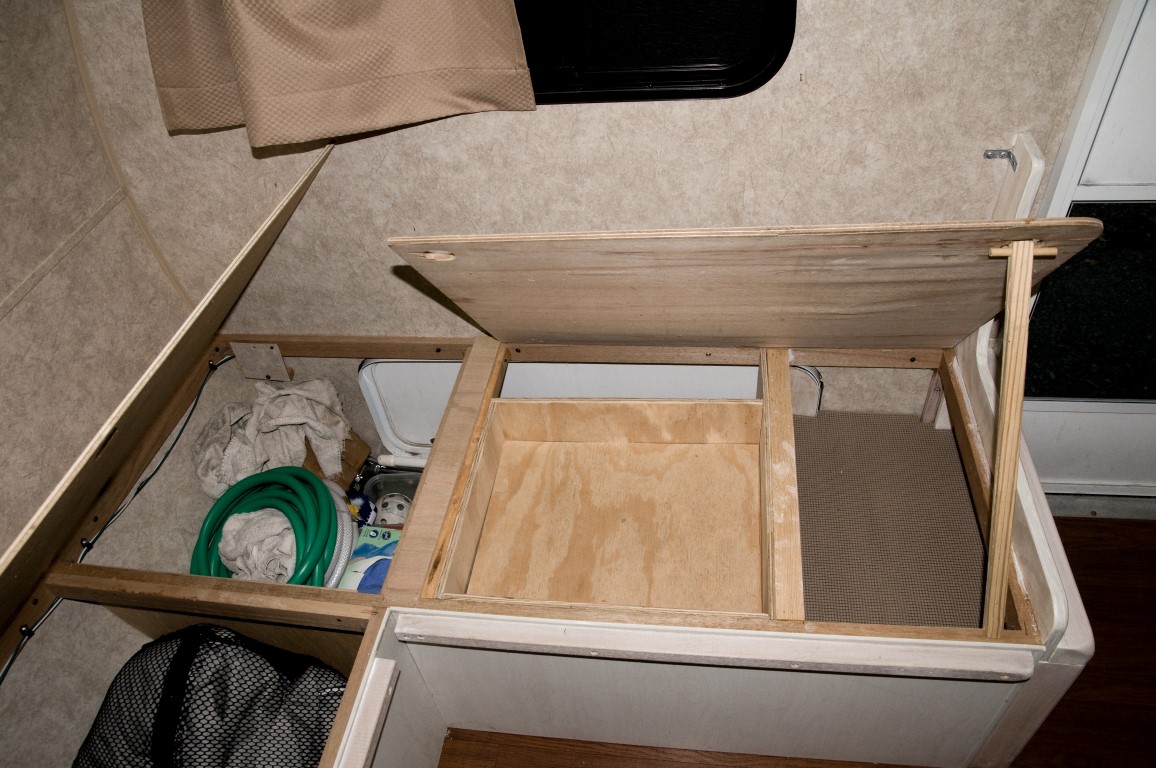
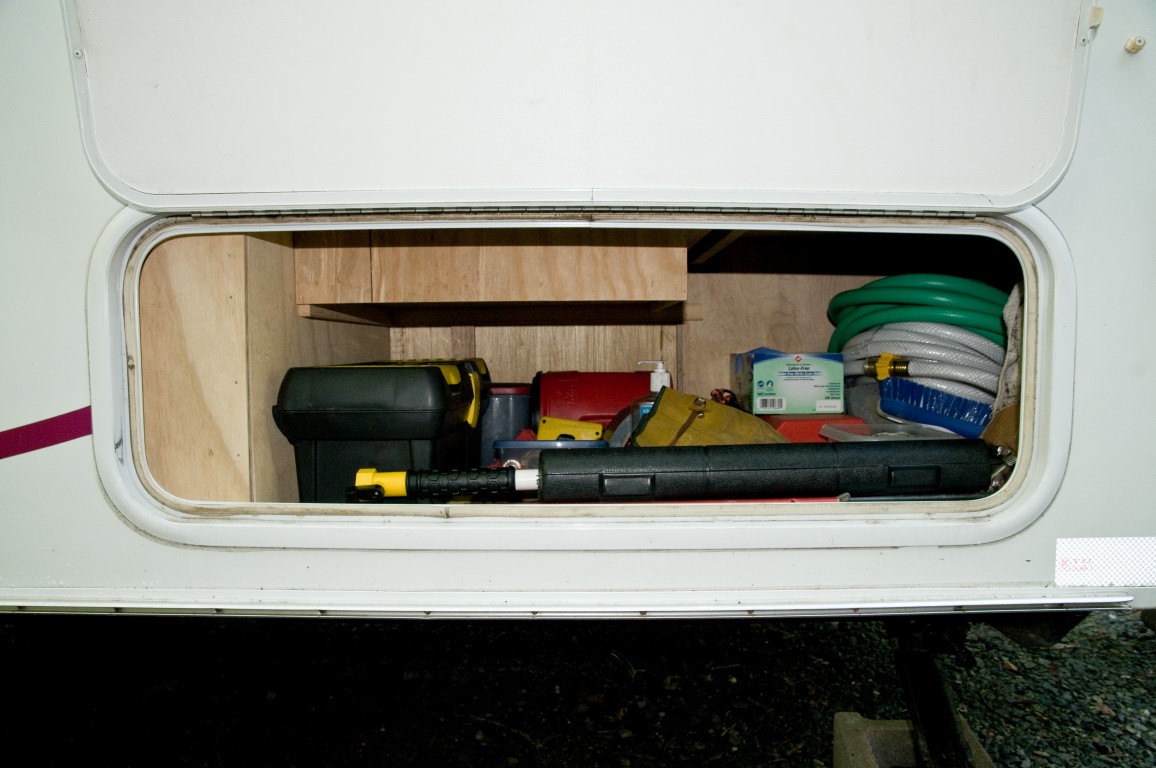
Dining table We use our Pod for long trips-4-5 weeks at the minimum. So we use the table a lot. Obviously, we use it for eating, but we also do a lot of work on the table. As everyone knows, it is NOT stable. We hated the table-spilled drinks, falls down, busted knees and shins and heavy. We made a new one. I started with a piece of plywood that was considerably larger than the original table top. We drew on it, cut it, drew some more, cut some more, etc. until we got it to the right size and shape. It is still the same basic shape as the original, but slightly larger and a different angle. I made the final table top from ¾” birch plywood. The legs are made from fir and plywood and are attached with piano hinges. The braces are made from aluminum bar stock and are connected by tee nuts and star handles. It weighs 4 pounds less than the original table and is very sturdy. We stained it and applied 6 coats of tabletop varnish. 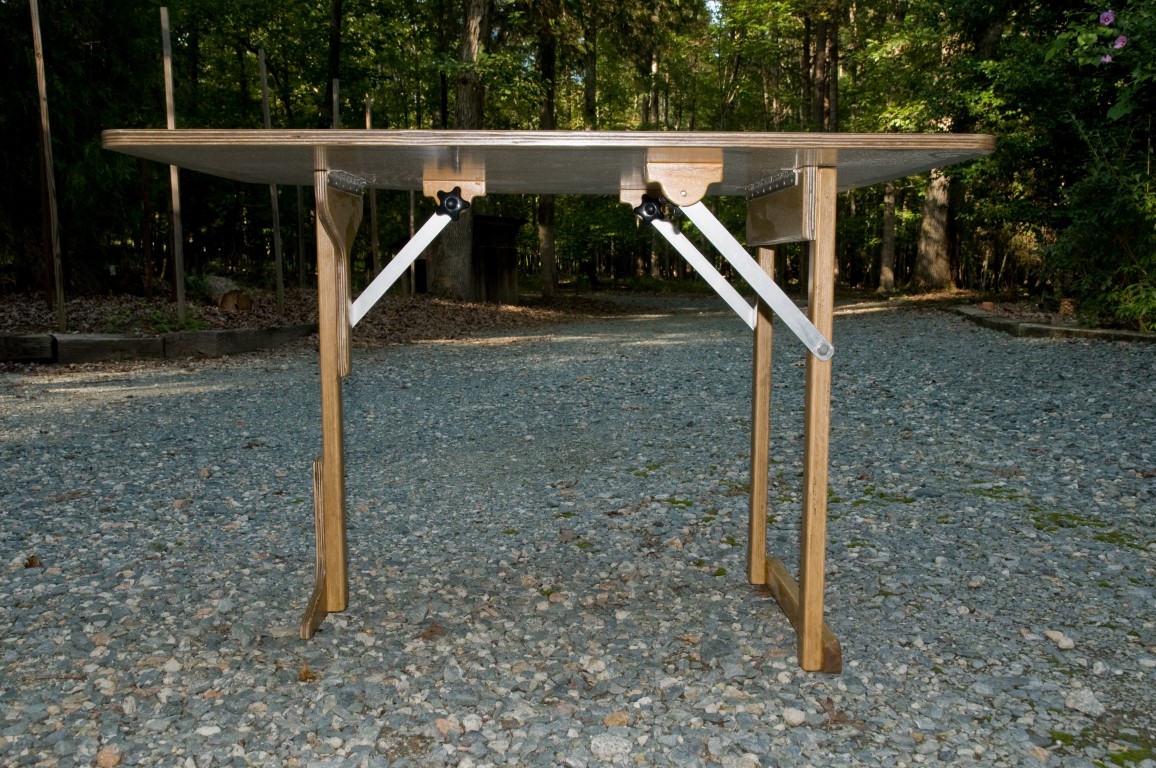 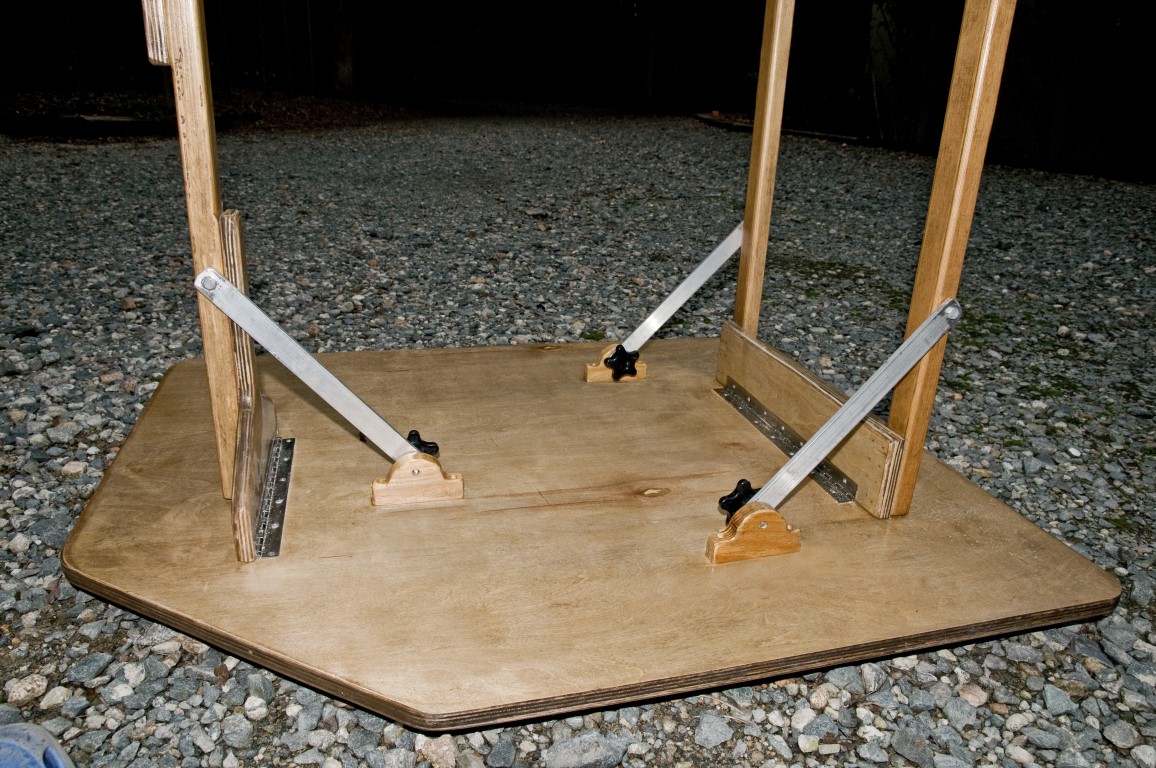 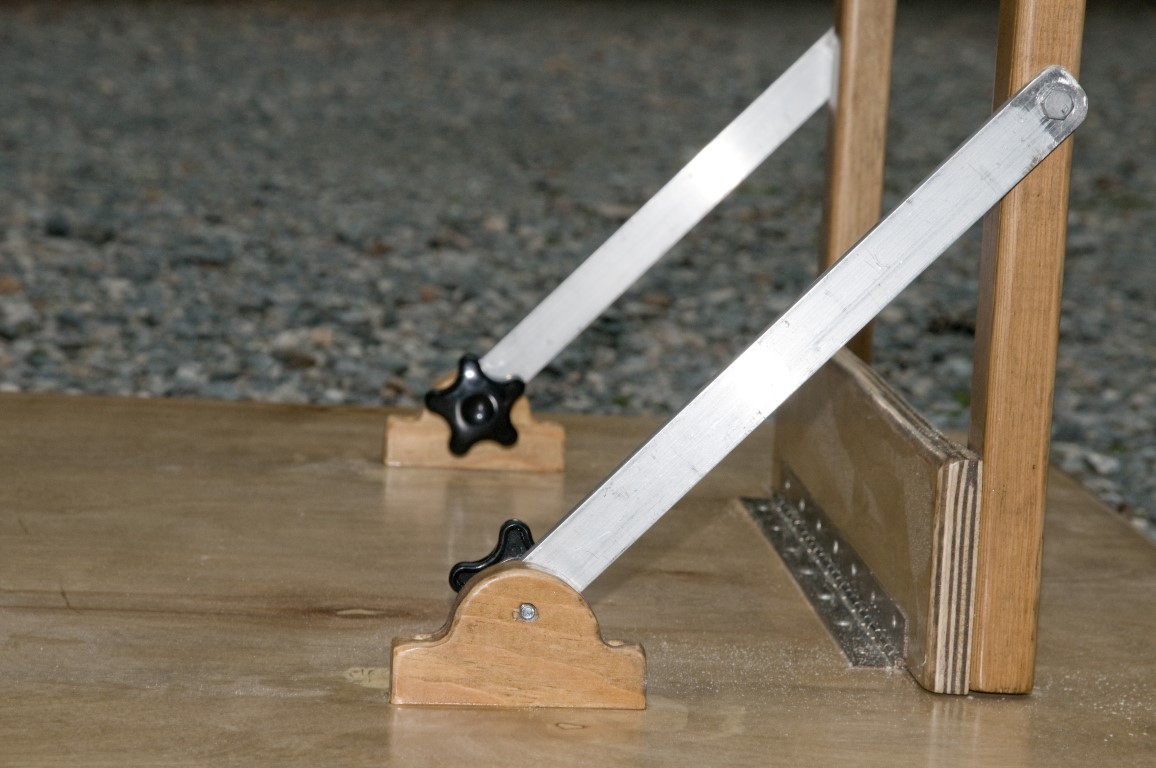 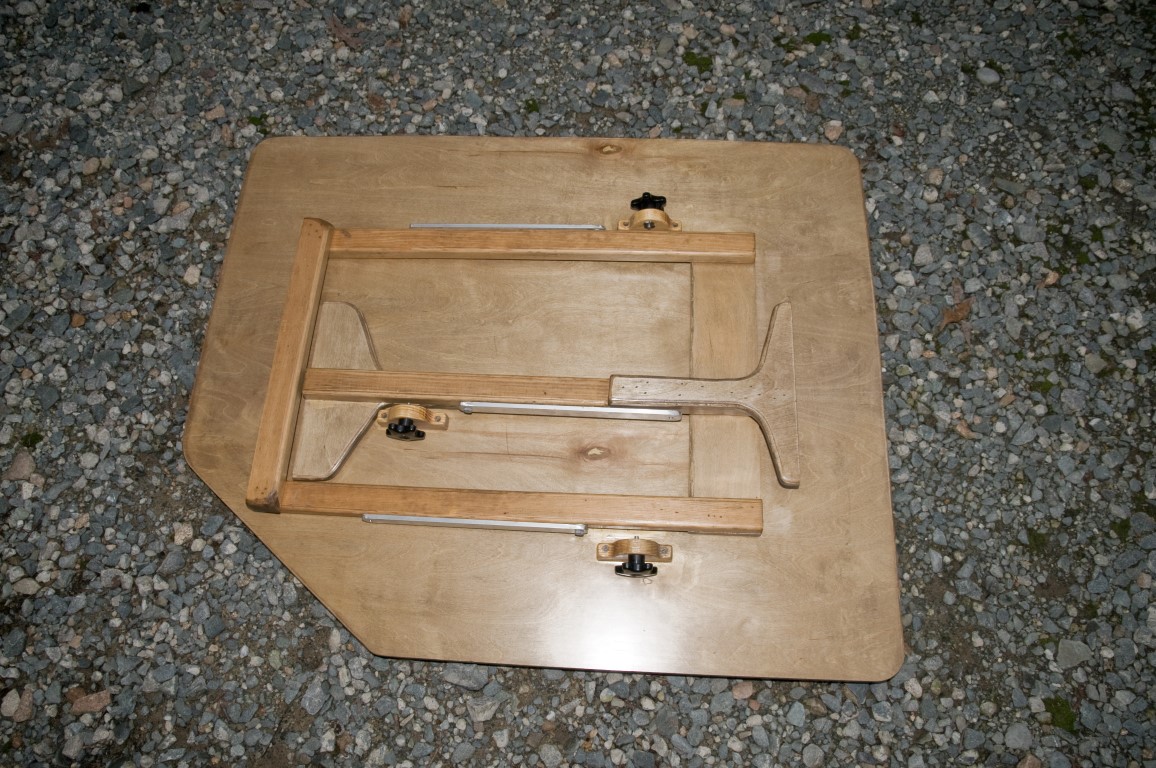 R Pod Storage There is never enough space to keep all of the things we THINK we need. We have tried to maximize our space with various storage mods. The best thing to do is use your pod and determine what you need and what is extra-leave the extras at home. We only have 1 exterior cargo hatch on our 173. The original space was hard to access and small. I enlarged it by dividing the cargo area under the dinette seat so that part of it was accessible from the outside hatch. This gave us a lot more space for our tools, sanitation and setup materials. I also divided the curb side seat area (which was hardly accessible from the exterior) and made a place to store our shoes. There is a 4” tray area above the tool section. We store all of our tools , spare water hoses, power cord extensions, vinyl gloves, disinfectant hand wipes, etc. There is a small touch light overhead for night vision.
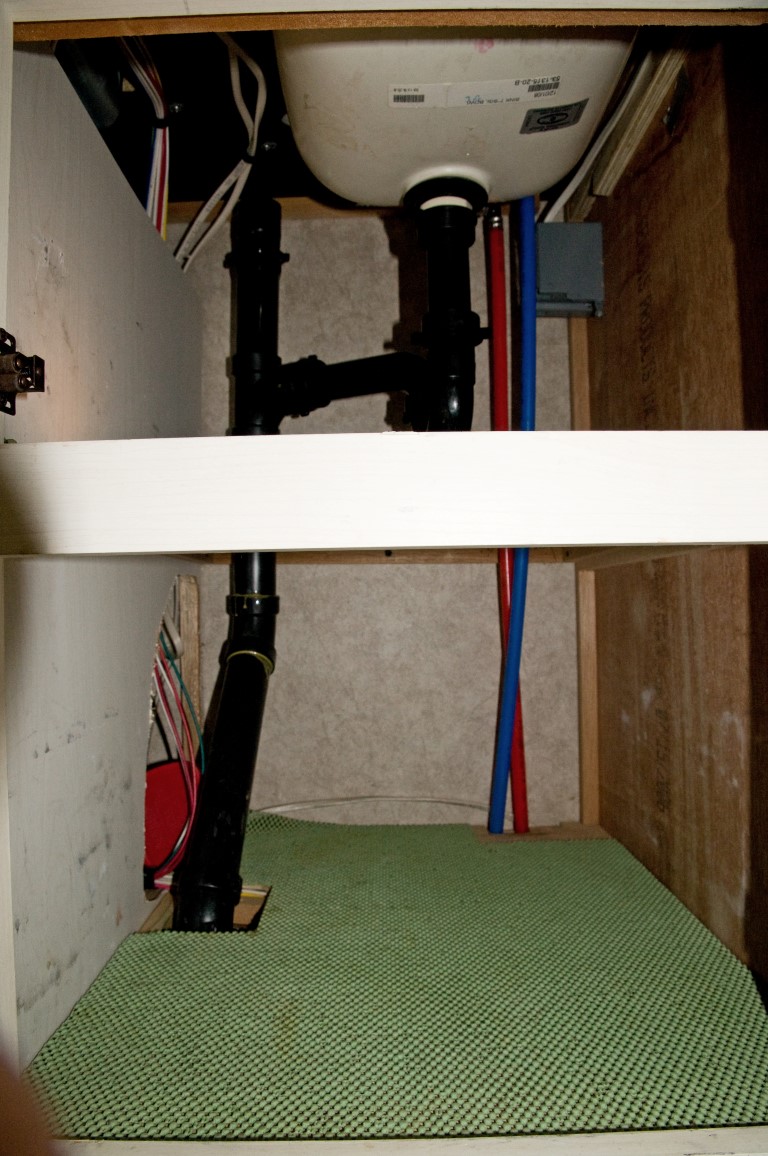
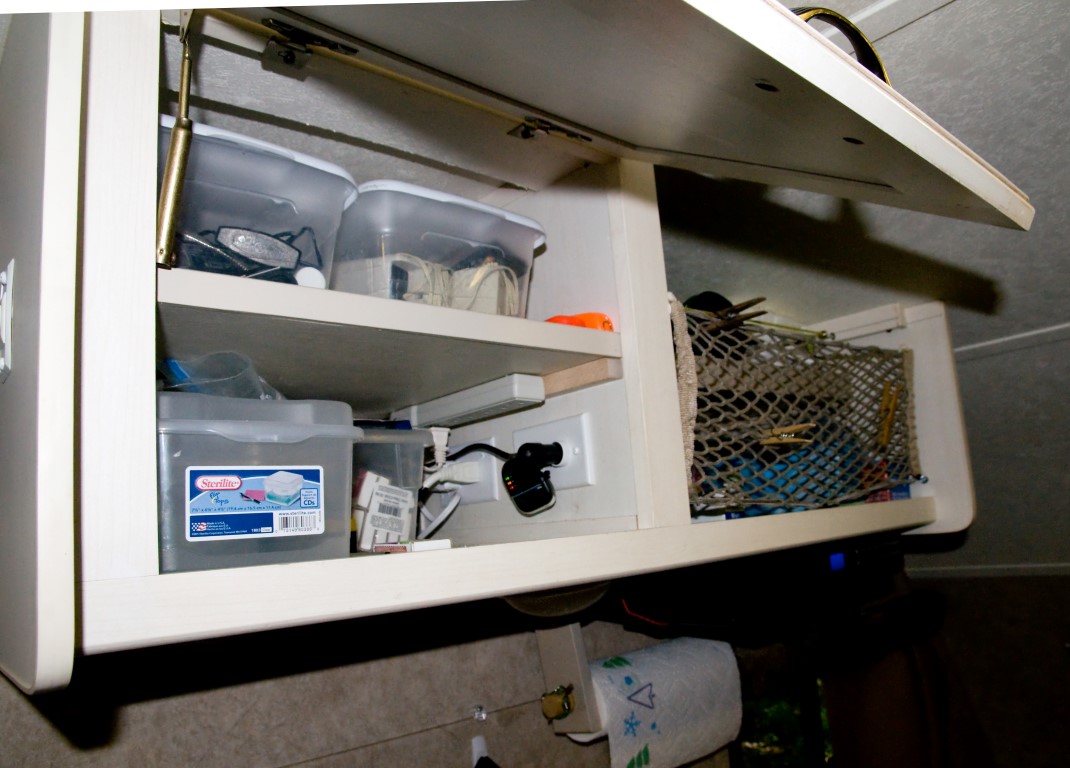
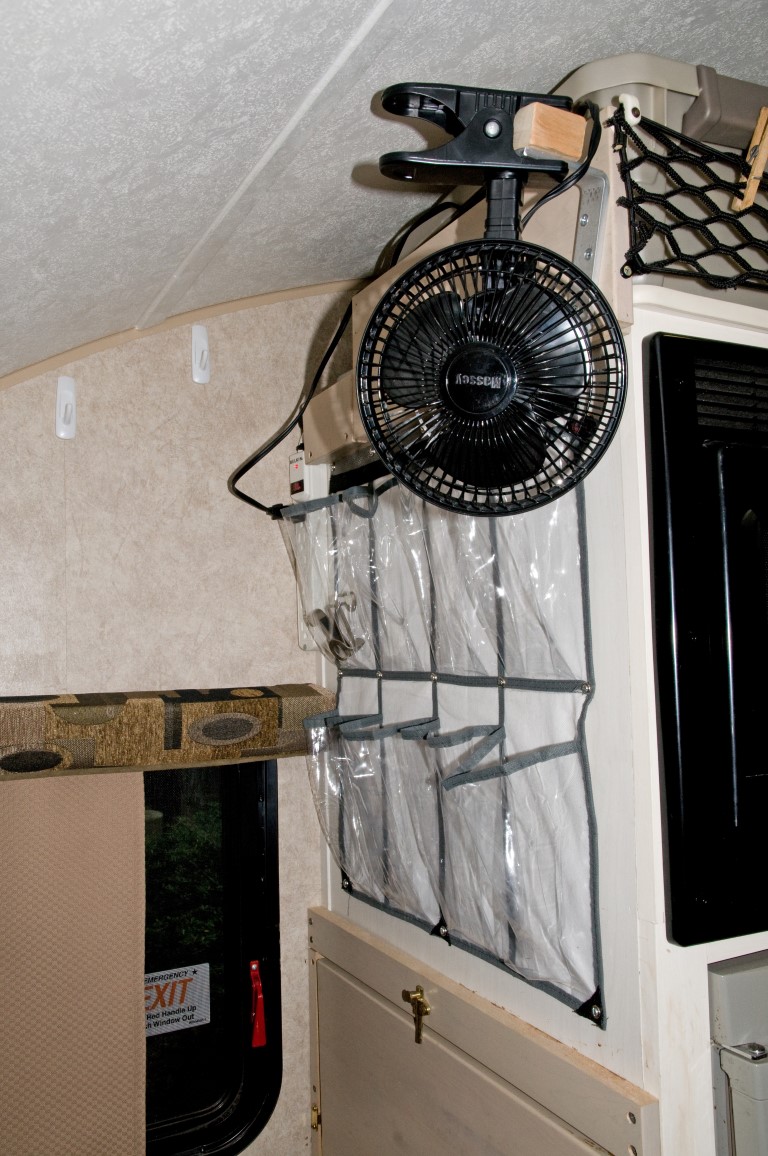
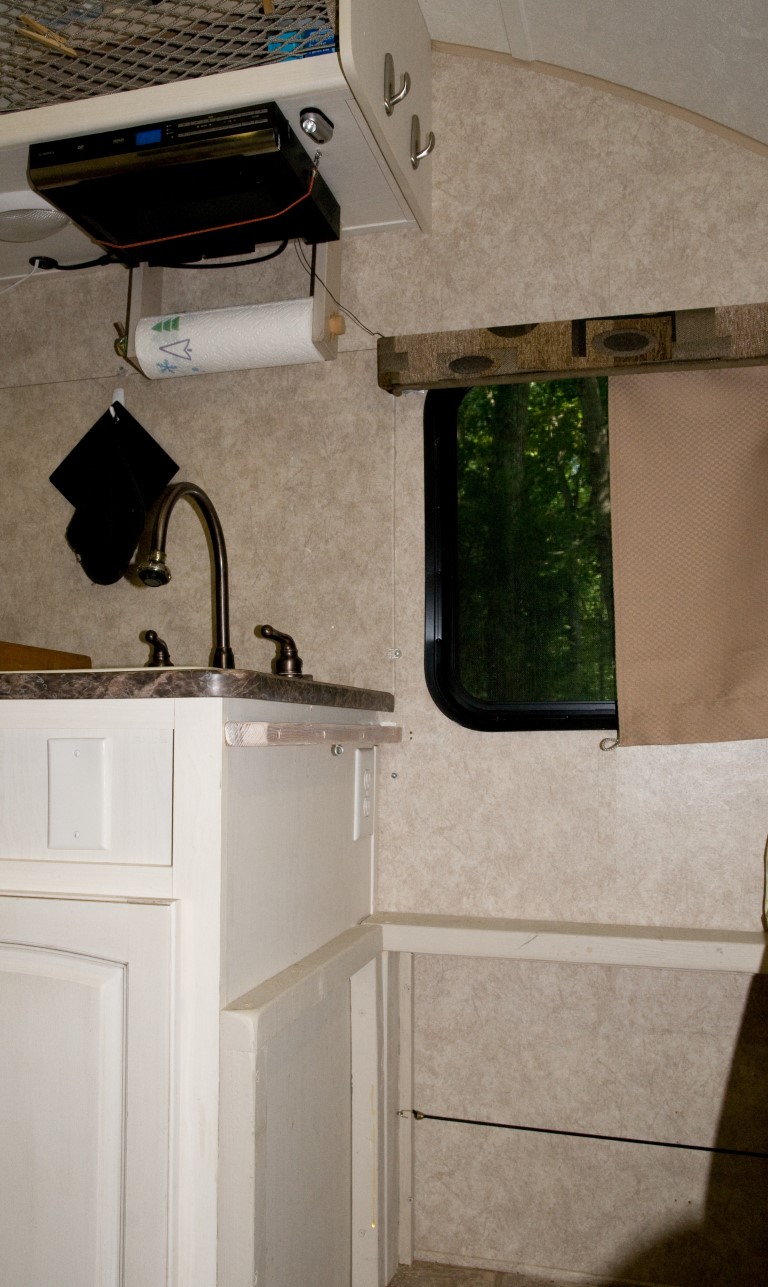
There are 2 false panels in the back of the cabinet below the sink. These are to protect the wiring and gas line. You can easily remove the panels and protect and reroute the mechanicals. We gained a lot of space from this simple mod. I added the top half of a clear plastic shoe bag to the side of the microwave cabinet. It provides great storage and easy access to lots of small items and it’s mostly hidden from view In the picture above, you can see the fold down shelf on the side of the microwave cabinet. This is a good place for a crock pot, electric frypan or other small appliance. I added a shelf on both sides of the cabinet over the sink/stove. The left side has various sized plastic boxes to hold flashlights, insect repellent, speakers, extra batteries, etc-normal junk. It’s a drop zone for Laura-purse, keys and phone. There is a small outlet strip under the top shelf at the back. The right side of the upper cabinet is part of the kitchen-ziplocks, spices, coffee filters, etc.
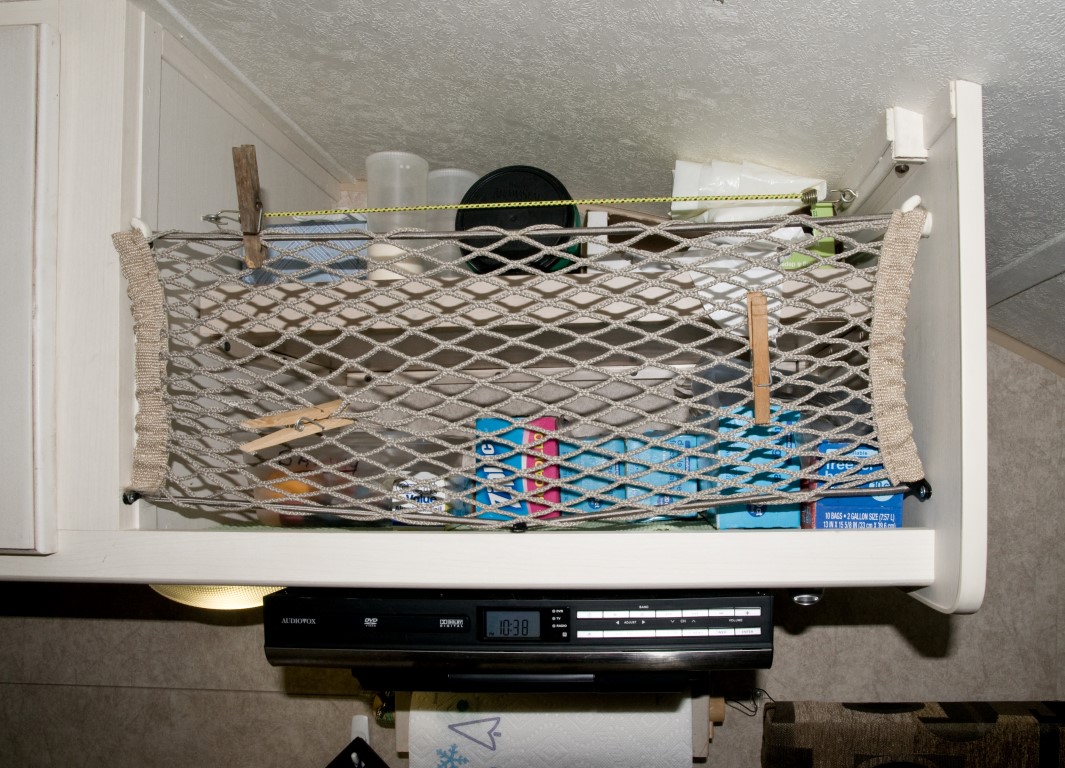
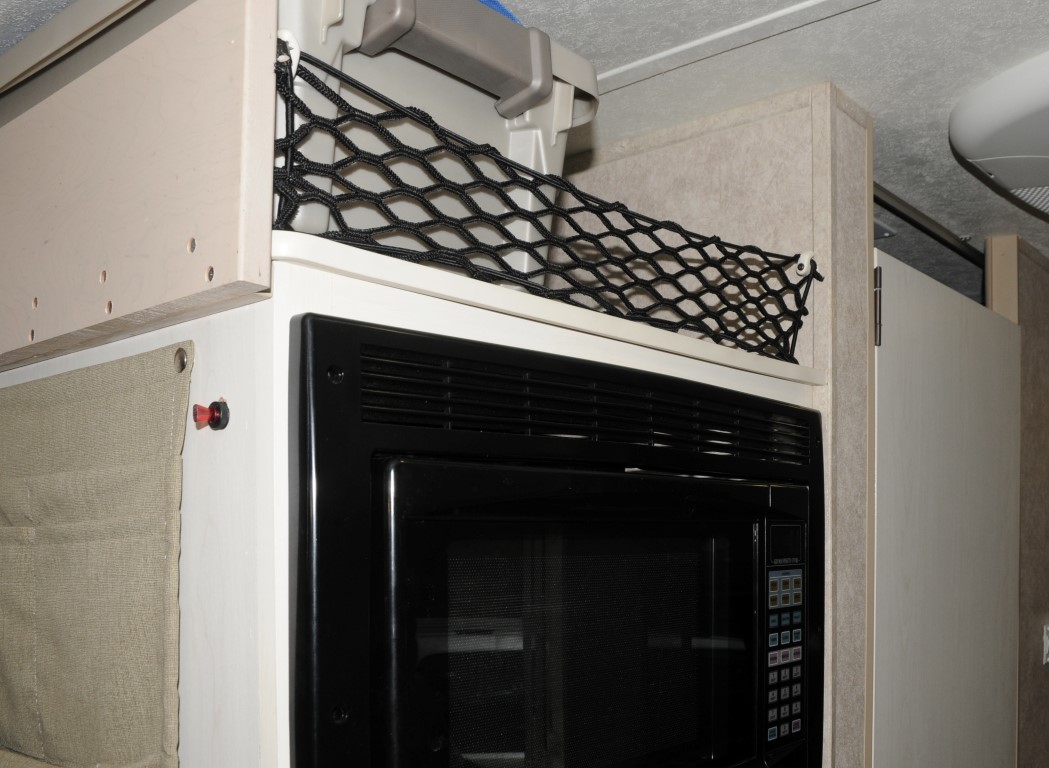
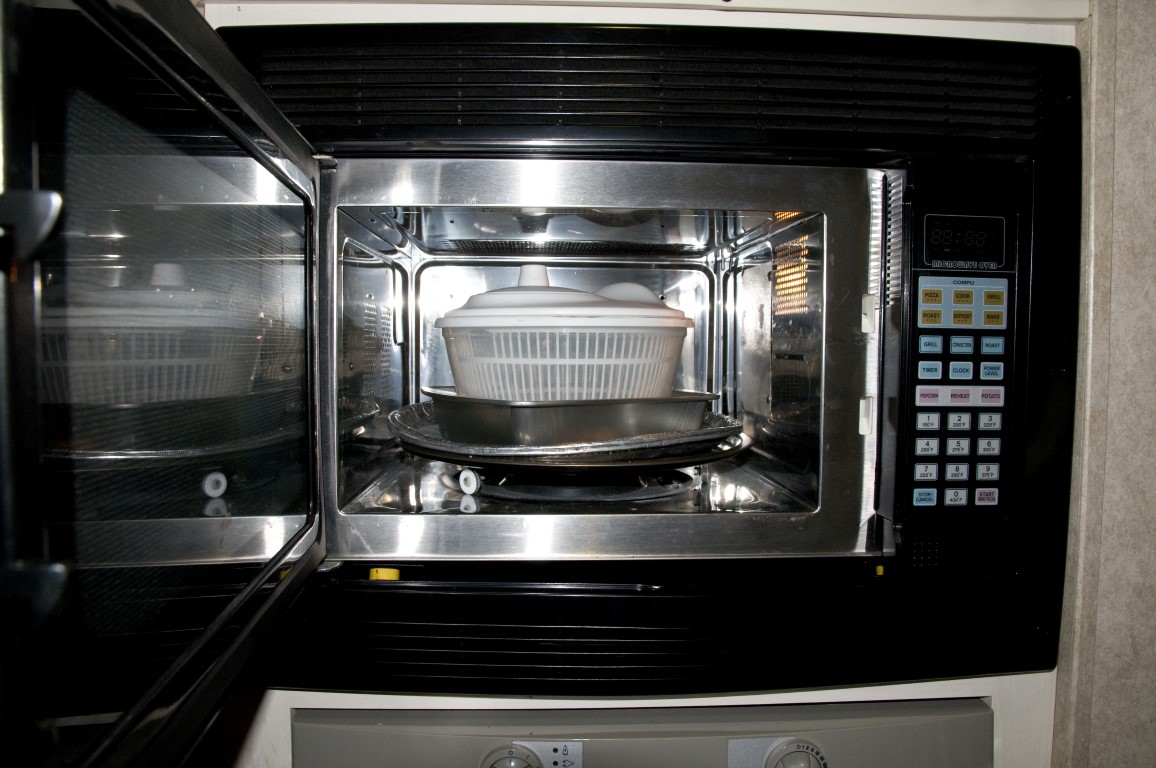
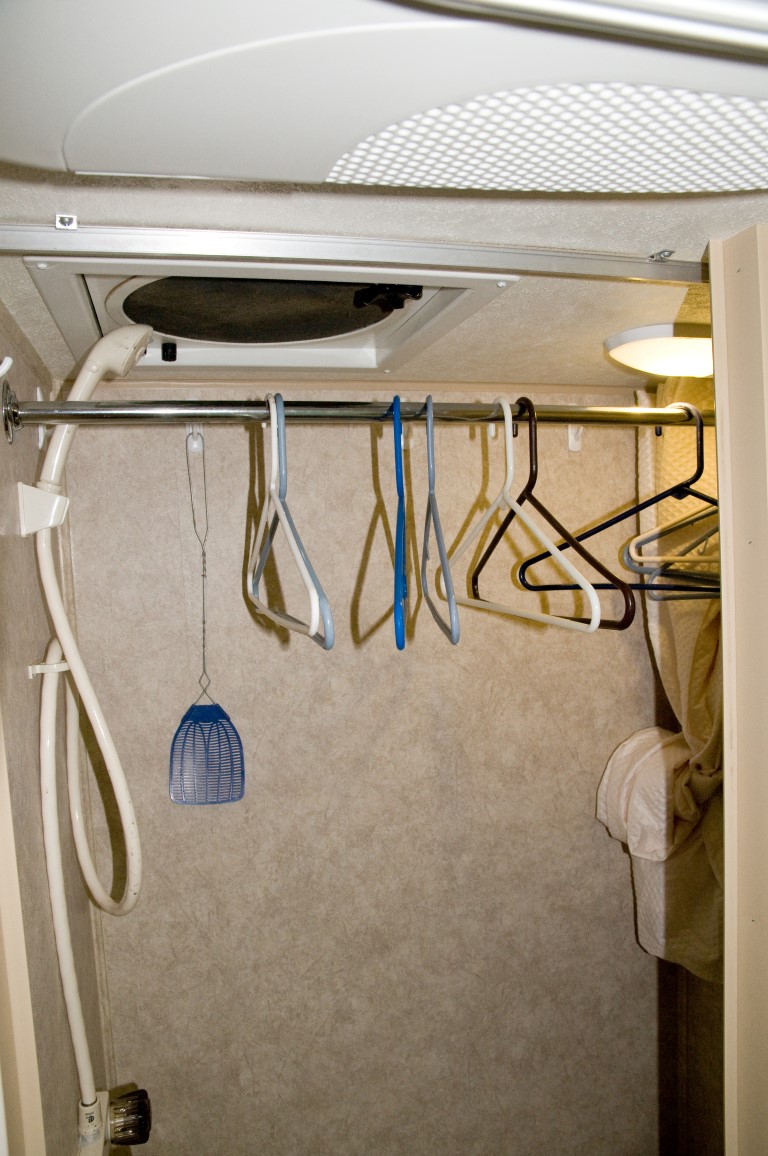
We also closed in the upper left side of the microwave cabinet and added a bungy cord net to the front. This gave us a large space that we subdivide with different sized containers. This is where we store our personal toiletries, medicines, books and games. We also store pizza pans and other cooking gear inside the moicrowave when traveling. We use our bath primarily as a toilet and never as a shower. We installed a shower curtain rod for hanging clothes. The rod is easily removed from the brackets.
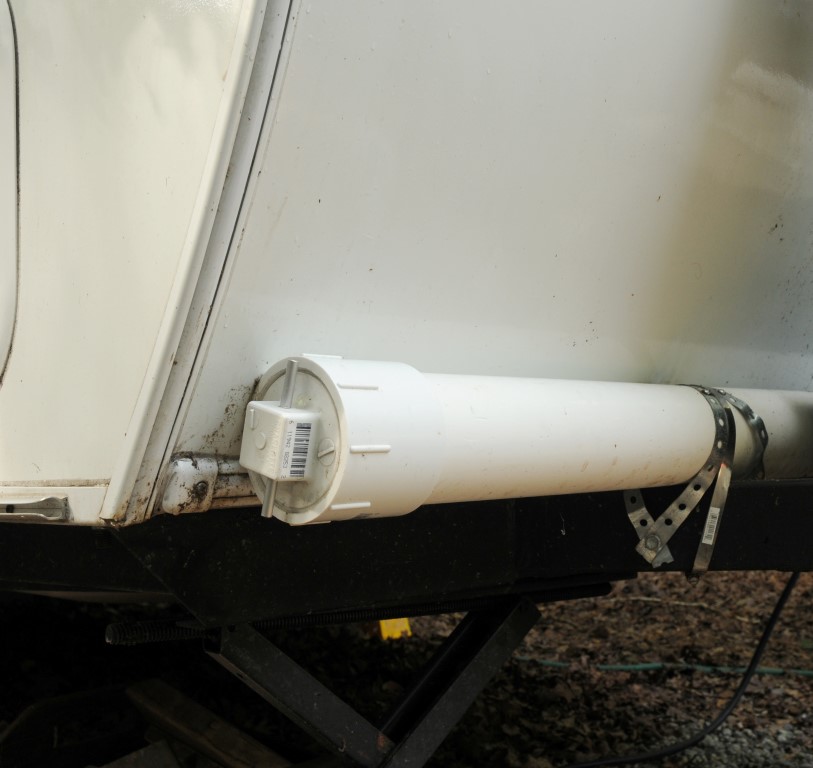
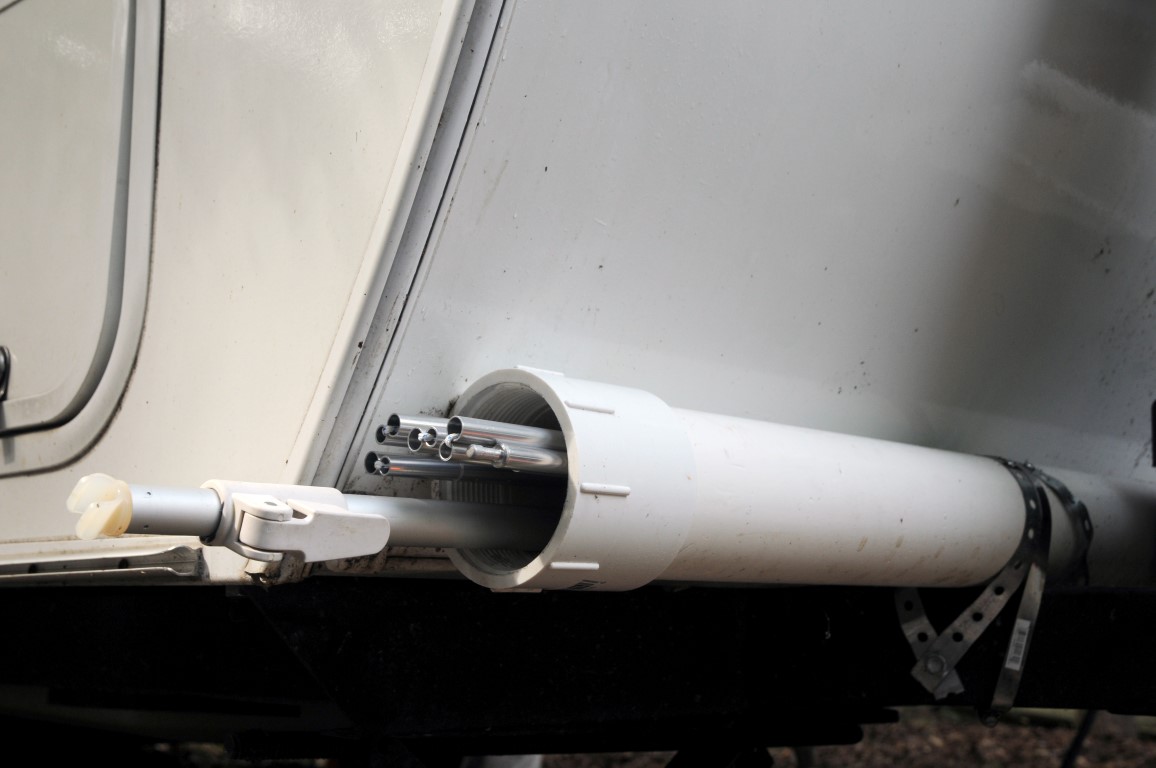
Our largest storage area is under our bed. We have an area that is about 50” x 72” and 16” high. We use various sized Tucker totes, sheetrock buckets and plastic boxes for our food, bedding, supplies and clothes. We use containers that are as tall as possible and different colors/models to differentiate their contents. We added a second layer of vinyl flooring in the rear –heavier duty and the lighter color doesn’t show scratches and dirt as much as the dark woodgrain floors. Our outside storage is very limited. I made a 4” PVC tube with screw ends to carry the poles for the R Dome. We keep the R Dome under the front dinette. The pipe can also hold a couple of fishing rods.
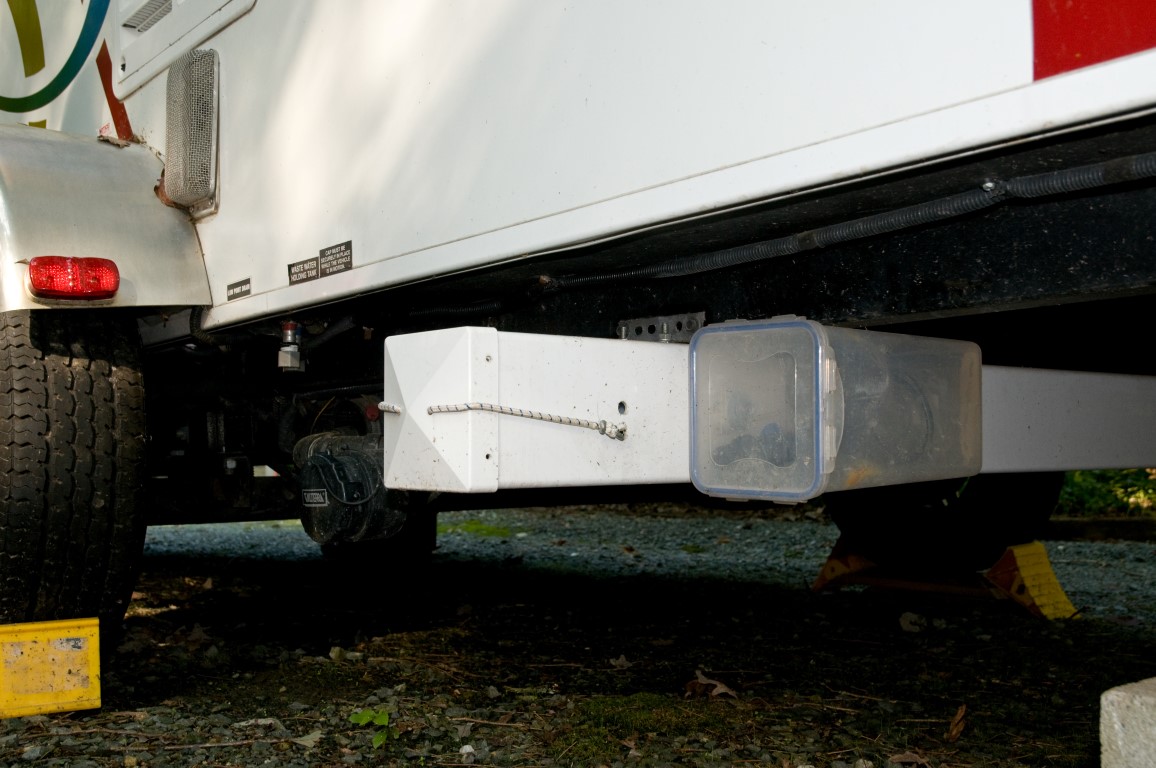
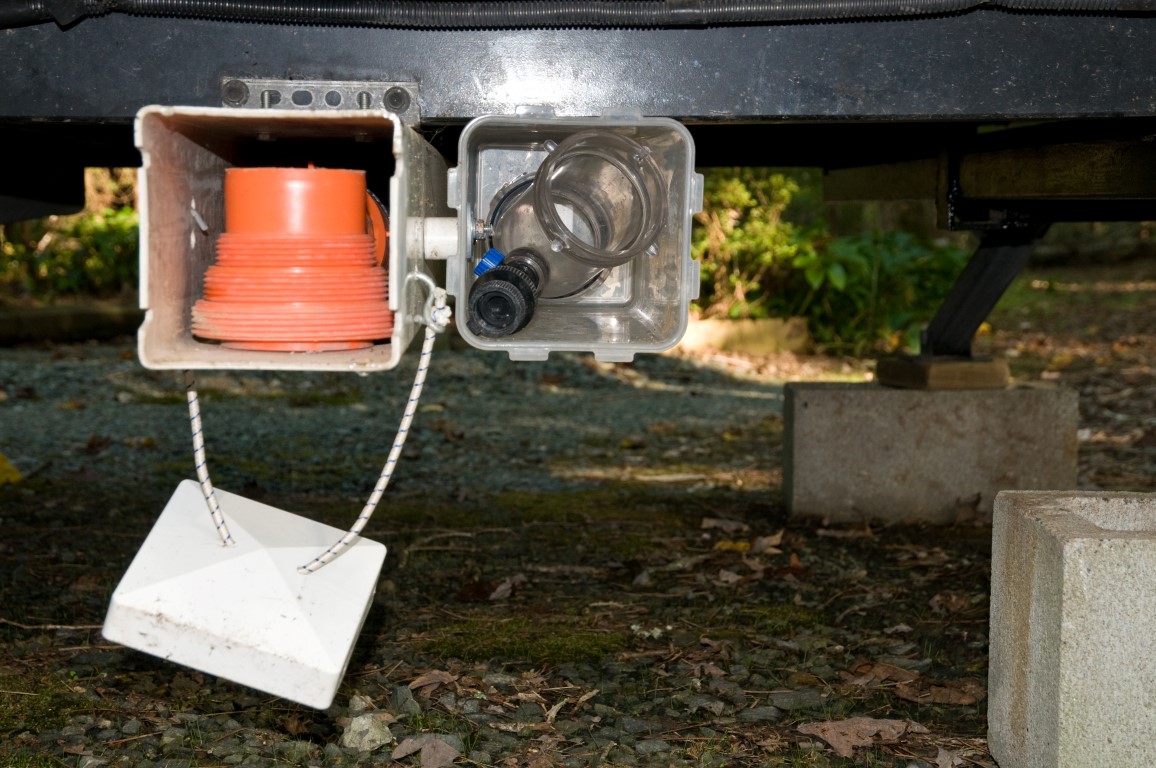
The Rhino hose and fitting is stored in a 5x5 PVC fence post attached to the frame. There is a clear plastic box next to it that holds the clear 45 degree Hydroflush cap.
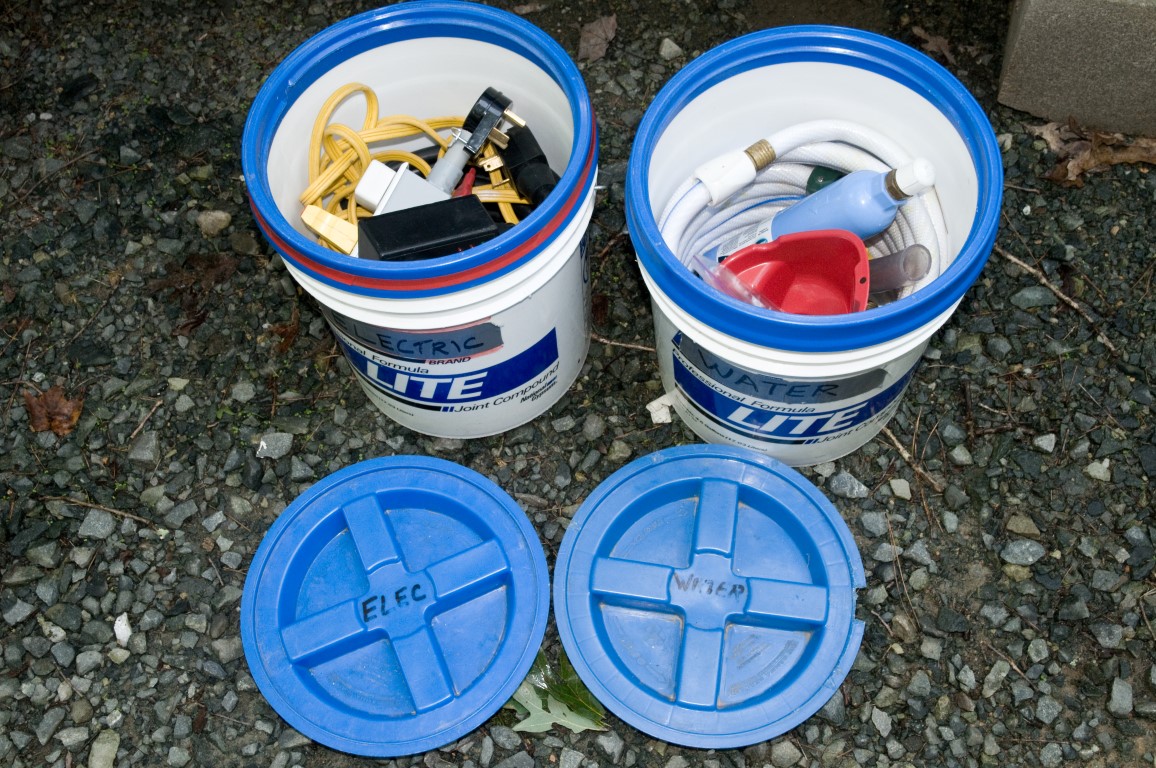
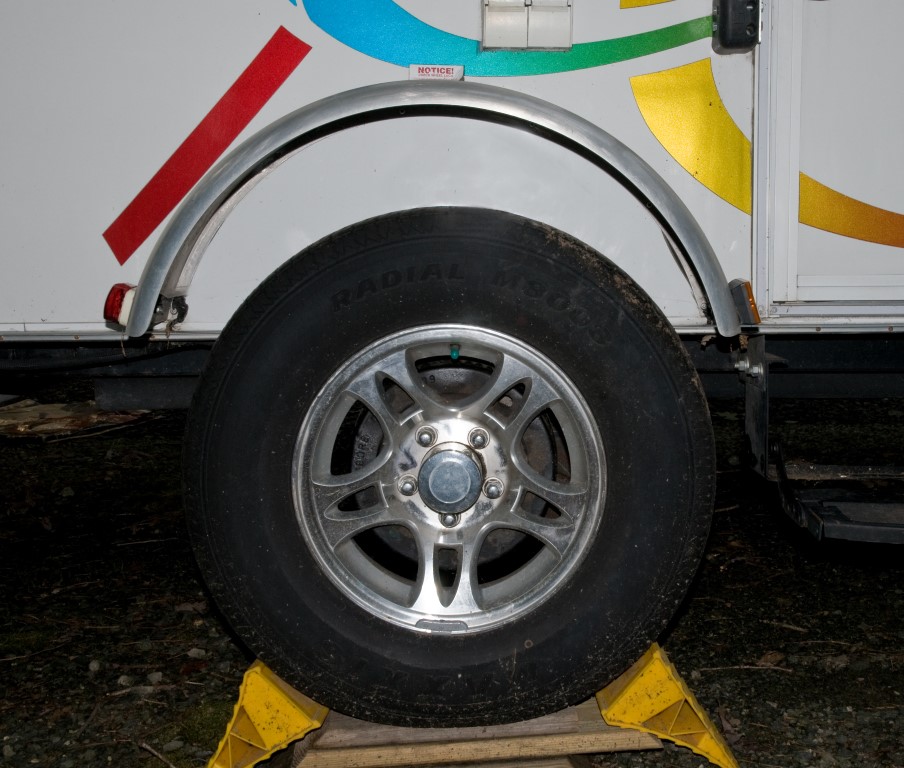
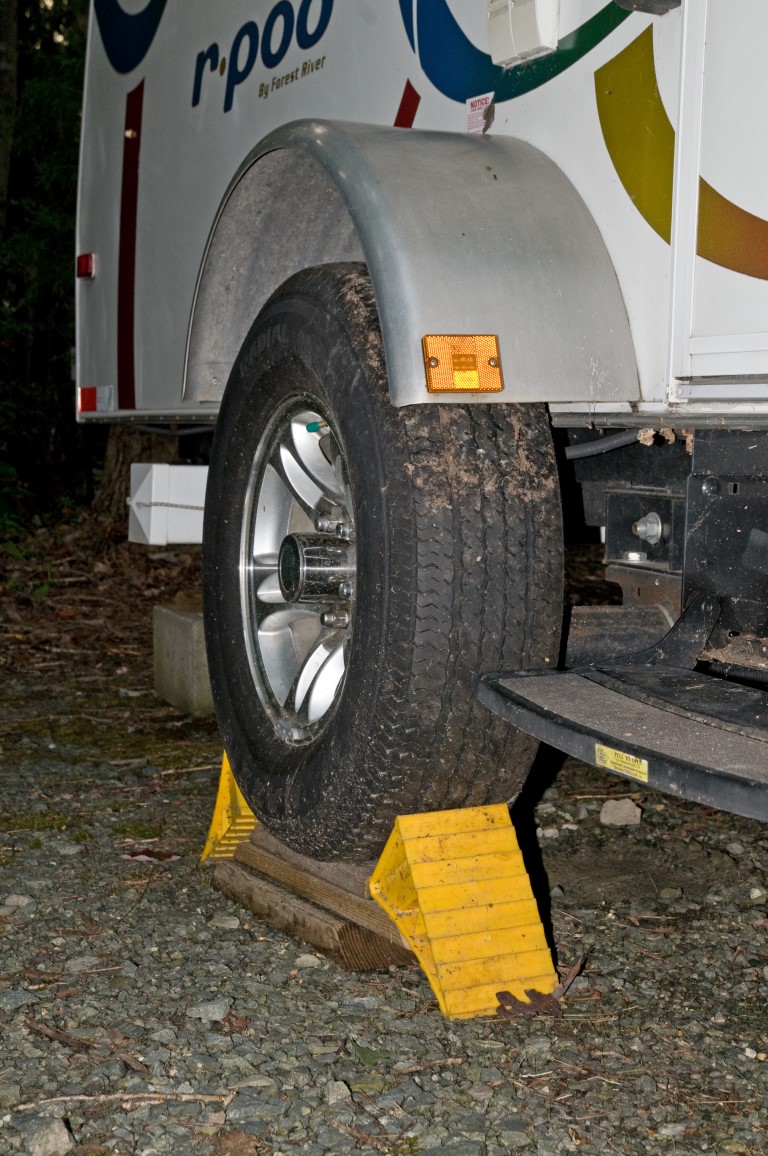
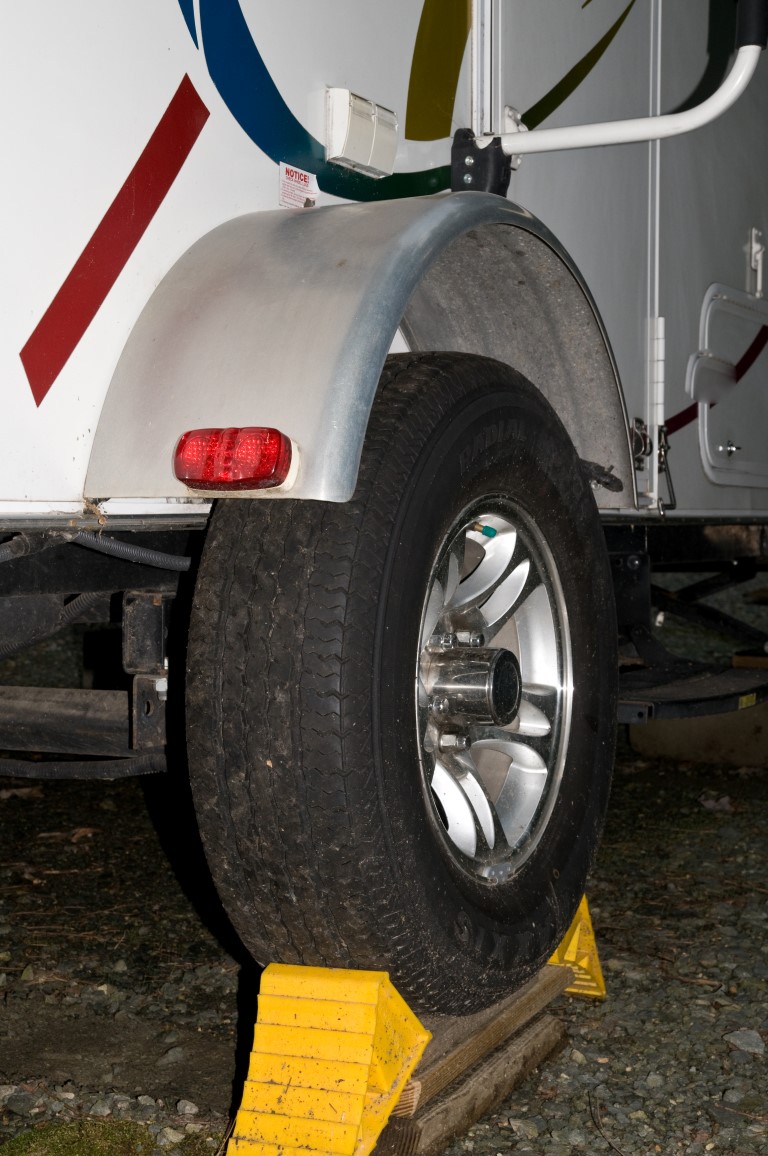
We store all of the fresh water supplies (hose, filter, pressure reducer, etc) in a sheet rock bucket with a screw lid. We do the same for all of the electrical set-up gear. Once we are set up, these buckets can be stored under the Pod. All of our wheel chocks, leveling blocks and jack foot parts are stored in a plywood box that also is stored under the Pod after we set up.
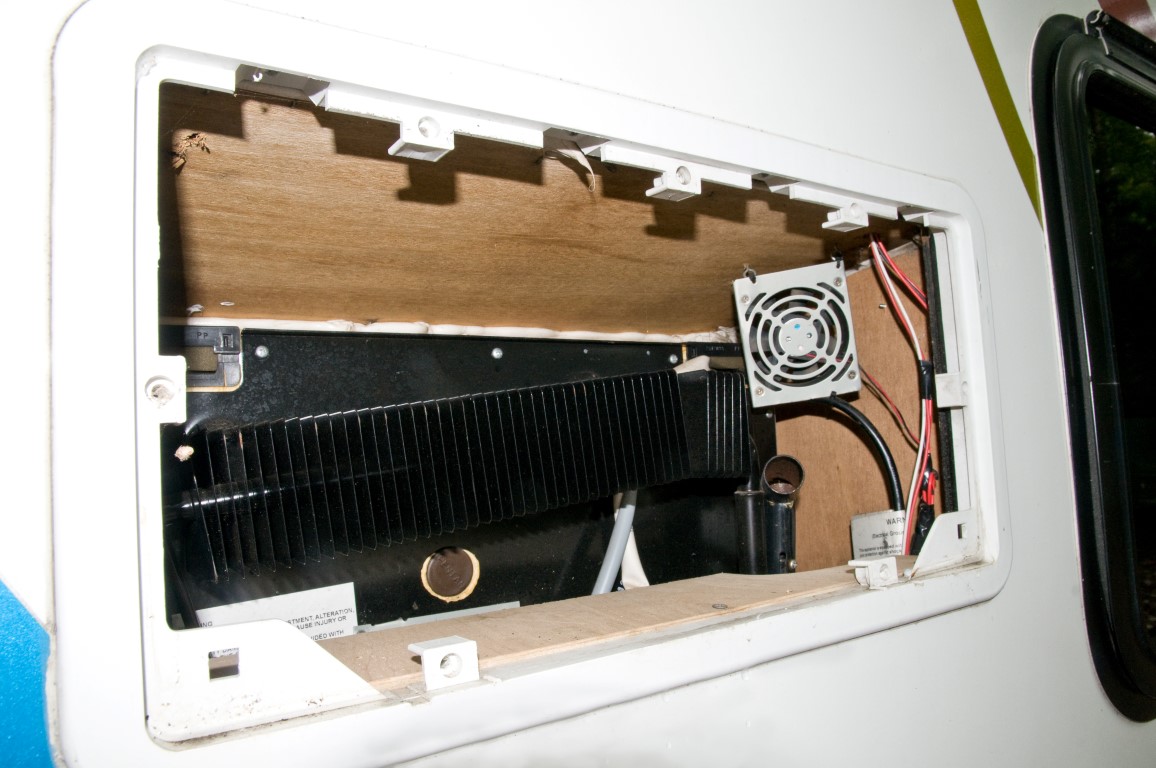
Refrigerator improvements I put aluminum screen wire over all of the exterior vents to stop the wasps and mud bobbers. I prebent the screen as much as possible and used a hot glue gun. I added 3 12v computer fans in the outside refrigerator access area to increase air circulation around the coils. There is one at the bottom blowing up, one in the middle blowing up and one at the top blowing out. All three are wired together and connected to a lighted switch on the inside of the pod. I also added a plywood baffle at the top to concentrate and direct the air flow.
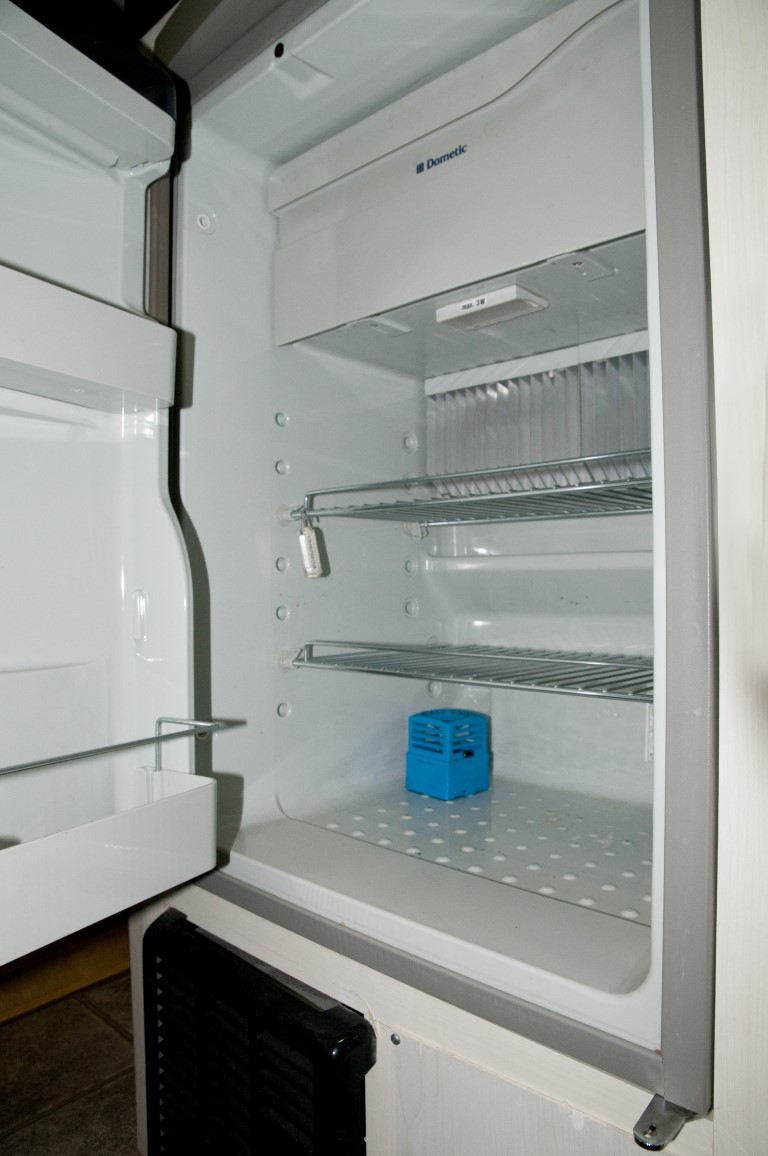
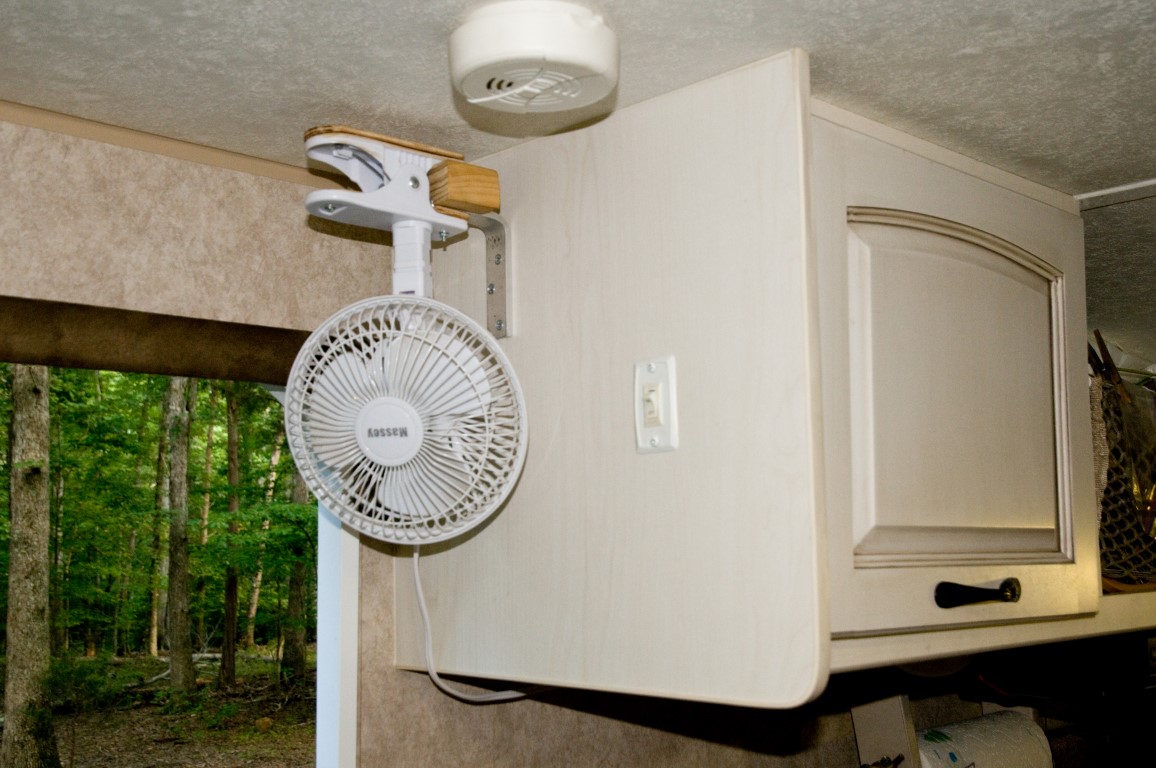
We also use a small battery powered fan to circulate cooled air inside the refrigerator
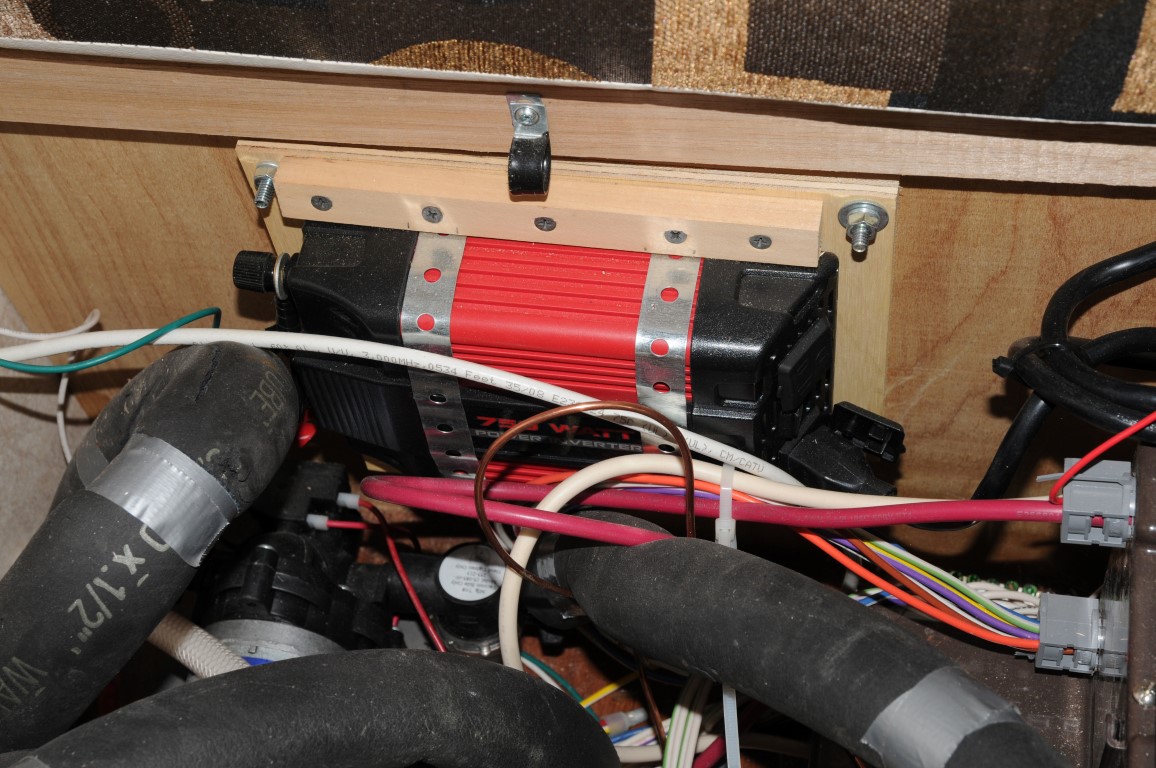
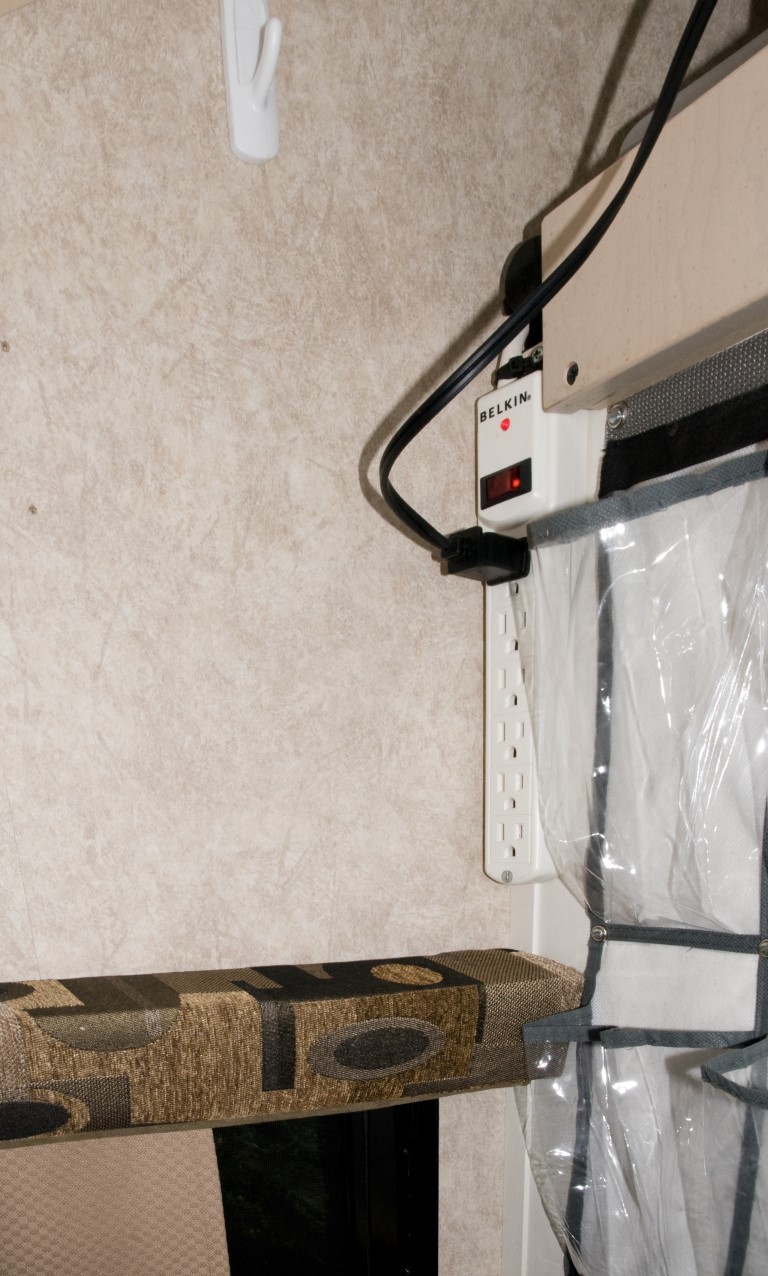
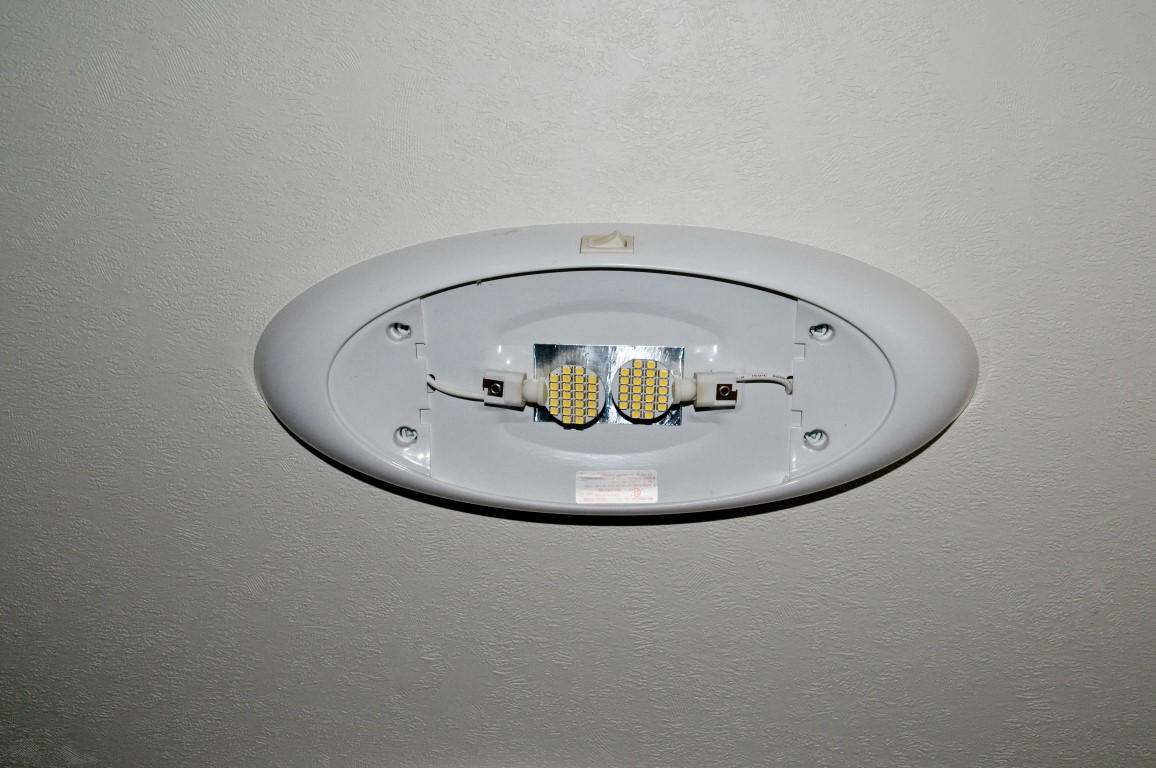
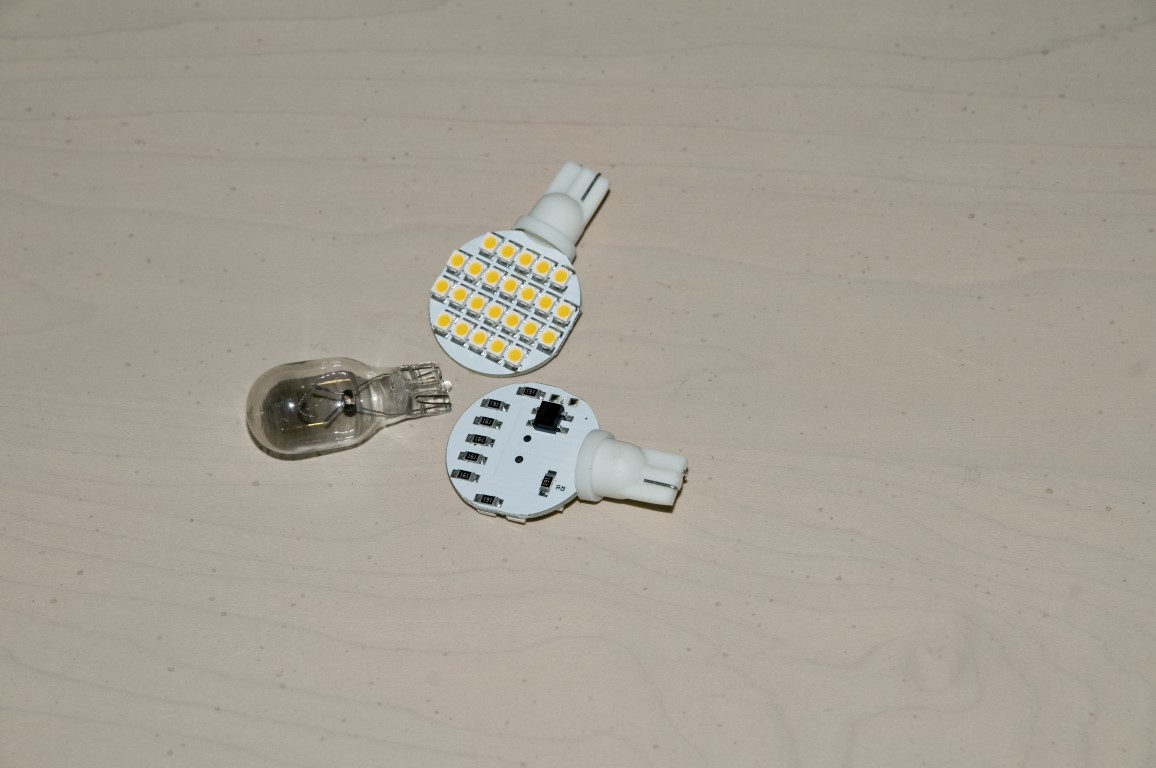
Electrical changes I mounted a 400watt inverter in our mechanical area. It is about 30” from the battery-I used car starter cables for the connections. I connected a 6 outlet strip directly to the inverter. The black strip is on the vertical face of the front dinette seat. We use it for our electronics while boondocking. There aren’t many 120v outlets in the pod. I ran a new wire from the power center to a junction box behind the water heater. In the picture above, you can see the new 6 gang white receptacle on the vertical face of the dinette side seat. We use these for our electronics while on shore power. I added a small strip outlet in the cabinet over the stove. We use this as a charging area for phones, flashlights and a power source for our fan. We use the 12v outlet for a DC voltage meter. I added a strip outlet on the back of the microwave cabinet. We use this for the bedroom/kitchen fan and to recharge phones. There is also a 12v outlet here. I changed all of the light bulbs to LED’s.
I added a second battery and cut off switch. When I first read about the recall for running lights, I assumed our Pod was too old(2009) to be included. So I installed my own running lights-front and rear on the fenders.
I also added a second set of tail lights because I thought the original ones were obstructed with the bikes in place. The new lights are exactly like the originals-I ordered them form the same manufacturer. I was able to tap into all of the wiring at the rear of the pod. They are fully functional. I added 2 small(8”) 120v fans-1 aimed toward the dinette and the other toward our bed.
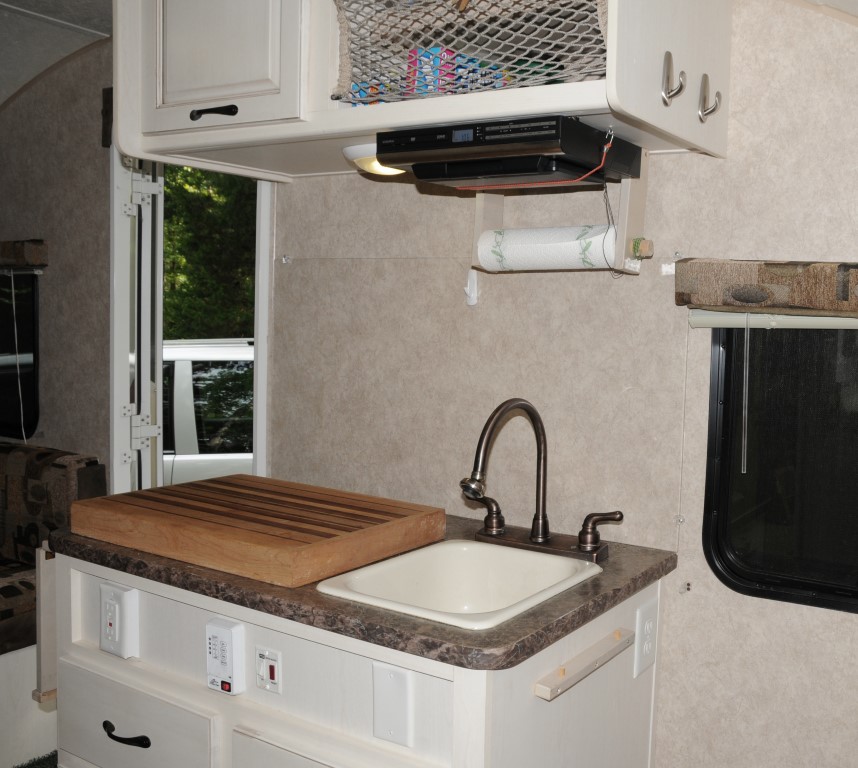
Kitchen changes We did the ever popular wood cutting board for a stove cover. It really is useful as a work surface or a cutting board.
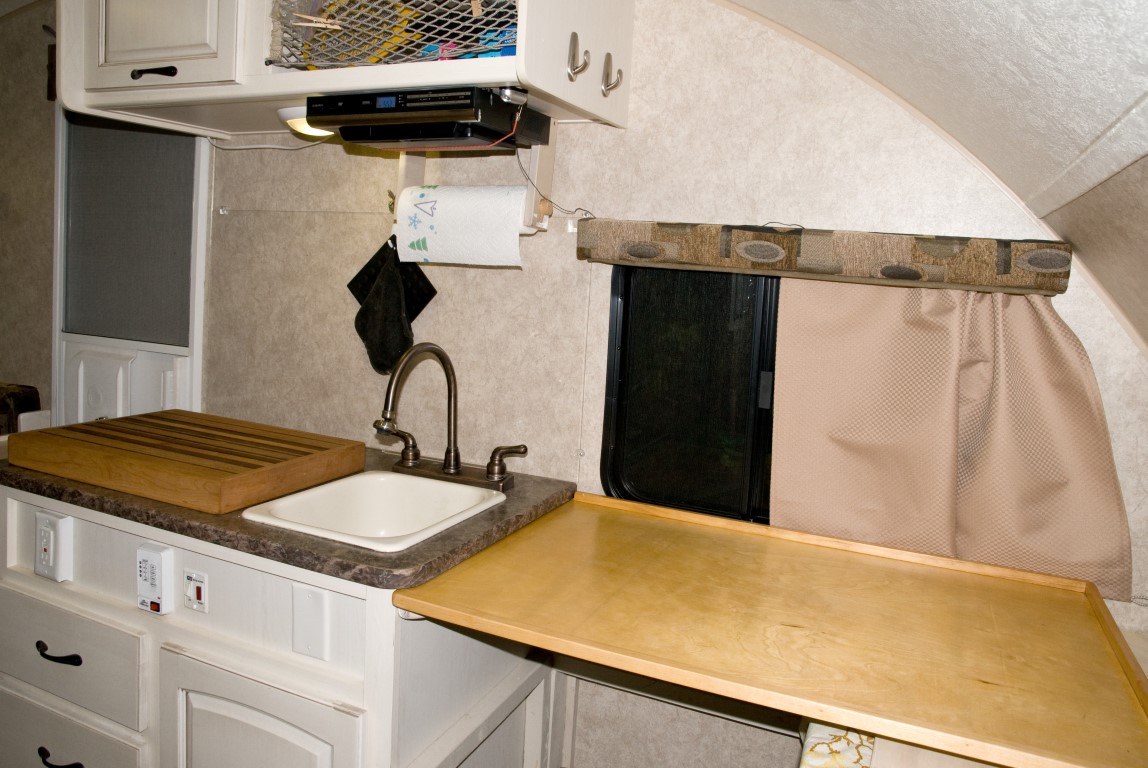
We have a pop-up shelf on the left side of the stove cabinet. We installed a clear plexiglass backsplash We have a removable countertop extension on the right side of the sink cabinet. The countertop extension rests on the stacked bed platform. The bed platform gives us a huge countertop area during meal prep. It makes it possible for 2 people to work in the kitchen at the same time. We moved the electrical outlet from the front of the cabinet to the right side. Now we can plug things in without rubbing against the plugs.
that's all for now-there are lots of other small things and lots more to do. Travel safe Vann
------------- Vann & Laura 2015 RPod 179 https://postimg.cc/0zwKrfB9"> 
|


Replies:
Posted By: jan demarinis
Date Posted: 23 Aug 2014 at 7:15pm
|
Thank you for the photos. Your mods are amazing! Wish I was that handy. Happy trails. ------------- 2014 178 HRE The Podyssey 2013 BMW X3 35i Prodigy RF Brake Controller |
Posted By: Leo B
Date Posted: 23 Aug 2014 at 7:57pm
|
Great photo's, nice work!! ------------- Leo & Melissa Bachand 2017 Ford F150 2021 Vista Cruiser 19 csk Previously owned 2015 Rpod 179 2010 Rpod 171 |
Posted By: techntrek
Date Posted: 23 Aug 2014 at 8:37pm
|
Nice job - the mods and the write-up! ------------- Doug ~ '10 171 (2009-2015) ~ 2008 Salem ~ http://www.rpod-owners.com/forum_posts.asp?TID=1723 - Pod instruction manual 
|
Posted By: GingerPod
Date Posted: 23 Aug 2014 at 8:53pm
|
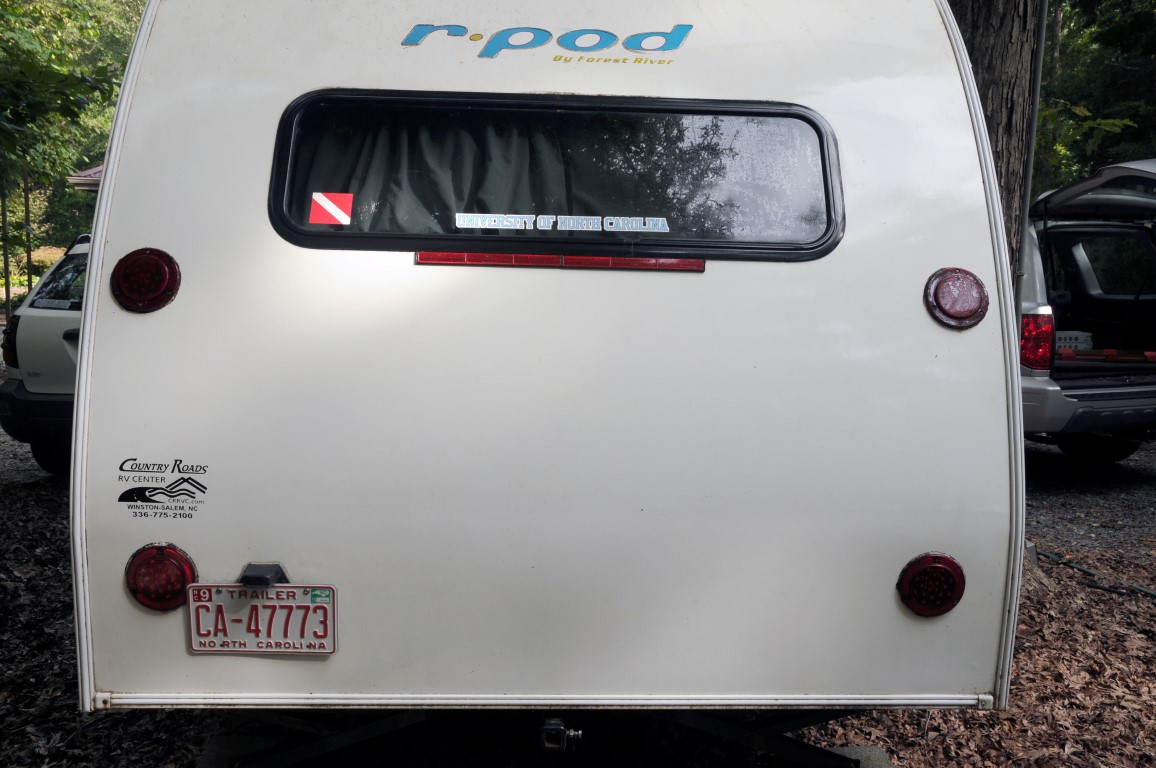
Nice work! Interesting to see an early model up close and what FR has done in it's evolution to today's models. I see another happy camper purchase from Country Roads RV center.....I saw the decal on the back of your POD  ------------- FOUND OUR NEW-RETRO TEARDROP!!! |
Posted By: David and Danette
Date Posted: 23 Aug 2014 at 9:08pm
|
I can see you have been busy while retired doing things that are fun to do besides camping. Your camper looks good and with all the mods a lot more camper friendly. The mods never seem to come to a end there is always another idea to change things. ------------- 2018 Vista Cruiser 19BFD (2018- 2012 Vibe 6503 (2014-2019) 2009 r-pod 171 (2009-2014) Middle Tn 2014 Ram 1500 Quad cab |
Posted By: duck42
Date Posted: 25 Aug 2014 at 3:18pm
|
Amazing number of modifications, all ideas that deal with the basic design shortcomings of Forest River RPODS. One would think that Forest River, if they monitor these forums at all, would pick up on the customer needs and wants concerning 1. The Sewer hose storage 2. Storage space in general 3. the current "unhandiness" and number of the electrical outlets both AC and DC 4. lack of user friendly shelf space etc. Many of these could be addressed at the factory in new RPOD design at least to a certain extent, but probably will never satisfy everyone. ------------- duck42 |