Outriggers Forest River parts
Printed From: R-pod Owners Forum
Category: R-pod Discussion Forums
Forum Name: Podmods, Maintenance, Tips and Tricks
Forum Discription: Ask maintenance questions, share your podmods (modifications) and helpful tips
URL: http://www.rpod-owners.com/forum_posts.asp?TID=14169
Printed Date: 07 Aug 2025 at 12:15am
Software Version: Web Wiz Forums 9.64 - http://www.webwizforums.com
Topic: Outriggers Forest River parts
Posted By: JA-Pod
Subject: Outriggers Forest River parts
Date Posted: 27 Oct 2020 at 5:55pm
|
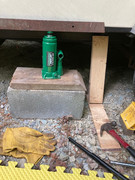
All, Received these outriggers from Forest River, took a while to get them, they came with no instructions but after working with the parts dept they were able to get the engineers to provide the screws to be used. I have not installed them yet, i am not happy with the long self tapping screws that go into and through the frame, i will use bolts with locking nuts. the other screws will go into the underside of the floor next to the edge of the body. I plan on installing them next to the frame but under the rollers for the slide out as that seems the logical place. FR gave no real instructions on where to install them except to place them "spaced apart" Sadly I do not have the part number, but Forest River identifies it as "Formed Outrigger - 4A - Used on R-pods they did mention that these are being installed on new rigs, didn't say which ones, so hard to get info from Forest River. Cheers 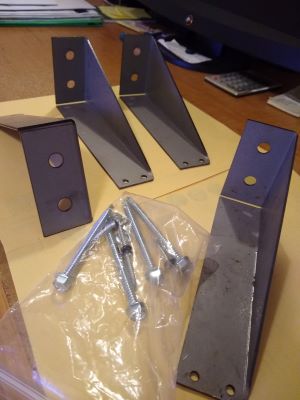
------------- John & Allison R-Pod 179 (2017) Nissan Frontier SL V6 4.0 (2019) |
Replies:
Posted By: mjlrpod
Date Posted: 27 Oct 2020 at 6:18pm
|
i'm iffy about the installation. The frame on the pod only has .100 thick walls. You can bend those in tightening the bolts/nuts. The frame is really meant to have a load pushing down on it. Not sure how much sideway pressure it can take. I have them stock on my 195, but they are tack welded onto the frame. Hopefully this works. ------------- 2017.5 Rp-172 2020 R-pod 195 2015 Frontier sv 4.0L 6cyl I'll be rpodding |
Posted By: offgrid
Date Posted: 27 Oct 2020 at 7:52pm
|
The frame tubes are very resistant to rotating, as all tube shapes are, so you should be good there. As for compressing the 0.1 tube walls, that is a valid concern. You could add a backing plate on the inner side of the tube to spread the load, or just be careful not to compress the tubing by overtightening the bolts. ------------- 1994 Chinook Concourse 1995 RV6A Experimental Aircraft 2015 Rpod 179 - sold |
Posted By: JA-Pod
Date Posted: 28 Oct 2020 at 8:46am
|
good replys, thanks, I originally considered welding these on as I do not want to compromise the frame by drilling holes but in talking to a welding shop they are concerned re the heat that would generate for the frame itself and weaken the steel (its thin) and secondly the water repellant membrane covering the wood floor would be subject to melting. I find it odd that FR would send self tapping screws that would go through the entire frame. I will get a second opinion from the welding shop, perhaps discuss just tac welding and be done with it as mentioned. I have to remember that these are precaution supports only as the floor is still in good shape, no sagging. appreciate the input!
mjlrpod would you have pictures of your tac welded supports on your 195? ------------- John & Allison R-Pod 179 (2017) Nissan Frontier SL V6 4.0 (2019) |
Posted By: geewizard
Date Posted: 28 Oct 2020 at 8:48am
|
Ummm, what are they used for?
------------- 2021 Winnebago Micro Minnie 1708FB 2017 R-Pod 177 (Blue) HRE SOLD 2004 Outfitter Apex 8 camper 2014 Toyota Tundra DC |
Posted By: JA-Pod
Date Posted: 28 Oct 2020 at 8:53am
|
there have been cases where the slide out is putting pressure on the walls and floor of the rigs causing over time for the floors to sag above the fender area, FR has produced these supports to beef up the body/frame area ------------- John & Allison R-Pod 179 (2017) Nissan Frontier SL V6 4.0 (2019) |
Posted By: offgrid
Date Posted: 28 Oct 2020 at 9:23am
|
The max bending stress in the frame tubes is on the top and bottom surfaces and the sidewalls immediately adjacent. Looking at the parts the through holes for the self tapping screws are well away from those areas, so I don't think the outrigger attachment will appreciably weaken the frame. If you're concerned about it keep the outriggers away from the axle attachments as that is where the frame tubes encounter the highest bending loads. If it were me I would make up backing plates to go on the inside of the frame rails and use bolts rather than self tappers. Not really needed structurally but that would make it easier to adjust the amount of compression on the frame rails, I'm just not sure how uniform that can be when driving a self tapper through two steel walls. As you say that is an unusual way to use self tapping screws. ------------- 1994 Chinook Concourse 1995 RV6A Experimental Aircraft 2015 Rpod 179 - sold |
Posted By: Pod_Geek
Date Posted: 28 Oct 2020 at 9:30am
|
I would love to see a picture of where these are installed by FR on, say, a 195/196, and also a discussion of how to determine if one's slideout is in fact causing said sag. This is all news to me.
------------- 2020.5 R-Pod 195 Hood River 2018 RAM 2500 6.4L |
Posted By: mjlrpod
Date Posted: 28 Oct 2020 at 10:38am
You HAVE outriggers on your 195. Take a look underneath. The 195 has 4 or 5 of these on each side of the camper. As far as tack welding them, I agree that that isn't as good an idea now that the frame is actually on the camper. I think a 1/4 thick, 2 x 5 backer plate on the inner edge of the frame might be the best way now. ------------- 2017.5 Rp-172 2020 R-pod 195 2015 Frontier sv 4.0L 6cyl I'll be rpodding |
Posted By: StephenH
Date Posted: 28 Oct 2020 at 11:01am
|
I used the same type of self-tapping screws that FR used for the tank supports to attach mine to the frame. I used three of them for each support I made. I have not had the opportunity to get out on the road to see how well it holds up, but I suspect it will be just fine. I did notice that it makes a difference in the height of the slide over the ottomans as it had been nearly dragging the top of the covers. Now there is additional space above them for clearance. I only attached them to the frame. I did not attach it to the side wall or the floor bottom. It looks like the factory ones were made to be attached to both. I may have to revisit mine and put a couple of screws in at the outside edge close to the wall also. ------------- StephenH Happy is the man that findeth wisdom,... http://www.rpod-owners.com/forum_posts.asp?TID=7712 - ouR escaPOD mods Former RPod 179 Current Cherokee Grey Wolf 24 JS |
Posted By: offgrid
Date Posted: 28 Oct 2020 at 11:10am
No need. The slide resting on the brackets will keep it from sagging. Gravity being what it is its not like you have to hold the slide down because its going to see negative g loads and be wanting to jump up in the air.  Did you use long TEK screws and go through both walls of the frame tubes? ------------- 1994 Chinook Concourse 1995 RV6A Experimental Aircraft 2015 Rpod 179 - sold |
Posted By: StephenH
Date Posted: 28 Oct 2020 at 11:32am
|
No, I used shorter ones. Would it be better to go through both walls? ------------- StephenH Happy is the man that findeth wisdom,... http://www.rpod-owners.com/forum_posts.asp?TID=7712 - ouR escaPOD mods Former RPod 179 Current Cherokee Grey Wolf 24 JS |
Posted By: offgrid
Date Posted: 28 Oct 2020 at 12:15pm
|
StephenH, I think what you did is fine, there really isn't that much load on the screws. You also used more than two per bracket, right? The reason I asked is because it looks like FR's kit is designed to run a long TEK screw through both frame walls. Not having ever tried to do that with a TEK screw I wonder how controllable that is, as does JA-Pod and mjlrpod. Since you haven't tried it either I think I'll stick to the recommendation with FR's kit to add a backing plate and use through bolts. I don't think you need to change anything you did unless you see some kind of issue we're not thinking of. ------------- 1994 Chinook Concourse 1995 RV6A Experimental Aircraft 2015 Rpod 179 - sold |
Posted By: StephenH
Date Posted: 28 Oct 2020 at 1:26pm
|
If I do see it not holding, I will go with a backing plate and bolts. I used four screws per bracket. I expect that will be more than sufficient. ------------- StephenH Happy is the man that findeth wisdom,... http://www.rpod-owners.com/forum_posts.asp?TID=7712 - ouR escaPOD mods Former RPod 179 Current Cherokee Grey Wolf 24 JS |
Posted By: offgrid
Date Posted: 28 Oct 2020 at 2:22pm
+1 ------------- 1994 Chinook Concourse 1995 RV6A Experimental Aircraft 2015 Rpod 179 - sold |
Posted By: JA-Pod
Date Posted: 28 Oct 2020 at 7:40pm
|
I had a great opportunity to meet with StephenH today (lives nearby in the Raleigh area). We discussed a bit about the outriggers and more of his mods, impressive! So with the help of offgrid and mjlrpod recommendations I will go with the backing plate with bolts through the frame, makes the most sense. I will post pics when the project is completed. thanks all for the discussion, this really helps to hear from a group of well versed and talented "engineers" Cheers! ------------- John & Allison R-Pod 179 (2017) Nissan Frontier SL V6 4.0 (2019) |
Posted By: StephenH
Date Posted: 28 Oct 2020 at 9:27pm
|
Thanks John. It was a pleasure meeting you. I'm glad we could meet. Thanks for bringing one of the brackets by. It was good to compare mine with the factory version. I like mine better but the factory ones look to be more than adequate. ------------- StephenH Happy is the man that findeth wisdom,... http://www.rpod-owners.com/forum_posts.asp?TID=7712 - ouR escaPOD mods Former RPod 179 Current Cherokee Grey Wolf 24 JS |
Posted By: Pod People
Date Posted: 29 Oct 2020 at 9:00am
|
Stephen, JA-Pod,Offgrid and others-- do you think all of the 179's should add these outriggers proactively as a precaution even if there is no evidence of sag? I am happy to add them to our 179 if you think it is a good idea. I plan to keep ours for a long time. Thanks for your input Vann ------------- Vann & Laura 2015 RPod 179 https://postimg.cc/0zwKrfB9"> 
|
Posted By: offgrid
Date Posted: 29 Oct 2020 at 9:24am
|
Good question. I have the same thoughts, no sag at this point in mine either. But it certainly can't hurt to add them, I'm leaning toward doing so. ------------- 1994 Chinook Concourse 1995 RV6A Experimental Aircraft 2015 Rpod 179 - sold |
Posted By: JR
Date Posted: 29 Oct 2020 at 9:41am
|
With all the talk about the outriggers I checked my 179 it's a 2019 model year and to my surprise I have 3 factory installed (welded on with screws into the exterior wall) outriggers one on either side of the wheel and one below the refrig (all are under the slideout). Nothing on the passenger side of the trailer. I haven't noticed any sagging in the flooring.
------------- Jay 179/2019 |
Posted By: JA-Pod
Date Posted: 29 Oct 2020 at 1:30pm
|
My 2017 179 does not have a sag, just adding as a precaution since they are installed on later models, i too expect to have this pod for awhile. It is a cheap fix from FR, they cost $3.43 each + shipping. ------------- John & Allison R-Pod 179 (2017) Nissan Frontier SL V6 4.0 (2019) |
Posted By: StephenH
Date Posted: 29 Oct 2020 at 4:02pm
|
I would add them as a precaution. Mine was starting to have a visible sag. ------------- StephenH Happy is the man that findeth wisdom,... http://www.rpod-owners.com/forum_posts.asp?TID=7712 - ouR escaPOD mods Former RPod 179 Current Cherokee Grey Wolf 24 JS |
Posted By: offgrid
Date Posted: 29 Oct 2020 at 4:21pm
|
Y'all have convinced me, and the price is right. I think I'll order them. Is 4 the recommendation from FR?
------------- 1994 Chinook Concourse 1995 RV6A Experimental Aircraft 2015 Rpod 179 - sold |
Posted By: JA-Pod
Date Posted: 29 Oct 2020 at 4:27pm
|
When I ordered them that is what FR recommended. Also from my point of view each support should go directly under the slide roller there are 4 of them. ------------- John & Allison R-Pod 179 (2017) Nissan Frontier SL V6 4.0 (2019) |
Posted By: offgrid
Date Posted: 29 Oct 2020 at 5:16pm
|
OK thanks. I'll take a look and see. I want to keep the brackets away from the axle attachments to avoid compromising the frame, which is also pretty marginal structurally. ------------- 1994 Chinook Concourse 1995 RV6A Experimental Aircraft 2015 Rpod 179 - sold |
Posted By: Pod People
Date Posted: 29 Oct 2020 at 6:02pm
|
thanks for the info-I guess I need to get some also Vann ------------- Vann & Laura 2015 RPod 179 https://postimg.cc/0zwKrfB9">
|
Posted By: Pod People
Date Posted: 02 Nov 2020 at 2:53pm
|
I just spoke with Amanda in the parts department (574-642-3119x4) and ordered 4 outriggers. For the record, the part number is F100140948 which is 1 outrigger and the complete screws/bolts for installation. They cost $3.43 each plus shipping. Thanks for all of the previous info. I'll post a picture when I get them installed. Vann ------------- Vann & Laura 2015 RPod 179 https://postimg.cc/0zwKrfB9">
|
Posted By: JA-Pod
Date Posted: 15 Nov 2020 at 2:27pm
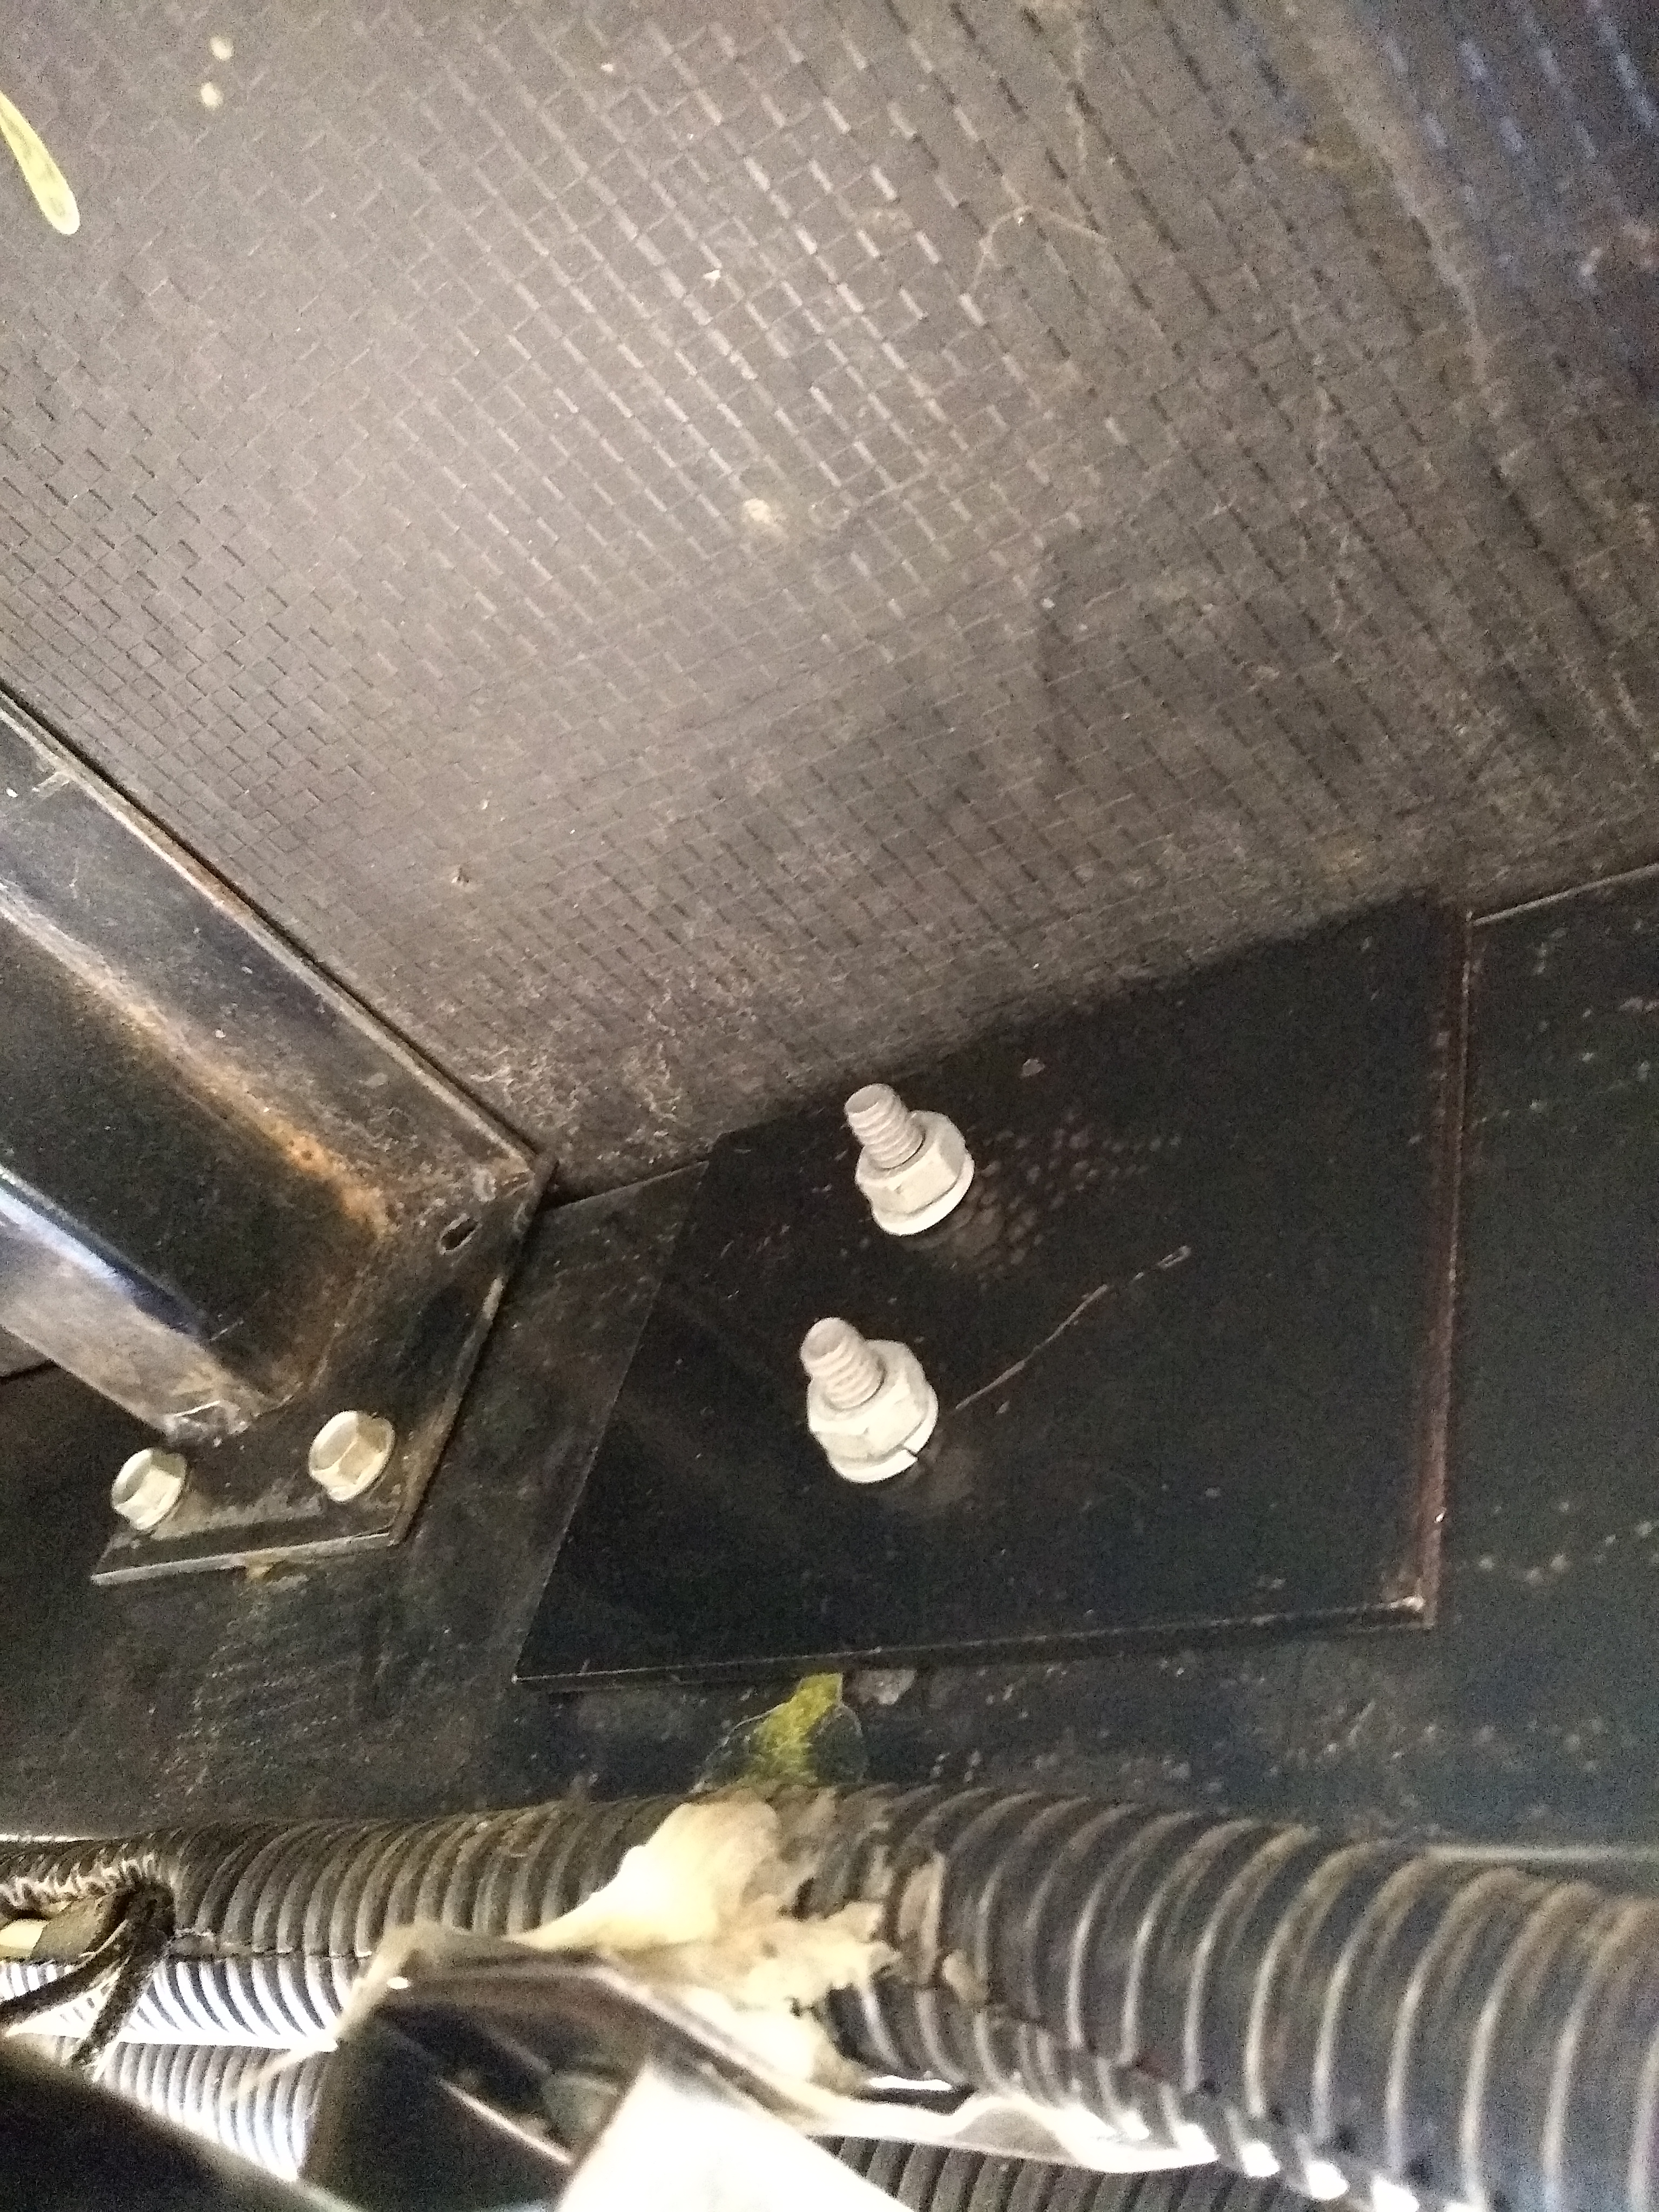
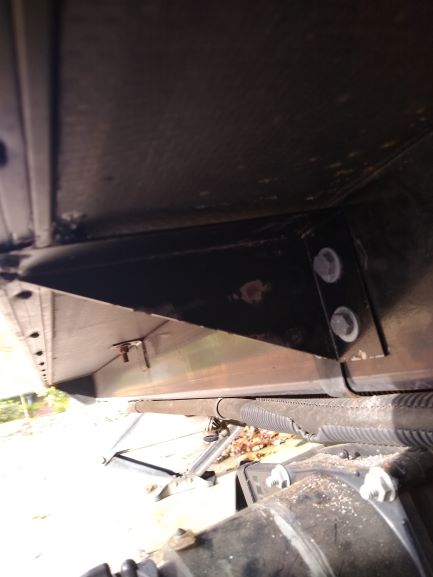
I was able to install the 4 outriggers which I installed mostly under the rollers of the slide out. I had to carve away some of the aluminum channel using an Oscillating Multi tool so I could slip the end of the outrigger onto the channel, I considered sliding it under the channel but could not pry it up since it is very much integrated into the floor and wall, did not want to compromise the integrity of the floor/wall connection. I did add a backer plate which was suggested and added galvanized bolts, locking washers and nuts. I did not use the FR solution of long screws. I added caulk to the screw heads and will touch up with black paint. All in all I feel good about the outcome of the supports.
   ------------- John & Allison R-Pod 179 (2017) Nissan Frontier SL V6 4.0 (2019) |
Posted By: offgrid
Date Posted: 15 Nov 2020 at 4:51pm
|
Looks good. Did you consider letting the Al channel rest on the outrigger rather than removing it? Just wondering if that would have worked? ------------- 1994 Chinook Concourse 1995 RV6A Experimental Aircraft 2015 Rpod 179 - sold |
Posted By: StephenH
Date Posted: 15 Nov 2020 at 6:01pm
|
Setting on the channel would have left a gap between it and the floor of the slide-out. I cut my homemade outriggers so they would just fit to the inside of the channel. Instead of cutting the channel, the alternative would have been to put a shim between the floor and the outrigger. I would like to see how the factory installs them. Does anyone have a picture of a factory installed outrigger for reference? ------------- StephenH Happy is the man that findeth wisdom,... http://www.rpod-owners.com/forum_posts.asp?TID=7712 - ouR escaPOD mods Former RPod 179 Current Cherokee Grey Wolf 24 JS |
Posted By: JA-Pod
Date Posted: 15 Nov 2020 at 7:33pm
|
Interesting how this worked, in removing the channel lip and inserting the outrigger I still could not get all of the outriggers to lay flush to the floor but was able to get two of them them to sync up in the corner where the floor and the frame meet, the other two are very close to the corner. I believe this has to do with the "squareness" of the floor to the frame, seems to be a bit of slop. As much as I tried to get them to true up to the floor and the corner it didn't happen. I am satisfied though that there is significantly more support from the frame to the edge of the trailer body. Time will tell, I suppose the squaring up of the floor would be to remove from the outrigger the end where the screws hold to the frame (in the AL channel) and attach to the floor further down toward the frame but this would require knowledge where the floor "joists" are located to attach. Not exact but this is a hand built vehicle and there will be issues along these lines as we have seen. Sometimes best effort is all we can hope for. ------------- John & Allison R-Pod 179 (2017) Nissan Frontier SL V6 4.0 (2019) |
Posted By: offgrid
Date Posted: 16 Nov 2020 at 7:26am
|
Off hand, I would think that if the outrigger is supporting the channel then that would take the wall loads off the cantilevered floor sections and carry them back to the frame. So, it wouldn't be necessary to support the floor itself in that area because there would no longer be any load on it to speak of. You could also increase the gap between the outrigger and the floor at the frame and tighten the bolts to pull up the wall a bit if it was sagging. But, I might have missed something in the construction video. ------------- 1994 Chinook Concourse 1995 RV6A Experimental Aircraft 2015 Rpod 179 - sold |
Posted By: JA-Pod
Date Posted: 16 Nov 2020 at 7:52pm
|
came to the same conclusion that the load is pushed out to the edge of the floor and transferred across the outrigger to the frame, I feel more comfortable these are installed, not terribly difficult to install cheers and thanks for the advice.
------------- John & Allison R-Pod 179 (2017) Nissan Frontier SL V6 4.0 (2019) |
Posted By: CoachHobbs
Date Posted: 19 Nov 2020 at 9:53am
| Looking to do this on my 2014, 179. No current issues myself but a preventative measure. My question. Are holes predrilled for this or do the holes need to be drilled? Thank you in advance. |
Posted By: Olddawgsrule
Date Posted: 22 Nov 2020 at 8:42am
Read your install and like what you've done! The backer plate was a good move on your part! The frame is just too thin... Lippert did basically the same thing on mine after fixing the frame, adding more steel, they added the outriggers. Very happy to see you all taking this serious and doing some preventive measures. Safe travels all! ------------- https://www.youtube.com/channel/UCJduGeZNFgtptH67leItRFQ - Byways no Highways 2017 Tacoma http://tnttt.com/viewtopic.php?f=55&t=72408 - Truck Camper Build 2004 F150 My Overlander |
Posted By: JA-Pod
Date Posted: 22 Nov 2020 at 2:34pm
|
Hi CoachHobbs, the holes are predrilled for the outriggers, for the edge of the outrigger where it connects to the edge of the wall frame i used stainless steel screws instead of what FR sent, for the screws into the frame as noted I used bolts with lock washers and nuts, same diameter (1/4 inch) as the screws sent by FR. Cheers! ------------- John & Allison R-Pod 179 (2017) Nissan Frontier SL V6 4.0 (2019) |
Posted By: SPrins
Date Posted: 07 Feb 2021 at 10:12pm
|
Just read this thread. I have a 2018 R179 and will be checking to see if it has outriggers or not. I see people order 4 of them; are two used on each side of the camper, or do all 4 go under the slider? How many inches is the spacing between them?
------------- 2018 R-Pod 179 2020 Ford F-150 3.5L Ecoboost |
Posted By: JA-Pod
Date Posted: 08 Feb 2021 at 10:09pm
|
Hi the outriggers are only installed under the slideout since this is where the sagging occurs. I installed them under the rollers to carry the weight of the slideout, I installed 4. ------------- John & Allison R-Pod 179 (2017) Nissan Frontier SL V6 4.0 (2019) |
Posted By: ronahue
Date Posted: 10 Feb 2021 at 9:59am
|
What length screw did you use going up into the floor? ------------- Ron & Sharon 2015 R-Pod 179 2022 Nissan Frontier No trees were harmed in the sending of this message but a billion electrons were really agitated |
Posted By: JA-Pod
Date Posted: 10 Feb 2021 at 1:34pm
|
one inch, I used the ones that FR sent with the outriggers, ------------- John & Allison R-Pod 179 (2017) Nissan Frontier SL V6 4.0 (2019) |
Posted By: SkiPod
Date Posted: 17 Apr 2021 at 9:49am
| Hi all, I have a 2016 176 that has a wall sagging on the left (slide) side. Has anyone had any issues with their 176 like the 179 is having? The sagging put stress on some wiring and plumbing fitting and caused a pinhole leak. The dealer I took it to was trying to get it covered under warranty but after some back and forth with me thinking Forest River was going to step up and fix the problem, they finally said they weren't going to cover the claim. How many of you watched this video about the "superior construction" of the rpod before buying one? I'm obviously disappointed: http://www.youtube.com/watch?v=vMXneKc_fDo - https://www.youtube.com/watch?v=vMXneKc_fDo |
Posted By: offgrid
Date Posted: 17 Apr 2021 at 9:59am
|
Yeah, that video needs to be categorized as satire.
I don't think there is anything unique about the 179, the slide is just not well supported in any of them. The cantilevered floor panel is just not that strong. If you don't have water damage then get the add on support bracket d, lift the slide side up back to level and add them. ------------- 1994 Chinook Concourse 1995 RV6A Experimental Aircraft 2015 Rpod 179 - sold |
Posted By: SkiPod
Date Posted: 18 Apr 2021 at 7:46am
| Yes, I do have water damage according to the dealer that submitted the claim. That could have had something to do with why Forest River denied the claim was because of the labor involved in making those repairs. Apparently they are forwarding these claims to their vendor Lippert and they said Lippert denied the claim. I'm assuming Lippert is manufacturing/designing the floor and slide assembly for Forest River? |
Posted By: offgrid
Date Posted: 18 Apr 2021 at 8:09am
|
I think Lippert just manufacturers the steel frame and axle, FR does the floor and slide.
Try to get a clear understanding of the location and extent of the water damage. That will tell you whether the trailer is salvageable or not. Since the walls are built off the floor it that is compromised it can be very difficult to repair. ------------- 1994 Chinook Concourse 1995 RV6A Experimental Aircraft 2015 Rpod 179 - sold |
Posted By: lostagain
Date Posted: 18 Apr 2021 at 9:02am
|
It is likely that Lippert builds the frames to FR specs. If they complied with the FR specifications, there would be no "defect in materials or workmanship" that would trigger warranty coverage, even if the warranty was transferable. If the damage is as a result of deficient design, that would be a matter for FR. If the failure occurred after the warranty expired, in most states recovery for the design defect would be very difficult and the cost would substantially exceed the value of the trailer. If you add prolonged water intrusion to the mix, it would be even harder to make a case against FR. ------------- Never leave footprints behind. Fred & Maria Kearney Sonoma 167RB Our Pod 172 2019 Ford F-150 4x4 2.7 EcoBoost |
Posted By: SkiPod
Date Posted: 18 Apr 2021 at 9:19am
| Based on the fact that FR told me that Lippert "denied" my claim, I am presuming that Lippert is at least manufacturing the floor, but it could be based on FR specs. Either way, it looks like FR may be blaming Lippert since they sent my claim to Lippert. There's no question that bringing a lawsuit would exceed the cost of the trailer. But the law in some state allows attorney's fees and treble damages to be recovered where misrepresentations relied on by the buyer can be proven, even if the warranty coverage is waived or not applicable. |
Posted By: offgrid
Date Posted: 18 Apr 2021 at 9:39am
|
The construction videos clearly show FR manufacturing the floor and installing it on the frame provided by Lippert. If the frame or axle were bent thenvthat could be a claim against Lippert if their warranty requirements were otherwise met. But not the floor itself. Since there is no mention of frame damage there is no reason to expect Lippert to accept warranty responsibility.
As for FR there is specific language requiring the owner to check plumbing for leaks IIRC. Check your maintenance requirements. So if your water damage was due to a plumbing leak that was not corrected FR has yet another justication for denial of your claim, the others being time and ownership. In my opinion you won't get satisfaction from FR, too many warrant limitations are . The outrigger brackets are an easy fix if you water damage is minor. If it's severe you are sadly looking at a total loss. ------------- 1994 Chinook Concourse 1995 RV6A Experimental Aircraft 2015 Rpod 179 - sold |
Posted By: lostagain
Date Posted: 18 Apr 2021 at 10:28am
|
SkiPod, Lippert makes the chassis on which the floor is mounted. Their stuff is painted black. FR made the floor, including the aluminum framing. If the chassis, assuming it was shipped "FOB," had a bend in it before it was loaded at the Lippert plant, then their warranty may apply. If it was bent during FR's handling of it, then there is no defect in materials or workmanship, but rather damage by a 3rd party, i.e. FR or the shipper. Yes, the laws in some states favor claims by consumers, but Texas is among the least favorable to consumers. Additionally, it may be problematical for you to prove that FR made a misrepresentation to you in particular, much less that you actually purchased the trailer based upon the alleged false representation. The video cited in this thread is not a misrepresentation to you personally. Indeed, it is simply product puffing, like the widget manufacturer that says they make the prettiest widgets in the world. Even in the most consumer oriented of states, your chance of proving actionable fraud and recovering treble or punitive damages are right in there with a snowball's chance in hell. I hope your trailer is repairable with the floor reinforcement. It would be a shame if it is not, but, like buying a used car without a warranty, it's always a problem of buyer beware. Check your purchase contract to see if it was "sold as is" or came with some kind of seller's warranty.
------------- Never leave footprints behind. Fred & Maria Kearney Sonoma 167RB Our Pod 172 2019 Ford F-150 4x4 2.7 EcoBoost |
Posted By: Olddawgsrule
Date Posted: 18 Apr 2021 at 1:06pm
|
With everything 'I' dug into, during my issue, Lippert is frame/axle. FR does Cabin. Even though the joists in mine did break loose, Lippert added the outriggers. The outriggers on mine were made by the welder onsite with material both he and my dealership had on hand. I bought from this particular dealership (Cold Springs RV) because they have the largest RV repair center in our area. They did very well by me! FR stating Lippert rejected the claim is like them saying I rejected the claim.. Neither of us had anything to do with it! From all I have talked to, adding the outriggers (on both sides) has fixed the issue. IMHO, well worth the cost to add them. To this, I believe the jury is still out as to bolting or welding these on. I personally fall into the group of though that welding is better, yet having outriggers is the main goal. Safe Travels
------------- https://www.youtube.com/channel/UCJduGeZNFgtptH67leItRFQ - Byways no Highways 2017 Tacoma http://tnttt.com/viewtopic.php?f=55&t=72408 - Truck Camper Build 2004 F150 My Overlander |
Posted By: K. Frost
Date Posted: 27 Apr 2021 at 10:30am
| The damage to my 2017.5 179 was a little more severe. I first noticed a small amount of buckling in the fiberglass along the lower trim rail on the slide side. Took it to the shop and while it was on their lot, the other side (door side) developed the same type of buckling. The side walls had dropped on both sides. The repair shop said that they had never seen a trailer without the outrigger supports. They are a FR dealer but don't sell R-Pods. They contacted FR and were told that it is a known issue. So after 3 months of discussion, all FR was willing to do is provide the supports and compensate for one hour labor. However, the shop could not get them to send the supports. I told them to fix it before it go worse. I'll be picking it up this week and the bill is $5800. About $900 for jacking up the sides and installing 10 custom made brackets that were welded on. The remaindrr if the cost covers repairing the fiberglass and installing black diamond plate over both sides to "hide" the repairs. It's a KNOWN ISDUE, for which there was no recall and collateral damage can and does occur. |
Posted By: StephenH
Date Posted: 27 Apr 2021 at 10:52am
|
On mine, the sagging seemed to appear only on the slide side. I will keep watch on the door side though now that you mention it. My two home-built brackets which I bolted on so far seem to be working okay. I might order a set from FR and add them for further support. ------------- StephenH Happy is the man that findeth wisdom,... http://www.rpod-owners.com/forum_posts.asp?TID=7712 - ouR escaPOD mods Former RPod 179 Current Cherokee Grey Wolf 24 JS |
Posted By: Olddawgsrule
Date Posted: 27 Apr 2021 at 2:48pm
You may wish to see the spec's of FR's first. I have to think your HB's are probably better! ------------- https://www.youtube.com/channel/UCJduGeZNFgtptH67leItRFQ - Byways no Highways 2017 Tacoma http://tnttt.com/viewtopic.php?f=55&t=72408 - Truck Camper Build 2004 F150 My Overlander |
Posted By: StephenH
Date Posted: 28 Apr 2021 at 6:59pm
|
Yes, but the FR ones are already made. I would need to buy materials and then weld them, and paint them. It might be more cost effective for me to purchase the FR ones if I could get a response from the parts department. I have tried calling twice so far and have left messages. So far, no call-back. ------------- StephenH Happy is the man that findeth wisdom,... http://www.rpod-owners.com/forum_posts.asp?TID=7712 - ouR escaPOD mods Former RPod 179 Current Cherokee Grey Wolf 24 JS |
Posted By: lostagain
Date Posted: 29 Apr 2021 at 5:49am
|
FR says they have a new policy of no direct parts sales anymore. You have to order them through any FR dealer (not just r-Pod dealers). We recently bought seam tape and got the part info from the factory, but had to buy it from a dealer. It's unfortunate as it caused delays due to double shipping, first to the dealer, then to you. Thankfully, most parts are pretty ubiquitous and can be purchased from other sources. Personally, I think it's a bad idea limiting parts sales in that manner, but all my calls to Mr. Buffett go unreturned. ------------- Never leave footprints behind. Fred & Maria Kearney Sonoma 167RB Our Pod 172 2019 Ford F-150 4x4 2.7 EcoBoost |
Posted By: StephenH
Date Posted: 29 Apr 2021 at 9:31am
|
Thanks. I need to locate an FR dealer then. The one from whom I purchased the RPod no longer sells them. I don't know if they sell other FR models. We are nowhere near them. Personally, I think that policy of no direct sales is short-sighted. It just means that the price listed above is to the dealer now and the dealer will probably add a markup that will make the price double or more. That would change the equation to make it more cost effective to make my own again probably. ------------- StephenH Happy is the man that findeth wisdom,... http://www.rpod-owners.com/forum_posts.asp?TID=7712 - ouR escaPOD mods Former RPod 179 Current Cherokee Grey Wolf 24 JS |
Posted By: JA-Pod
Date Posted: 29 Apr 2021 at 10:47am
|
thanks for the update All, Wow! no parts directly from FR they are making it difficult to believe in this company, not customer friendly at all. I have reached out to FR as well, will see if I have any luck. Stephen I too know of no R-Pod dealer in the area, although there is suppose to be one in Apex, D&H RV center? If you do find a source of the outriggers let me know I will also add them to my door side. Interesting I have not heard of an issue with this side of the pod except on this forum but do believe an "ounce of prevention is worth a pound of cure" so adding them on would be a good thing. ------------- John & Allison R-Pod 179 (2017) Nissan Frontier SL V6 4.0 (2019) |
Posted By: JA-Pod
Date Posted: 29 Apr 2021 at 12:13pm
|
All I received a email response from FR, appears that certain parts can be ordered. see their response: "Good afternoon,
There are critical components that FR cannot sell directly to retail customers. We advise to purchase parts with your dealership or a local FR Certified dealership but if you wish to purchase those with us, you may give us a call. F100140948 FORMED OUTRIGGER - 4A - USED ON R-PODS 1051177 L & W ENGINEERING $3.44 ea + tax + ups shipping Thank you, LACEY STUTSMAN FOREST RIVER PARTS ADMINISTRATOR (574)-642-1600 ------------- John & Allison R-Pod 179 (2017) Nissan Frontier SL V6 4.0 (2019) |
Posted By: StephenH
Date Posted: 29 Apr 2021 at 12:28pm
|
I just got that call-back. Outriggers will be on the way soon.
 ------------- StephenH Happy is the man that findeth wisdom,... http://www.rpod-owners.com/forum_posts.asp?TID=7712 - ouR escaPOD mods Former RPod 179 Current Cherokee Grey Wolf 24 JS |
Posted By: chasl
Date Posted: 30 Apr 2021 at 11:32am
|
I saw some questions about these being installed on newer R-Pod. So fyi, I have 5 outriggers on each side of my 2021 196. Installed by factory I assume. ------------- cl |
Posted By: StephenH
Date Posted: 30 Apr 2021 at 3:00pm
|
It seems like FR realized that there was a problem and addressed it (finally). ------------- StephenH Happy is the man that findeth wisdom,... http://www.rpod-owners.com/forum_posts.asp?TID=7712 - ouR escaPOD mods Former RPod 179 Current Cherokee Grey Wolf 24 JS |
Posted By: LB Boozer
Date Posted: 30 Apr 2021 at 4:35pm
| Are these welded on the newer models? Just ordered two sets and not sure if I am going to mount them with bolts and backing plates or take it to a welder to have them welded on. |
Posted By: offgrid
Date Posted: 30 Apr 2021 at 5:00pm
|
You don't have to weld them.
FR suggests using TEK self drilling screws and shooting them through both walls of the frame rails. Or you can through books them but if you use a flat washer and don't compress the frame tube by overtightening. It's walls are only 0.1 inch thick. ------------- 1994 Chinook Concourse 1995 RV6A Experimental Aircraft 2015 Rpod 179 - sold |
Posted By: chasl
Date Posted: 30 Apr 2021 at 6:57pm
|
I'm not necessarily recommending to anyone, but the factory welded the outriggers to the frame, and used nut/bolt to fasten under the wall sides on my 196. ------------- cl |
Posted By: StephenH
Date Posted: 30 Apr 2021 at 7:54pm
|
It is easy for the welding to be done at the factory. I think the screws are a solution for installation outside the factory, especially if one does not have access to a welding shop to do the job. ------------- StephenH Happy is the man that findeth wisdom,... http://www.rpod-owners.com/forum_posts.asp?TID=7712 - ouR escaPOD mods Former RPod 179 Current Cherokee Grey Wolf 24 JS |
Posted By: LB Boozer
Date Posted: 30 Apr 2021 at 7:54pm
| Excellent. I will probably through bolt with a backing plate or large washer for most of them. Unfortunately, where it is already sagging, the black tank is mounted directly behind the frame so I can’t through bolt and not even enough room to screw into both sides of the frame without risk of puncturing the black tank. Looks like I may have to weld that one or come up with a work-around. |
Posted By: StephenH
Date Posted: 30 Apr 2021 at 7:56pm
|
For my home-made ones, I used screws that went through one side. I also did not want to risk puncturing a tank. So far, it seems to be working okay. ------------- StephenH Happy is the man that findeth wisdom,... http://www.rpod-owners.com/forum_posts.asp?TID=7712 - ouR escaPOD mods Former RPod 179 Current Cherokee Grey Wolf 24 JS |
Posted By: LB Boozer
Date Posted: 30 Apr 2021 at 9:56pm
| I’ll keep that in mind. I ordered a couple sets so maybe I’ll just put a couple closer together and just go through the one side. |
Posted By: K. Frost
Date Posted: 01 May 2021 at 5:48am
|
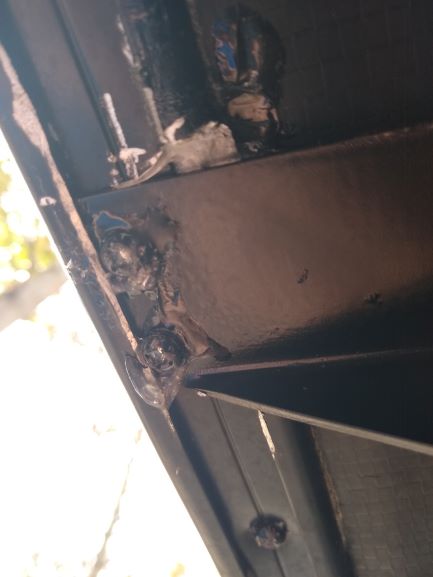
I asked the repair shop if they had any issues when welding. They had none. If someone can tell me how to attach photos, I'll add some.
|
Posted By: StephenH
Date Posted: 01 May 2021 at 8:51am
|
Use the advanced editor. Look for an icon that looks like two boxes with an arrow inside pointing to the top-right. That will give you an option for attaching photos. It seems to work best if you re-size the photos to 800x600. You can use a free program like the GIMP (GNU Image Manipulation Program), which is like a freeware Photoshop. You can use other programs also, but you may appreciate the GIMP for other photo use also. Once you are in the advanced editor, there will be an icon that looks like a tree. Click on it to open the dialog for uploading images. ------------- StephenH Happy is the man that findeth wisdom,... http://www.rpod-owners.com/forum_posts.asp?TID=7712 - ouR escaPOD mods Former RPod 179 Current Cherokee Grey Wolf 24 JS |
Posted By: Pod People
Date Posted: 16 May 2021 at 2:53pm
|
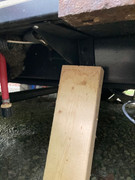
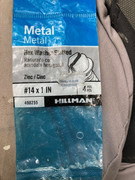
Outriggers finally installed I ordered the 4 outriggers from Forest River months ago when this topic first came up(October,2020). I have been putting off the actual installation for a long time because I knew it was going to be a PITA to install them. I knew that because I had checked my 2015 179 with a square between the floor and the frame under the slidout-the wall definitely had dropped about 3/8”. So, the issue became how to get the outriggers tight to the floor above and tight to the frame at the same time. I read all of the other posts and developed my plan. I decided that in order to eliminate the gap between the top of the outrigger and the floor, I would have to jack up the outside edge of the wall that had dropped. I used a bottle jack, an 8x16 concrete block with 2”x10” wooden block on top of it, and a 24” length of angle iron for jacking up the wall. I jacked it up slowly, checking each stroke of the jack. It took about 3-4 strokes to get flat(90 degrees to the frame) https://postimg.cc/QHcLNWNc"> I found that attaching the 2 end screws on the outrigger to the outside wall edge as the first step made the job a little easier as the outrigger was held in place. The next question was how to get the outrigger up tight to the floor. I used a piece of 2x4 cut to the appropriate length and a piece of ¾”x4”x12” as a base runner. Putting the 2x4 at the bottom of the outrigger and tapping it with a hammer as the 2x4 slid forward on the plywood base runner, this forced the outrigger up tight to the floor. Then I could drill the holes for the 2 large screws that hold the outrigger to the frame. I made sure to drill the holes at the top of the outrigger hole to make sure the outrigger didn’t drop after the 2x4 was released. I used 1”x#14 metal screws form Lowe’s. Probably ¾” would work if you can find them. https://postimg.cc/0rTRqCv8"> https://postimg.cc/y3SMZDm4"> Overall, this system worked well. Indeed, it was a PITA because you had to move the jack base and jack 4 times as well as lie on your back and drill upward and sideways. It took about 2.5 hours to install all 4 outriggers. All of the outriggers are tight to both the frame and the floor at the junction where it rests on the frame. There is a piece of metal trim at the bottom of the wall that keeps the outside end of the outrigger about 1/8” below the floor. The part of the wall under the slide out no longer shows any droop along the cantilevered part under the slideout. Hope this may help someone who will be installing the outriggers Vann ------------- Vann & Laura 2015 RPod 179 https://postimg.cc/0zwKrfB9">
|
Posted By: StephenH
Date Posted: 16 May 2021 at 3:06pm
|
Thanks for the write-up Vann. It parallels my experience. ------------- StephenH Happy is the man that findeth wisdom,... http://www.rpod-owners.com/forum_posts.asp?TID=7712 - ouR escaPOD mods Former RPod 179 Current Cherokee Grey Wolf 24 JS |
Posted By: offgrid
Date Posted: 17 May 2021 at 6:30am
|
Good writeup, lots of helpful detail.
One of those details causes me concern though. It sounds like you are drilling 1 inch holes through the frame rails. I wasn't expecting anything near that big, and I don't think the forces on the outriggers are anywhere near needing something that heavy. I was thinking more like 1/4 or 5/16 bolts. 1/4 inch grade 5 bolts are good for about 3800 lbs. The concern is of course weakening the already weak rpod frame tubes. What was the size fastener suggested by FR? ------------- 1994 Chinook Concourse 1995 RV6A Experimental Aircraft 2015 Rpod 179 - sold |
Posted By: Pod People
Date Posted: 17 May 2021 at 6:44am
|
Definitely not 1" holes! The screws were 1" long and #14. I drilled a 7/32 hole for the screws. forest river originally sent 1/4" bolts. I could not use the bolts because tanks were in the way of getting to the backside of the frame. I had to use screws that were drilled only through the outside frame member. Vann ------------- Vann & Laura 2015 RPod 179 https://postimg.cc/0zwKrfB9">
|
Posted By: offgrid
Date Posted: 17 May 2021 at 8:00am
Ah, my bad. Should have looked at the photo of the bag.  ------------- 1994 Chinook Concourse 1995 RV6A Experimental Aircraft 2015 Rpod 179 - sold |
Posted By: StephenH
Date Posted: 17 May 2021 at 8:40am
|
When the package with mine arrived, it was split open on the bottom and there was no hardware bag inside, just the four brackets. I did not want to wait on FR sending replacements, so I got the hardware locally to attach two of them to supplement my homemade ones. I am considering adding the other two to the door side. ------------- StephenH Happy is the man that findeth wisdom,... http://www.rpod-owners.com/forum_posts.asp?TID=7712 - ouR escaPOD mods Former RPod 179 Current Cherokee Grey Wolf 24 JS |
Posted By: JA-Pod
Date Posted: 17 May 2021 at 9:32am
|
I too ordered and received a new set of outriggers to be installed on the door side of the rig, mine came this time without any bolts, screws unlike the last batch where i received TEK screws, no worries since I will bolt these through with 1/4 in bolts with lock washers and nuts. I will review again if I need to cut the channel, possibly add a shim to take up the space of the channels thickness (1/8 inch?) will see if this will true up to where the frame and floor corner meet. thanks all for the inspiration to proceed with the other side of the pod, did not know others were experiencing issues with that sag. As far as the slide out side, i only installed them under the slide, do you suggest that they also should be installed along the frame away from the slide area? ------------- John & Allison R-Pod 179 (2017) Nissan Frontier SL V6 4.0 (2019) |
Posted By: offgrid
Date Posted: 17 May 2021 at 10:54am
|
I'd add flat washers too, spreads the load on the frame tubes. Through bolts are a better solution than self tappers because the dang frame tubes are so dang thin. I think the self tappers are only 14 threads per inch and the tubes are 0.1 inch so that's only 1.4 threads engaged in each tube wall. Not much.
Put the outriggers anywhere you suspect or are concerned you might get sag. Sag has been reported in other areas besides the slide area. Won't hurt anything. I'd just place a shim rather than cut the channel. Why weaken another part of the trailer? ------------- 1994 Chinook Concourse 1995 RV6A Experimental Aircraft 2015 Rpod 179 - sold |
Posted By: LB Boozer
Date Posted: 17 May 2021 at 11:09am
| I too received my outriggers (without mounting hardware) from FR last week and installed one set on the drivers side under the slide and 3 on the passenger side. I only had one area that was sagging very mildly and also used a bottle jack to get it square. I used 1" self tapping screws for the areas where the tank was in the way and 3/8' through bolts, with 2" washers, lock washers and locking bolts (all ss). Took a little while as my pod is off center to the frame so I had to trim and drill new holes for the drivers side outriggers and I trimmed all the aluminum c-channels under to get a nice flush mount. Hopefully this prevents future issues. |
Posted By: PilotPodder
Date Posted: 12 Sep 2021 at 3:12pm
|
Late to the party unfortunately. Just discovered sagging at the slide-side of my 179 last week when my slide snagged the ottoman when bringing it in. Obvious wall sag below the slide outside and no outriggers for roughly 9' on my 2017.5. Glad to find this thread and great info. Likely I'll put a video out on the fix at some point and may hit some of you up on for more info along the way. I am very glad for this forum!~PP ------------- Portage, MI — 2017 RPod 179 - sold / 2017 Toyota Tundra — https://johnmarucci.com/r-pod-video-list/ - My RPod YouTube Videos |
Posted By: PilotPodder
Date Posted: 13 Sep 2021 at 9:10am
|
Quick update on purchasing the outriggers for the R-Pod 179, as of 9/13/21 a.m... I contacted Jenn Weldy at FR (R-Pod Parts) via email (jweldy@forestriverinc.com) with the part number (F100140948 FORMED OUTRIGGER - 4A) and she got back to me pretty much immediately with confirmation that the part is still available. I was instructed to call her to complete the order, which I just did. I purchased 8 units to facilitate potentially adding them to both sides of the trailer. ~PP ------------- Portage, MI — 2017 RPod 179 - sold / 2017 Toyota Tundra — https://johnmarucci.com/r-pod-video-list/ - My RPod YouTube Videos |
Posted By: JA-Pod
Date Posted: 13 Sep 2021 at 8:42pm
|
Not too bad of a mod to perform, although the sag is concerning in that you will have to jack up the slide, others have done it successfully, I fortunately did not have to do that, also you mention in your first post that you have no outriggers for 9 ft, did your 2017.5 come with outriggers?, unless I misunderstood your posting. thanks John for all of your videos, most helpful especially when I picked up our pod 2+ years ago, we knew nothing of the travel trailer and specifically the pod world. I was able to use your advice to fabricate a support beam under the kitchen floor, it has really help to shore up the floor. cheers john ------------- John & Allison R-Pod 179 (2017) Nissan Frontier SL V6 4.0 (2019) |
Posted By: PilotPodder
Date Posted: 14 Sep 2021 at 5:43am
|
John, there are a few outriggers on the frame. The slide is unsupported. There is an outrigger near the front of the frame and then nothing for 9' until the next outrigger near the axle. Glad the floor support video was helpful. There was a lot of pain involved in getting that work done by FR and I am very happy that the solution has helped others. ------------- Portage, MI — 2017 RPod 179 - sold / 2017 Toyota Tundra — https://johnmarucci.com/r-pod-video-list/ - My RPod YouTube Videos |
Posted By: pedwards2932
Date Posted: 14 Sep 2021 at 1:42pm
| Coming in on the tail of this but I think some of my issues at the front of my rPOD were due to not enough support. I am going to order 8 of these and use 4 on each side. Does that seem reasonable? I was going to make sure 2 where the pullout is. I was going to try to evenly space them for all the others. |
Posted By: JA-Pod
Date Posted: 14 Sep 2021 at 2:31pm
|
good question on the optimal place to install them, I went with all 4 under the slide as directly under the rollers as i could get, logic to me seem this is where the most pressure would be on the side of the trailer. Not an engineer here though, on this forum there are others well versed in the engineering world ------------- John & Allison R-Pod 179 (2017) Nissan Frontier SL V6 4.0 (2019) |
Posted By: JA-Pod
Date Posted: 14 Sep 2021 at 2:54pm
|
John, I checked my 2017 (Green ver) and no outriggers at all, so they must have added them in the 1/2 year change to be installed on your 2017.5 are they welded or bolted on? ------------- John & Allison R-Pod 179 (2017) Nissan Frontier SL V6 4.0 (2019) |
Posted By: Olddawgsrule
Date Posted: 14 Sep 2021 at 2:55pm
That in it's self is a good reason not to play any deeper. You folks know my opinion of FR and these risers.. Basically what I will say is this 'NOT' an off tar rig and thinking that raising the clearance of the Pod will get you there.. Well... I do wish you luck and chance that I meet you out there with my rig, I will 'try' to help. Adding a longer section of 2x2 tube(about 4ft long) will get you there with some additional support. Just adding the risers they sell... with TEK screws holding them.. Not in my lifetime. Safe travels folks! ------------- https://www.youtube.com/channel/UCJduGeZNFgtptH67leItRFQ - Byways no Highways 2017 Tacoma http://tnttt.com/viewtopic.php?f=55&t=72408 - Truck Camper Build 2004 F150 My Overlander |
Posted By: pedwards2932
Date Posted: 15 Sep 2021 at 8:44am
| I can't seem to find any pictures of a factory install of these outriggers? When I ordered them and asked the parts person if there were any instructions on installation and location for them she said FR didn't have anything but I should be able to find instructions on internet? |
Posted By: PilotPodder
Date Posted: 15 Sep 2021 at 10:05am
|
I don't have the R-Pod with me currently, but the pics I took do show three supports (outriggers) welded, one near the front and two near the axle. ------------- Portage, MI — 2017 RPod 179 - sold / 2017 Toyota Tundra — https://johnmarucci.com/r-pod-video-list/ - My RPod YouTube Videos |
Posted By: pedwards2932
Date Posted: 15 Sep 2021 at 11:38am
| Ok did you post any of the pics? I still can't find any pics. I did look at your videos as well. I saw that you had the same issue as I did that caused your flooring in the storage area to get wet. FR did a horrible job on my 189 at the joint where the walls meet the front. They cut the wall improperly and tried to use a ton of screws to hold it together.....it all came apart while traveling and I had to relaminate the sides at the bottom edge. It is rediculous that mine in a 2018 and I just want to use it for 2 to 3 years as I am 68 now and I am not sure it will last that long. |
Posted By: PilotPodder
Date Posted: 15 Sep 2021 at 6:54pm
|
Yeah, my cargo bay water leak was very disappointing. Strange, but none of my appliances have even acted up on my 179 in 5 full seasons, but the structure, especially the floors, are just not supported well nor are they made of the best materials. My Keystone Bullet 243BHS RV that I use for longer trips, has the new Hyperdeck composite flooring and its structure is rock solid vs the Pod. However, I have had issues with almost everything with a Dometic label on it, including getting the A/C replaced within 18 months! It would be nice if someone could get a composite floor, Azdel walls and better appliances in one RV! ~PP ------------- Portage, MI — 2017 RPod 179 - sold / 2017 Toyota Tundra — https://johnmarucci.com/r-pod-video-list/ - My RPod YouTube Videos |
Posted By: StephenH
Date Posted: 17 Sep 2021 at 2:14pm
|
The down side of using the screws or nuts and bolts for that matter is the placement of the tanks. They are too close to the rails to allow one to get in there to use bolts and if one uses screws and goes through both walls, one runs the risk of puncturing one of the tanks in the process. Since the black water tank is the one in question, that would be an ugly scene. I used shorter screws on the ones that would be at the tank location and went through one wall of the frame only. I figured the major stress would be vertical. Besides, I had already installed two homemade outriggers and bolted them. i installed two of the FR outriggers. I still have two that I need to get installed on the door side. ------------- StephenH Happy is the man that findeth wisdom,... http://www.rpod-owners.com/forum_posts.asp?TID=7712 - ouR escaPOD mods Former RPod 179 Current Cherokee Grey Wolf 24 JS |
Posted By: offgrid
Date Posted: 18 Sep 2021 at 1:05am
|
Actually the stress on the screws attaching the outriggers to the frame are axial not vertical. As the floor sags it pushes downward on the outer ends of the outriggers trying to rotate them. So the upper screws go into tension while the bottom ones are pretty much just along for the ride.
That being said TEKS screws should work fine. Assuming they are 1/4-20 and knowing that the frame tube thickness is 0.1 inch gives an allowable pullout load of about 430 lbs. If the outriggers are 10 inches long (how long are they actually?) and the attachment screws are placed 3 inches apart in the frame tube then each pair of screws should be good for about 3/10*430=130 lbs. There's really not that much load from the sagging wall due to rpod light construction so I'd guess an outrigger every couple feet would be fine. Of course, if you have room to through bolt and use a large flat wwasher on the inside (don't overtighten and compress the frame tube!) then that would be much stronger and you could use fewer outriggers in those areas. ------------- 1994 Chinook Concourse 1995 RV6A Experimental Aircraft 2015 Rpod 179 - sold |
Posted By: pedwards2932
Date Posted: 04 Oct 2021 at 2:15pm
| I finally recieved my outriggers.....no screws and they weren't painted. I intend to use TEKS screws. I am going to space them evenly front to back 4 on each side. Everyone has been saying put them under the rollers for the slide out? My slide out is on tracks that are midway up on side of slide out. Where are the rollers? |
Posted By: JA-Pod
Date Posted: 04 Oct 2021 at 3:32pm
|
When the slide out is extended all the way, look under it and you will see 4 rollers about 4 inches long, this is what i have on my 179. I figured this is where the most of the weight is located. ------------- John & Allison R-Pod 179 (2017) Nissan Frontier SL V6 4.0 (2019) |
Posted By: Pod People
Date Posted: 04 Oct 2021 at 5:22pm
|
I installed my outriggers spaced equally under the width of the slideout . I put one at each end of the slideout and the other 2 equidistant from each other.I assumed that would support the weight evenly across the width of the wall cutout. It certainly worked, but may not have been the best spacing. Travel safe Vann ------------- Vann & Laura 2015 RPod 179 https://postimg.cc/0zwKrfB9">
|
Posted By: offgrid
Date Posted: 05 Oct 2021 at 7:27am
|
It's not critical in this application but in general if you place evenly spaced supports under a beam with ones at each end the those will only have half the load of the inner ones. That's why you often see cantilevered beams with the outer supports inboard a bit. ------------- 1994 Chinook Concourse 1995 RV6A Experimental Aircraft 2015 Rpod 179 - sold |
Posted By: pedwards2932
Date Posted: 05 Oct 2021 at 8:04am
| The forward corner is where I was having the issue on both sides. The fiberglass pulled out of the aluminum molding. I feel like this was because it was bouncing on rough roads. My repairs to the fiberglass laminate seems to have fixed it as nothing broke free on our last trip. I got the outriggers to support my repairs so hopefully it won't happen again. |
Posted By: offgrid
Date Posted: 05 Oct 2021 at 1:44pm
|
Yes, just put them where you have sagging; there's not really that much weight on them, the problem is the floor is just too flimsy. ------------- 1994 Chinook Concourse 1995 RV6A Experimental Aircraft 2015 Rpod 179 - sold |
Posted By: pedwards2932
Date Posted: 06 Oct 2021 at 2:57pm
| NA |
Posted By: offgrid
Date Posted: 06 Oct 2021 at 4:29pm
|
Yikes, 3/4 inch is a lot. Check to be sure there isnt any water damage in the floor in that area if you haven't already. If not, then jack her up and add outrigger brackets as needed. Get more if you need to, can't hurt. Then, reaseal both the top and bottom edges. Since the walls are resting on the sagging floor the walls must have dropped down too which would compromise the seals. ------------- 1994 Chinook Concourse 1995 RV6A Experimental Aircraft 2015 Rpod 179 - sold |