New to me 176T.....Mods have begun......
Printed From: R-pod Owners Forum
Category: R-pod Discussion Forums
Forum Name: Podmods, Maintenance, Tips and Tricks
Forum Discription: Ask maintenance questions, share your podmods (modifications) and helpful tips
URL: http://www.rpod-owners.com/forum_posts.asp?TID=12532
Printed Date: 16 Aug 2025 at 9:54am
Software Version: Web Wiz Forums 9.64 - http://www.webwizforums.com
Topic: New to me 176T.....Mods have begun......
Posted By: Motor7
Subject: New to me 176T.....Mods have begun......
Date Posted: 14 Jan 2019 at 8:40am
|
Picked the 2015 up Sat morning. After reading here about other modifications I knew to look under the wet bath for a lack of bracing. Yep, FR supported the shower pan with 4 - 2x4's almost at each corner under some foam and a 1/2" piece of plywood which left the center(the place we will all stand) basically unsupported. The area in red is what needs more support and it is 11" by about 10": 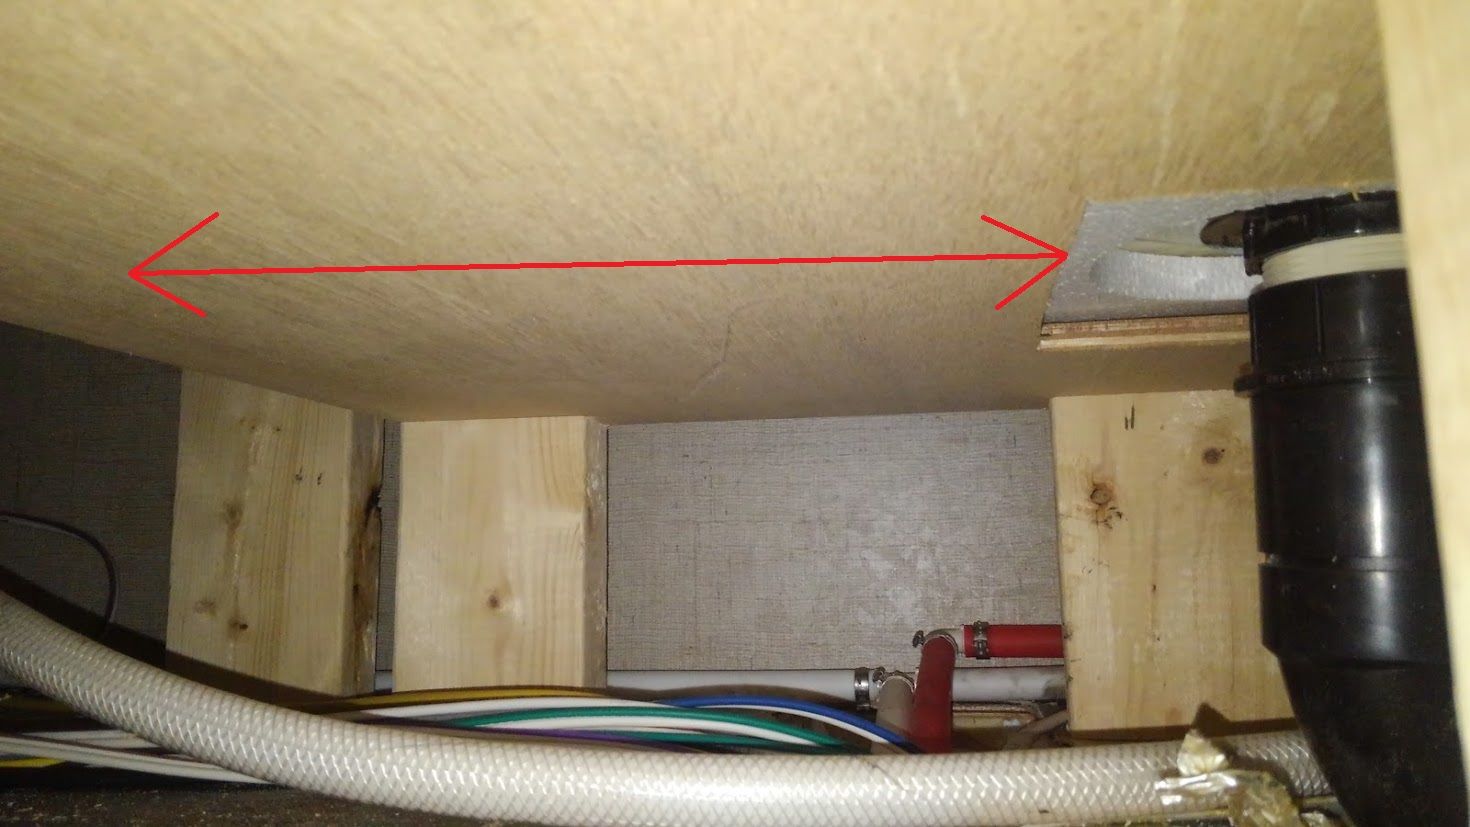 Access to the area is through the storage under the left side dinette seat and a louvered vent cover under the bathroom door. There is not enough room to assemble a "T" shaped support, so I just cut a section of 3/4 plywood into a 11 x 5" rectangle, then cut two smaller sections for the pedestal and screwed those two together. I then slid the rectangle piece under the shower pan, held it up against under the pan then placed the pedestal under it. I had pre-drilled some holes in the rectangle and some angled holes in the base of the pedestal. By hand I screwed in all the screws(in red ovals) locking the both sections of wood in place: 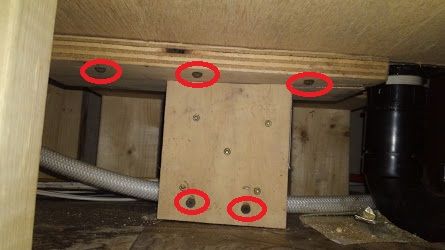 That done, the next 'fix' is to remove the spare from the bump-out tent bed base and relocate it under the trailer. When the seller closed up the tent bed, we had a heck of a time getting the bed base to close properly...it was hitting the top inside lip of the camper and upon inspection I found it crooked and poorly aligned...most likely at the factory since there were no signs of sagging or stripped screws. More to come............
------------- 2016 R-Pod 176T |
Replies:
Posted By: Motor7
Date Posted: 17 Jan 2019 at 7:27pm
Next was the crooked folding queen tent bunk. I did not take a before pic, but mine was so misaligned that the gap on the top right side was zero:
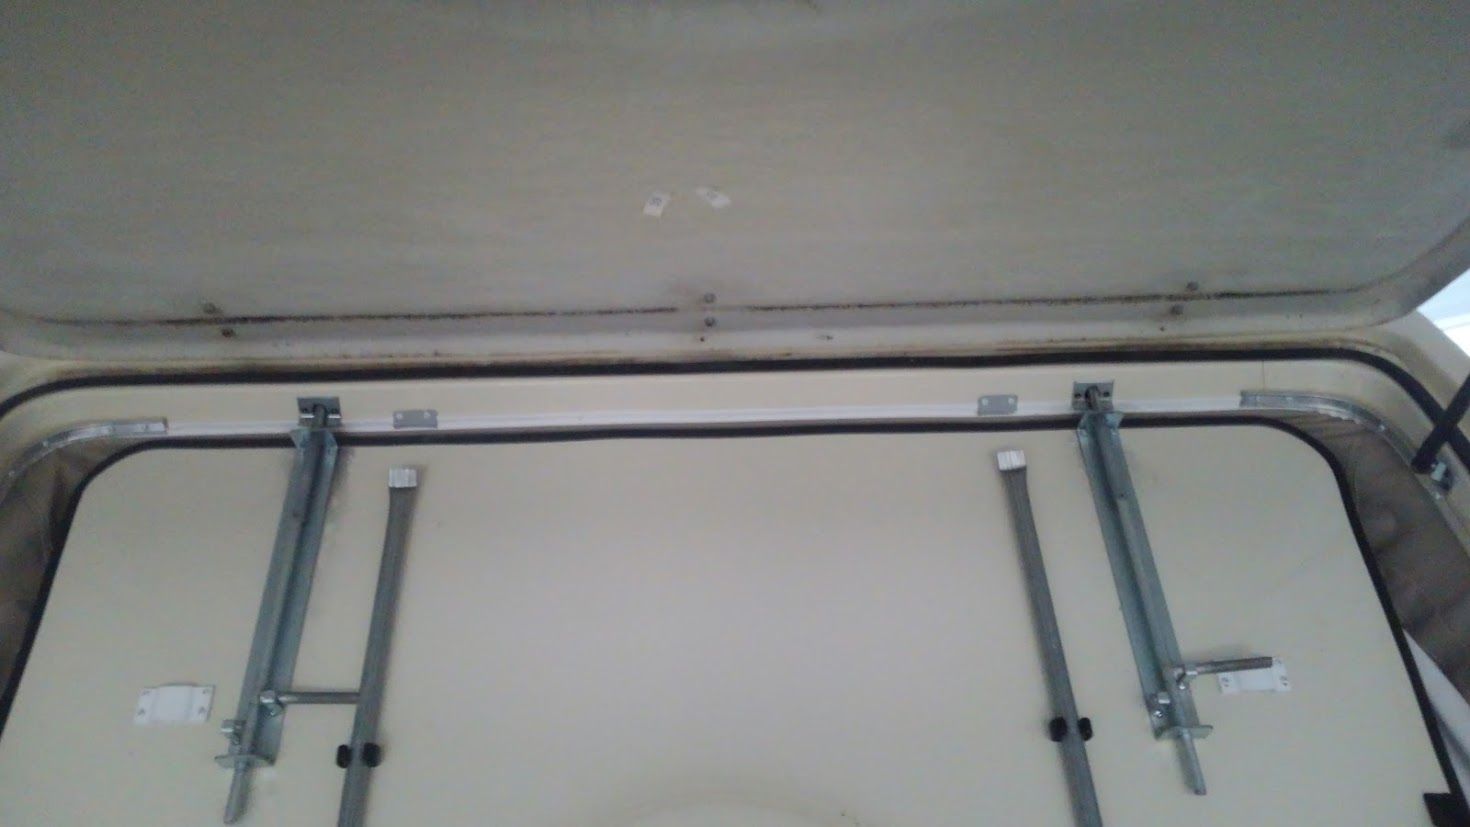 So I removed all the screws on the top of the piano hinge except the ones on each end: 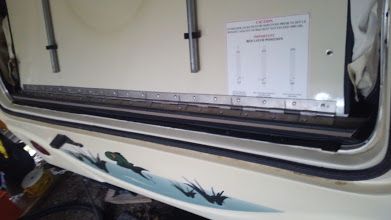 I put a 2x4 and another small block of wood inside under the 'door' then removed the RH screw. this dropped the door about 1/4" so I pre-drilled the fiberglass to keep it from spider-webbing(there is an aluminium frame behind the glass) then replaced the screw. You can see the "witness mark" above the top corner of the hinge where it was originally installed: 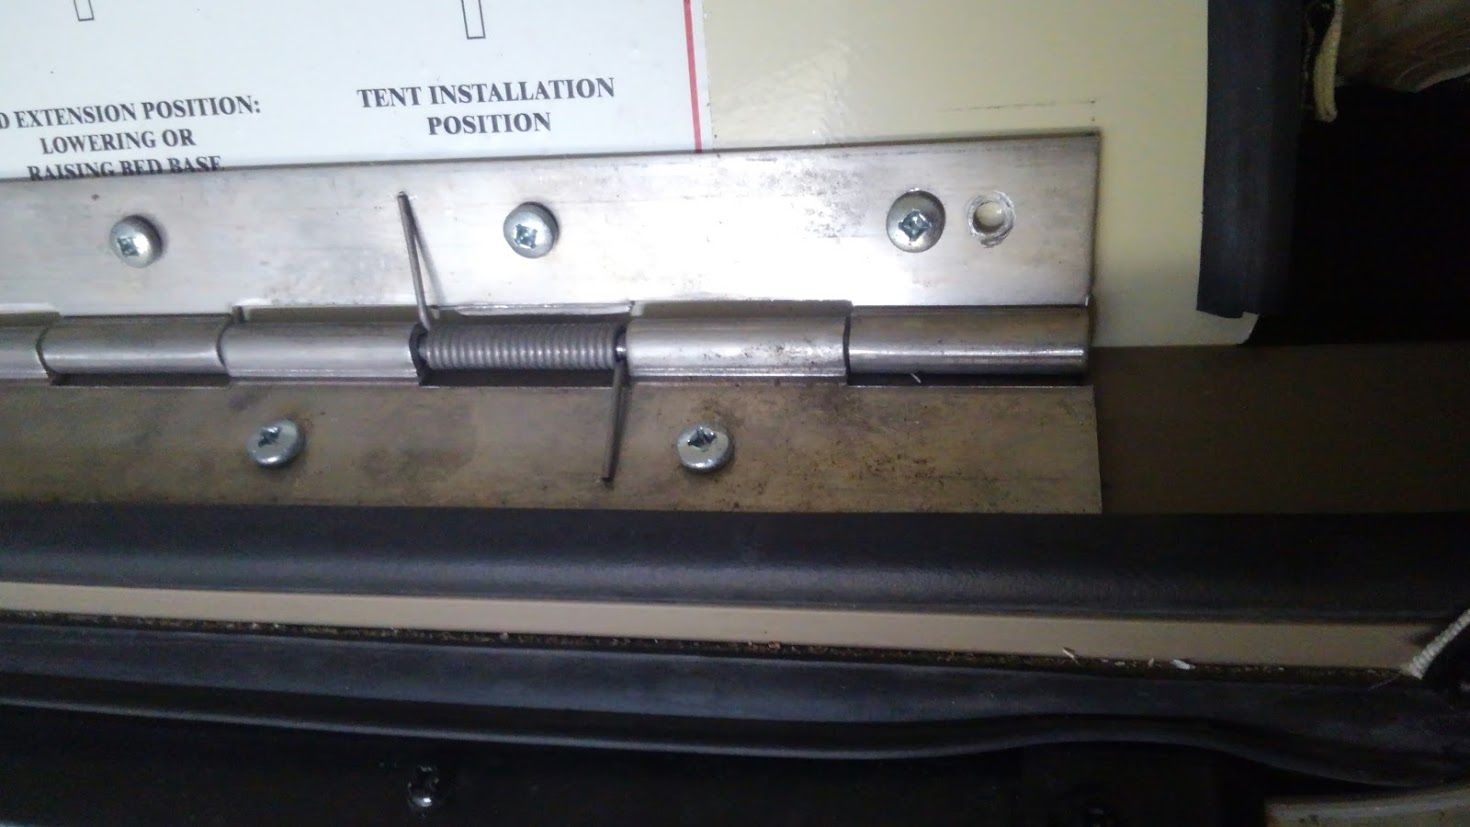 then I pre-drilled the rest of the screws before screwing them back in. The result is a door that fits properly:  ------------- 2016 R-Pod 176T |
Posted By: Motor7
Date Posted: 18 Jan 2019 at 7:19pm
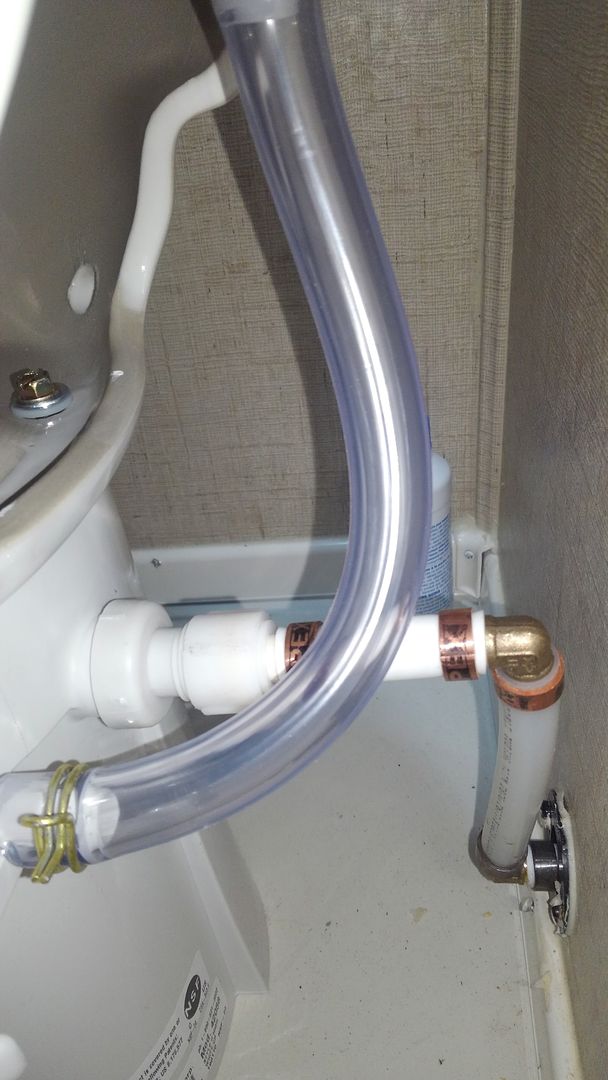
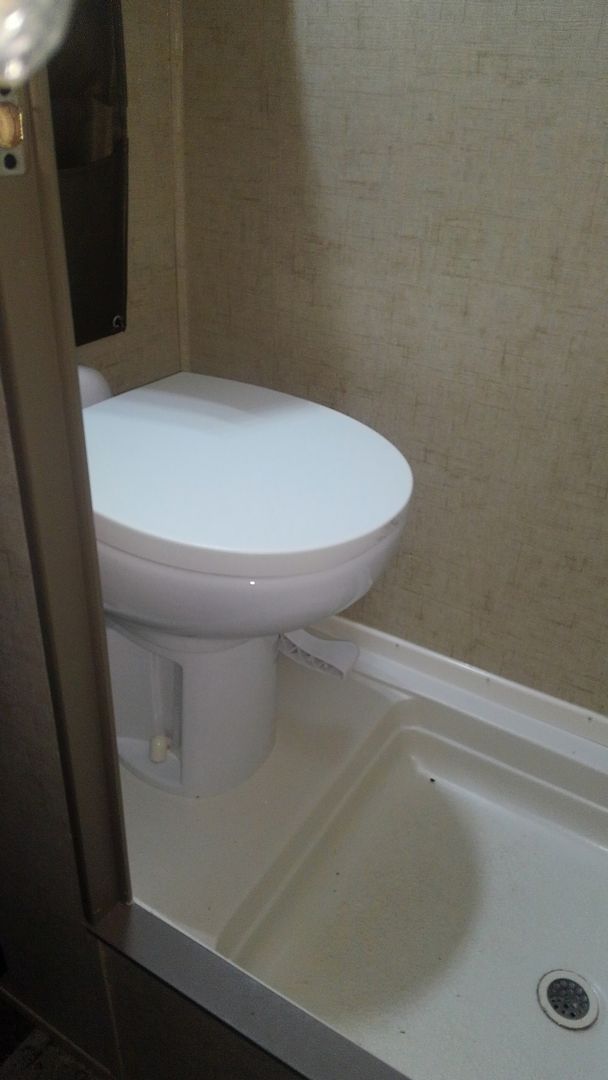
Added a MaxxAir vent cover and it was really close to the batwing antenna but it fit: the green is foam to keep the ladder from scratching the side of the Pod: 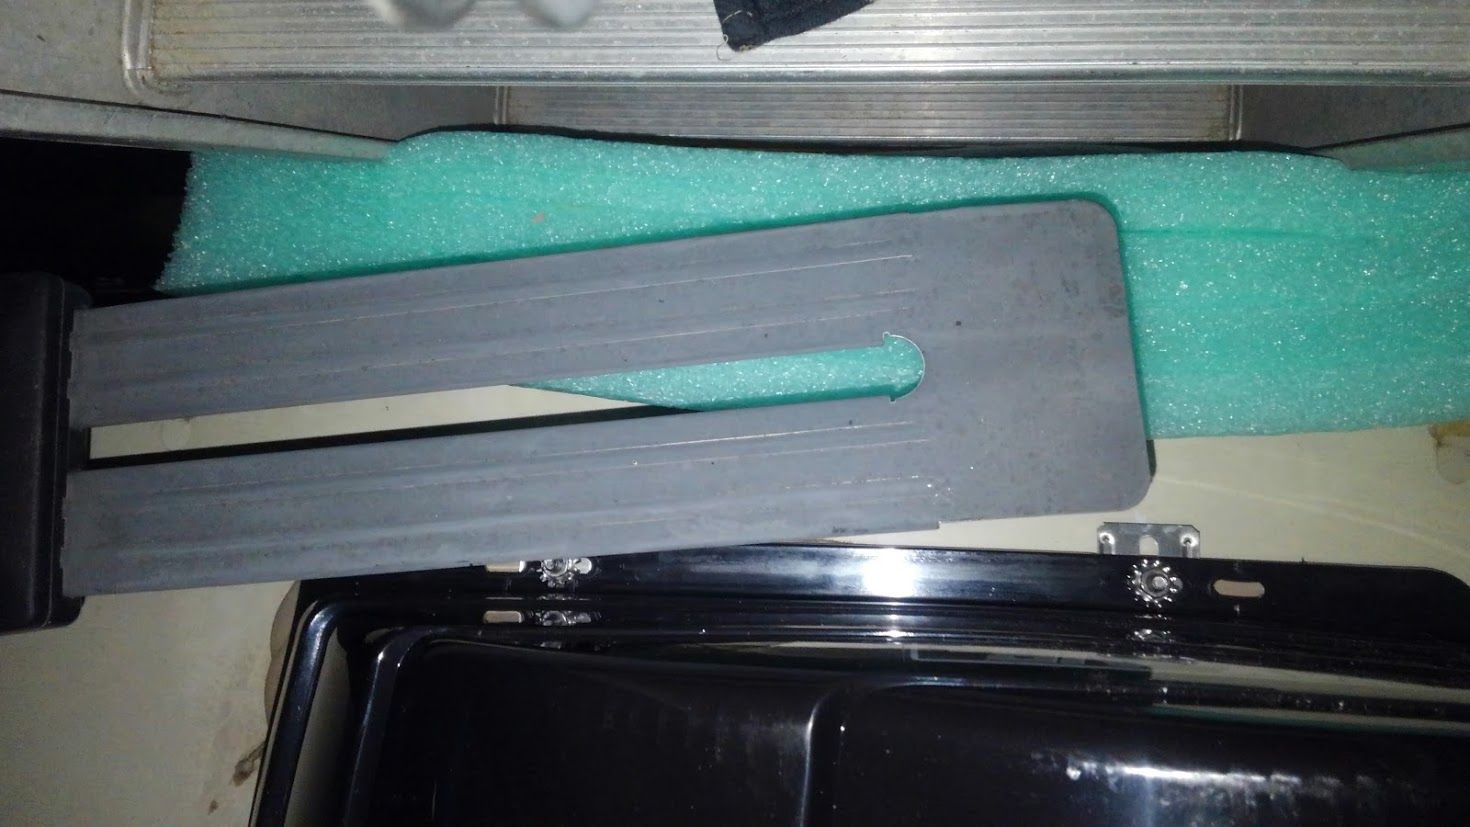 I also replaced the head with a tall ceramic Thedford. It required changing the Pex plumbing water inlet configuration. ------------- 2016 R-Pod 176T |
Posted By: Motor7
Date Posted: 20 Jan 2019 at 4:21pm
 ------------- 2016 R-Pod 176T |
Posted By: Motor7
Date Posted: 30 Jan 2019 at 12:49pm
|
I added two Costco/Interstate 6'v batteries and a side by side battery box: https://allbatterysalesandservice.com/century-plastics-heavy-duty-battery-box-holds-2-6-volt-golf-cart-batteries-gce-g  Next was the sewer Hose caddy. I bought the 60" one which will not reach between the frame rails unless you modify it just a bit. It has to be slid open about 2.5" past where they recommend, so I marked it, then wrapped the tube at the joint with Gorilla tape, added a heavy duty zip tie, and will also run a strap support under the center so it won't bounce: https://www.dwincorp.com/product/super-slider-adjustable-super-tube/ 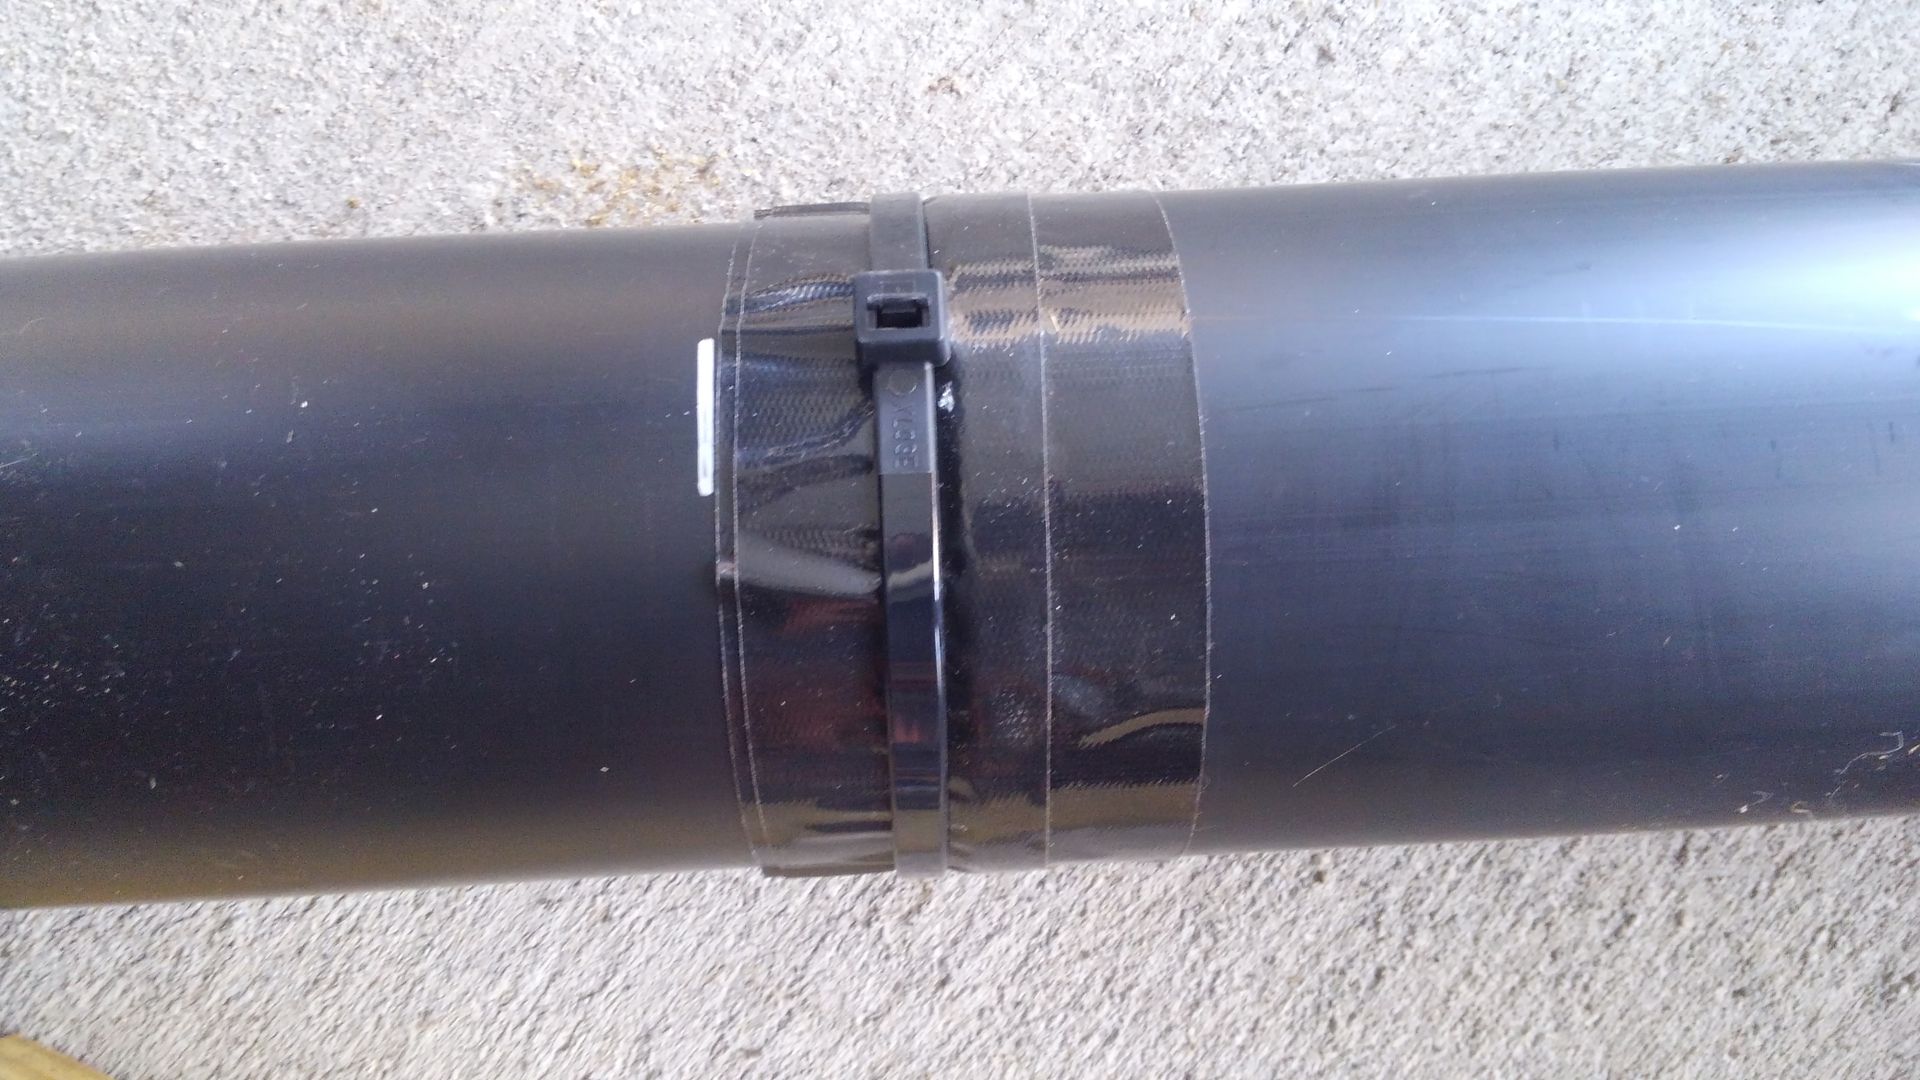 ------------- 2016 R-Pod 176T |
Posted By: Motor7
Date Posted: 31 Jan 2019 at 7:53am
 ------------- 2016 R-Pod 176T |
Posted By: StephenH
Date Posted: 31 Jan 2019 at 8:38am
|
Looks pretty good to me.
------------- StephenH Happy is the man that findeth wisdom,... http://www.rpod-owners.com/forum_posts.asp?TID=7712 - ouR escaPOD mods Former RPod 179 Current Cherokee Grey Wolf 24 JS |
Posted By: Motor7
Date Posted: 31 Jan 2019 at 3:36pm
|
Risers are here....aaand it's warming up so I can install them and still 'feel' my fingers. ------------- 2016 R-Pod 176T |
Posted By: Motor7
Date Posted: 02 Feb 2019 at 5:09pm
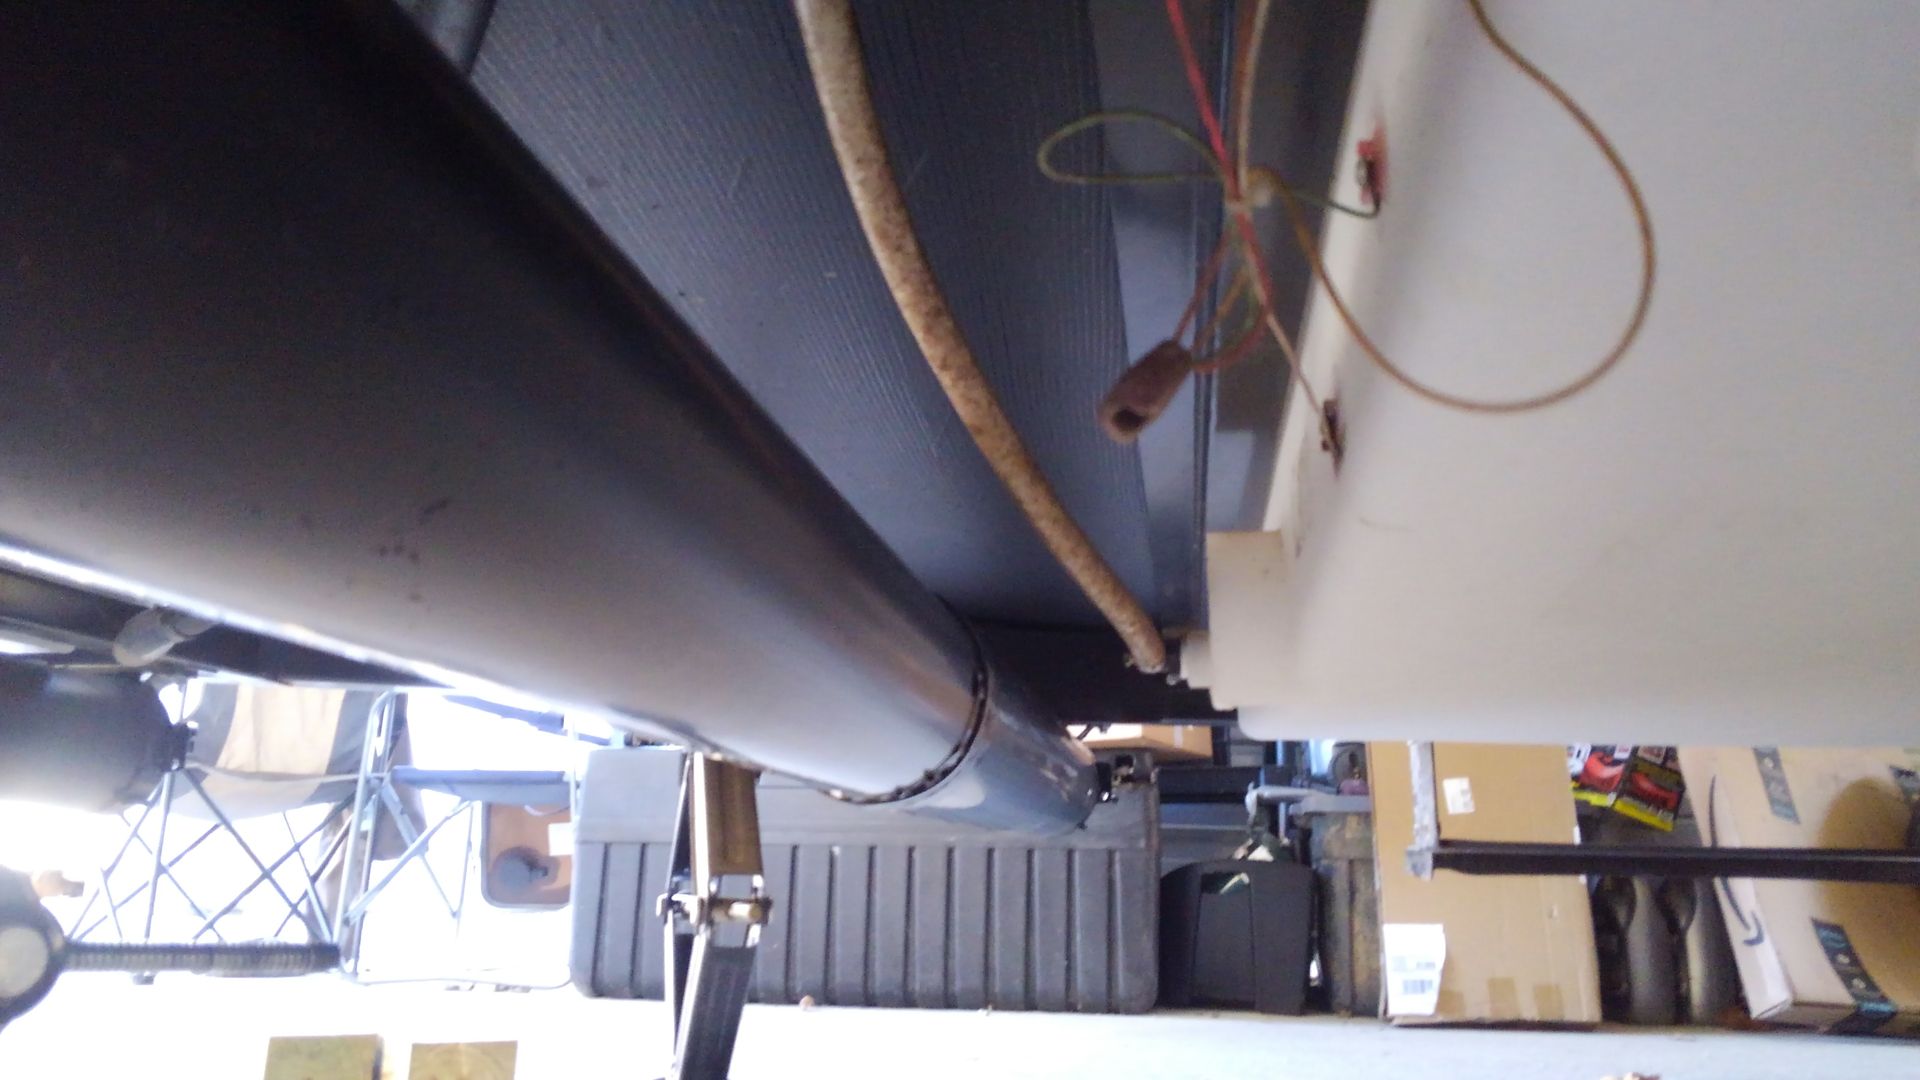
Riser time: Jacked up the pod: 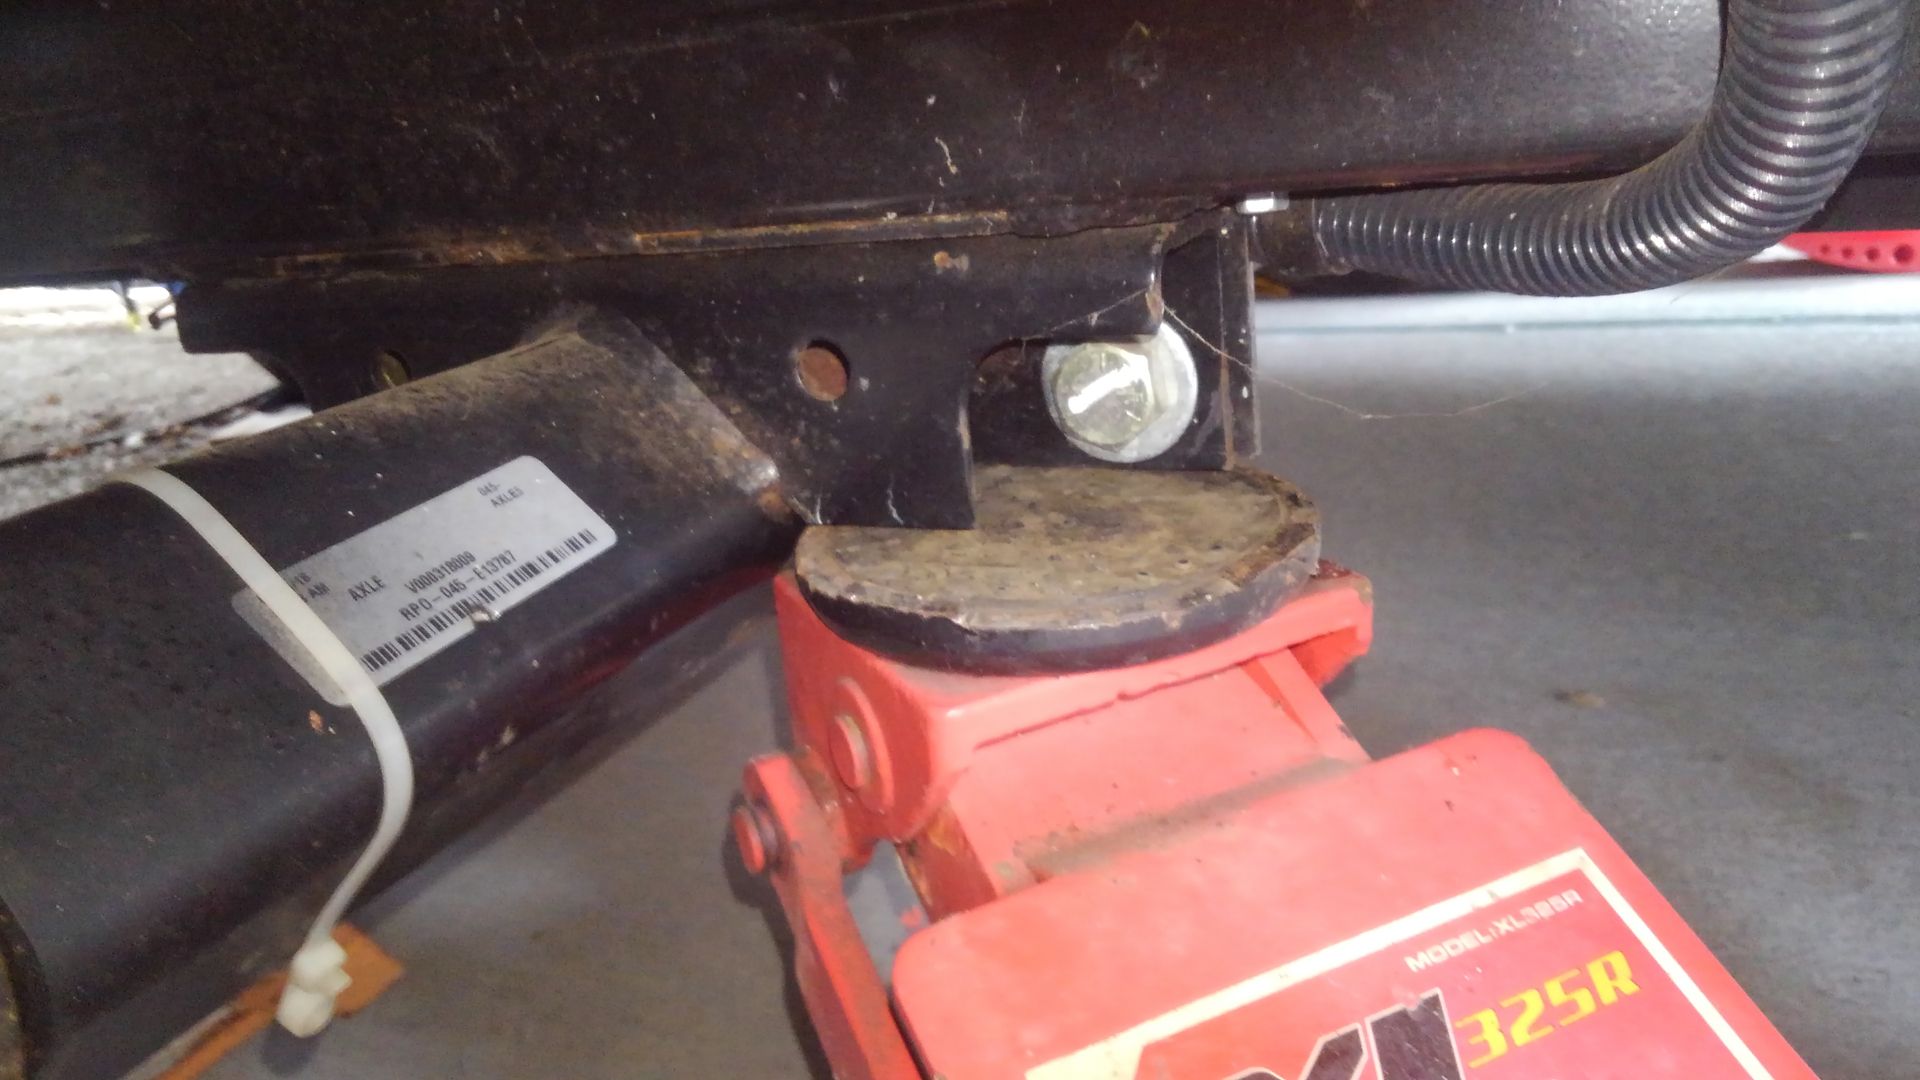 Set up the Jack stands using 2x4's along the frame: 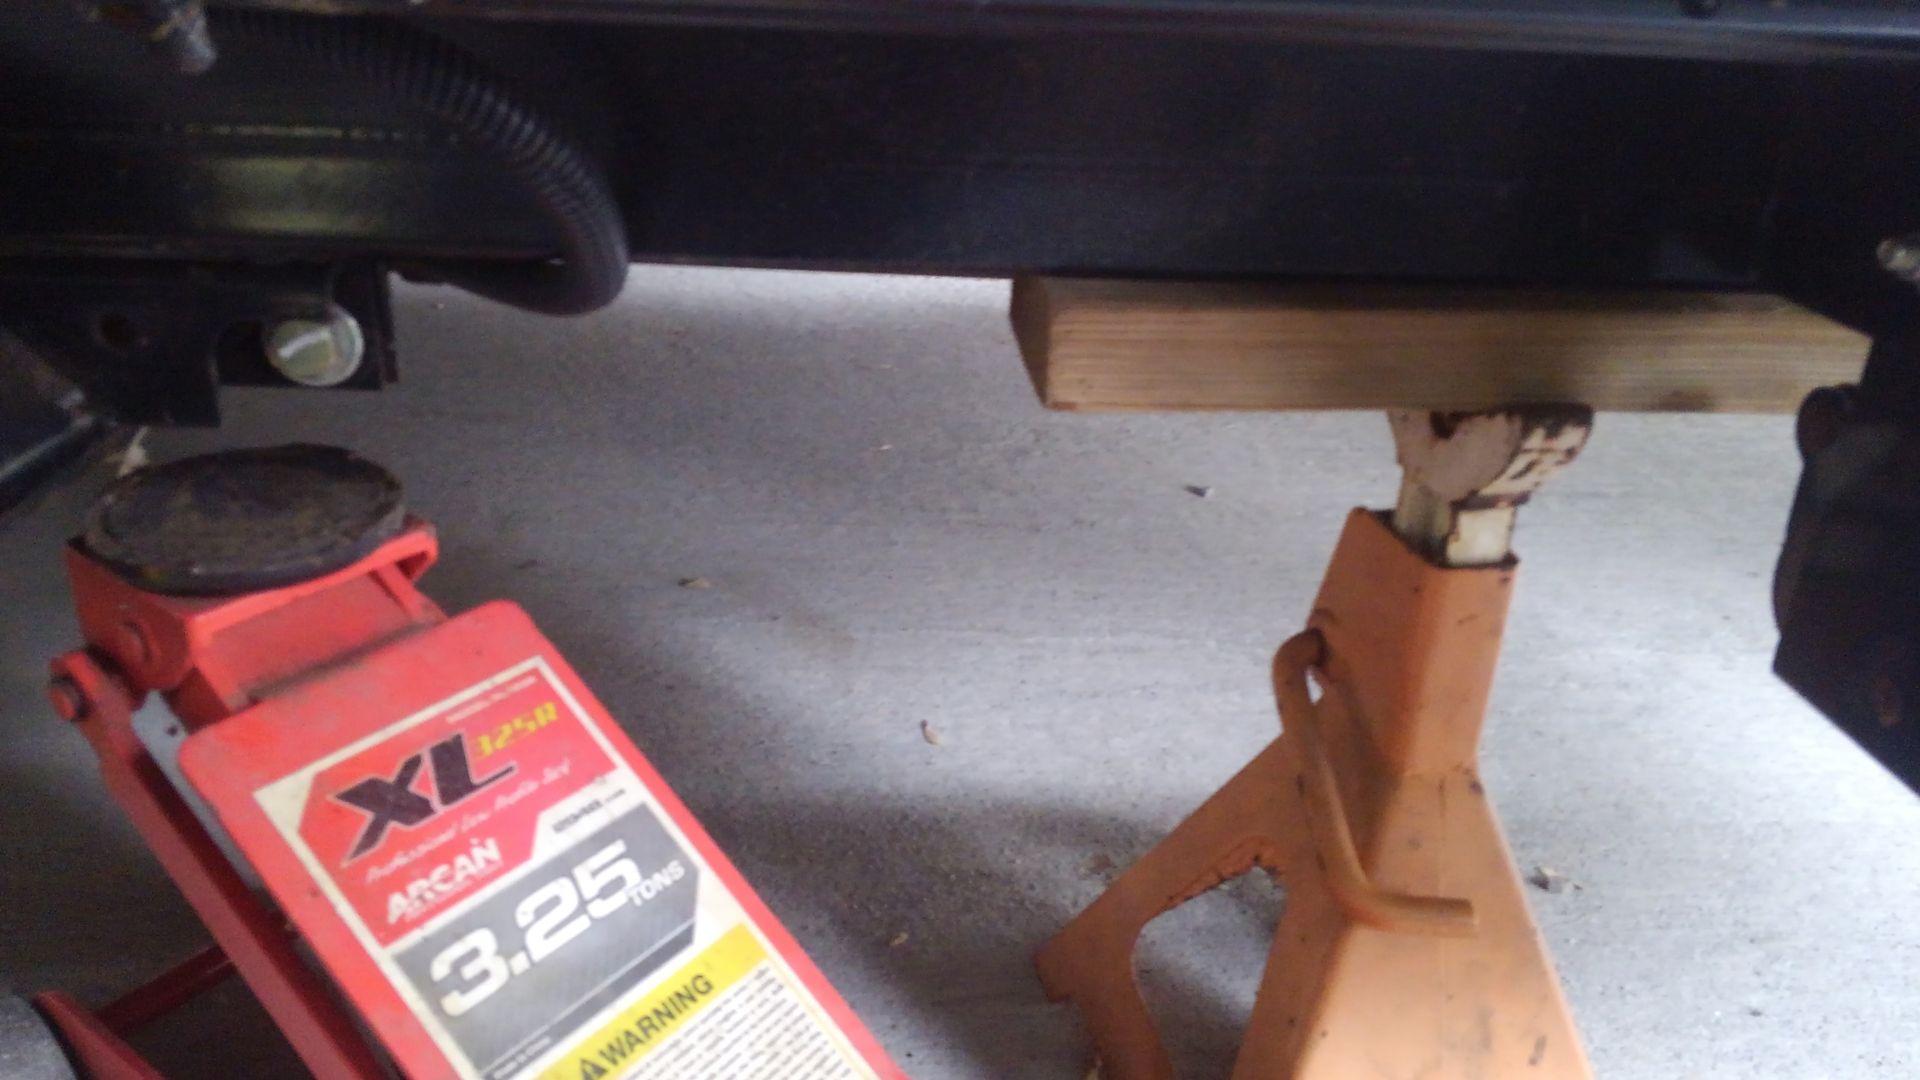  ------------- 2016 R-Pod 176T |
Posted By: Motor7
Date Posted: 02 Feb 2019 at 5:14pm
I have a air impact. If you are going to do this yourself, it's much easier with an impact, either air or electric. Dropped the axle: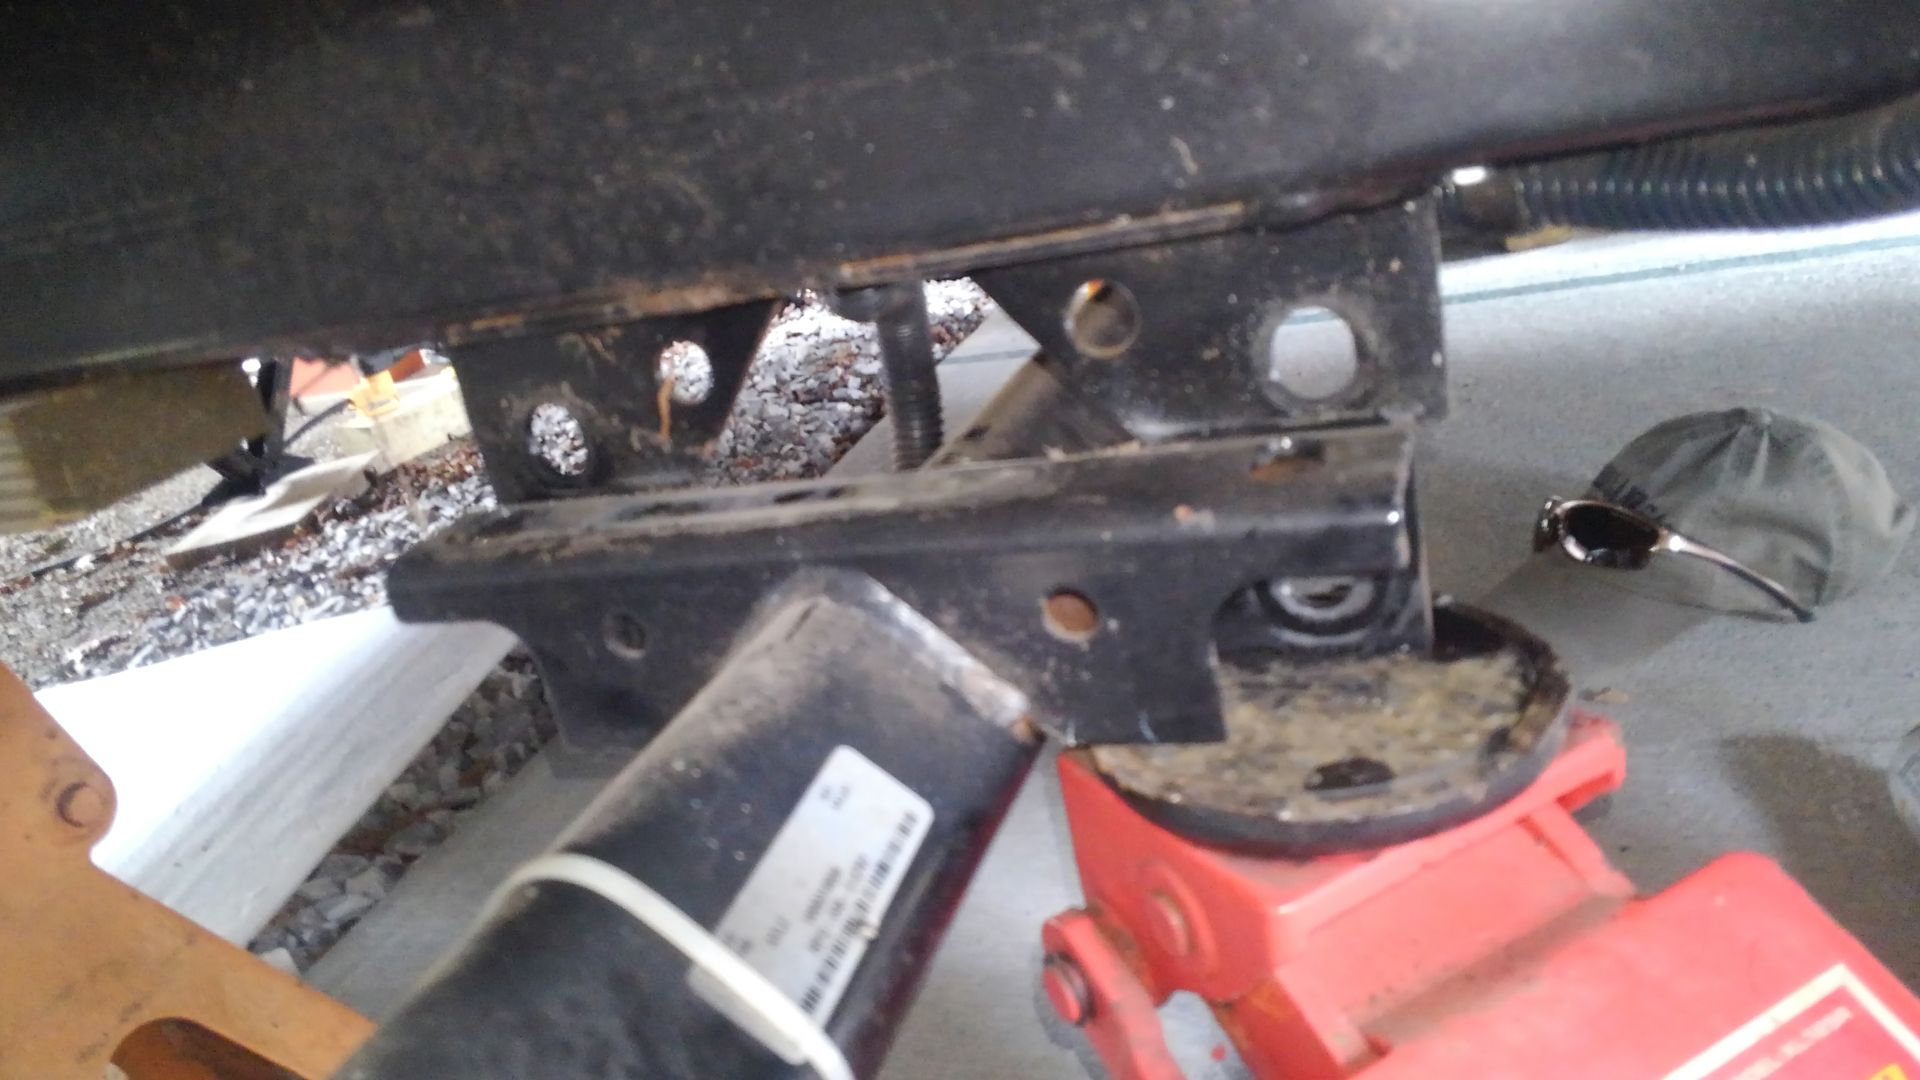 When I slid the riser in, this little self tapping screw they used for the wiring loom was in the way, preventing the riser from lining up. You may or may not have this issue, it just depends on the factory installation guy or gal: 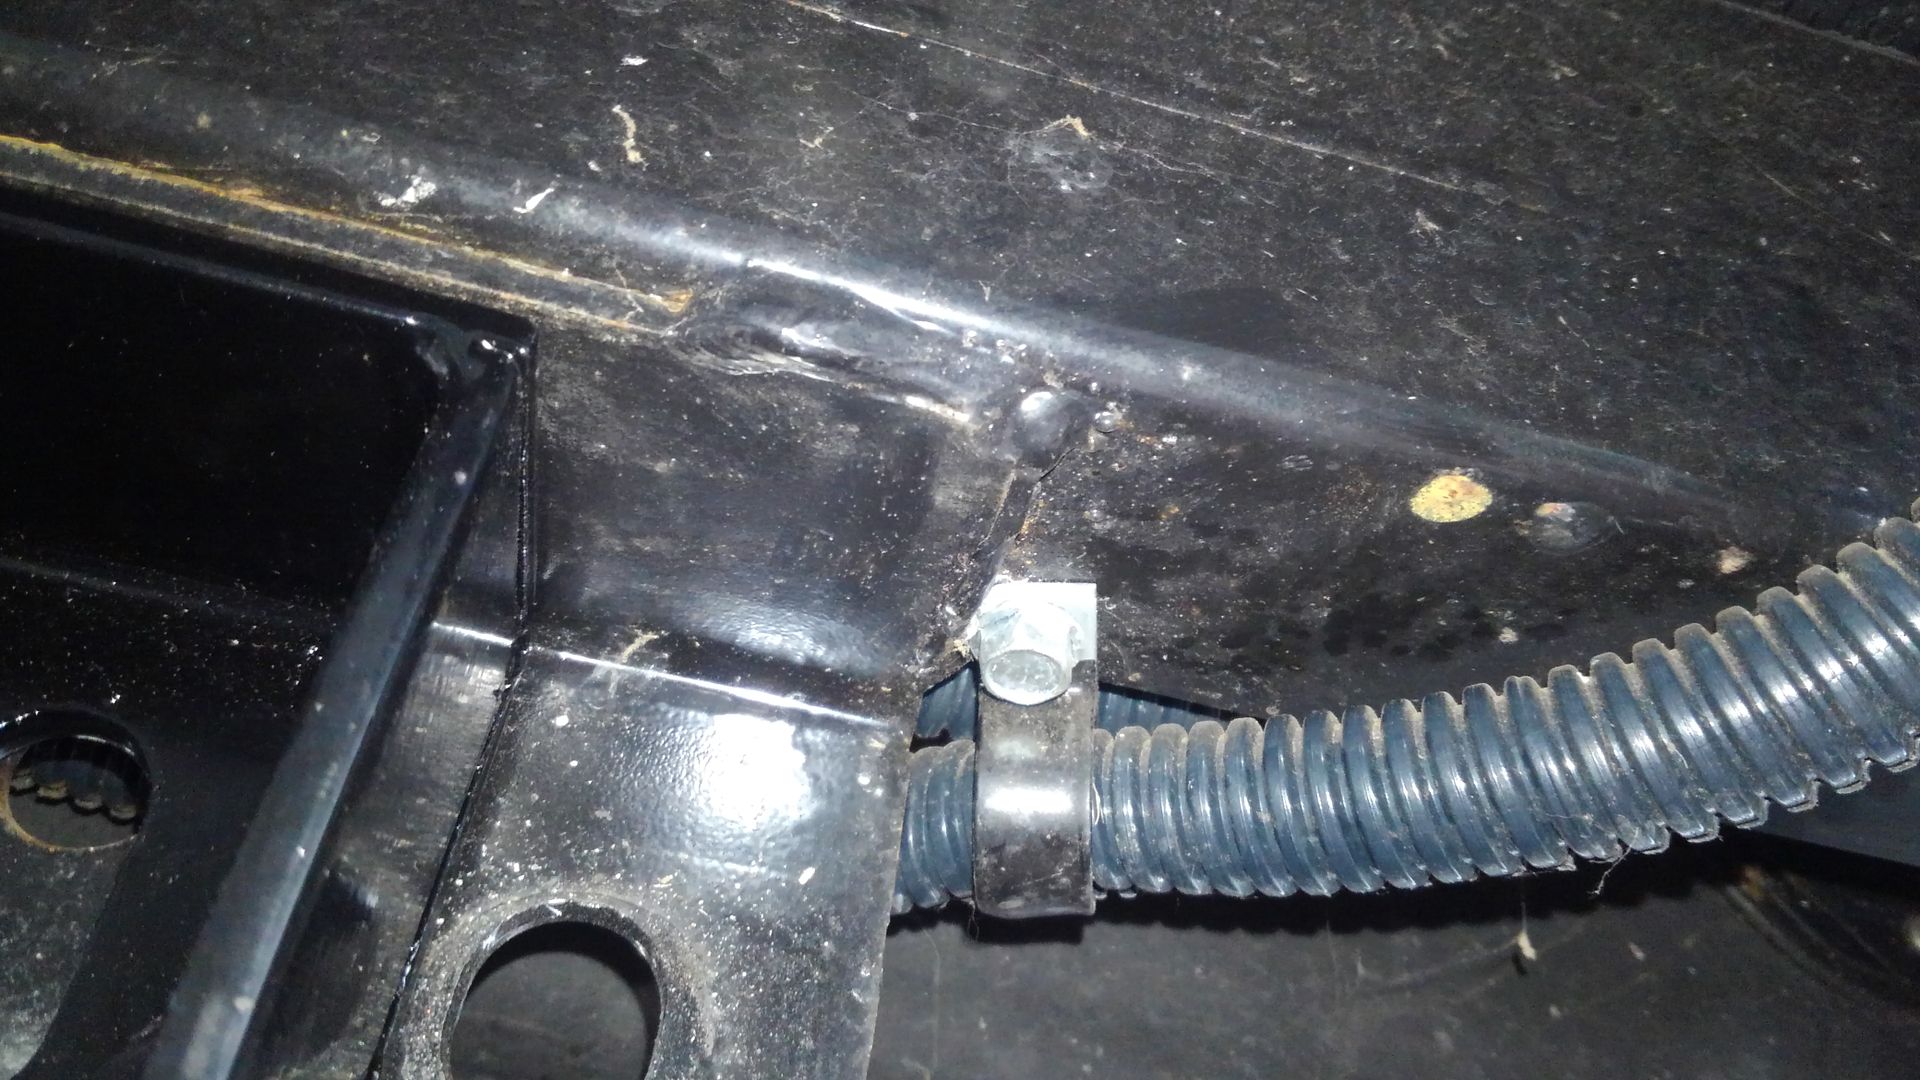 ------------- 2016 R-Pod 176T |
Posted By: Motor7
Date Posted: 02 Feb 2019 at 5:23pm
I was using a floor jack which raises and lowers in an arc. There was enough arc that threw off the alignment holes between the frame brackets and the riser. If you use a bottle jack you won't have this problem. I just grabbed a large ratchet strap and hooked it on the tongue of the trailer, then back to the axle. Tightening it just a little aligned the holes and I was in business: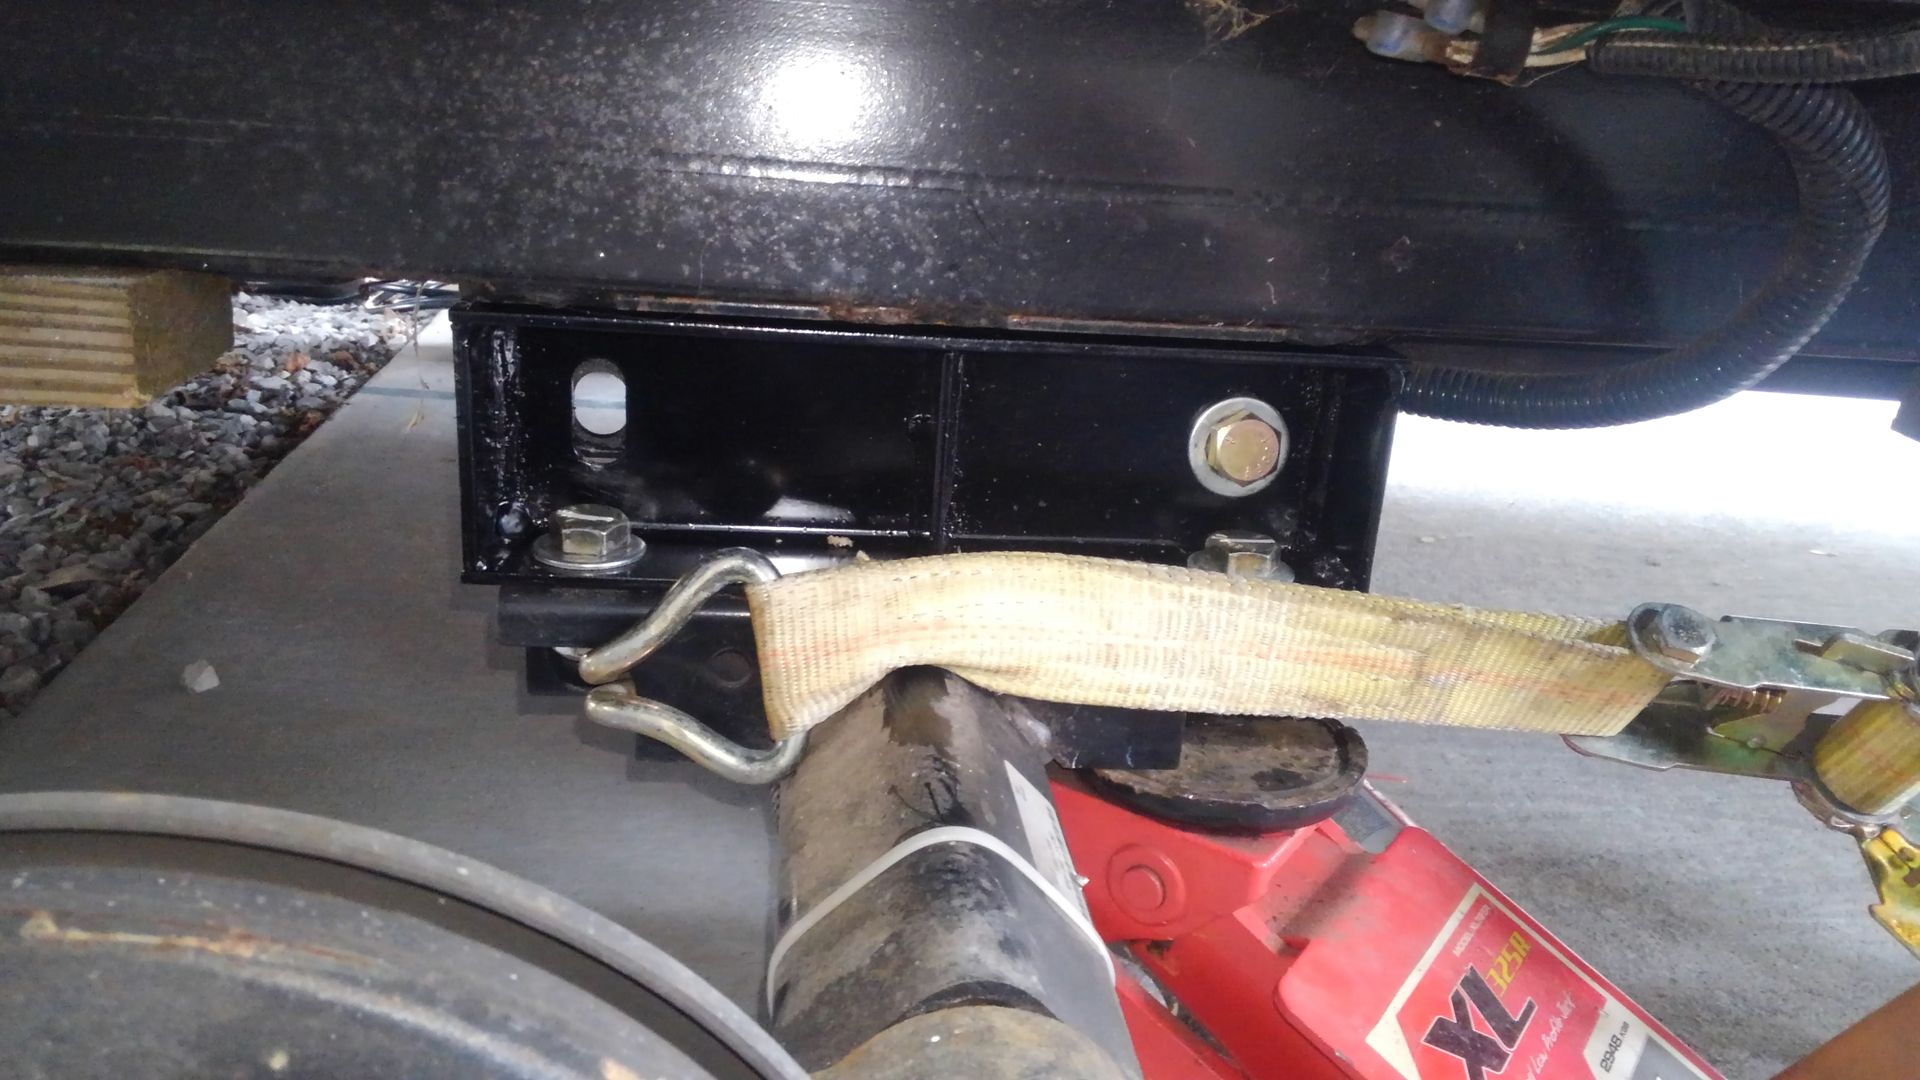 After that is was just drop the bolts and washers in and tighten them. The lug nuts are 19 mm and the riser bolts are 24mm or 15/16ths: 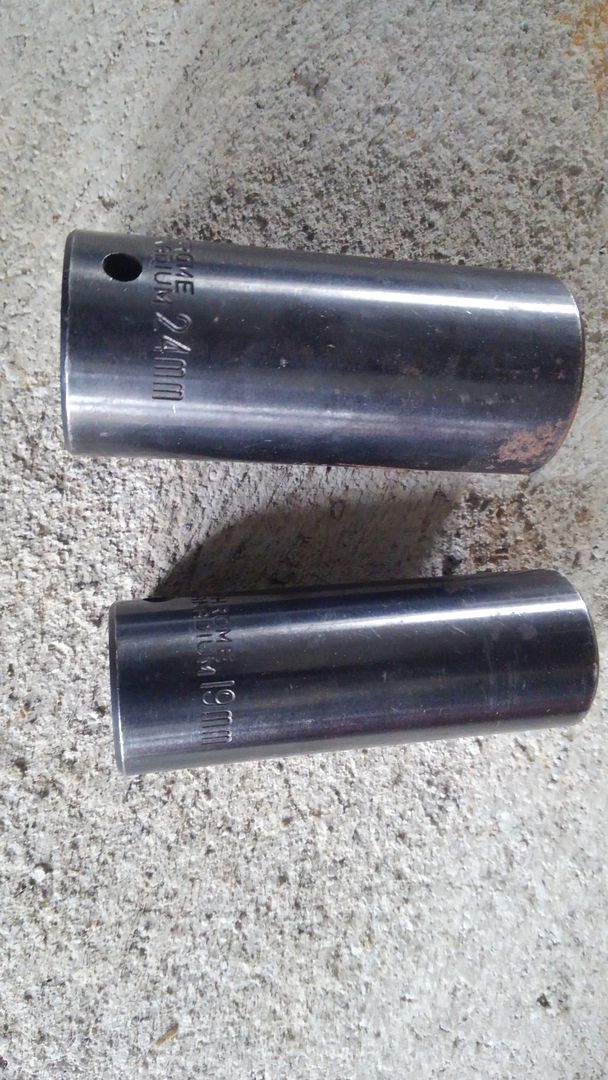 Deep sockets or extensions are needed to do the job along with a 24 mm / 15/16 wrench to tighten everything down. I did cut the zip tie on the axle which holds the brake wiring harness before starting, replacing it when done.
------------- 2016 R-Pod 176T |
Posted By: mcarter
Date Posted: 02 Feb 2019 at 5:33pm
|
Motor 7,
Get rid of wimpy zip ties. Get some industrial ties 3/8" for those wire lines. Much better. GREAT job. ------------- Mike Carter 2015 178 " I had the right to remain silent, I just didn't have the ability." |
Posted By: Motor7
Date Posted: 02 Feb 2019 at 5:39pm
|
Actually, I think the brake wiring loom has to move as the axle flexes up and down....not sure if zipping them really tight is a good idea?? ------------- 2016 R-Pod 176T |
Posted By: mcarter
Date Posted: 02 Feb 2019 at 5:44pm
|
I don't wrap them tight, I use quality wraps. ------------- Mike Carter 2015 178 " I had the right to remain silent, I just didn't have the ability." |
Posted By: Motor7
Date Posted: 02 Feb 2019 at 5:46pm
|
10-4...:) ------------- 2016 R-Pod 176T |
Posted By: Motor7
Date Posted: 02 Feb 2019 at 5:52pm
|
Btw, I have the Lippert 3500# torsion axle. This is the correct riser kit from Etrailer for $65: https://www.etrailer.com/Accessories_and_Parts/Lippert_Components/LC270682.html ------------- 2016 R-Pod 176T |
Posted By: mcarter
Date Posted: 02 Feb 2019 at 5:58pm
|
Love that place, always friendly and their videos are outstanding, not using them, highly recommend. Good choice. ------------- Mike Carter 2015 178 " I had the right to remain silent, I just didn't have the ability." |
Posted By: GlueGuy
Date Posted: 02 Feb 2019 at 7:19pm
|
I've picked up MASSIVE tie-wraps at a local hydraulic control company. I buy replacement hydraulic hoses there (they make them custom), and they also have a large assortment of tie-wraps that can be used on tractors and heavy duty industrial equipment. ------------- bp 2017 R-Pod 179 Hood River 2015 Ford F150 SuperCrew 4WD 3.5L Ecoboost |
Posted By: Motor7
Date Posted: 06 Feb 2019 at 6:59am
I made a HDPE chopping block cover for the cook top. I used a stick of 1" round stock HDPE for the feet, then stuck on some felt. I positioned the feet at each of the curved 4 corners of the cook top so that the board locks into position when placed over the burners. 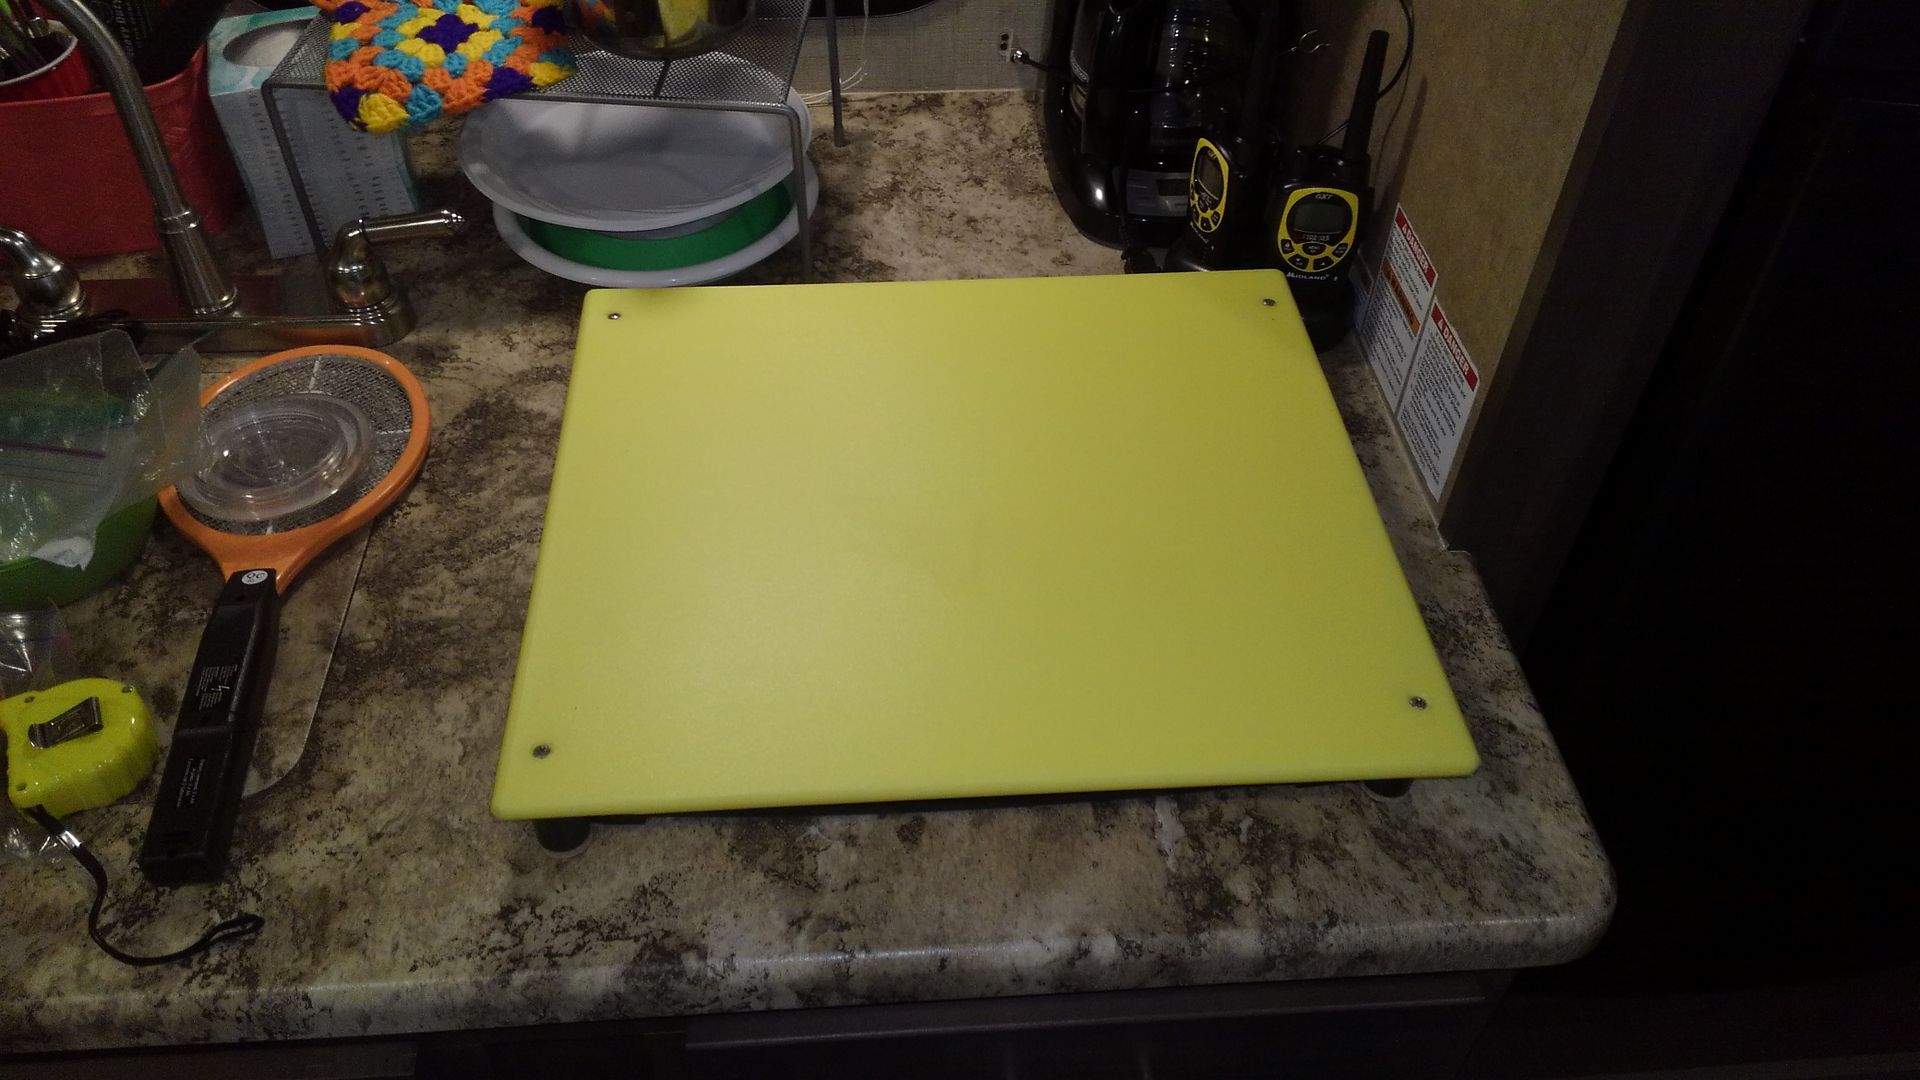 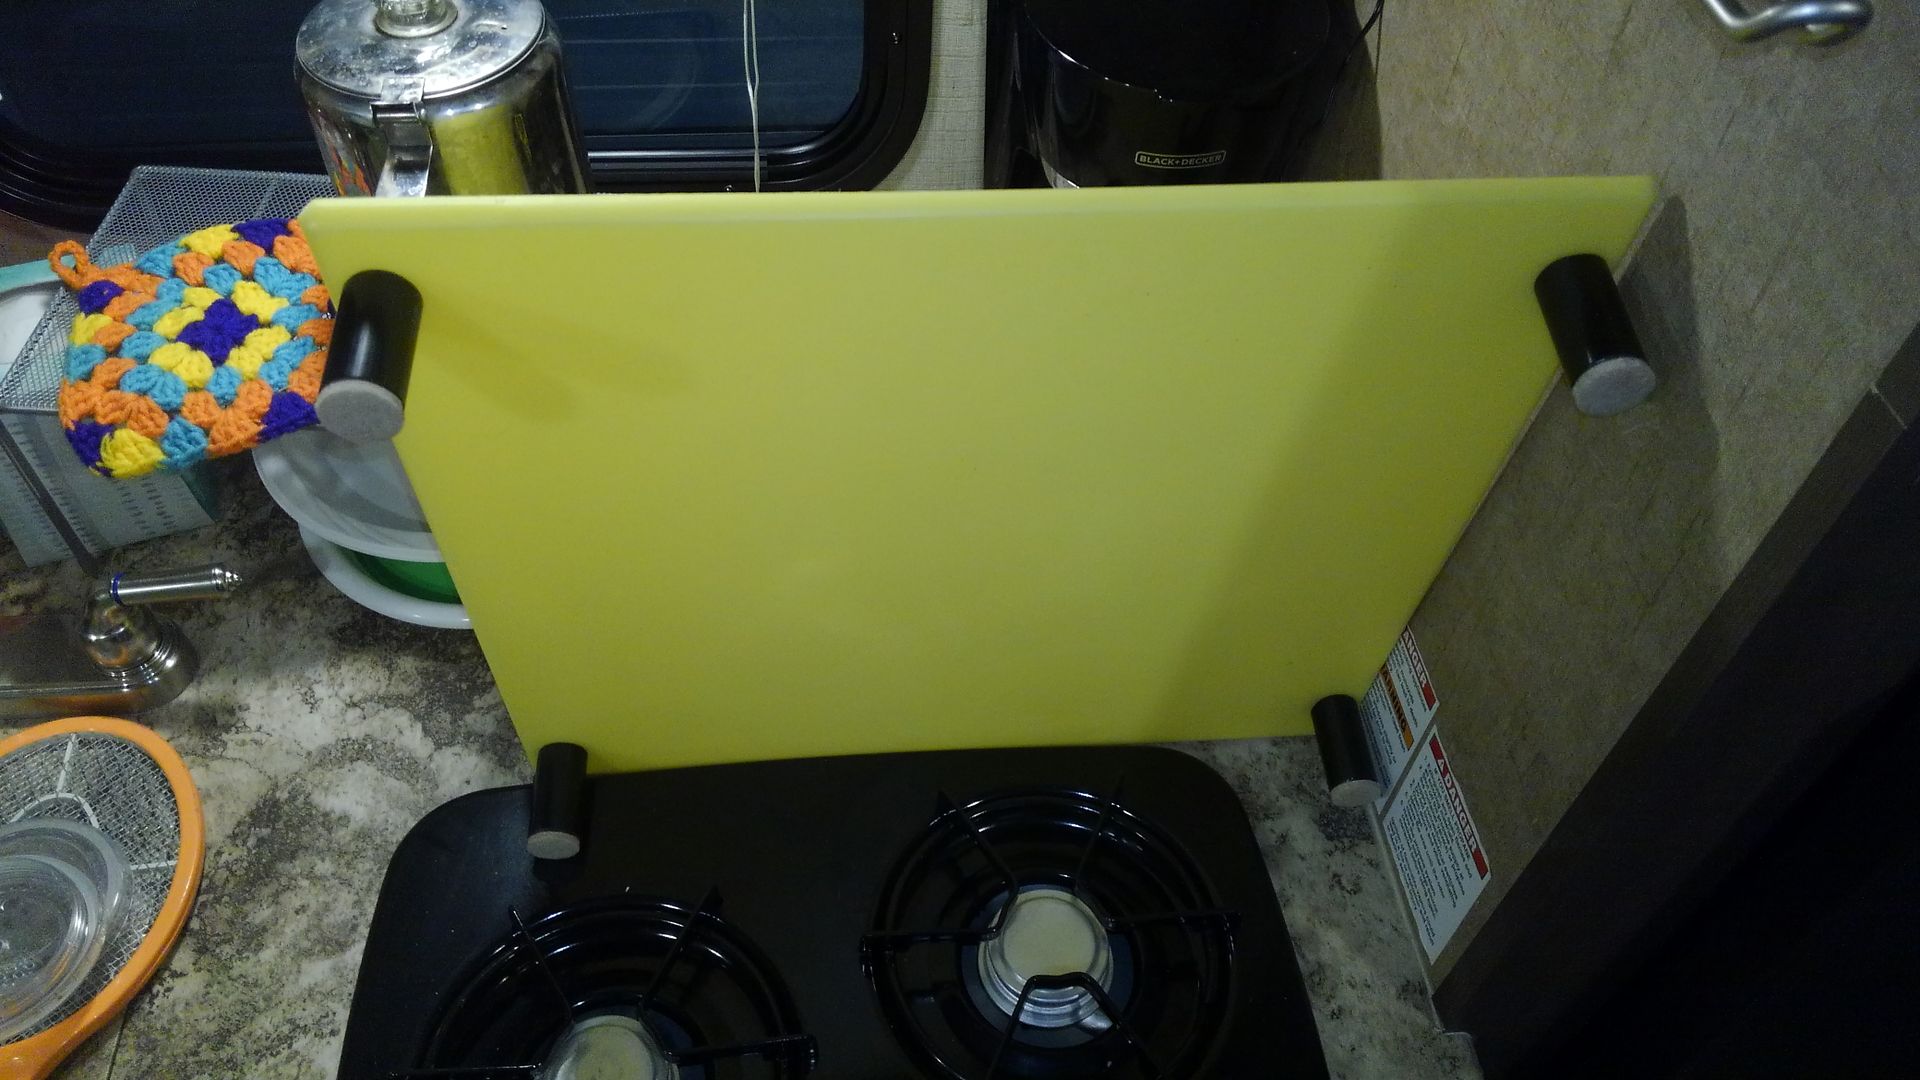 ------------- 2016 R-Pod 176T |
Posted By: Motor7
Date Posted: 22 Jul 2019 at 5:21pm
|
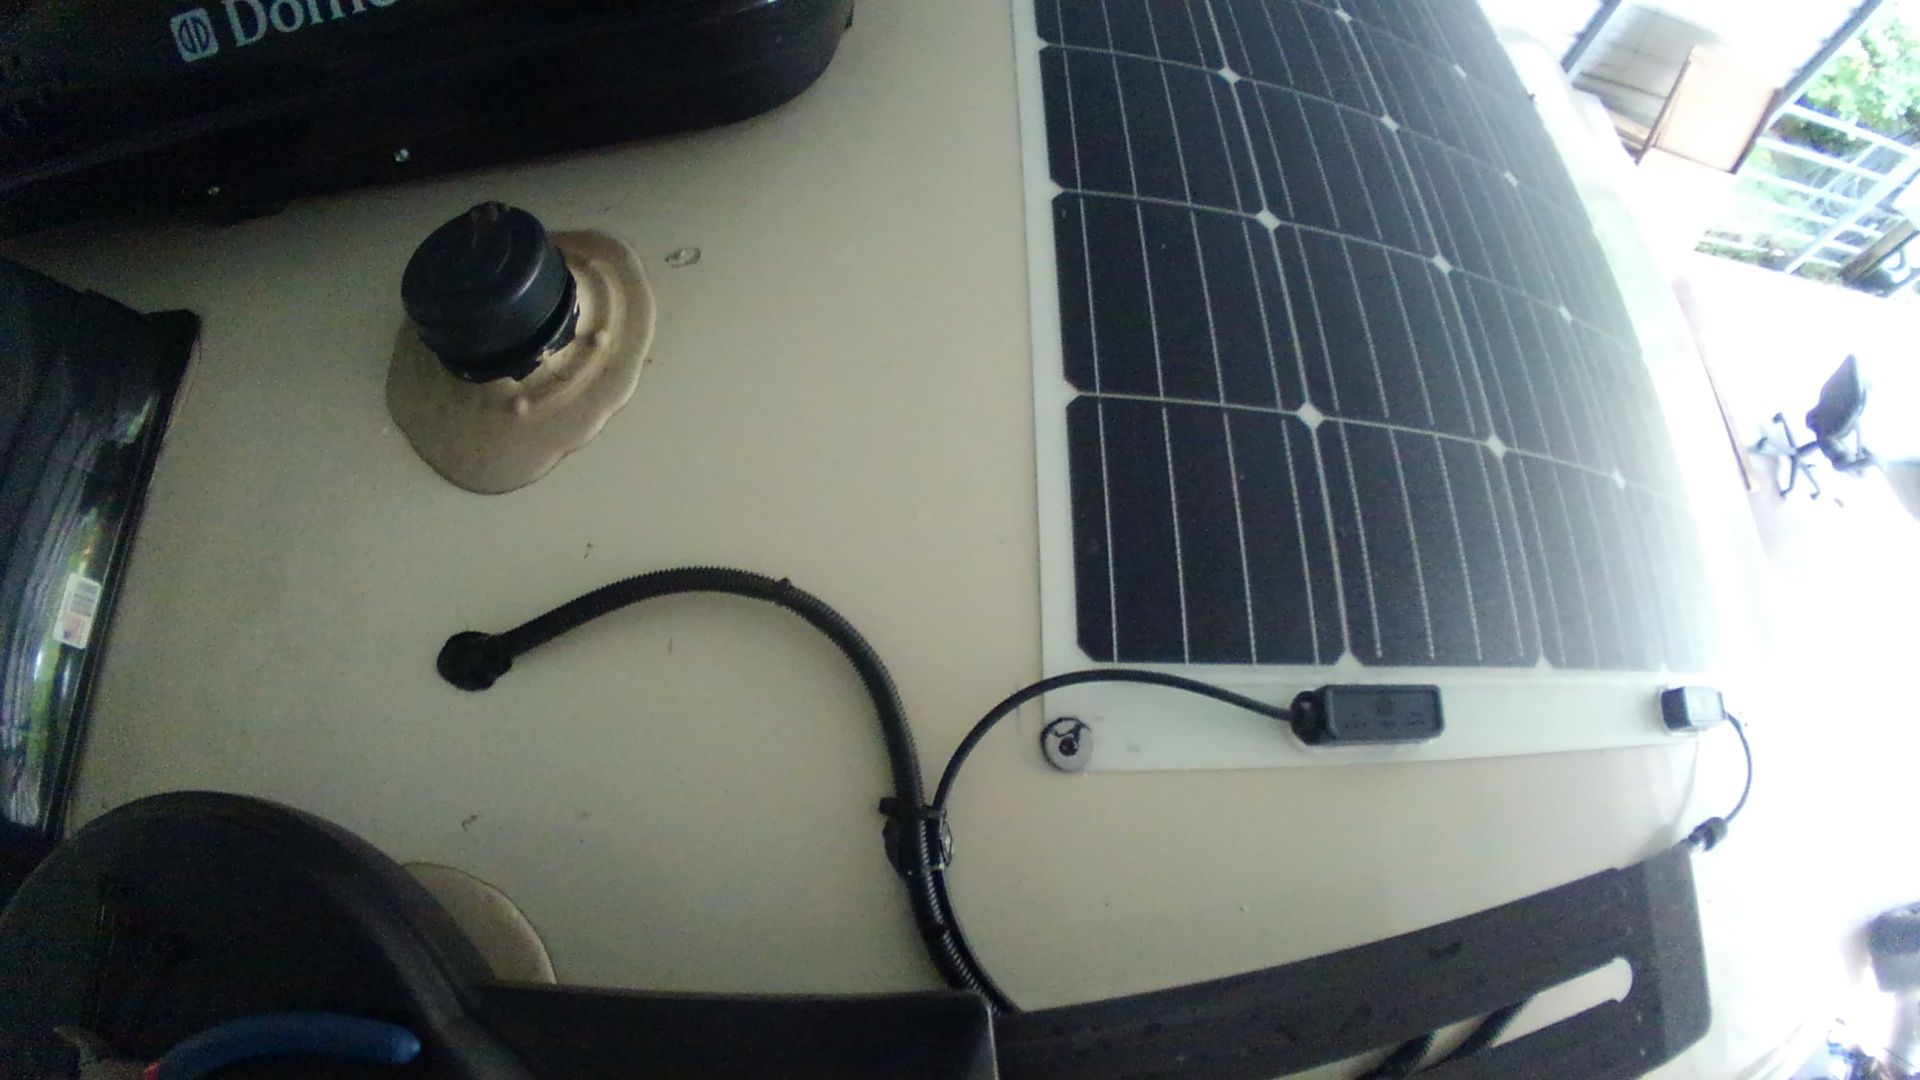
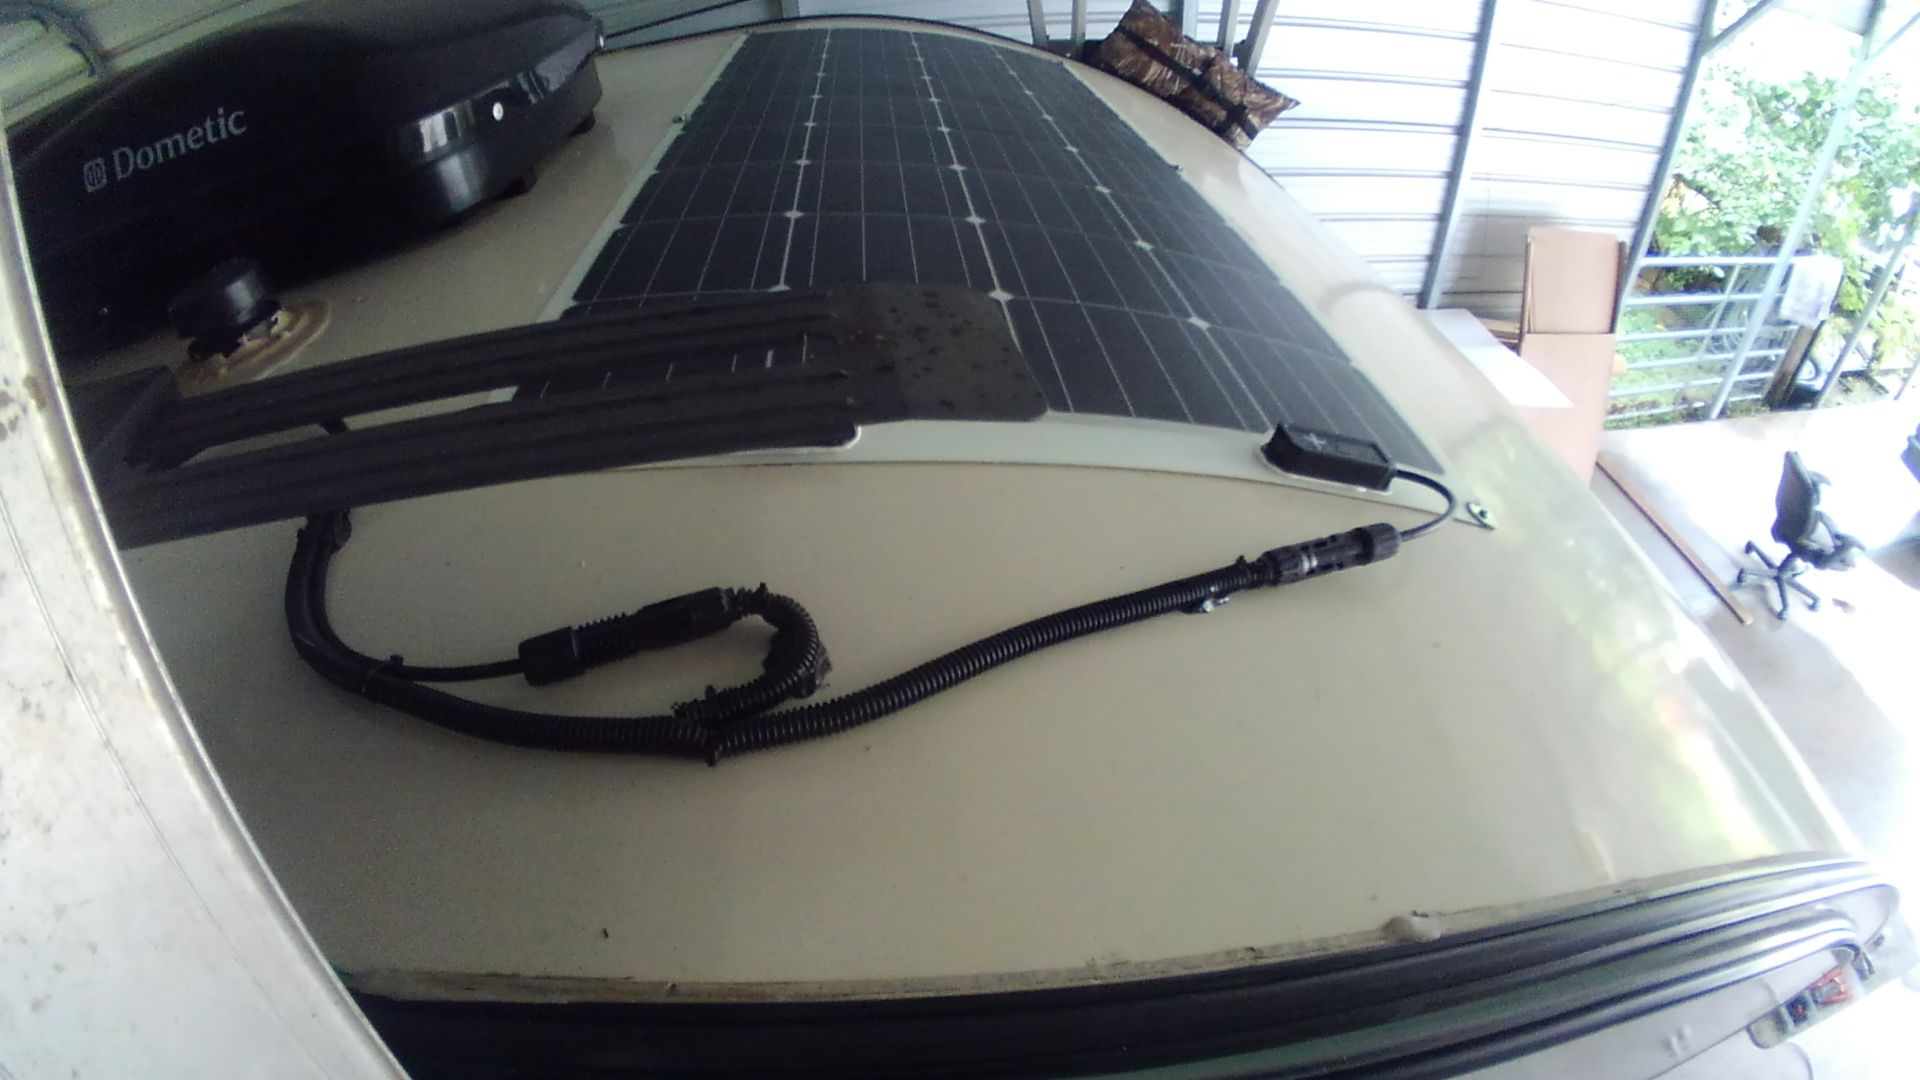
Currently adding 160watts of solar and a Renogy 20 amp charge controller. ------------- 2016 R-Pod 176T |
Posted By: Motor7
Date Posted: 24 Jul 2019 at 11:19am
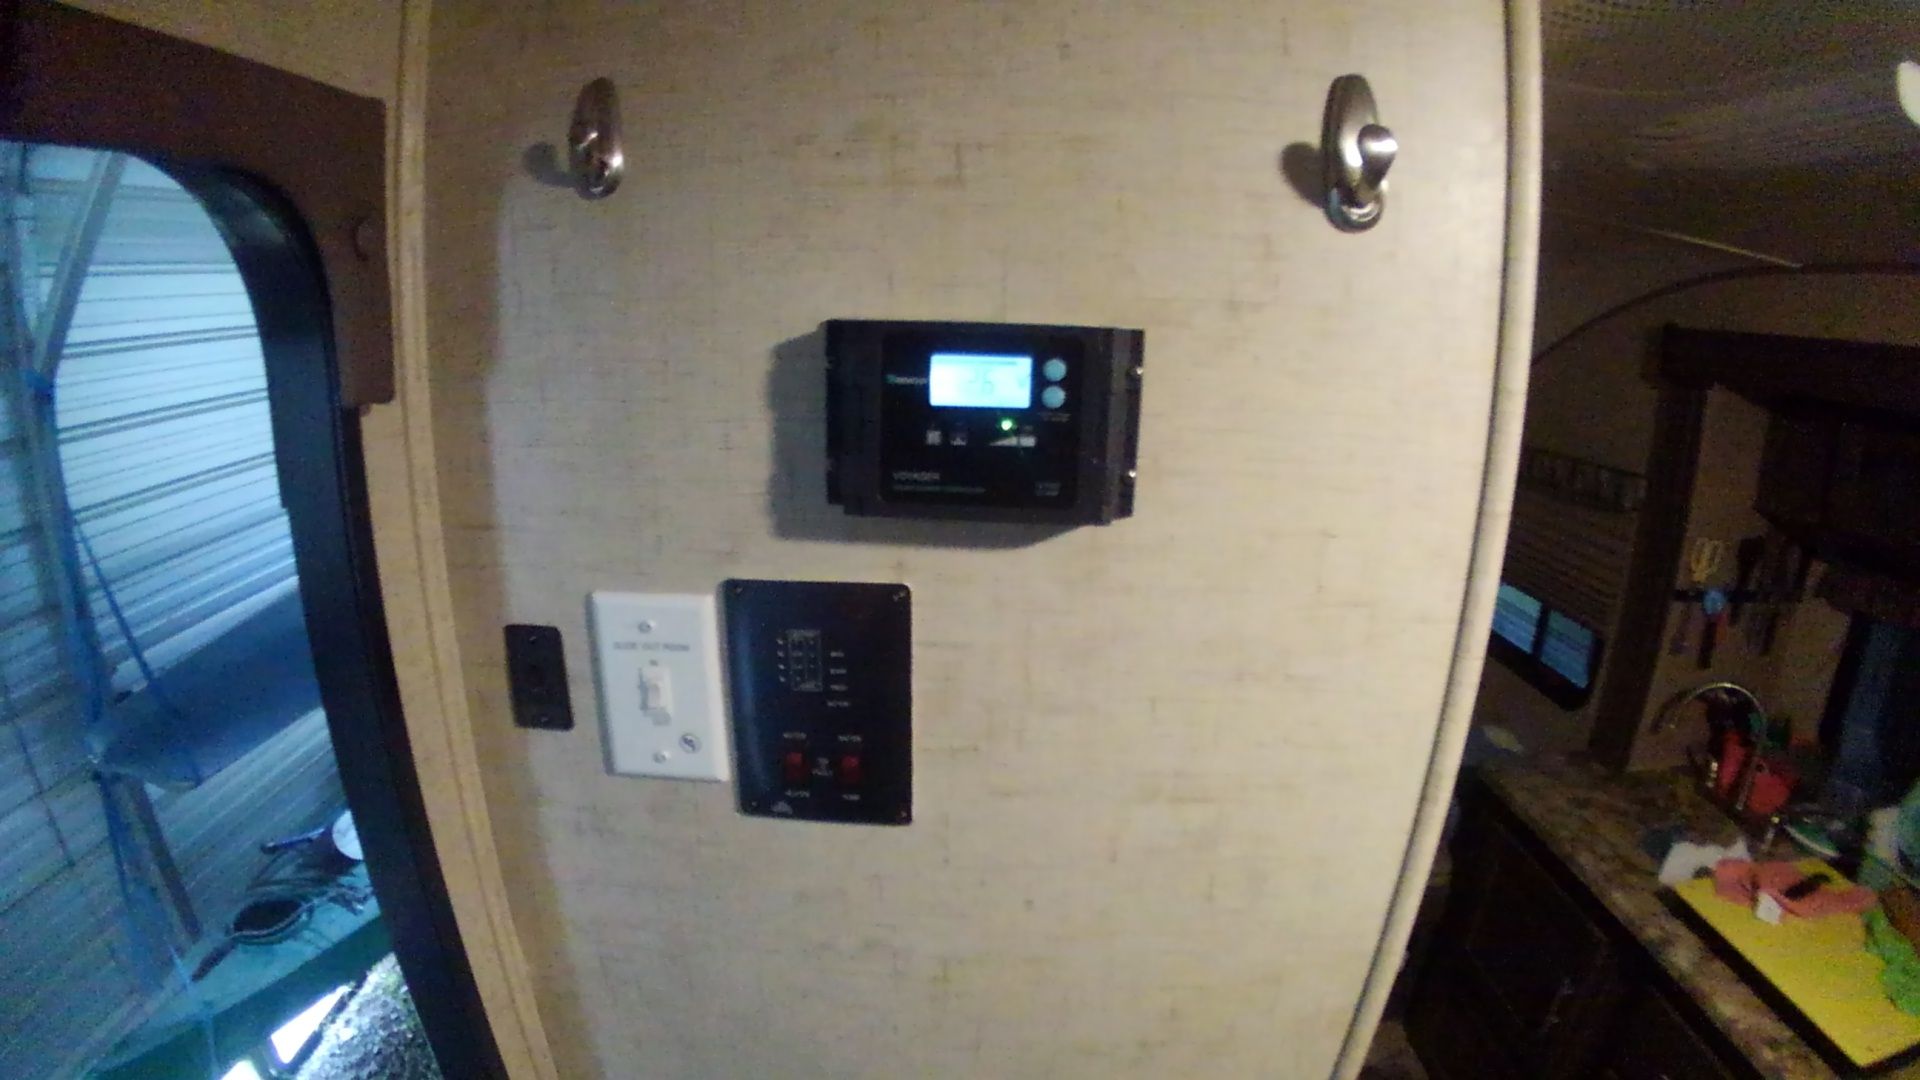 ------------- 2016 R-Pod 176T |