
|
List Your Mods: |
Post Reply 
|
Page <1 5455565758 77> |
| Author |
 Printable Version Printable Version Google Google Delicious Delicious Digg Digg StumbleUpon StumbleUpon Windows Live Windows Live Yahoo Bookmarks Yahoo Bookmarks reddit reddit Facebook Facebook MySpace MySpace Newsvine Newsvine Furl Furl Topic Search Topic Search  Topic Options Topic Options
|
Alaskaflyer 
Newbie 
Joined: 30 Aug 2016 Location: YNP, WY Online Status: Offline Posts: 18 |
 Post Options Post Options
 Quote Reply Quote Reply
 Topic: List Your Mods: Topic: List Your Mods:Posted: 11 Oct 2016 at 4:16pm |
|
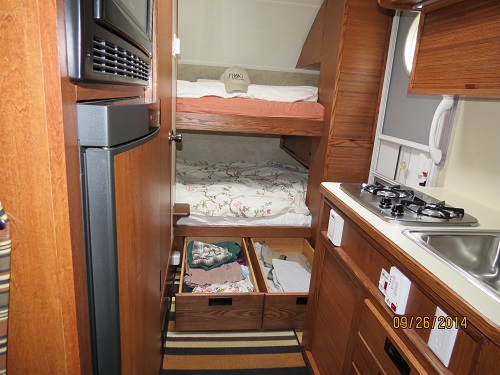
I finished installing two cubbyholes in my underseat storage. We found it is most crowded inside at bedtime, when we are using all the berth space and want access to our bags without lifting the top of the benches. Nice to stuff bags and sundries through these instead. Used simple 'stain-able' 1/2 inch outside corner moulding to finish the edges. Will stain the finish work when I get around to it.
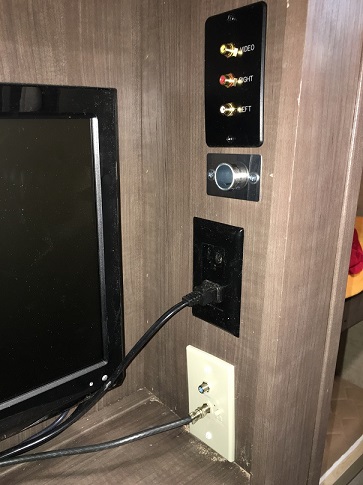
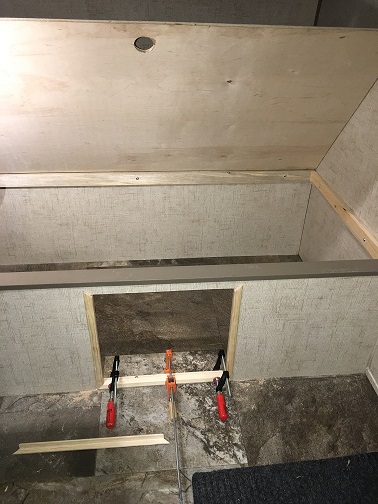 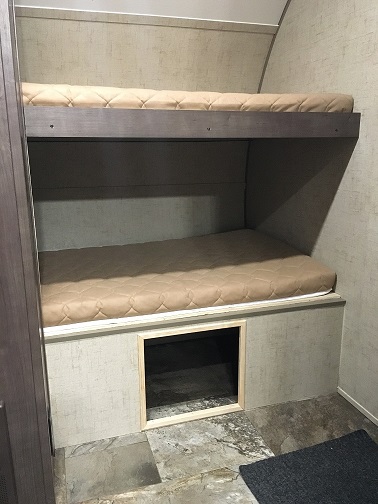 Photo of the DC socket I installed a little while ago. I wanted it in the entertainment center to plug in our mounted TV while boondocking, using a small fist-sized inverter, and to have a shelf for our phones while charging.
 |
|
 |
|
|
Debster1955
Newbie

Joined: 03 Aug 2016 Location: Newbury Park Online Status: Offline Posts: 4 |
Post Options
Quote Reply
Posted: 14 Oct 2016 at 12:39am |
|
How did you mount the spice rack and the shelf over the bed. The walls are really thin.
|
|
|
|
|
Debster1955
Newbie
Joined: 03 Aug 2016 Location: Newbury Park Online Status: Offline Posts: 4 |
Post Options
Quote Reply
Posted: 14 Oct 2016 at 12:44am |
|
Hi,
How did you mount the spice rack? The walls are so thin. Debbie |
|
|
|
|
lostagain
Senior Member 

Joined: 06 Sep 2016 Location: Quaker Hill, CT Online Status: Offline Posts: 2587 |
Post Options
Quote Reply
Posted: 15 Oct 2016 at 11:11am |
|
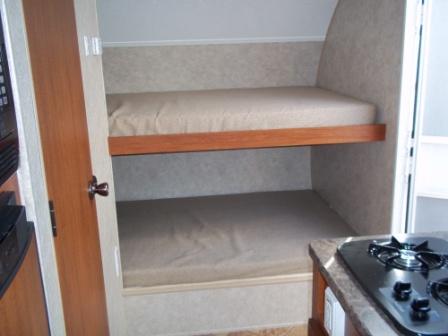
Does anyone know how the upper bunk is attached on a 172? I'm thinking of copying yitzit's work on the lower bunk, but need to remove the upper bunk to do it. I don't want to leave a bunch of gaping holes in the walls. My thought is to raise and narrow the upper bunk so it f.unctions as a shelf as we don't need the bed capacity.
Thanks in advance for any info.
|
|
|
Never leave footprints behind.
Fred & Maria Kearney Sonoma 167RB Our Pod 172 2019 Ford F-150 4x4 2.7 EcoBoost |
|
|
|
|
lostagain
Senior Member
Joined: 06 Sep 2016 Location: Quaker Hill, CT Online Status: Offline Posts: 2587 |
Post Options
Quote Reply
Posted: 15 Oct 2016 at 11:12am |
|
Does anyone know how the upper bunk is attached on a 172? I'm thinking of copying yitzit's work on the lower bunk, but need to remove the upper bunk to do it. I don't want to leave a bunch of gaping holes in the walls. My thought is to raise and narrow the upper bunk so it f.unctions as a shelf as we don't need the bed capacity.
Thanks in advance for any info.
|
|
|
Never leave footprints behind.
Fred & Maria Kearney Sonoma 167RB Our Pod 172 2019 Ford F-150 4x4 2.7 EcoBoost |
|
|
|
|
Randrestj
Newbie
Joined: 04 Oct 2016 Location: British Columbi Online Status: Offline Posts: 10 |
Post Options
Quote Reply
Posted: 23 Oct 2016 at 7:47pm |
|
Hi, I like the shelving idea but was always a little leery about drilling holes in the sides of the trailer. What type of screws, (length and size) did you utilize to fasten the the strips of wood and is there any special location as to where you need to put the screws. Thanks so much,
|
|
|
RogerSJ
|
|
|
|
|
kkomorn
Newbie
Joined: 17 Oct 2015 Online Status: Offline Posts: 7 |
Post Options
Quote Reply
Posted: 27 Oct 2016 at 9:21am |
|
How was the trip? Window hold up to the elements?
KK
|
|
|
|
|
Jonknite
Newbie
Joined: 25 May 2015 Location: Placitas, NM Online Status: Offline Posts: 19 |
Post Options
Quote Reply
Posted: 27 Oct 2016 at 9:48am |
|
Went very well, the road was so rough i had to take the stabilizer Jacks off to have sufficient clearance. All that bouncing and everything held well. |
|
|
|
|
marwayne
Senior Member

Joined: 25 Oct 2011 Location: Edmonton AB Can Online Status: Offline Posts: 1002 |
Post Options
Quote Reply
Posted: 27 Oct 2016 at 10:53am |
  |
|
|
If you want something done right, do it yourself.
2011 RP172, 2016 Tundra 5.7 Litre, Ltd. |
|
|
|
|
mooremg1
Newbie
Joined: 02 Sep 2016 Location: Grand Rapids Online Status: Offline Posts: 26 |
Post Options
Quote Reply
Posted: 27 Oct 2016 at 2:51pm |
|
We bought our 179 in August of this year and although it's titled as a 2017 model it seems to be a transitional 2016-1/2 model when it comes to features. Ours has the King Jack TV antenna and rotator as well as the stainless steel undermount sink and updated exhaust fan but it is missing some of the features of the new blue R-pods that I would have liked to have. I've already added an electric tongue jack to replace the flip foot jack and this past weekend I installed the flush-mount stove surround - see picture below. I've also purchased the D&W Super Slider sewer hose storage tube but I haven't gotten it installed yet. The only other mods I've made to our 179 is to replace the outlet near the stove with one that has 2 USB charging ports and added a bracket to the TV swing arm that allows me to angle it downward. Installing the flush mount for the stove was easy after carefully measuring the visually checking clearances. There is a cleat between the front of the cabinet and the counter top that you need to clear and the wiring for the electrical outlet by the stove runs along that same cleat. The flush mount doesn't come with a template so you have to use the mount itself to draw your outline then draw the cut line 3/8" inside of that. I found that after initially unscrewing the stove top from the counter that I could just use the flexible gas line to angle the stove so I could just lower it down inside the cabinet while I was making my cut instead of having to disconnect the line. We don't use the stove top that often and rather than make a cutting board top like many people do we chose to go this route to recover the counter space. 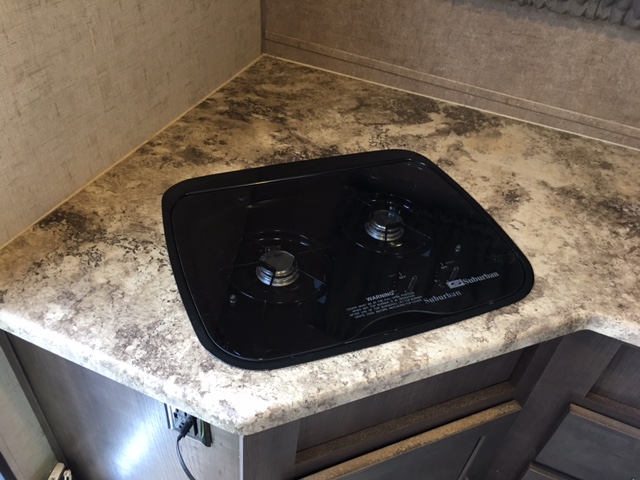 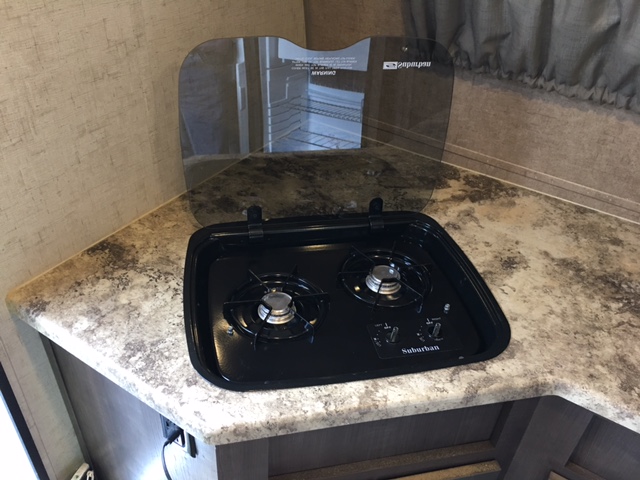 |
|
|
Sue and Mike
2022 Grand Design 23LDE 2017 Ford Expedition Platinum 2017 r-pod 179 (for sale) 2018 Chevrolet Traverse LT (sold) |
|
|
|
|
Post Reply
|
Page <1 5455565758 77> |
| Forum Jump | Forum Permissions You cannot post new topics in this forum You cannot reply to topics in this forum You cannot delete your posts in this forum You cannot edit your posts in this forum You cannot create polls in this forum You cannot vote in polls in this forum |


