
|
ouR escaPOD mods |
Post Reply 
|
Page <1 7891011 58> |
| Author |
 Printable Version Printable Version Google Google Delicious Delicious Digg Digg StumbleUpon StumbleUpon Windows Live Windows Live Yahoo Bookmarks Yahoo Bookmarks reddit reddit Facebook Facebook MySpace MySpace Newsvine Newsvine Furl Furl Topic Search Topic Search  Topic Options Topic Options
|
StephenH 
podders Helping podders - pHp 

Joined: 29 Nov 2015 Location: Wake Forest, NC Online Status: Offline Posts: 6289 |
 Post Options Post Options
 Quote Reply Quote Reply
 Topic: ouR escaPOD mods Topic: ouR escaPOD modsPosted: 15 Oct 2016 at 9:14am |
|
I didn't post a picture of the Fan-tastic Ultrabreeze vent cover in my description above. I had put the cover on before I could take a picture. I removed the cover and now will post a picture.
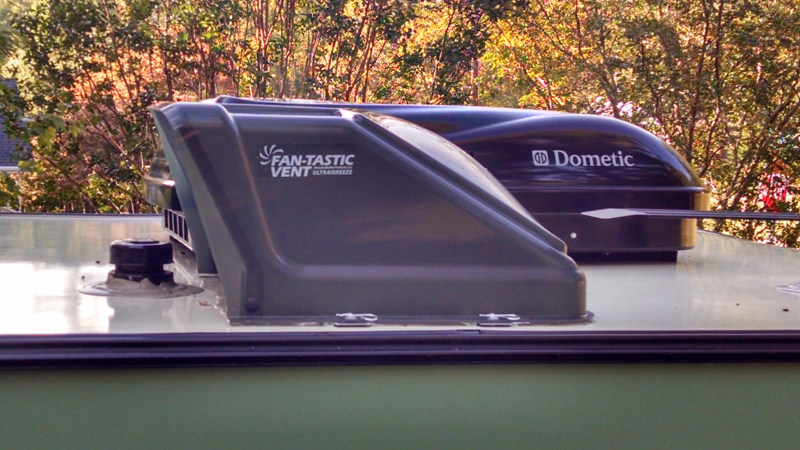 As you can see, there is no problem with either the antenna or the vent stack on our R-179. Given that each Pod might have variation in antenna placement, I wouldn't be able to guarantee that it would fit any other R-Pods. |
|
|
StephenH
Happy is the man that findeth wisdom,... ouR escaPOD mods Former RPod 179 Current Cherokee Grey Wolf 24 JS |
|
 |
|
|
StephenH
podders Helping podders - pHp
Joined: 29 Nov 2015 Location: Wake Forest, NC Online Status: Offline Posts: 6289 |
Post Options
Quote Reply
Posted: 18 Oct 2016 at 10:34pm |
|
Time for another one. After seeing what others had done to make a stove-topper/cutting board, I thought I would try my hand at it.
First thing: buy a cutting board. I found one that looked big enough. It is a bamboo cutting board. I did not have bamboo pieces I could use for legs, so I used some oak that I had on hand. After cutting and gluing them, I sanded the corners to try to match the radius of the cutting board. I also sanded the other edges for a smoother look. I sealed each piece with two coats of Formby's Tung Oil finish, which I had on hand. I left one surface unfinished on each leg as I planned on using that surface to glue the legs to the cutting board along with a screw. I used Liquid Fusion glue to glue the legs and screws which I had on hand to hold it. Because I glued the legs, I felt that one screw would be adequate. I had a dowel jig and used that to drill straight holes. It beat me trying to drill freehand. I finished them off with some silicone pads, one on each corner. Here are some pictures: Top View: 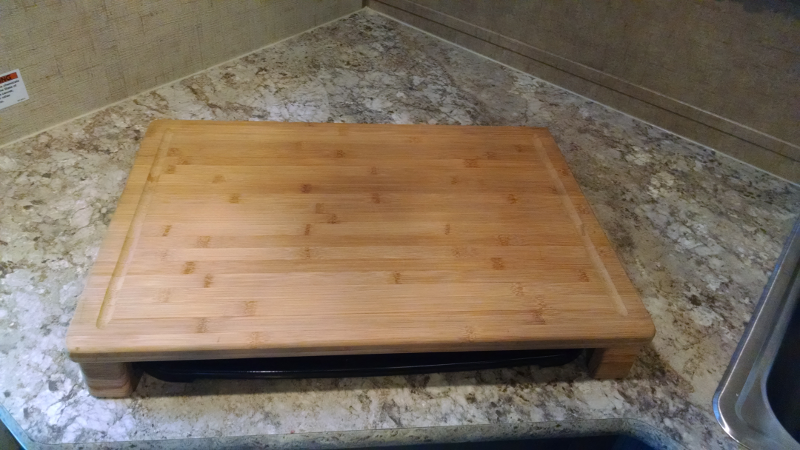 Bottom view: 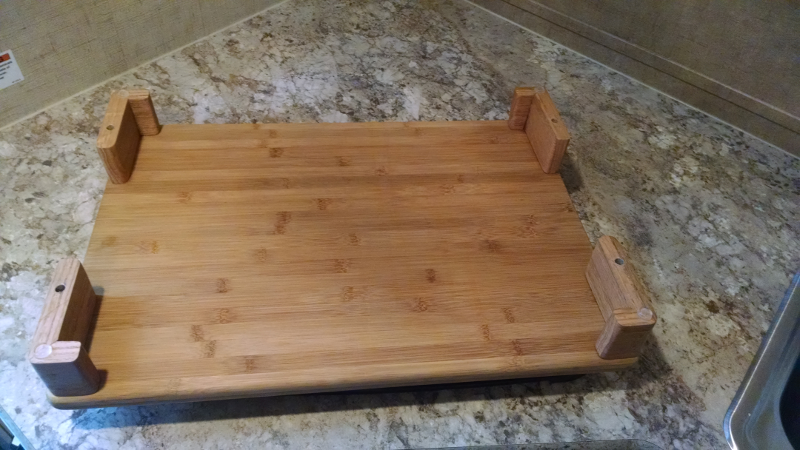 Side view: 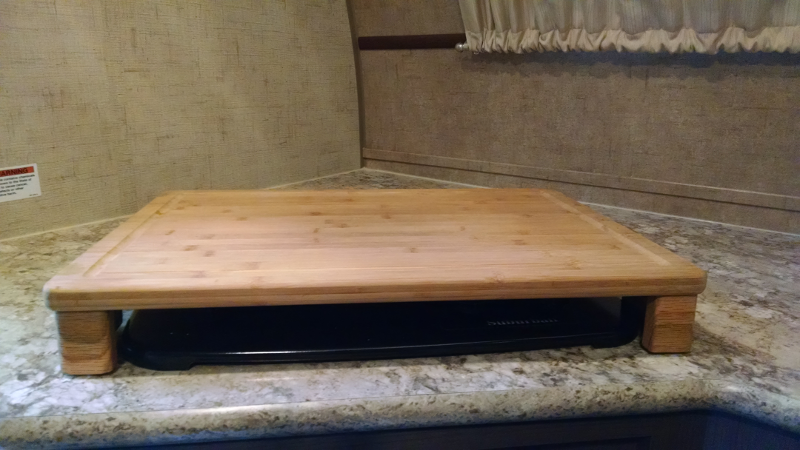 The cover just fits over the top of the stove. It is tight enough that it does not shift around. The silicone pads also help it to stay put. I don't know if it would stay on while towing, especially if we hit a big bump. I'll find out. Here's a bonus: I brought home a spice rack from a rummage sale. It is one meant to mount on the inside of a cabinet door. It had adjustable metal pieces which could slide to adjust for width. I did not want to use them, so I removed them and drilled though the wood rail to which the metal pieces had been attached. I used screws long enough to hold, but short enough so that there was no risk of going through the side of the R-Pod. Here it is: Spice Rack: 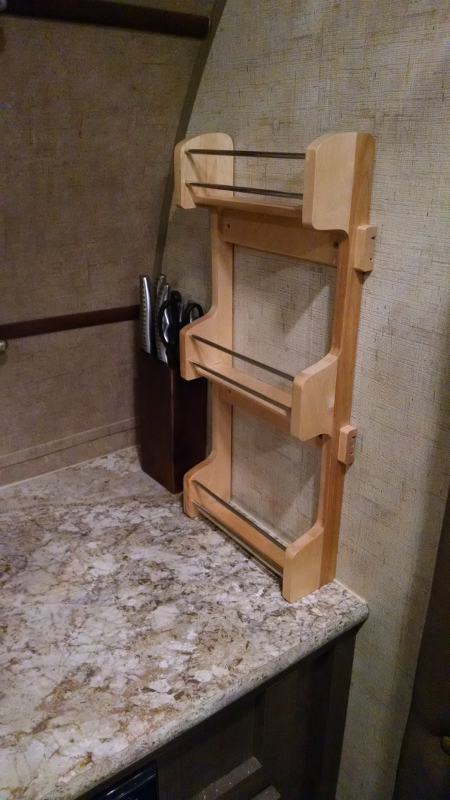 You can see the knife rack behind the spice rack. It was one that started out angled. I modified it for vertical storage after seeing how knifes did not stay in it when it was angled. I think they will stay put better now that it is nearly vertical. |
|
|
StephenH
Happy is the man that findeth wisdom,... ouR escaPOD mods Former RPod 179 Current Cherokee Grey Wolf 24 JS |
|
|
|
|
Patriot Dave
Senior Member

Joined: 06 Feb 2016 Location: LaSalle, Mi. 48 Online Status: Offline Posts: 206 |
Post Options
Quote Reply
Posted: 19 Oct 2016 at 6:45am |
|
Excellent thanks for sharing.
|
|
|
Dave & Joyce
Never Forget, In God We Trust; This Our National Motto. Member; Patriot Guard Riders, Michigan Chapter Retired; So Every Day is Saturday.... Except Sunday |
|
|
|
|
StephenH
podders Helping podders - pHp
Joined: 29 Nov 2015 Location: Wake Forest, NC Online Status: Offline Posts: 6289 |
Post Options
Quote Reply
Posted: 19 Oct 2016 at 10:03am |
|
I did not explain what Liquid Fusion is. It is a clear, Urethane adhesive. It claims to be "Non-foaming, Waterproof, fast drying, and dries clear. I like it better than the white or yellow glue for a number of reasons. It can be used indoors or outdoors on a number of surfaces. Before it dries, it can be cleaned up with water. It is manufactured by iLoveToCreate, 5673 East Shields Avenue, Fresno, CA 23727, USA. RM# 0026946. It comes in a 2 oz bottle. I find it in craft shops like Michaels, AC Moore, or Hobby Lobby. I have not seen it in hardware stores.
|
|
|
StephenH
Happy is the man that findeth wisdom,... ouR escaPOD mods Former RPod 179 Current Cherokee Grey Wolf 24 JS |
|
|
|
|
StephenH
podders Helping podders - pHp
Joined: 29 Nov 2015 Location: Wake Forest, NC Online Status: Offline Posts: 6289 |
Post Options
Quote Reply
Posted: 20 Oct 2016 at 10:48pm |
|
Here's another fix to a Forest River "What were they thinking?" situation. I had wondered why the water pump with its winterization valve and hose were put in a place that could not be reached without removing the whole bed platform. While I had previously modified the bed to give better access to the water heater, I had neglected to address the problem of access to the water pump. I didn't want to have to remove the mattress and remove the whole platform to work with the water pump.
My answer: Install an access hatch. I still need to move the mattress, but I can hold it up or fold it over in order to access the new hatch I made. Since I had previously installed hinges, I removed the screws holding the back part of the platform in place and folded it over to get it out of the way I had removed screws from the hinge, thinking I would need to do so to cut the platform. It turns out I did not need to do so, which will become clear later. Steps: 1. Fold back half of the platform over the front part, allowing access to the water pump. 2. Using cleat stock or scrap lumber, add additional wood to the perimeter of the opening to provide more support for the hatch. Unfasten wire anchors as needed and cut notches as needed so it fits over the existing screw heads so it can be tight against the original frame. 2. I used an oscillating tool with a wood/metal blade to cut through the hinge and the platform just where the hinge was plus a little more. I did not cut the whole length as I wanted to draw a cutting line. After figuring out where the wood needed to be cut to rest properly, I used a straight-edge to mark the line and cut it to meet up with the cut I made previously. 3. With the line cut, I made sure the new hatch would open and close without hitting the window shade. Then I took the insulation which I had previously removed from the opening and fit it to the resized opening. I then used Locktite construction adhesive to glue the insulation to the hatch lid. 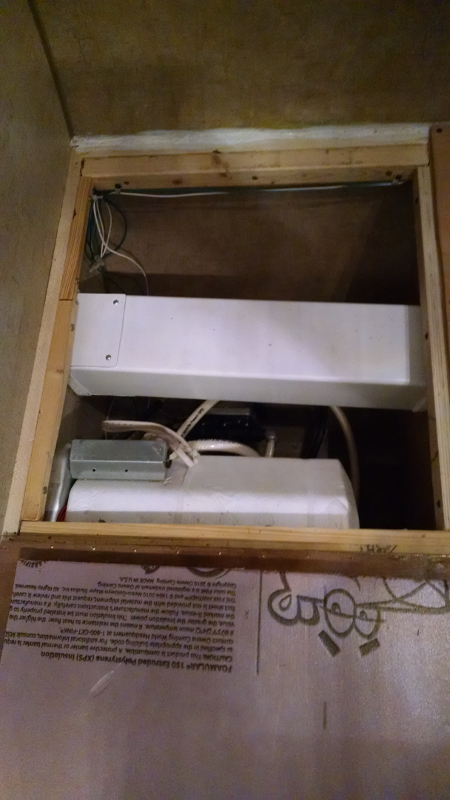 I left the project overnight so the glue could cure. The last step was figuring out how to open the hatch without having a bulky pull. I wanted something that would be relatively flat. I had an old shoelace from a worn-out pair of hiking shoes. I did some creative folding and wrapping to make a handle with extra lace hanging out from each end. I sealed it with glue so it would not come undone. I drilled two holes and fed the lace ends through. Then I brought the ends together and tied them in a square knot. Now I have a hatch through which I can access the water pump. The other side of the platform did not need to open now. It has the handle I had put in if I needed to open the whole back end of the platform. Since I did not want to leave a hole, I left the handle in place. I did use screws to permanently attach that part of the platform after using some glue to fix the insulation which had started to fall through to the basement storage. The finished hatch looks like this: 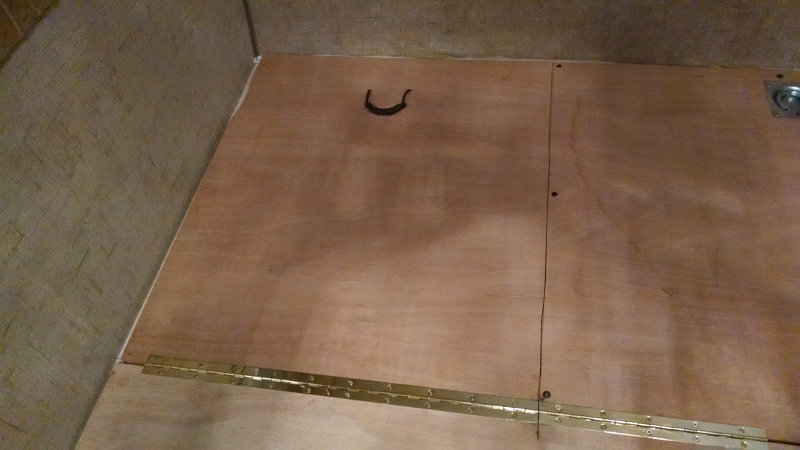 I'll see how well it works when I go to winterize the R-Pod. That won't happen until after it gets more toward winter. We will be making a short camping trip first. |
|
|
StephenH
Happy is the man that findeth wisdom,... ouR escaPOD mods Former RPod 179 Current Cherokee Grey Wolf 24 JS |
|
|
|
|
StephenH
podders Helping podders - pHp
Joined: 29 Nov 2015 Location: Wake Forest, NC Online Status: Offline Posts: 6289 |
Post Options
Quote Reply
Posted: 31 Oct 2016 at 9:37pm |
|
Here is one suggested by rGod2013 ( See this link ). He painted the cover for his AC and said it helps the AC to run better. It makes sense that it would make it more efficient since the black cover would absorb more solar energy and get hotter than a white cover. I liked the idea, so I did so also. Here are the results:
 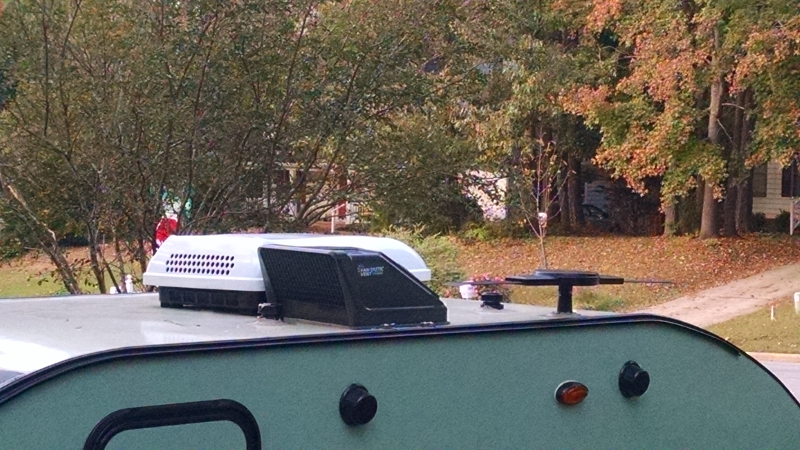 I think it turned out great. Hopefully, it will hold up. The preparation work I did should help ensure it does. I decided not to do the refrigerator vent covers, at least not yet. I would prefer to try to match the color of the side, which would work for the top cover, but the decals on either side of the bottom cover would mean some very finicky work to try to get everything to match. Leaving them black is simpler at this point. |
|
|
StephenH
Happy is the man that findeth wisdom,... ouR escaPOD mods Former RPod 179 Current Cherokee Grey Wolf 24 JS |
|
|
|
|
Gregm
Senior Member

Joined: 20 Dec 2015 Location: Statesville NC Online Status: Offline Posts: 103 |
Post Options
Quote Reply
Posted: 01 Nov 2016 at 7:11am |
|
Looks good. Something else added to my to do list
|
|
|
Gregm
2014 171 2015 Toyota Tacoma Prerunner |
|
|
|
|
Grandpa Hiker
Senior Member

Joined: 04 Jan 2015 Location: Martinsville, V Online Status: Offline Posts: 143 |
Post Options
Quote Reply
Posted: 01 Nov 2016 at 9:10am |
|
I just added it my list as well.
|
|
|
Rob & Becky
2014 Ford Explorer 3.5 SOHC V6 2015 R-179 Pod aka Piddle Pod "Life is not about waiting for the storms to pass, it is about learning to dance in the rain!!" |
|
|
|
|
StephenH
podders Helping podders - pHp
Joined: 29 Nov 2015 Location: Wake Forest, NC Online Status: Offline Posts: 6289 |
Post Options
Quote Reply
Posted: 09 Nov 2016 at 9:46pm |
|
Here are two simple mods that are quite useful:
1. We had previously purchased a couple of LED lights from Aldi. These are a little light bar that has a motion sensor. One is in our laundry area at home. I had the second one for a while and was thinking of how I could use it. I came up with the idea to mount it in the wardrobe closet, which is rather dark. I think you will see that it provides good light and since it has a motion detector, it turns on automatically when the door is opened. To save battery life, I have it set for a short time-out after which it shuts itself off. 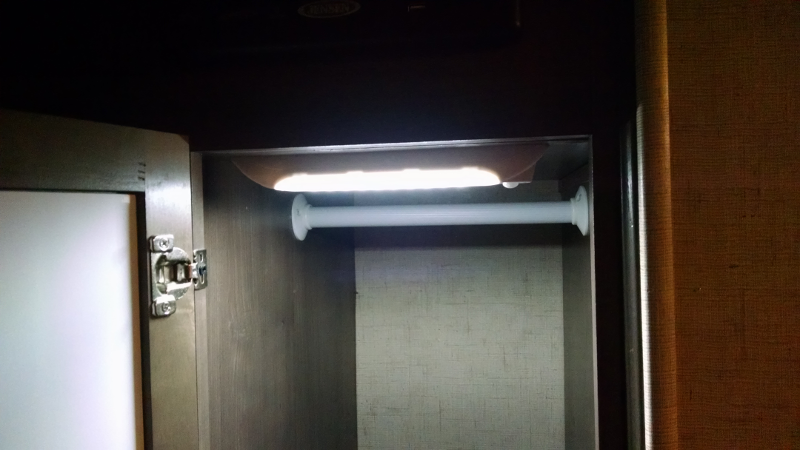 The light also does a good job of lighting the drawers when they are pulled out.  2. My wife had complained about the lighting for the sink area. The two lights that are in the kitchen area are located so that they do not provide much light for the sink. I was originally going to use the light above, but decided it just did not look good enough to use there. I found instead this Rite Lite LED Track Light on Amazon. It turns out that this not only provides much better lighting for the sink area, but it solves the problem of having a switch near the door so we can turn a light on and not come in to a dark R-Pod. It has a remote which I will mount to the wall (right now, it is sitting on the counter next to the door). I don't have to mess with any wiring this way. 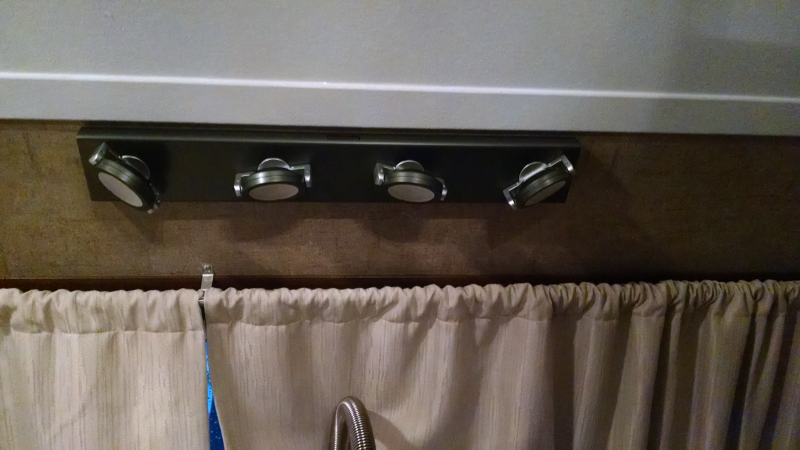 And lit: 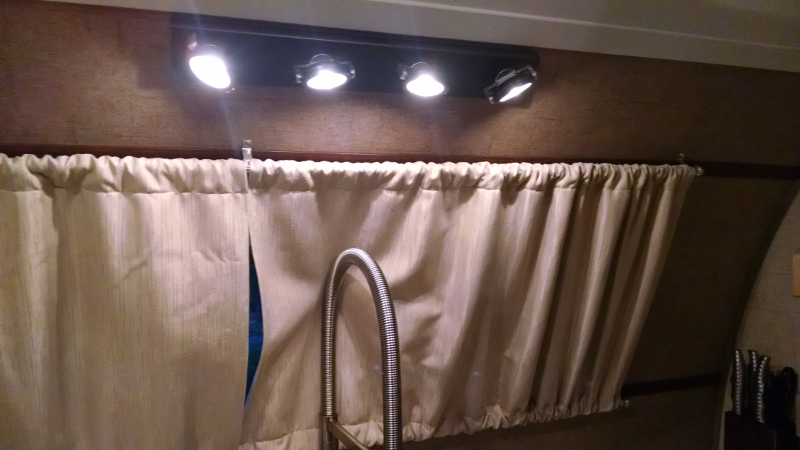 The heads swivel so that I can aim them to provide the best task lighting, not only for the sink, but for the sides as well. My wife is happy with this mod.  |
|
|
StephenH
Happy is the man that findeth wisdom,... ouR escaPOD mods Former RPod 179 Current Cherokee Grey Wolf 24 JS |
|
|
|
|
Gregm
Senior Member
Joined: 20 Dec 2015 Location: Statesville NC Online Status: Offline Posts: 103 |
Post Options
Quote Reply
Posted: 10 Nov 2016 at 7:10am |
|
Nice lights. For the one above the sink,how does it mount? Screws or adhesive? Thanks,
|
|
|
Gregm
2014 171 2015 Toyota Tacoma Prerunner |
|
|
|
|
Post Reply
|
Page <1 7891011 58> |
| Forum Jump | Forum Permissions You cannot post new topics in this forum You cannot reply to topics in this forum You cannot delete your posts in this forum You cannot edit your posts in this forum You cannot create polls in this forum You cannot vote in polls in this forum |


