
|
ouR escaPOD mods |
Post Reply 
|
Page <1 4142434445 58> |
| Author |
 Printable Version Printable Version Google Google Delicious Delicious Digg Digg StumbleUpon StumbleUpon Windows Live Windows Live Yahoo Bookmarks Yahoo Bookmarks reddit reddit Facebook Facebook MySpace MySpace Newsvine Newsvine Furl Furl Topic Search Topic Search  Topic Options Topic Options
|
StephenH 
podders Helping podders - pHp 

Joined: 29 Nov 2015 Location: Wake Forest, NC Online Status: Offline Posts: 6288 |
 Post Options Post Options
 Quote Reply Quote Reply
 Topic: ouR escaPOD mods Topic: ouR escaPOD modsPosted: 07 Apr 2020 at 9:21pm |
|
Okay. I have the charger installed. I can't finish the Frontier's wiring until the parts arrive from eTrailer, but I got it together sufficiently to test the operation of the charger. More pictures will have to wait for daylight, but here is the battery and charger setup.   The input wires are 6AWG. Renogy says that 12AWG wiring would be okay for the output wiring, but I used 10AWG. When I tested it, the charger was operating as expected. Now I can be sure to have the battery charged, plus I finally have sufficient power going to the battery to allow running the refrigerator on battery while we are on the road. That will save the propane for use when we are stopped or boondocking. The input wires are run thus: Negative wire runs from the negative input terminal through the battery compartment and through a new hole lined with a plastic 3/4" bushing connector inserted into a hole drilled in the bottom between the frame rail and the fresh water tank. The wire is then attached to the frame using one of the existing screws located just aft of the opening which is used to hold the other wires running along the frame. The hole is lined with a 3/4" Insulated Bushing which threads onto the other piece and holds it in place. The Positive wire runs from the charger's positive input terminal to the terminal of a 30A circuit breaker, which is what Renogy recommends to protect the charger (I could have used a fuse also). The other terminal of the circuit breaker continues the run of the positive cable which goes through the same fitting. The positive lead is then attached to the existing wiring run with zip-ties. It is currently runnign to be co-located with the existing trailer umbilical. I think it will be easiest to have the two connectors side-by-side, but that may have to change once the 2-pole connector arrives and I see if it will work where I am thinking of placing it. The D+ signal wire is attached to the terminal of the 30A breaker. Normally, this would be connected to an ignition circuit, but since I am using a battery isolator to make sure the circuit is live only when the vehicle is running, this also becomes a logical point for attaching the D+ wire. It works just as I expected. When the vehicle is off, the circuit is not energized. When the vehicle starts, the isolator relay closes, sending power through the wire. Most of the wiring diagrams I was able to find for the DC-to-DC charger seem to be written with the assumption that it will be installed in a motor home. I have had to figure out how to make it work with the RPod. I will post pictures of the Frontier's wiring tomorrow.
|
|
|
StephenH
Happy is the man that findeth wisdom,... ouR escaPOD mods Former RPod 179 Current Cherokee Grey Wolf 24 JS |
|
 |
|
|
StephenH
podders Helping podders - pHp
Joined: 29 Nov 2015 Location: Wake Forest, NC Online Status: Offline Posts: 6288 |
Post Options
Quote Reply
Posted: 08 Apr 2020 at 11:08pm |
|
This is what it looks like under the hood of the Frontier with the exception that I re-routed the white wire which is going from one of the relay's terminals to a grounding screw. The other is connected to one of the only two ignition-controlled fuses I could find under the hood that I could fit the fuse tap into. I forgot to take a picture of that, so I will remedy that tomorrow. I also am still waiting on the socket and plug parts to finish the job.  |
|
|
StephenH
Happy is the man that findeth wisdom,... ouR escaPOD mods Former RPod 179 Current Cherokee Grey Wolf 24 JS |
|
|
|
|
StephenH
podders Helping podders - pHp
Joined: 29 Nov 2015 Location: Wake Forest, NC Online Status: Offline Posts: 6288 |
Post Options
Quote Reply
Posted: 09 Apr 2020 at 7:08pm |
|
The parts came in, but too late to get them mounted today. I found that the mounting bracket for the 2-pole connector is not going to work as is, so I am making a shim to add some space to allow for the lid to open. It would work if I mounted it upside-down, but I don't want to do that. Anyway, since I don't have those pictures yet, I will add one for the fuse box showing how I tapped into the circuit to power the relay. Also, I could never find which fuse would cut the power to the 7-pole connector so the idea hit me to just disconnect the wire on the trailer end from the little junction box. I sealed it in a little shrink tubing so it will be easy to put it back on if and when I decide to revert the RPod back to lead-acid batteries, such as if we upgrade and I want to move the LiFePO4 battery to a newer model. This has the benefit of not impacting the TV's connection in case the Hayes Sway-Master requires that power to be available.  |
|
|
StephenH
Happy is the man that findeth wisdom,... ouR escaPOD mods Former RPod 179 Current Cherokee Grey Wolf 24 JS |
|
|
|
|
StephenH
podders Helping podders - pHp
Joined: 29 Nov 2015 Location: Wake Forest, NC Online Status: Offline Posts: 6288 |
Post Options
Quote Reply
Posted: 11 Apr 2020 at 3:09pm |
|
And--the completed job! I had a little problem at first. Where I had connected the ground wire from the connector on the truck was not adequate. I had a set of jumper cables and used them to connect the RPod and truck together and it was working. That is how I narrowed the problem down to a ground issue. That is now resolved by drilling and tapping a new grounding point directly on the truck's frame. I took care of that and wrapped the two cables together (positive and negative) for the RPod's new connector. As stated, I disconnected the 12V line from the main 7-pin connector at the junction under the front corner of the RPod. The pictures will show these things. The only thing remaining is to make sure the new entry point is well sealed. I had sealant in there, but it fell out. I got as much as I could back in there (and some on the fresh water tank and elsewhere also, but I want to make sure it is well sealed. Now for the pictures.     For anyone thinking of doing this job, it does take more time and effort than I aoriginally anticipated. However, it should be well worth the effort to finally have a reliable power solution that will not drain the start battery in the Frontier, be able to charge the LiFePO4 battery properly, and have enough extra power to reliably both charge the battery and run the refrigerator simultaneously.  Edit: I did a little clean-up on the TV's negative wire, making it a direct connection to the frame. That is better. I also wrapped the two wires together to the connector. I have tested it, and the isolation relay is doing the job I wanted it to do. It cuts off the power when the engine shuts off so that the Frontier's start battery is isolated from the LiFePO4 battery. I'm happy with the way this turned out.
|
|
|
StephenH
Happy is the man that findeth wisdom,... ouR escaPOD mods Former RPod 179 Current Cherokee Grey Wolf 24 JS |
|
|
|
|
StephenH
podders Helping podders - pHp
Joined: 29 Nov 2015 Location: Wake Forest, NC Online Status: Offline Posts: 6288 |
Post Options
Quote Reply
Posted: 05 May 2020 at 9:20pm |
|
I spoke elsewhere about my no longer noisy water pump. It turns out that there was a washer inside that had likely been pinched in between the housing and the diaphragm that worked loose over the 4+ years we have owned it and started rattling intermittently, especially when the pump started and stopped. However, as part of the routine maintenance of flushing the water heater, I noticed water coming out from under the pod, not just from the opening of the water heater. Some time back, I had mentioned to the dealer that the frame that holds the cover did not appear to be sealed properly and more silicone was added. It turns out that the silicone was likely slapped over a dirty place and did not adhere. I decided to remove the cover and outside frame to see what was up with this. When I did, this is what I found:   In the first picture, it is obvious why just adding some silicone did not stop it from leaking. It was applied over the label, which was not firmly attached. The water just ran behind the label. In the second, there was no label, but it was likely the surface was not cleaned prior to putting silicone there, so it also leaked. You can also see that the opening has square corners wile the water heater is rounded. There is the gap in the corners that also meant it was easier for the water to run into the opening since that was not sealed while the flange of the frame was. It irritates me that I did not think to pull that frame off before now to check that. It looked like there was plenty of silicone, so I did not think leaks could be happening there. It is good that I only drain the water heater once or twice a year. I'll have to make sure the area is thoroughly dry. I did not have any non-self-leveling lap sealant to use and I don't want to use silicone to put the frame back on. The sealant that was on there did not look like butyl rubber as was tan and not black. There is an RV place not too far from us now, so I will go there tomorrow to see if they have the sealant I need. In the meantime, I did take some Dow Dynaflex Ultra Advanced Exterior Sealant and sealed the bottom and part way up the sides of the water heater at the opening. I need to fill the top corners where it is a larger gap. Then I will seal that as well. The Dynaflex is somewhat like Dicor in that it stays flexible, but it does not stay sticky. The color I used is black. Since it will not be visible, that is okay. It is just another layer of protection against the leak recurring. I am working on getting the old silicone off the frame so when I seal it, it will stay sealed. If you have not checked your water heater cover, you might wish to. As I found, it isn't always sealed properly when it is installed.
|
|
|
StephenH
Happy is the man that findeth wisdom,... ouR escaPOD mods Former RPod 179 Current Cherokee Grey Wolf 24 JS |
|
|
|
|
StephenH
podders Helping podders - pHp
Joined: 29 Nov 2015 Location: Wake Forest, NC Online Status: Offline Posts: 6288 |
Post Options
Quote Reply
Posted: 09 May 2020 at 8:30am |
|
Thankfully, an RV place opened up near us so I was able to go and pick up a tube of Dicor Cap Sealant, Non-Sag. I had a choice of black or white. Since the cover for the water heater is black, I opted for the black sealant, #351CSB-1. Beside completing the seal around the heater using a bit of pool noodle to fill the gap between the heater and the square corners using the Dap Dynaflex sealant, I put a good bead of Dicor around the cover's frame to include more on the bottom of the heater where the cover sits to ensure that the bottom is totally sealed between the frame and the heater. I had enough on so that it would squeeze out when I put the screws back in. I cleaned up the excess and left it to cure. I am pretty sure that I will never again see water dripping from under the RPod when I drain the hot water tank again.   Yes, It is a bit sloppy, but it is all hidden behind the cover when it is closed.
 |
|
|
StephenH
Happy is the man that findeth wisdom,... ouR escaPOD mods Former RPod 179 Current Cherokee Grey Wolf 24 JS |
|
|
|
|
lostagain
Senior Member

Joined: 06 Sep 2016 Location: Quaker Hill, CT Online Status: Offline Posts: 2587 |
Post Options
Quote Reply
Posted: 09 May 2020 at 8:43am |
|
When I replaced the water heater in our Pod, instead of caulking the seam between the water heater housing and the flange around the door frame, I used a heavy duty hvac aluminum tape. It created a really tight and clean seal. This is the kind of tape I used: https://www.amazon.com/3M-Silver-Foil-Tape-3340/dp/B00DY9IXFI/ref=sr_1_3?dchild=1&keywords=aluminum+hvac+tape&qid=1589031490&sr=8-3
|
|
|
Never leave footprints behind.
Fred & Maria Kearney Sonoma 167RB Our Pod 172 2019 Ford F-150 4x4 2.7 EcoBoost |
|
|
|
|
StephenH
podders Helping podders - pHp
Joined: 29 Nov 2015 Location: Wake Forest, NC Online Status: Offline Posts: 6288 |
Post Options
Quote Reply
Posted: 09 May 2020 at 9:05am |
|
I could have done that if I had thought about it since I do have some of the aluminum tape left over from my furnace diverter project. It is too late to do that now since I don't want to go through removing all the sealant I just applied.
|
|
|
StephenH
Happy is the man that findeth wisdom,... ouR escaPOD mods Former RPod 179 Current Cherokee Grey Wolf 24 JS |
|
|
|
|
bhesse
Newbie 

Joined: 30 May 2019 Location: WA Online Status: Offline Posts: 9 |
Post Options
Quote Reply
Posted: 19 Jun 2020 at 12:36pm |
|
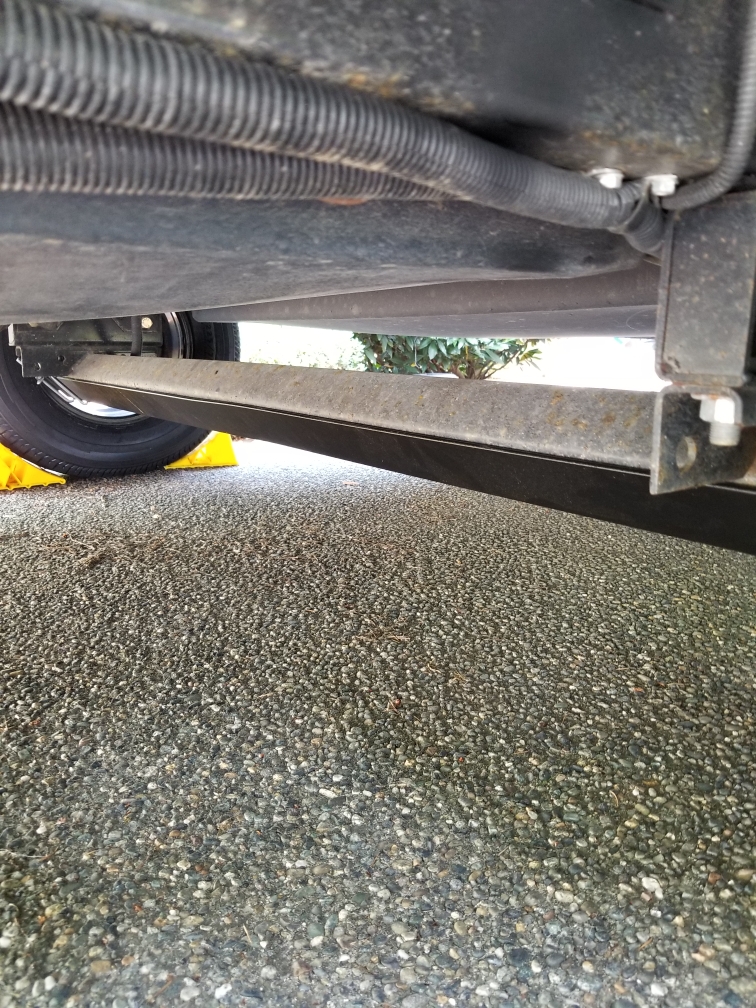
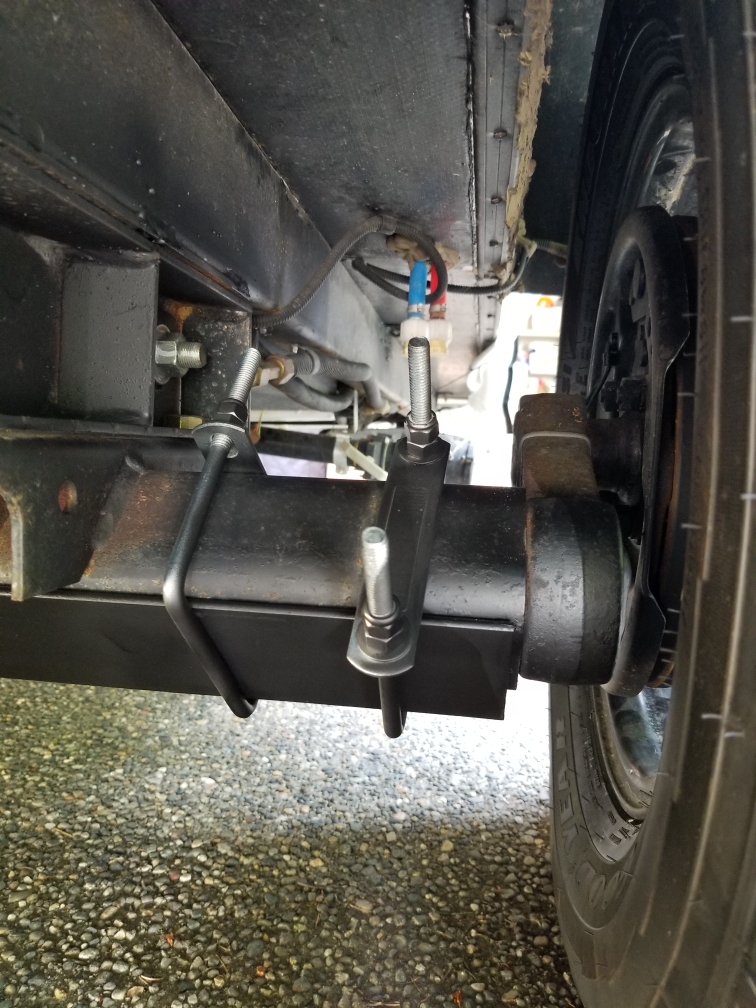
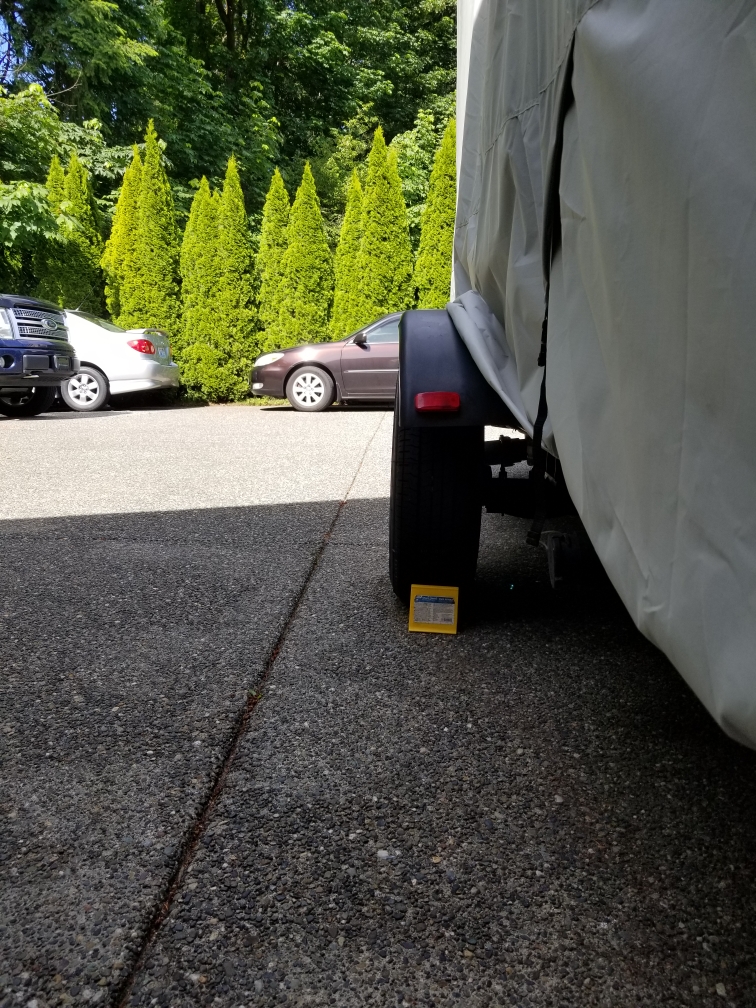
I followed your final instructions, had angle cut and bowed at metal shop.
Had tires replaced and we're off at installation, (greased bearings) Now my tires are just a little in, instead of bowed out, I am sure it will settle Thanks for this mod |
|
|
2015 RP-178
|
|
|
|
|
bhesse
Newbie
Joined: 30 May 2019 Location: WA Online Status: Offline Posts: 9 |
Post Options
Quote Reply
Posted: 19 Jun 2020 at 1:04pm |
|
|
|
2015 RP-178
|
|
|
|
|
Post Reply
|
Page <1 4142434445 58> |
| Forum Jump | Forum Permissions You cannot post new topics in this forum You cannot reply to topics in this forum You cannot delete your posts in this forum You cannot edit your posts in this forum You cannot create polls in this forum You cannot vote in polls in this forum |


