|
|
Post Reply 
|
Page 123> |
| Author |
 Printable Version Printable Version Google Google Delicious Delicious Digg Digg StumbleUpon StumbleUpon Windows Live Windows Live Yahoo Bookmarks Yahoo Bookmarks reddit reddit Facebook Facebook MySpace MySpace Newsvine Newsvine Furl Furl Topic Search Topic Search  Topic Options Topic Options
|
Subzilla 
Senior Member 

Joined: 23 Jan 2017 Location: Concord, NC Online Status: Offline Posts: 302 |
 Topic: Pod People's 179 Mod's Topic: Pod People's 179 Mod'sPosted: 15 Aug 2018 at 12:08pm |
|
Nice mods, Vann. We've done some of the same things but you have quite a few things I haven't thought of. Dang it, every time I get on this forum, I find something else I want to do to our Pod. My to-do list keeps getting longer and this thing called employment keeps getting in the way of completing that list. Keep at it......
|
|
|
Mark
Concord, NC 2017 RP 179 "Podzilla" 2011 Silverado 1500 4X4 |
|
 |
|
|
GlueGuy
Senior Member

Joined: 15 May 2017 Location: N. California Online Status: Offline Posts: 2630 |
Posted: 12 Aug 2018 at 4:15pm |
|
Don't confuse recirculating heated air versus combustion air. The intake and exhaust for the furnace combustion are both outside the pod, and do not mix with the heated air. I can imagine that having both hot air and the return being inside the same chamber might affect efficiency though. Two air streams colliding, or just the hot air going back into the return; neither would be desirable.
|
|
|
bp
2017 R-Pod 179 Hood River 2015 Ford F150 SuperCrew 4WD 3.5L Ecoboost |
|
|
|
|
Richand Cindy
Senior Member

Joined: 16 Apr 2016 Location: New Jersey Online Status: Offline Posts: 328 |
Posted: 12 Aug 2018 at 4:06pm |
|
I do not understand the science of it but it is recommended that all furnaces and fireplaces use cold air rather than already heated air. In our homes we had a hot water heater that received its air through a duct connected outside and also the fireplace had two ducts leading outside to draw in cold air rather than using the air from the room. Claimed it was more efficient. It would even be better if the air intake could be ducted to draw air from outside or at least away from the hot air exhaust.
|
|
|
OLD 2017.5 RPOD 180 + 2015 Jeep Cherokee Trailhawk
NEW: 2018 Passport Elite 23RB + 2017 Ram 1500 Diesel |
|
|
|
|
StephenH
podders Helping podders - pHp

Joined: 29 Nov 2015 Location: Wake Forest, NC Online Status: Offline Posts: 6291 |
Posted: 12 Aug 2018 at 2:26pm |
|
StephenH
Happy is the man that findeth wisdom,... ouR escaPOD mods Former RPod 179 Current Cherokee Grey Wolf 24 JS |
|
|
|
|
Pod People
Senior Member
Joined: 22 Sep 2011 Location: Chapel Hill,NC Online Status: Offline Posts: 1067 |
Posted: 12 Aug 2018 at 12:53pm |
|
Hello Stephen thanks for looking at our mods. I see your suggestion. However, I don't think I understand the problem. If the cold air return's purpose is to provide intake air into the heater to be warmed, would not using"pre-warmed" air make the heater more efficient? why does the heater need a "cold" air return since it is not ducted ? I would appreciate your insight. Thank you Vann
|
|
|
Vann & Laura 2015 RPod 179 
|
|
|
|
|
StephenH
podders Helping podders - pHp
Joined: 29 Nov 2015 Location: Wake Forest, NC Online Status: Offline Posts: 6291 |
Posted: 12 Aug 2018 at 9:07am |
|
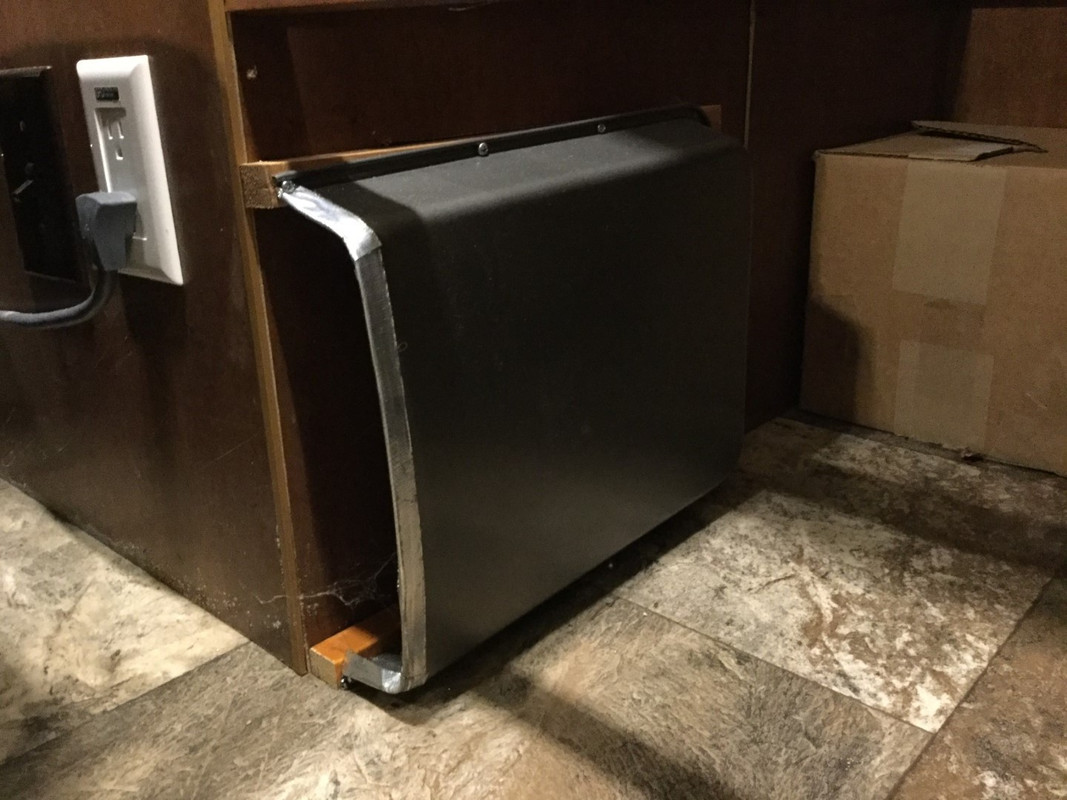
Please re-think your heat diverter. If you look at the grill for the furnace, there is a square section. The larger, L-shaped section is heat output. The square section, along with slots around the perimeter are cold air returns. By putting the pan over the whole thing, you are pulling heated air back through the furnace. You need to allow for the cold air return by modifying your design to avoid the perimeter and square return sections. Instead of a diverter, I put a ten inch O2 Cool fan at the base of the bed on the wardrobe side to pull the warm air out from under the bed and distribute it to the rest of the R-Pod. The end next to the slide-out then is free to act as the cold-air return. One of these days, I will make a diverter that is designed to avoid the problem or maybe convert to a hydronic system that uses the water heater as a heat source instead. Both of those have been detailed by others here in the forum.
|
|
|
StephenH
Happy is the man that findeth wisdom,... ouR escaPOD mods Former RPod 179 Current Cherokee Grey Wolf 24 JS |
|
|
|
|
Pod People
Senior Member
Joined: 22 Sep 2011 Location: Chapel Hill,NC Online Status: Offline Posts: 1067 |
Posted: 11 Aug 2018 at 10:53pm |
|
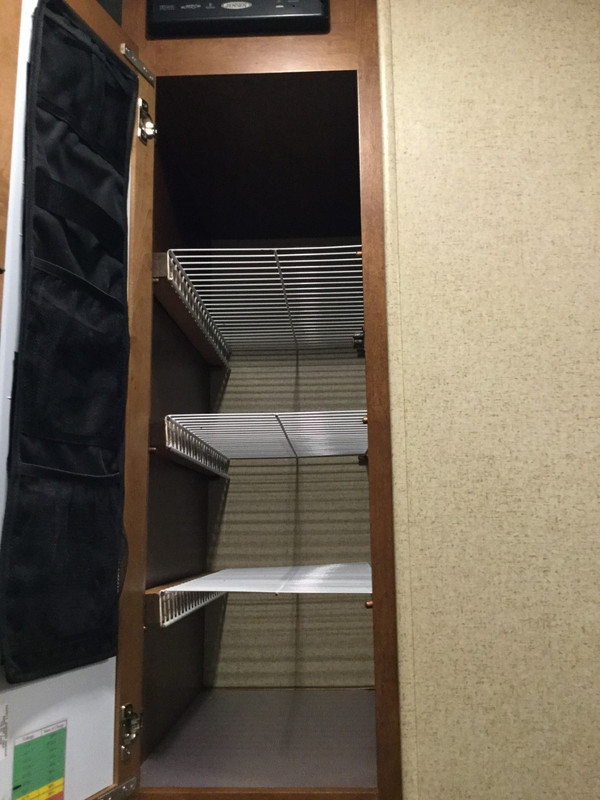
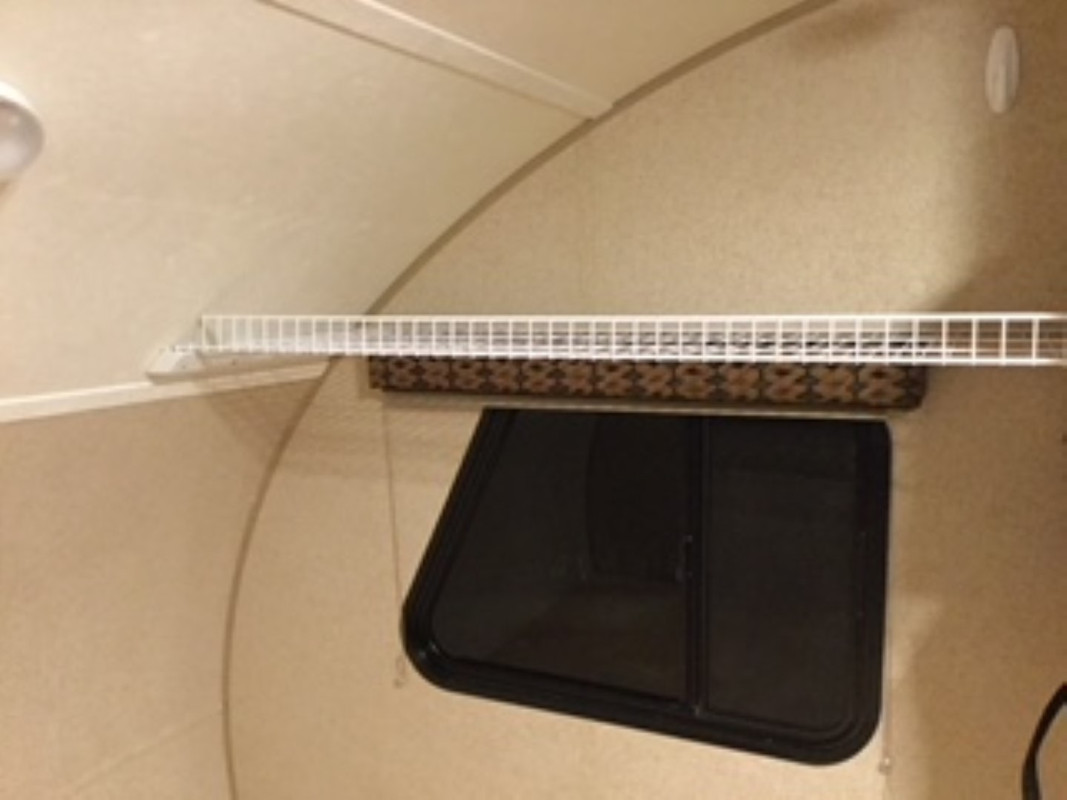
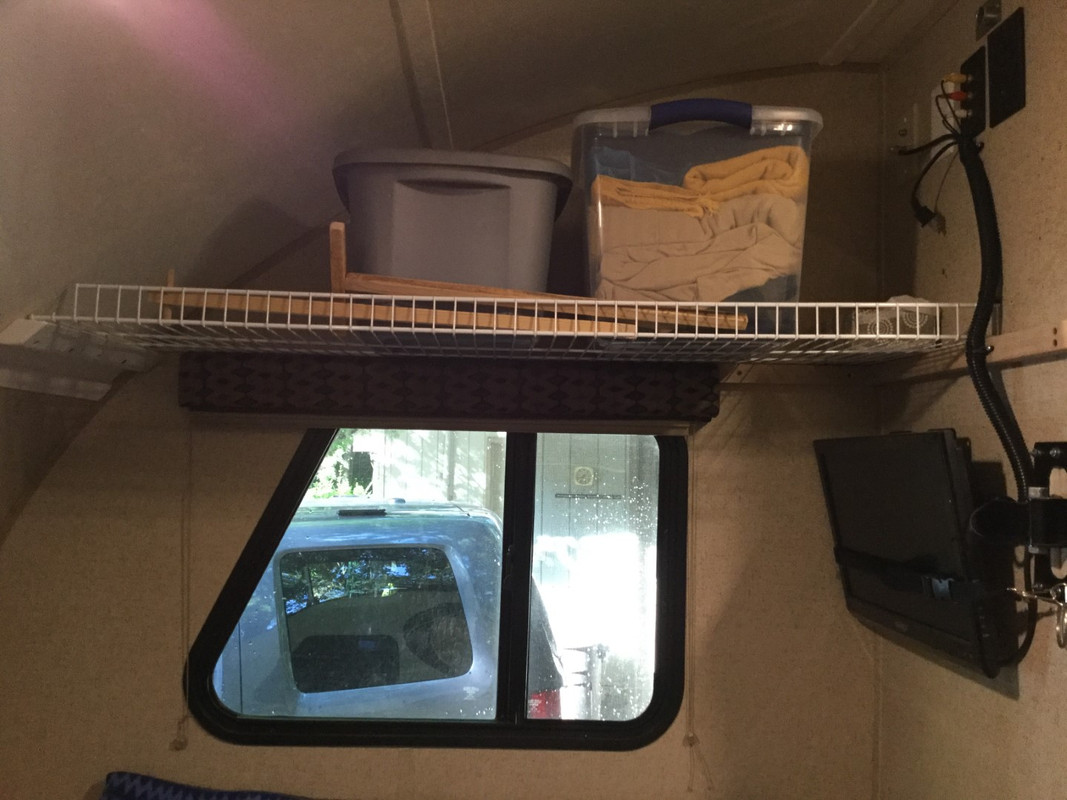
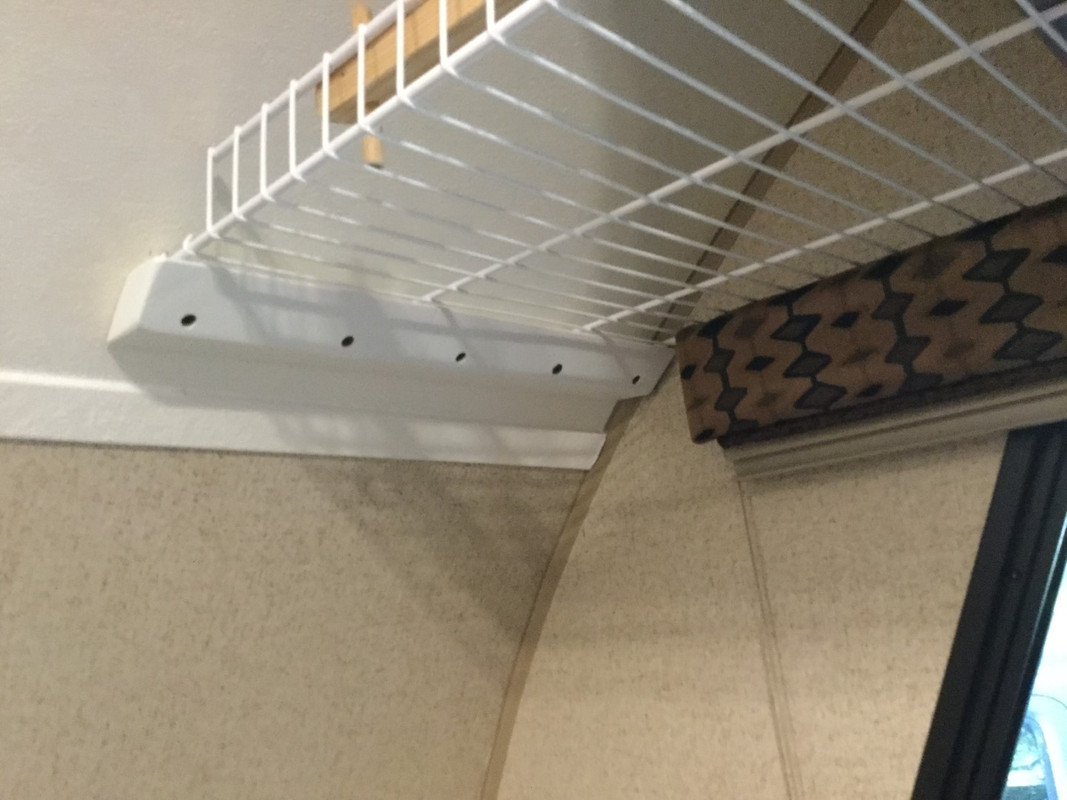
Here is the next installment of interior mods for our 179 We added 3 wire shelves in the wardrobe so that we each have 2 shelves for our clothes. There is also a pocket unit velcroed to the inside wardrobe door.
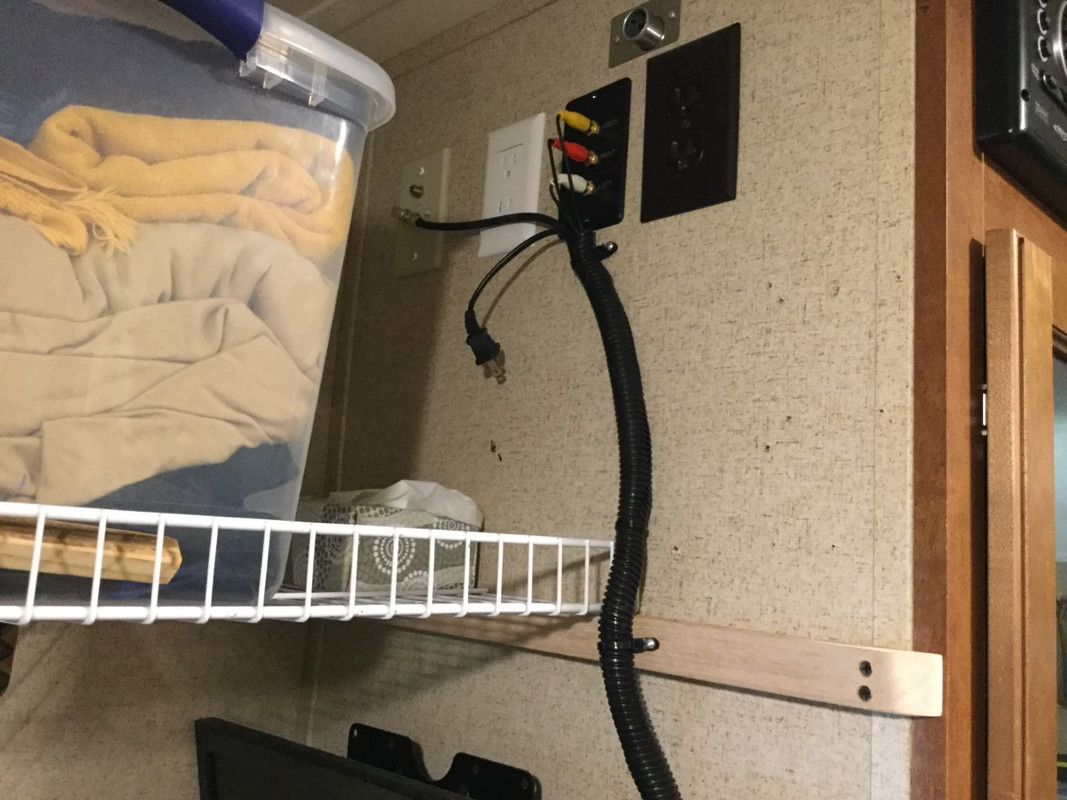
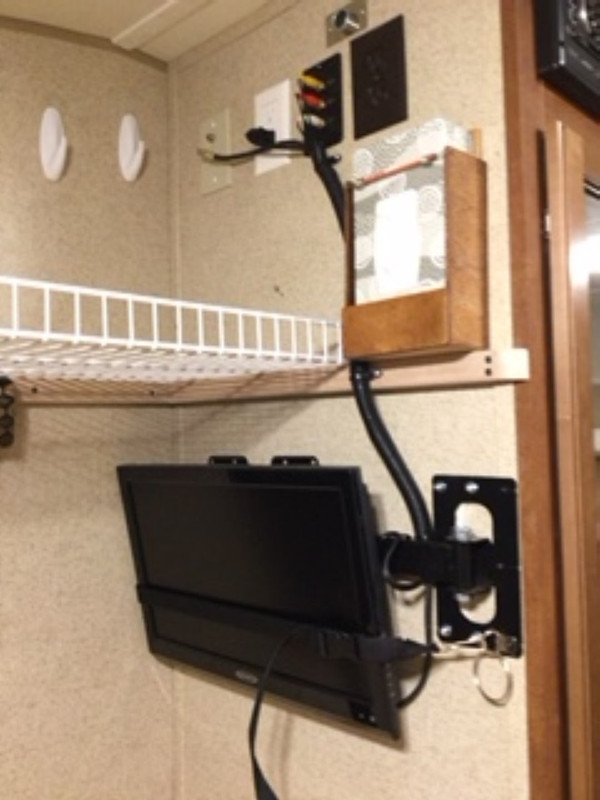
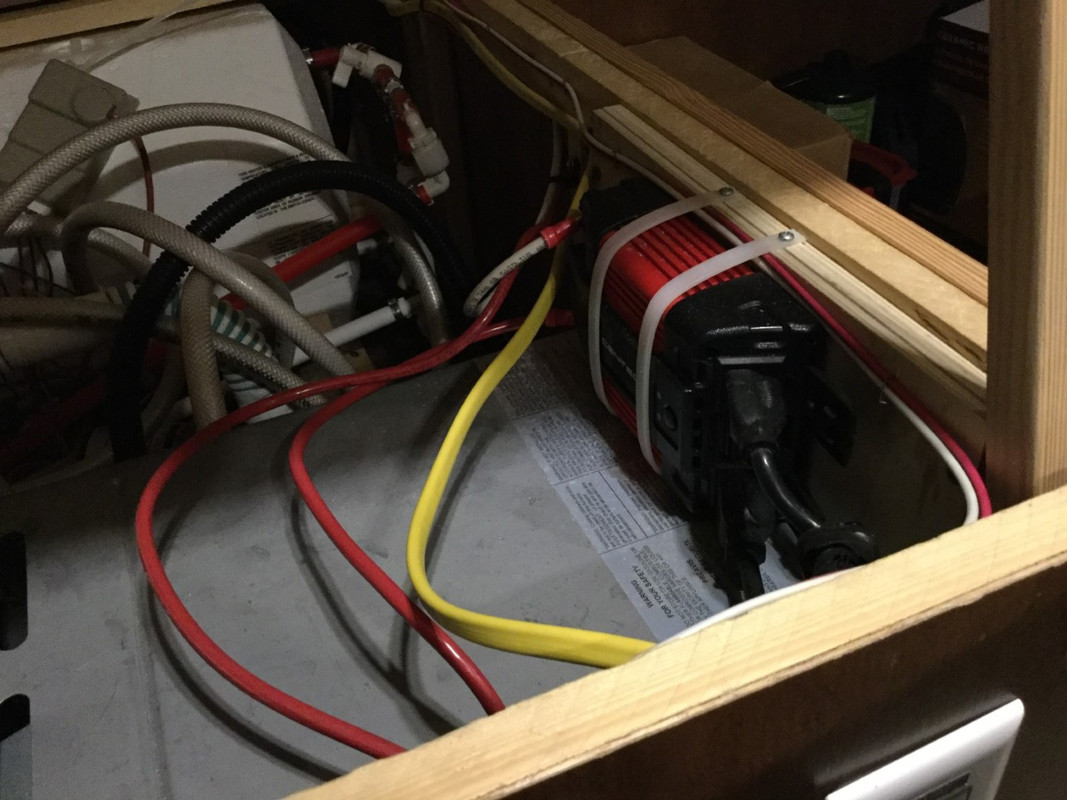
I installed a 400watt inverter under the bed. The inverter draws power continuously, so I put an inline switch to power it on/off. I added 2 110 receptacles that are connected to the inverter. The inverter switch and the 2 receptacles are brown to differentiate them from the standard white devices. One receptacle is over the tv for use with the tv or the fan. The other is below the bed for a power strip under the dinette. The power strip can be connected to either the 12 volt inverter or the standard receptacle. I also added 2 12 volt receptacles in the same locations.
We used a Lasagna pan to make a diverter for the heater. I added wood furring strips on 3 sides to give it a little more clearance. It redirects the heat flow nicely and allows us to use the under bed storage area more completely. Before winter use, I will insulate the pan.
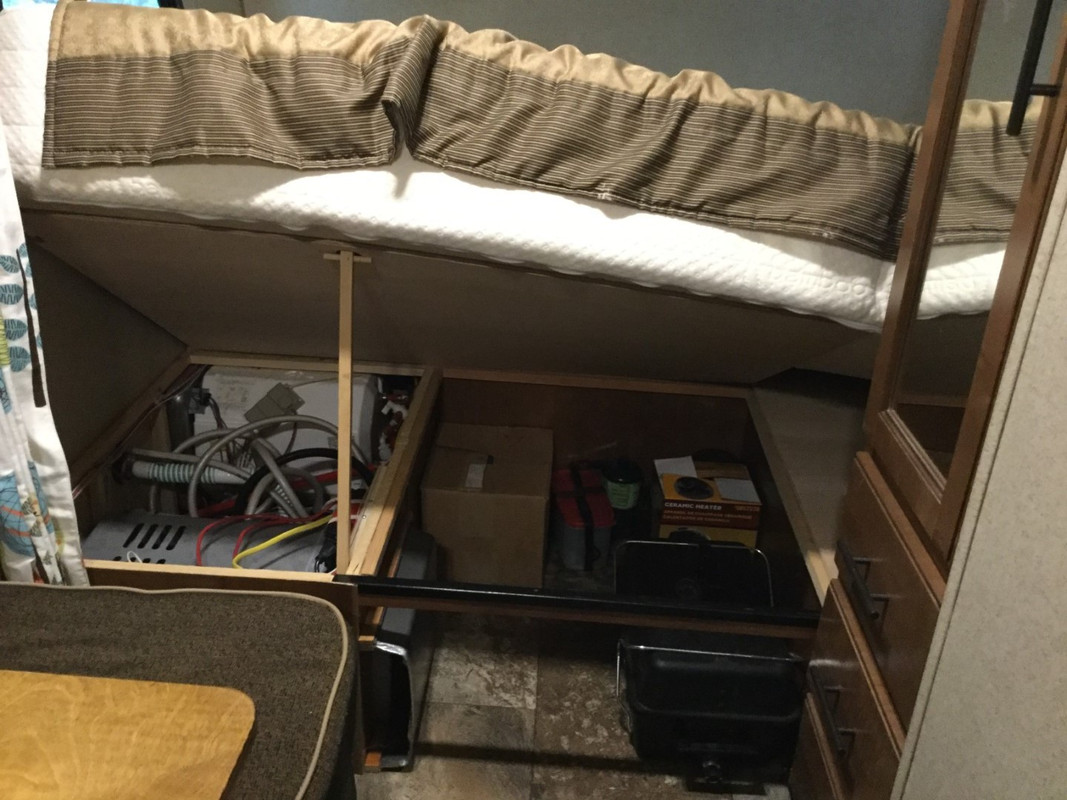
I removed the wood board that spans the storage area under the bed and replaced it with a metal U channel and smaller piece of wood. This gives us 2” of additional height for our storage bins under the bed
I also recut the plywood under the bed and hinged the front section for easier access to the winterization valves and under bed storage area
We did a lot of mods that don’t require pictures- Added additional reinforcement straps to both black and gray tank valves; we switched the double/single LED ceiling lights around so that the kitchen has more lighting (double unit) and the bed area less light (single unit); installed wire mesh/screen covers for the water heater, heater and refrigerator vents; added a hanging rod in the bath; added multiple Command hooks for clothing, hats and towels; created shoe storage in both hassocks; installed a paper towel holder on kitchen wall; added an indoor /outdoor thermometer to the refrigerator/freezer: there are still more in the works-not completed, but anticipated: a custom awnin, new curtains, mosquito netting for the exit window and who knows what else I hope this will help some other podders with ideas. It can be hard to get started, but doing mods is so worthwhile. The R Pod is a great platform to start making your personal camper. I will be glad to answer questions. Safe travels Vann |
|
|
Vann & Laura 2015 RPod 179
|
|
|
|
|
StephenH
podders Helping podders - pHp
Joined: 29 Nov 2015 Location: Wake Forest, NC Online Status: Offline Posts: 6291 |
Posted: 11 Aug 2018 at 6:48pm |
|
Those are some very nice mods. I have been using a spring-tension rod for our curtains. I think I will take a hint from you and make wooden brackets for the ends. I also will have to see if I can re-work my kitchen drawers. I had previously lengthened the bottom two, but the top is still short due to the drain hose for the sink being in the way. I may re-work the drain as well to see if I can make more usable space and then change the top drawer to take advantage of it like you did. I'm not sure I could move our propane tank any farther forward. The space between it and the jack is tied up with the support leg for the Stomberg-Carlson Trailer Tray. Since my generator travels there, I won't be moving the tanks but may at some point swap for a dual-tank setup.
|
|
|
StephenH
Happy is the man that findeth wisdom,... ouR escaPOD mods Former RPod 179 Current Cherokee Grey Wolf 24 JS |
|
|
|
|
Pod People
Senior Member
Joined: 22 Sep 2011 Location: Chapel Hill,NC Online Status: Offline Posts: 1067 |
Posted: 11 Aug 2018 at 5:54pm |
|
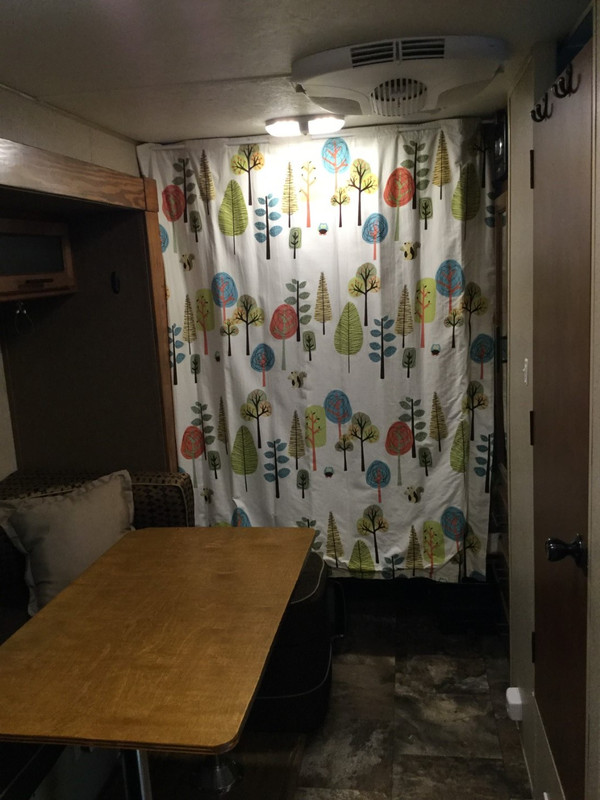
We replaced the ugly fake leather/naugahyde trim around the slide out with real wood stained to match the interior.
  A major turn off was the useless dining table. Since there are just 2 of us, we do not need to make the dinette into a bed, so we do not need to keep the table. We scrapped the original table and built a new one. The original table was 20”x38” and the new one is 24”x42”. It is ¾” birch plywood sitting on 2 metal columns that are mounted to 5/8” plywood on the floor. The floor plywood is sized to fit tightly between the hassocks so it does not move. The table is easy to disassemble for travel, can be used outside in the R dome and is very sturdy.
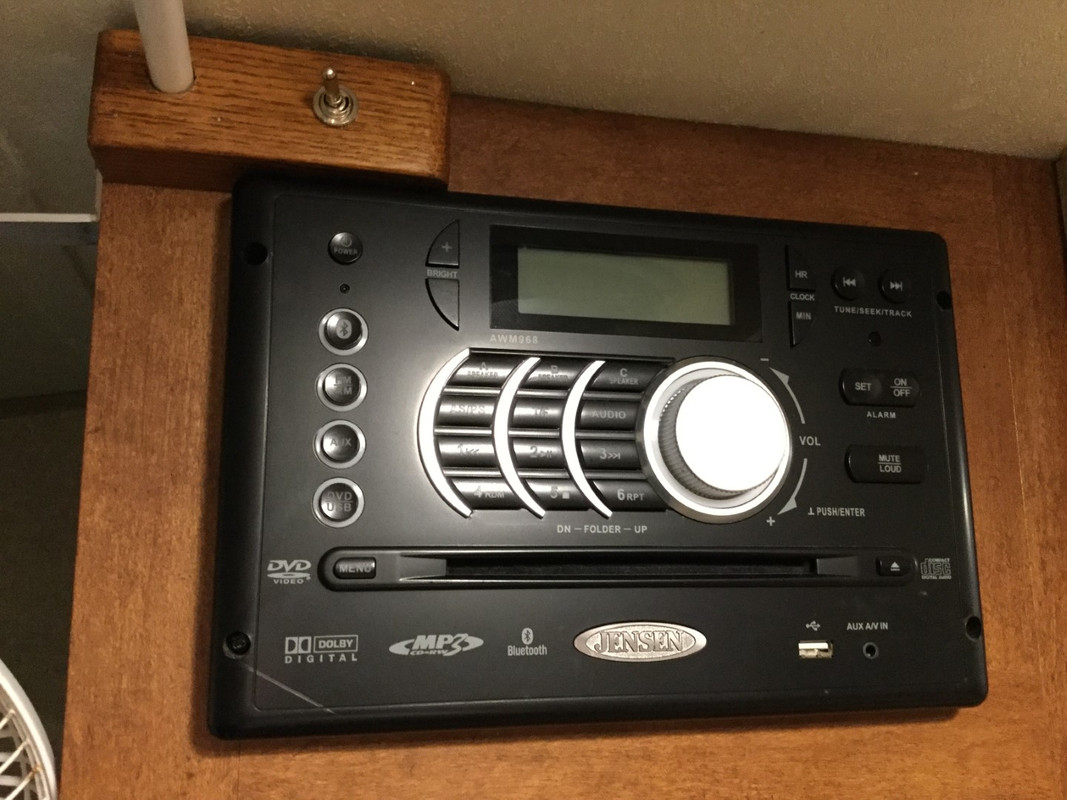
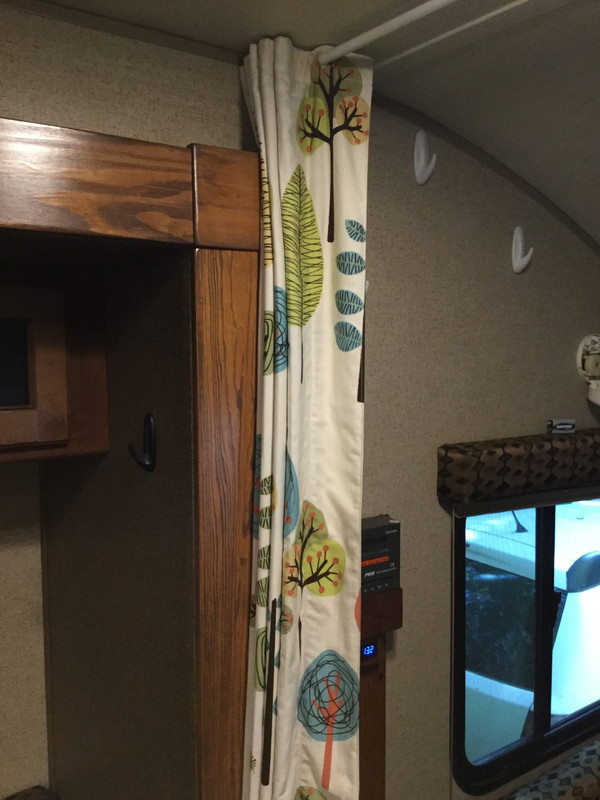
Laura made a nice privacy and light blocking curtain for the bedroom area. It is hung on a 5/8” aluminum tube with ½” wood dowel inside for strength. I made custom wood curtain blocks to support the rod at each end. The rod support on the radio side also contains a power switch to completely turn off the entertainment system.
We wanted a shelf over the bed, but did not like the feel of
it being over our heads. So, we put the
shelf in a front to back orientation on the curb side. This required relocation of the tv, which we
lowered. We added a metal plate on the inside of the wardrobe to help support
the tv. Now, the tv is in a much better
position for watching from the couch or in bed.
more later Vann |
|
|
Vann & Laura 2015 RPod 179
|
|
|
|
|
Pod People
Senior Member
Joined: 22 Sep 2011 Location: Chapel Hill,NC Online Status: Offline Posts: 1067 |
Posted: 11 Aug 2018 at 5:43pm |
|
another mistake!! here is the counter top extension and stove cover 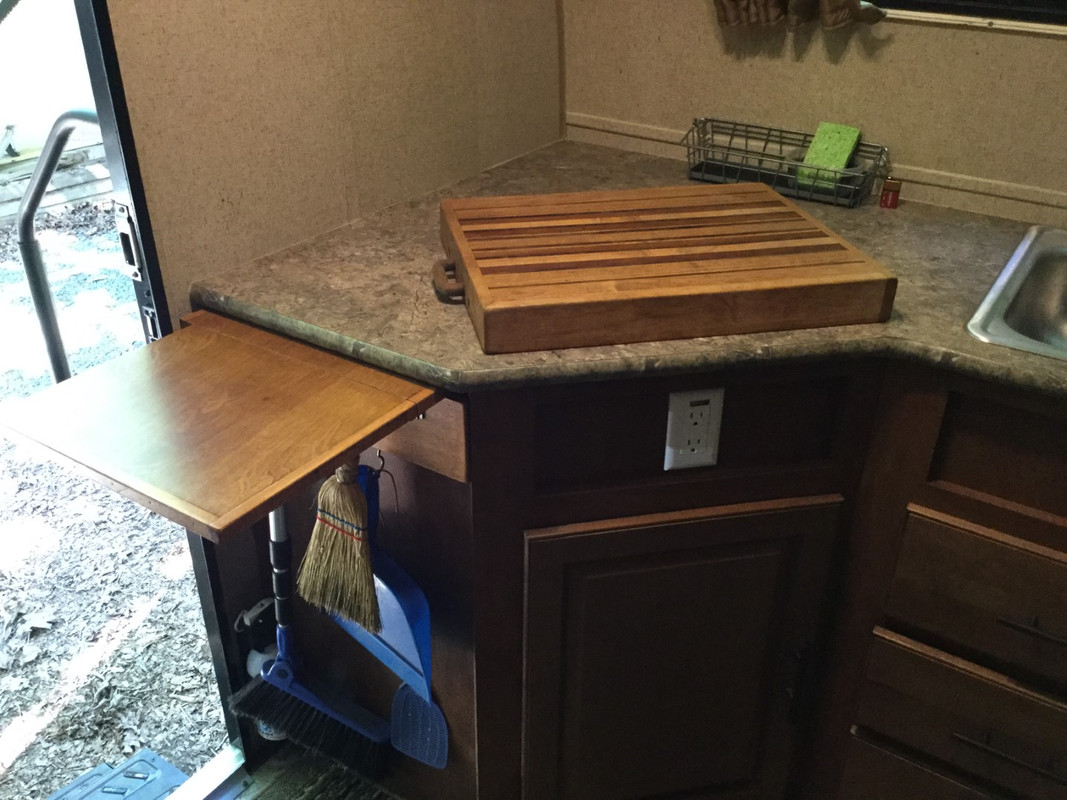 |
|
|
Vann & Laura 2015 RPod 179
|
|
|
|
|
Post Reply
|
Page 123> |
| Forum Jump | Forum Permissions You cannot post new topics in this forum You cannot reply to topics in this forum You cannot delete your posts in this forum You cannot edit your posts in this forum You cannot create polls in this forum You cannot vote in polls in this forum |


 Pod People's 179 Mod's