
|
List Your Mods: |
Post Reply 
|
Page <1 1011121314 78> |
| Author |
 Printable Version Printable Version Google Google Delicious Delicious Digg Digg StumbleUpon StumbleUpon Windows Live Windows Live Yahoo Bookmarks Yahoo Bookmarks reddit reddit Facebook Facebook MySpace MySpace Newsvine Newsvine Furl Furl Topic Search Topic Search  Topic Options Topic Options
|
lostagain 
Senior Member 

Joined: 06 Sep 2016 Location: Quaker Hill, CT Online Status: Offline Posts: 2595 |
 Post Options Post Options
 Quote Reply Quote Reply
 Topic: List Your Mods: Topic: List Your Mods:Posted: 04 May 2019 at 11:04am |
|
shande81, you can find the frame using a stud good quality stud finder. It will pick up both metal and wood. As for the construction of the roof, I believe it is framed with 2x2's perpendicular to the walls that are attached to the aluminum wall frame. inside is fiberglass insulation and it's covered with a big single sheet of fiberglass that extends from the bottom front of the trailer over the roof and to the bottom real of the trailer. There are some videos of the fabrication of the rPod that you can take a look at that will give you a very good idea of the basic structure.
By the way, welcome to the board and congratulations on your new acquisition.
|
|
|
Never leave footprints behind.
Fred & Maria Kearney Sonoma 167RB Our Pod 172 2019 Ford F-150 4x4 2.7 EcoBoost |
|
 |
|
|
shande61
Newbie 

Joined: 15 Dec 2017 Location: Idaho Online Status: Offline Posts: 2 |
Post Options
Quote Reply
Posted: 04 May 2019 at 10:46am |
|
Hello everyone. We have a 2016 RPOD 171. I am building a wooden cabinet to install over the window above the bed. It will be curved to match the ceiling. I want to attached it to the ceiling and wall above the window. From what I've found the walls are made from tubular Aluminum. Any ideas on how to best locate these? Another assumption is that the roof is wood. Is it solid wood? From front to back. Thank you all for any insight. We love our RPOD.
|
|
|
|
|
EchoGale
Senior Member
Joined: 10 Mar 2019 Location: FL Online Status: Offline Posts: 469 |
Post Options
Quote Reply
Posted: 18 Mar 2019 at 10:21am |
|
Hi everyone,
I've been busily working on making my 2016 172 "mine." So here's a first round of posted mods: 1. I removed the dinette table opening up the space and making more of a "living room" feel; this really made the pod feel bigger. I have a folding table to use when its needed. 2. I replaced the back cushions (that were too far back into the slope to be comfortable anyway) with piles of pillows and made bright covers for them. 3) I covered the valences in a coordinating fabric until I get to replacing those window covering altogether. 4) I removed the dark brown back curtain that blocked all the light and made a fabric roll-down shade to replace it. 5) I opened the under-dinette storage to be accessible without lifting the cushion and added storage bins. I've got a couple of nice pictures of all of this but I can't for the life of me figure out how to post them here.  Julie
|
|
|
Julie
|
|
|
|
|
dcard44
Newbie
Joined: 27 Feb 2019 Location: Oregon Online Status: Offline Posts: 2 |
Post Options
Quote Reply
Posted: 17 Mar 2019 at 10:55am |
|
How did you secure the dispenser in the wet bath? I have a 177, same bathroom and would like to add that too.
|
|
|
dcard44
|
|
|
|
|
deroosje
Newbie
Joined: 22 Feb 2019 Online Status: Offline Posts: 1 |
Post Options
Quote Reply
Posted: 25 Feb 2019 at 8:41am |
|
Anyone remove the entertaiment center out of the 176? would like to get rid of both top bunk and entertainment center to make a bigger bed but don't know what wiring is in the entertianment center. MOD NOTE. Since you asked the same question twice, I deleted the 2nd one.
|
|
|
|
|
MIK
Groupie 

Joined: 09 Jul 2017 Location: MA Online Status: Offline Posts: 42 |
Post Options
Quote Reply
Posted: 12 Dec 2018 at 2:45pm |
|
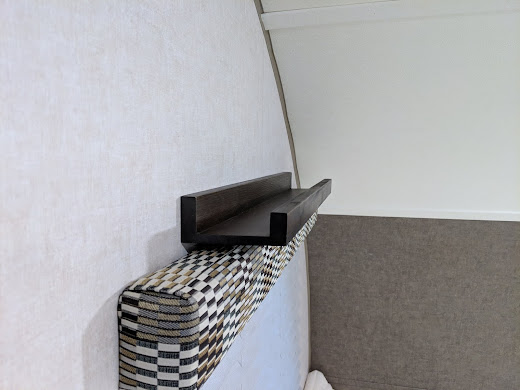
didn't want a big shelf over the bed in rpod 180, but needed something to place small items on - here is an alternative (bought it from target)
  |
|
|
2018 R-Pod 180
|
|
|
|
|
Brent S
Newbie
Joined: 25 Sep 2018 Location: SE USA Online Status: Offline Posts: 21 |
Post Options
Quote Reply
Posted: 07 Oct 2018 at 6:35am |
|
I like your idea of making the counter space more practical. I will see how I feel after I take it out and use the kitchen some before deciding anything on that. I was out of town for a few days last week so just got back to my tongue modifications yesterday. I finished sanding and priming the tongue after cutting off the single mounts for the gas and batteries. I also welded together a new battery mount that after cleaning and priming I will weld it to the top of the tongue today. I just bought the dual gas tank mount so only need to weld it to the tongue. I also bought a new jack for it yesterday. The previous owner hit it and it was tough to raise and lower. Adding extra life to the battery and gas supply was kind of common sense, as well as the solar to recharge the batteries, but I can’t wait to take it out on the first test run and see how everything is in use. Oh yeah, my running lights don’t work, so need to check that out too. Tail lights are fine at least.
|
|
|
|
|
Kevinscamps
Newbie

Joined: 14 Jul 2018 Location: Fort collins, c Online Status: Offline Posts: 37 |
Post Options
Quote Reply
Posted: 04 Oct 2018 at 3:00pm |
|
Actually should improve the performance of fridge on hot days by pushing a lot more air through it. And on cold days, shouldn't make much difference. since "hot air" is pretty much room temperature. In theory icing up could be a problem if I get condensation from the moist air coming off stove, but I live in Colorado so again should not be a problem. I was more worried about CO, but with louvers shouldn't be a problem. Also I may put in a damper to provide more separation between vent and exhaust port.
|
|
|
|
|
marwayne
Senior Member

Joined: 25 Oct 2011 Location: Edmonton AB Can Online Status: Offline Posts: 1004 |
Post Options
Quote Reply
Posted: 04 Oct 2018 at 12:40pm |
|
You may induce a problem behind the fridge by pushing hot air in the fridge compartment, there may not be enough cool air pushing through the cooling fins.
|
|
|
If you want something done right, do it yourself.
2011 RP172, 2016 Tundra 5.7 Litre, Ltd. |
|
|
|
|
Kevinscamps
Newbie
Joined: 14 Jul 2018 Location: Fort collins, c Online Status: Offline Posts: 37 |
Post Options
Quote Reply
Posted: 04 Oct 2018 at 12:16pm |
|
Stove range Vent. This is a mod I have not seen anybody else do yet, but is surprisingly easy and quick to do. I quickly tired of opening the window and running the fantastic fan while cooking breakfast. Nothing worse than freezing my butt off while cooking the pancakes!!! I moved the stove back against the wall and eliminated the dead space behind it, added a range vent that vents into the refrigerator vent space and added some prep space in front of the stove. It took all of 6 hours from start to finish including making the custom cutting the board. I will be adding a piece of stainless steel backsplash to protect the wall. I will probably just glue it to the luan, though in theory I should put in some spacers so it is not touching the wall. Process: Drill a hole in the wall with 4.25" hole saw cut in 1/2 piece of plywood, mark hole, drill hole slip in 4" louvered dryer vent, cut off extra part that goes through hole staple plywood to camper from inside screw vent to plywood. insulate the refrigerator compartment when you realize it is only seperated from the inside of camper by 3/16" luan!! Buy Heng industries 20" stainless steel rear vented rv 12V hood. Modify to vent downwards using HVAC boot, small piece of metal, and some tape. Use 4" elbow to direct out of the vent. Take off the puck light and wire to the fan. Moving the stove is even easier: Just remove cover, undo 4 holes, remove stove (undoing the gas flare joint makes this easier, though not strickly necessary) cut new hole by measuring old by drilling four corners and using a jigsaw, bend the flexible copper pipe a little bit, plunk stove in new hole screw in stove, test gas if you disconnected with some soapy water. cover old hole. All Done!! notes: If you like to use plug in appliances, move vent a few inches further over from where I placed so you can get at the outlet. Also I am venting into the refrigerator space, which is NOT going to pass code, but I could not come up with a use case that would cause problems, especially since the vent is louvered. You could easily vent right through the wall and it would work better with more airflow. I have had problems with dust getting into my old camper through the vents on rough Utah roads despite the louver, so I decided on the refrigerator compartment. https://postimg.cc/f3fJXvfr https://postimg.cc/gallery/iv7gvnjm/ |
|
|
|
|
Post Reply
|
Page <1 1011121314 78> |
| Forum Jump | Forum Permissions You cannot post new topics in this forum You cannot reply to topics in this forum You cannot delete your posts in this forum You cannot edit your posts in this forum You cannot create polls in this forum You cannot vote in polls in this forum |


