
|
|
Post Reply 
|
Page 123> |
| Author |
 Printable Version Printable Version Google Google Delicious Delicious Digg Digg StumbleUpon StumbleUpon Windows Live Windows Live Yahoo Bookmarks Yahoo Bookmarks reddit reddit Facebook Facebook MySpace MySpace Newsvine Newsvine Furl Furl Topic Search Topic Search  Topic Options Topic Options
|
kickhead70 
Newbie 

Joined: 19 Jul 2020 Location: Livermore Online Status: Offline Posts: 16 |
 Topic: Shower Leak Topic: Shower LeakPosted: 07 Sep 2020 at 7:41pm |
|
update! I was able to get in there, after a little more persistence, with a large channel lock to tighten down the flange collar. plumbers putty squeezed out from the top, and the flange leveled out and firmed up. it won't slide around anymore. However, in order to see where the leak was coming from, i cleared away all the black foam. how necessary is it to replace the foam? would great stuff work? posting pics in case this helps someone else someday. leak underneath: 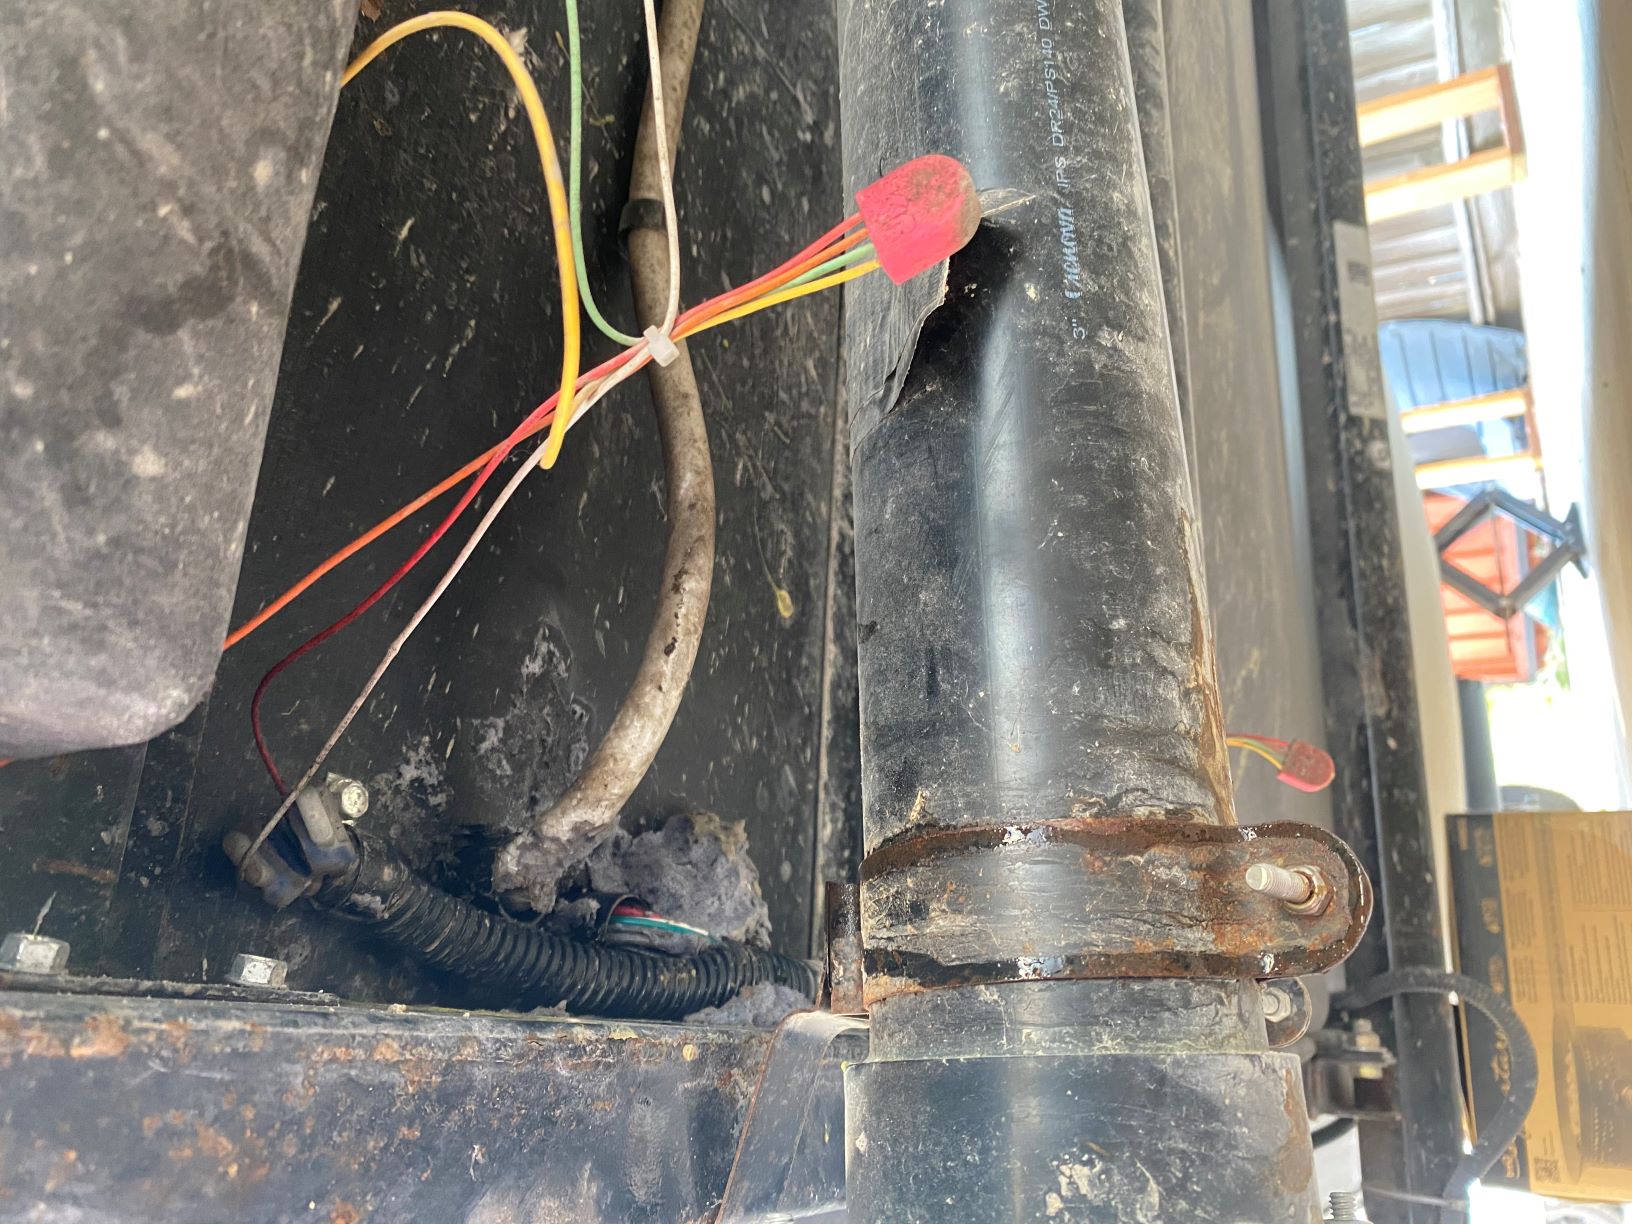 flange under shower drain (now tightened): 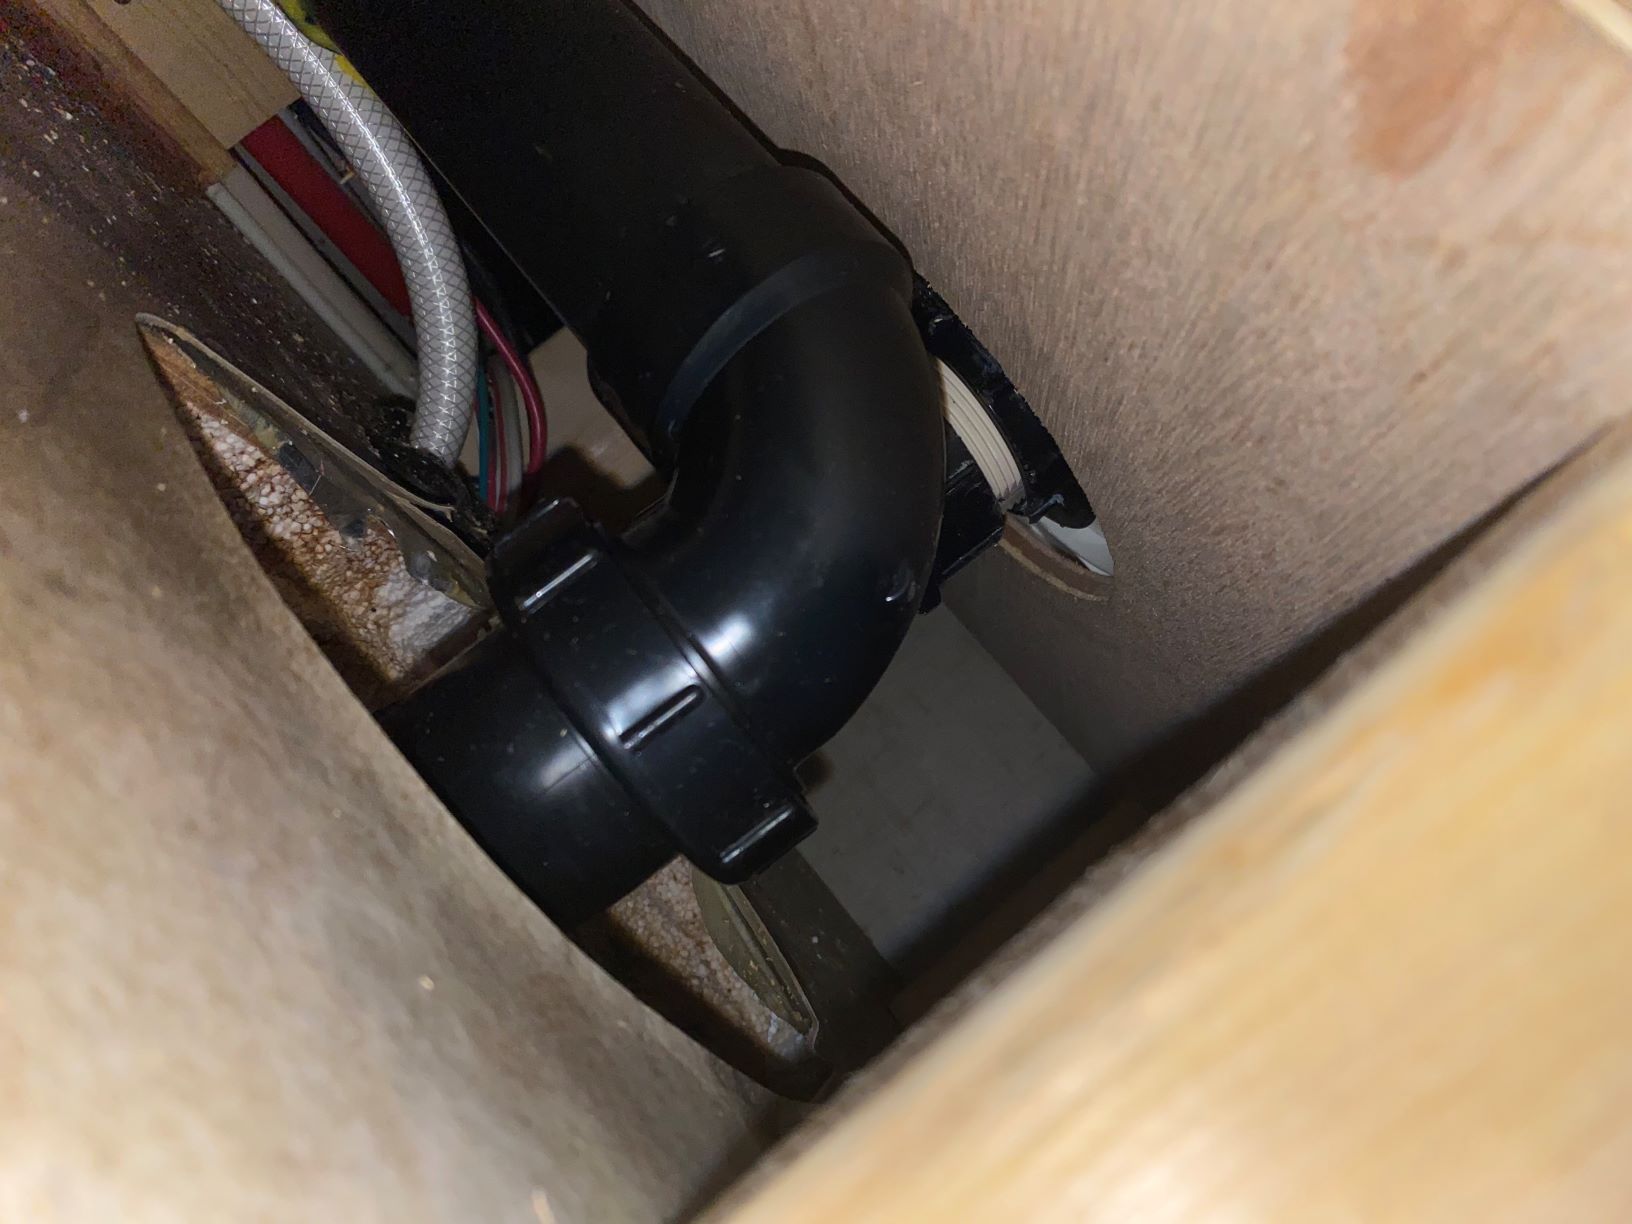 p-trap with part of floor removed, this was holding leaked water until it leaked out: 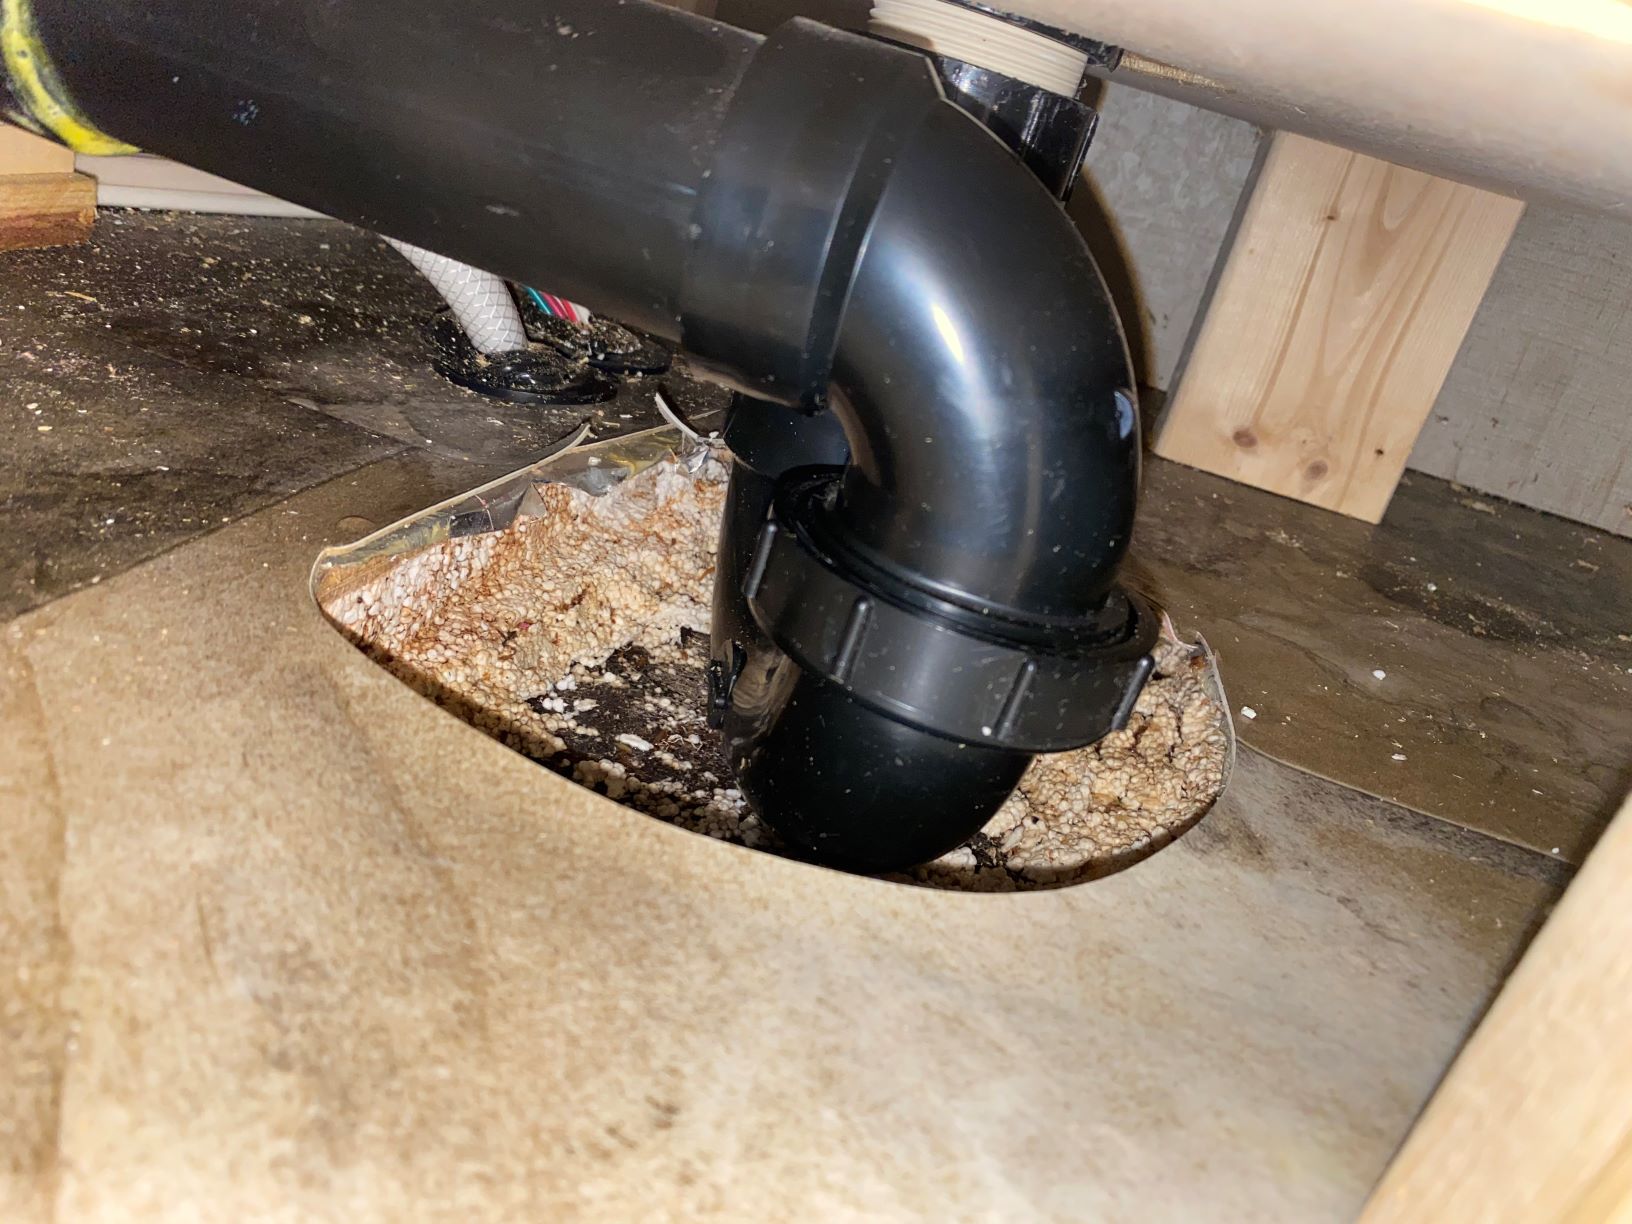 shower drain with plumber putty squeezed out: 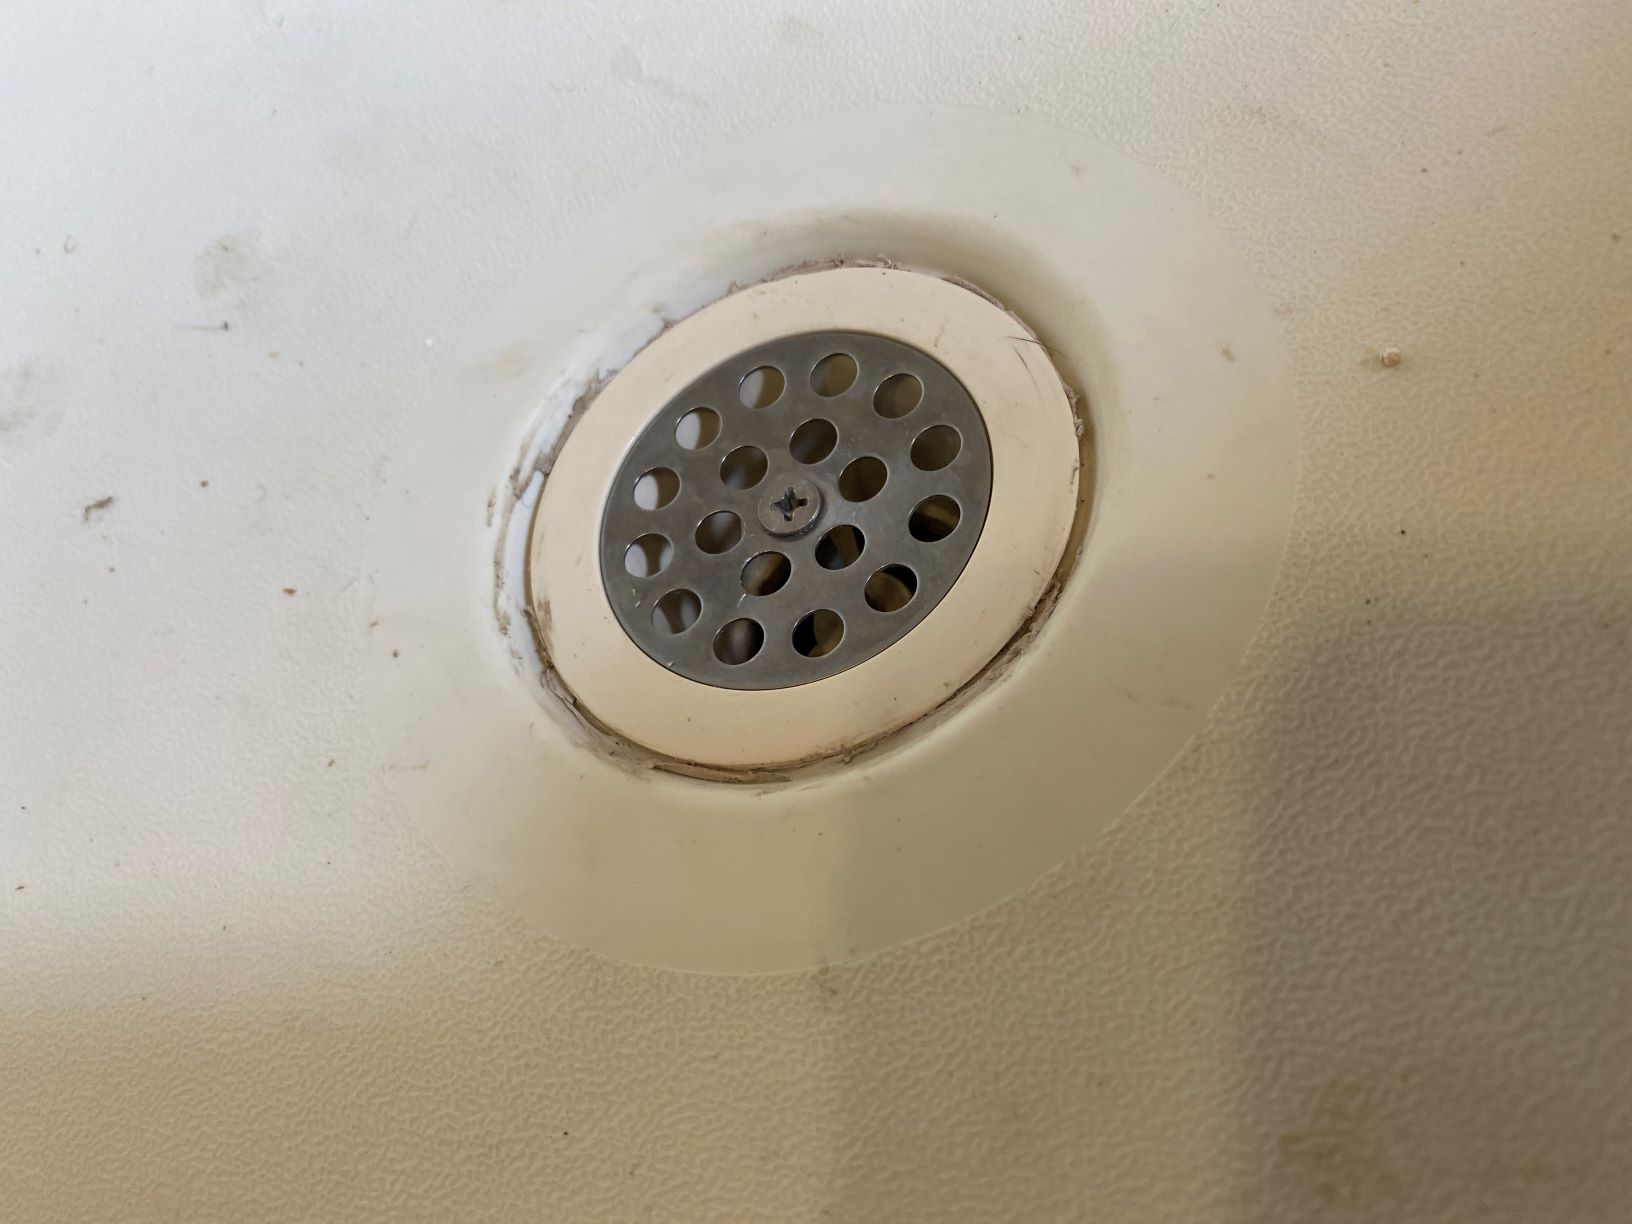 |
|
|
Wrangler Unlimitied 75th Anniv. Ed.
2017 R-Pod RP180 |
|
 |
|
|
kickhead70
Newbie
Joined: 19 Jul 2020 Location: Livermore Online Status: Offline Posts: 16 |
Posted: 07 Sep 2020 at 6:07pm |
|
i have R180, with corner shower, separate from toilet. there's a leak in the bottom, because the drain flange isn't in tight enough. I have a reinforced platform underneath, but with just 3"-4" access hole, I can't get a hand around the reinforcing platform to try to tighten the flange nut underneath. Even if I remove/replace the shower pan, how do I get it back together tight enough, if I can't even reach in and snug it up now? In mine, part of the floor has a cavity shaved into/carved out of it to make room for the p-trap. there's only about 5" from bottom of pan to top of floor. I'm thinking about cutting a new, larger, access panel in the side of the shower floor pan, but I want to know how I'm going to cover it over before cutting it open. any suggestions?
|
|
|
Wrangler Unlimitied 75th Anniv. Ed.
2017 R-Pod RP180 |
|
|
|
|
Pod People
Senior Member 
Joined: 22 Sep 2011 Location: Chapel Hill,NC Online Status: Offline Posts: 1088 |
Posted: 20 Jun 2020 at 12:21pm |
|
That is about the same size as the vent opening in the 179. Its tight to work in, but doable.
Vann
|
|
|
Vann & Laura 2015 RPod 179 
|
|
|
|
|
vbdomenico
Groupie 

Joined: 19 Apr 2020 Location: Kansas City, MO Online Status: Offline Posts: 57 |
Posted: 20 Jun 2020 at 10:10am |
|
There is no access like that in the 190 just a small vent opening outside of the bathroom that is 8" by 4", just enough to get to the drain pipe.
So I dont think it will be easy to reinforce. There is a small amount of wall paneling below the shower in the bathroom, but don't know how to remove it. Accessing through the converter panel might be the only option. I will ask the dealer if they can reinforce it once I have a chance to get it in under warranty. |
|
|
|
|
mcarter
podders Helping podders - pHp

Joined: 07 Apr 2016 Location: Greenbrier, TN Online Status: Offline Posts: 3419 |
Posted: 19 Jun 2020 at 6:32pm |
|
+2.
|
|
|
Mike Carter
2015 178 " I had the right to remain silent, I just didn't have the ability." |
|
|
|
|
StephenH
podders Helping podders - pHp

Joined: 29 Nov 2015 Location: Wake Forest, NC Online Status: Offline Posts: 6438 |
Posted: 19 Jun 2020 at 4:13pm |
|
I did similar reinforcing with the shower pan in our 179. It really helped.
|
|
|
StephenH
Happy is the man that findeth wisdom,... ouR escaPOD mods Former RPod 179 Current Cherokee Grey Wolf 24 JS |
|
|
|
|
Pod People
Senior Member
Joined: 22 Sep 2011 Location: Chapel Hill,NC Online Status: Offline Posts: 1088 |
Posted: 19 Jun 2020 at 3:59pm |
|
We discovered that the shower pans flex when standing on them. this will ultimately cause a crack and a leak. they flex because there is no support under the pan-at least in our 179.. We added 4 supports as follows: Remove the metal grille under the door to the bathroom to access the area under the shower. Measure the height from the subfloor to the bottom of the shower pan-for conversation and clarity, let's assume it is 6" for this discussion-yours will be different. cut 4 blocks from a 2x4 that are 5 1/4" long and also cut 4 squares from 3/4" plywood that are 3 1/2"x3 1/2". Using adhesive like Beats Nails or other construction adhesive put the 2x4x 5 1/4 blocks upright in the 4 corners of the shower. add the 3/4" plywood blocks under the 2x4 blocks to make a solid support between the shower base and the subfloor. the 3/4" space under the 2x4 blocks gives enough clearance that you can turn the blocks upright under the shower floor and then shim under the blocks with the plywood squares. this makes a good tight fit. Use plenty of adhesive between the 2x4 block, the shower pan, the plywood squares and the subfloor. After we glued everything, I added about 100 pounds of weight in the shower until the glue dried. Our shower pan does not flex any more remember that your measurement between the shower pan and subfloor will be different. Take the measurement and subtract 3/4" to make your 2x4 blocks. Vann
|
|
|
Vann & Laura 2015 RPod 179
|
|
|
|
|
Woodmiester
Senior Member

Joined: 03 Aug 2018 Location: Greenwood IN Online Status: Offline Posts: 142 |
Posted: 19 Jun 2020 at 3:42pm |
|
I eventually replaced the shower pan. Not a hard job. When you are in the converter area , have some put a bright light on the shower pan.
|
|
|
Swampfox
|
|
|
|
|
Woodmiester
Senior Member
Joined: 03 Aug 2018 Location: Greenwood IN Online Status: Offline Posts: 142 |
Posted: 19 Jun 2020 at 3:39pm |
|
I eventually replaced the shower pan. Not a hard job.
|
|
|
Swampfox
|
|
|
|
|
vbdomenico
Groupie
Joined: 19 Apr 2020 Location: Kansas City, MO Online Status: Offline Posts: 57 |
Posted: 19 Jun 2020 at 8:49am |
|
Putting weight on the pan is no issue, I'm 6' 230! I cant see the crack from the inside of the shower as the wall comes all the way down to the horizontal part of the pan. Hopefully I can see and access it from behind the converter.
Thanks again |
|
|
|
|
Post Reply
|
Page 123> |
| Forum Jump | Forum Permissions You cannot post new topics in this forum You cannot reply to topics in this forum You cannot delete your posts in this forum You cannot edit your posts in this forum You cannot create polls in this forum You cannot vote in polls in this forum |


 Shower Leak